| Site News |
|---|
| Warning: This wiki contains spoilers. Read at your own risk! Social media: If you would like, please join our Discord server, and/or follow us on X (Twitter) or Tumblr! |
Julia: Difference between revisions
m (Text replacement - "(?i)\{\{Round" to "{{SUBST:Round") |
Thecornerman (talk | contribs) m (Text replacement - "’" to "'") |
||
| (63 intermediate revisions by 17 users not shown) | |||
| Line 1: | Line 1: | ||
:''For the character from ''TearRing Saga: Yutona Heroes War Chronicles'', see [[Saga:Julia]].'' | |||
{{Character Infobox | {{Character Infobox | ||
| | |image=[[File:FE776 Julia.png|200px]] | ||
|caption=Artwork of Julia from ''[[Fire Emblem: Treasure]]'' and {{title|Thracia 776}}. | |||
| | |||
|gender=Female | |gender=Female | ||
|race=[[Human]] | |race=[[Human]] | ||
|family= | |family= | ||
*[[Heim]], [[Fjalar]], [[Gair]], [[Maera]] <small>(ancestors)</small> | |||
*[[Azmur]] <small>(maternal great-grandfather)</small> | |||
*[[Kurth]] <small>(maternal grandfather)</small> | |||
*[[Victor (Genealogy of the Holy War)|Victor]] <small>(paternal grandfather)</small> | |||
*[[Cigyun]] <small>(maternal and paternal grandmother)</small> | |||
*[[Arvis]] <small>(father)</small> | *[[Arvis]] <small>(father)</small> | ||
*[[Deirdre]] <small>(mother)</small> | *[[Deirdre]] <small>(mother)</small> | ||
| Line 24: | Line 16: | ||
*[[Seliph]] <small>(elder half-brother)</small> | *[[Seliph]] <small>(elder half-brother)</small> | ||
*[[Saias]] <small>(elder half-brother)</small> | *[[Saias]] <small>(elder half-brother)</small> | ||
*[[ | *[[Azelle]] <small>(paternal half-uncle)</small> | ||
*[[ | *[[Linoan]], [[Hilda (Genealogy of the Holy War)|Hilda]], [[Ishtar]], [[Ishtore]] <small>(distant relatives)</small> | ||
|nationality=[[Grannvale]]an ([[Belhalla]]) | |||
|titles=Imperial Princess of [[Grannvale]] | |||
|startingclass=*[[Light Priestess]] <small>({{title|Genealogy of the Holy War}})</small> | |||
|startingclass= | |||
*[[Light Priestess]] <small>({{title|Genealogy of the Holy War}})</small> | |||
*[[Sage]] <small>({{title|Awakening}})</small> | *[[Sage]] <small>({{title|Awakening}})</small> | ||
|voice=*[[wikipedia:Cassandra Morris|Cassandra Morris]]<br><small>(English, {{title|Heroes}})</small> | |voice=*[[wikipedia:Cassandra Morris|Cassandra Morris]]<br><small>(English, {{title|Heroes}})</small> | ||
*[[wikipedia:Ayane Sakura|Ayane Sakura]]<br><small>(Japanese, {{title|Heroes}})</small> | *[[wikipedia:Ayane Sakura|Ayane Sakura]]<br><small>(Japanese, {{title|Heroes}})</small> | ||
|appearances= | |appearances=*{{title|Genealogy of the Holy War}} | ||
*{{title|Genealogy of the Holy War}} | |||
*{{title|Thracia 776}} | *{{title|Thracia 776}} | ||
*{{title|Awakening}} | *{{title|Awakening}} | ||
| Line 44: | Line 33: | ||
'''Julia''' (pronounced {{IPA|ˈdʒuliə}}<ref>Julius in {{FEH}}</ref>; Japanese: {{hl|ユリア|Yuria}} ''Yuria'') is a princess of [[Grannvale]], the daughter of [[Arvis]] and [[Deirdre]], twin sister of Prince [[Julius]] and a [[Holy Blood|full-blooded]] descendant of Saint [[Heim]] of the [[Twelve Crusaders]]. Born some time after the [[Battle of Belhalla]], her father's ascension to the Grannvale throne and the rise of Grannvale as an empire, as a child she was attacked by her brother shortly after he first claimed the [[Loptous (tome)|Book of Loptous]], escaping only with the last of her mother's strength. She was found, taken in and raised by [[Lewyn]], who later entrusted her to the protection of [[Seliph]] at the beginning of his revolution in [[Timeline of Archanea, Valentia and Jugdral|Grann 776]]. She developed a strong trust in Seliph and was a close ally of his throughout the campaigns in [[Isaach]], the [[Munster District]] and [[Thracia]], and proved instrumental in the final confrontation with Julius. | '''Julia''' (pronounced {{IPA|ˈdʒuliə}}<ref>Julius in {{FEH}}</ref>; Japanese: {{hl|ユリア|Yuria}} ''Yuria'') is a princess of [[Grannvale]], the daughter of [[Arvis]] and [[Deirdre]], twin sister of Prince [[Julius]] and a [[Holy Blood|full-blooded]] descendant of Saint [[Heim]] of the [[Twelve Crusaders]]. Born some time after the [[Battle of Belhalla]], her father's ascension to the Grannvale throne and the rise of Grannvale as an empire, as a child she was attacked by her brother shortly after he first claimed the [[Loptous (tome)|Book of Loptous]], escaping only with the last of her mother's strength. She was found, taken in and raised by [[Lewyn]], who later entrusted her to the protection of [[Seliph]] at the beginning of his revolution in [[Timeline of Archanea, Valentia and Jugdral|Grann 776]]. She developed a strong trust in Seliph and was a close ally of his throughout the campaigns in [[Isaach]], the [[Munster District]] and [[Thracia]], and proved instrumental in the final confrontation with Julius. | ||
==Biography== | ==Biography== | ||
| Line 52: | Line 39: | ||
===With Seliph=== | ===With Seliph=== | ||
Years later, in response to the situation in Silesse worsening, Lewyn and Julia fled the area and eventually arrived in Ganeishire Castle in Grannvale-controlled [[Isaach]], where they met her then-unknowing half-brother [[Seliph]], who had just launched an offensive against the House [[Dozel]] occupation of the nation. Lewyn left Julia in Seliph's care while he travelled to [[Leonster]]. Using a light tome looted from an Isaach castle, she fought in Seliph's army and acted as an advisor and confidante to him throughout it. | Years later, in response to the situation in Silesse worsening, Lewyn and Julia fled the area and eventually arrived in Ganeishire Castle in Grannvale-controlled [[Isaach]], where they met her then-unknowing half-brother [[Seliph]], who had just launched an offensive against the House [[Dozel]] occupation of the nation. Lewyn left Julia in Seliph's care while he travelled to [[Leonster]]. Using a light tome looted from an Isaach castle, she fought in Seliph's army and acted as an advisor and confidante to him throughout it. | ||
Eventually, at Peruluke Castle in [[Miletos]], Julia was found and cornered by [[Manfroy]] of the [[Loptr Church]], who abducted her while nobody was looking. Manfroy initially took Julia to [[Chalphy]] Castle for temporary imprisonment; there, she was reunited with Arvis, who attempted to set her free with [[Palmarch]] and other captive children. He was stopped by Manfroy, who took her straight to Belhalla to see Julius, but not before Arvis surreptitiously passed on her late mother's [[circlet]] to her. Although Julius wanted Julia to be killed without delay, at Manfroy's insistence she was spared and instead hypnotized by Manfroy into serving him. | Eventually, at Peruluke Castle in [[Miletos]], Julia was found and cornered by [[Manfroy]] of the [[Loptr Church]], who abducted her while nobody was looking. Manfroy initially took Julia to [[Chalphy]] Castle for temporary imprisonment; there, she was reunited with Arvis, who attempted to set her free with [[Palmarch]] and other captive children. He was stopped by Manfroy, who took her straight to Belhalla to see Julius, but not before Arvis surreptitiously passed on her late mother's [[circlet]] to her. Although Julius wanted Julia to be killed without delay, at Manfroy's insistence she was spared and instead hypnotized by Manfroy into serving him. | ||
| Line 60: | Line 47: | ||
=={{FE4}}== | =={{FE4}}== | ||
===Role=== | ===Role=== | ||
Julia is a playable character | Julia is a playable character during the second generation. In [[Inheritors of Light|Chapter 6]], she appears as a player unit once [[Ganeishire]] is seized. If Julia is defeated in battle, she will be available again at the start of the following chapter. At the start of [[Light and Dark|Chapter 10]], Julia is removed from the party. In the [[End of the Holy War|Endgame]], after [[Friege]] has been seized, Julia appears as an enemy unit affilated with [[Belhalla]]. She is re-recruited when [[talk]]ed to by Seliph once [[Manfroy]] is killed. Alternatively, if [[Julius]] is killed first, she will automatically re-recruit herself. | ||
===Starting stats and growth rates=== | ===Starting stats and growth rates=== | ||
| Line 92: | Line 77: | ||
|def1=10 | |def1=10 | ||
|res1=50 | |res1=50 | ||
|recruit=[[ | |recruit=[[Inheritors of Light|Chapter 6]], automatically after seizing [[Ganeishire]] Castle<br>[[The Final Holy War|Endgame]], automatically upon killing [[Julius]], or talk with [[Seliph]] after killing [[Manfroy]]. | ||
}} | }} | ||
| Line 108: | Line 93: | ||
|weaponlvl={{LightSNES}} ★ {{FireSNES}} A {{ThunderSNES}} B {{WindSNES}} B | |weaponlvl={{LightSNES}} ★ {{FireSNES}} A {{ThunderSNES}} B {{WindSNES}} B | ||
}} | }} | ||
===Love growths and events=== | |||
{{LoveSystemGenII | |||
|options=13 | |||
|portrait=[[File:Portrait julia fe04.png]] | |||
|class=Light Priestess | |||
|portrait1=[[File:Ma snes02 junior lord playable.gif|link=Junior Lord]] | |||
|option1=[[Seliph]] | |||
|initialpoints1=490 | |||
|plus1=−5 | |||
|portrait2=[[File:Ma snes02 sword fighter playable.gif|link=Sword Fighter]] [[File:Ma snes02 sword fighter playable.gif|link=Sword Fighter]] | |||
|option2=[[Scáthach]]/[[Dalvin]] | |||
|initialpoints2=0 | |||
|plus2=0 | |||
|portrait3=[[File:Ma snes02 paladin playable.gif|link=Paladin]] | |||
|option3=[[Oifey]] | |||
|initialpoints3=0 | |||
|plus3=0 | |||
|portrait4=[[File:Ma snes02 free knight playable.gif|link=Free Knight]] [[File:Ma snes02 free knight playable.gif|link=Free Knight]] | |||
|option4=[[Diarmuid]]/[[Tristan]] | |||
|initialpoints4=0 | |||
|plus4=0 | |||
|portrait5=[[File:Ma snes02 arch knight playable.gif|link=Arch Knight]] [[File:Ma snes02 arch knight playable.gif|link=Arch Knight]] | |||
|option5=[[Lester]]/[[Deimne]] | |||
|initialpoints5=0 | |||
|plus5=0 | |||
|portrait6=[[File:Ma snes02 mage playable.gif|link=Mage]] [[File:Ma snes02 wind mage playable.gif|link=Wind Mage]] | |||
|option6=[[Arthur (Genealogy of the Holy War)|Arthur]]/[[Amid]] | |||
|initialpoints6=0 | |||
|plus6=0 | |||
|portrait7=[[File:Ma snes02 axe knight playable.gif|link=Axe Knight]] | |||
|option7=[[Iuchar]] | |||
|initialpoints7=0 | |||
|plus7=0 | |||
|portrait8=[[File:Ma snes02 axe fighter playable.gif|link=Axe Fighter]] | |||
|option8=[[Iucharba]] | |||
|initialpoints8=0 | |||
|plus8=0 | |||
|portrait9=[[File:Ma snes02 swordmaster playable.gif|link=Swordmaster]] | |||
|option9=[[Shannan]] | |||
|initialpoints9=0 | |||
|plus9=0 | |||
|portrait10=[[File:Ma snes02 prince playable.gif|link=Prince]] | |||
|option10=[[Leif]] | |||
|initialpoints10=0 | |||
|plus10=0 | |||
|portrait11=[[File:Ma snes02 cavalier playable.gif|link=Cavalier]] | |||
|option11=[[Ares]] | |||
|initialpoints11=0 | |||
|plus11=0 | |||
|portrait12=[[File:Ma snes02 bow fighter playable.gif|link=Bow Fighter]] [[File:Ma snes02 bow fighter playable.gif|link=Bow Fighter]] | |||
|option12=[[Febail]]/[[Asaello]] | |||
|initialpoints12=0 | |||
|plus12=0 | |||
|portrait13=[[File:Ma snes02 sage playable.gif|link=Sage]] [[File:Ma snes02 sage playable.gif|link=Sage]] | |||
|option13=[[Ced]]/[[Hawk (character)|Hawk]] | |||
|initialpoints13=0 | |||
|plus13=0 | |||
|portrait14=[[File:Ma snes02 priest playable.gif|link=Priest]] [[File:Ma snes02 priest playable.gif|link=Priest]] | |||
|option14=[[Coirpre]]/[[Charlot]] | |||
|initialpoints14=0 | |||
|plus14=0}} | |||
* In [[Inheritors of Light|Chapter 6]], [[Lana]]/[[Muirne]] can initiate a conversation with Julia any time after she joins, which gives Julia a [[Mend]] staff. | |||
* In [[Inheritors of Light|Chapter 6]], Julia can talk to [[Seliph]] after conquering either Sophara or Isaach. This rewards Julia with a [[Light (magic)|light tome]], depending on which castle was conquered – [[Nosferatu]] for Isaach, and [[Aura]] for Sophara. | |||
* In [[The Wyvern Knights of Thracia|Chapter 8]], Julia can talk to Seliph at any point before [[Ishtar]] appears on the map, awarding Seliph +1 [[luck]]. | |||
* In [[For Whose Sake|Chapter 9]], Julia can talk to Seliph after conquering Grutia, awarding Seliph +3 [[resistance]]. | |||
* In the [[End of the Holy War|Endgame]], Julia can visit [[Velthomer]], giving her the [[Naga (tome)|Naga]] tome. | |||
===Analysis=== | ===Analysis=== | ||
{{analysis}} | {{analysis}} | ||
Julia is available from the start of the second generation. She has [[Adept]], [[Follow-Up]], and [[Nihil]], three useful combat skills. | Julia is available from the start of the second generation. She has [[Adept]], [[Follow-Up]], and [[Nihil]], three useful combat skills. Julia has major Naga blood and minor Fjalar blood, granting her a very high magic growth and a high resistance growth; her magic growth in particular is 100%, and will always increase when she [[Level-up|levels up]], capping at level 13. Julia's damage output can become extremely high, although she can have trouble doubling enemies due to her rather low speed growth and the high [[weight (weapon)|weight]] of many [[light magic]] tomes. | ||
In Chapter 6, Julia can get the [[Mend]] staff from her conversation with [[Lana]]/[[Muirne]]. Also in Chapter 6, Julia can obtain the [[Aura]] | In Chapter 6, Julia can get the [[Mend]] staff from her conversation with [[Lana]]/[[Muirne]]. Also in Chapter 6, Julia can obtain the [[Aura]] or [[Nosferatu]] tomes from a conversation with Seliph after seizing Sophara or Isaach; which tome she receives is determined by which castle is seized—Aura is obtained by seizing Sophara, and Nosferatu by seizing Isaach. Nosferatu is the better tome; it has slightly less [[might]] than Aura, but significantly less weight and heals the user whenever they deal damage with it. Additionally, seizing Sophara for Aura creates a longer journey to Ribaut castle—the end goal of the chapter—for Seliph, making obtaining Nosferatu ideal for faster play, such as in [[Rankings|ranked]] runs. Her promotion bonuses are excellent; while she does not get a mount, she gains significant statistical bonuses, that includes +7 in magic, +5 in skill, and +8 in speed, improving her combat significantly. Julia will also gain B levels in thunder and wind magics, and A in fire due to her Fjalar blood, making her and a promoted [[Leif]] the only two units able to use [[Bolganone]] if [[Tine]], [[Arthur (Genealogy of the Holy War)|Arthur]], or [[Ced]]'s father is not [[Azelle]]; light magic has [[weapon triangle]] advantage against all other types of magic—except dark magic, which it is neutral against—but many non-light tomes have less weight, and may allow Julia to double more reliably. | ||
With Nosferatu, Julia has a useful niche in [[Beyond the Desert|Chapter 7]], where she can fight enemy dark mages. With her very high magic and resistance, she can deal significant damage and take very little in return | With Nosferatu, Julia has a useful niche in [[Beyond the Desert|Chapter 7]], where she can fight enemy dark mages, especially those that start fairly close to the home castle. With her very high magic and resistance, she can deal significant damage and take very little in return, healing what damage she does take with Nosferatu. Julia can sometimes miss with Nosferatu, but it is generally reliable. Julia can also be used to fight the mage sisters encountered in Chapters 7 and [[The Dracoknights of Thracia|8]] for the same reasons. While the sisters—[[Banba]], [[Eriu]], and [[Fotla]]—can perform the [[triangle attack]], Julia is immune to it due to Nihil, giving her an additional advantage when fighting them. | ||
In [[End of the Holy War|the final chapter]], Julia obtains the [[Naga (tome)|Naga]] tome from Velthomer castle. The tome makes her arguably the most powerful combat unit in the game; it has 30 might, 50 uses, and gives her +20 to skill, speed, defense, and resistance. She will have no trouble doubling most enemies, her durability will increase substantially, and she also ignores the attack-halving effect of [[Loptous (tome)|Loptous]] when wielding it. Even if she is level 1, with Naga, Julia is capable of taking one hit from Julius, doubling him, and dealing 6 damage to him—for comparison, Seliph with [[Tyrfing]] and the lowest speed he can inherit can double Julius, but cannot survive an attack from him without resistance or HP growths, and will only deal 5 damage with capped strength and the [[Power Ring]]. | In [[End of the Holy War|the final chapter]], Julia obtains the [[Naga (tome)|Naga]] tome from Velthomer castle. The tome makes her arguably the most powerful combat unit in the game; it has 30 might, 50 uses, and gives her +20 to skill, speed, defense, and resistance. She will have no trouble doubling most enemies, her durability will increase substantially, and she also ignores the attack-halving effect of [[Loptous (tome)|Loptous]] when wielding it. Even if she is level 1, with Naga, Julia is capable of taking one hit from Julius, doubling him, and dealing 6 damage to him—for comparison, Seliph with [[Tyrfing]] and the lowest speed he can inherit can double Julius, but cannot survive an attack from him without resistance or HP growths, and will only deal 5 damage with capped strength and the [[Power Ring]]. | ||
Julia additionally has utility | Julia additionally has staff utility; she can use staves like [[Warp]] before promotion, which allows her to gain experience without engaging enemies, and with her excellent magic, she will also be a great healer when others like Lana have already used their turn or are too far away. If Julia is left at the home castle with a staff like Warp or [[Return (staff)|Return]] and another unit to use them on, she can safely gain more experience faster than she could by attempting to fight enemies on the map; this is particularly useful for ranked runs. | ||
Julia's primary negative aspect is her permanent lack of a mount. This limits her movement to 5 (6 when promoted), which is a significant detriment on the large maps of ''Genealogy of the Holy War'', where mounted units with 8 or 9 movement—which can move up to 12 tiles with roads—can defeat enemies before unmounted units could possibly reach them. There are opportunities in the second generation where unmounted units can contribute, but it is still an issue. Julia is unlikely to participate in significant combat because of it, unless the player limits their mounted units to allow the infantry to keep up. | Julia's primary negative aspect is her permanent lack of a mount. This limits her movement to 5 (6 when promoted), which is a significant detriment on the large maps of ''Genealogy of the Holy War'', where mounted units with 8 or 9 movement—which can move up to 12 tiles with roads—can defeat enemies before unmounted units could possibly reach them. There are opportunities in the second generation where unmounted units can contribute, but it is still an issue. Julia is unlikely to participate in significant combat because of it, unless the player limits their mounted units to allow the infantry to keep up. | ||
Julia also has an availability gap to consider—she is not available in [[Light and Dark|Chapter 10]] and most of the endgame. This does not impede her abilities significantly, but temporarily lacking access to her may hurt the player. | Julia also has an availability gap to consider—she is not available in [[Light and Dark|Chapter 10]] and most of the endgame. This does not impede her abilities significantly, but temporarily lacking access to her may hurt the player. Additionally, re-recruiting her will take a while, and–while difficult–it is possible to beat the Endgame without her. | ||
=={{FE5}}== | =={{FE5}}== | ||
[[File:Portrait julia fe05.png|right]] | [[File:Portrait julia fe05.png|right]] | ||
===Role=== | ===Role=== | ||
Julia appears in the opening cutscene of [[The Liberation | Julia appears in the opening cutscene of [[The War of Liberation|Chapter 21]], accompanying [[Seliph]] in his first meeting with [[Leif]]. | ||
=={{FE13}}== | =={{FE13}}== | ||
| Line 160: | Line 212: | ||
|def1=30 | |def1=30 | ||
|res1=35 | |res1=35 | ||
|strm= | |strm=−3 | ||
|magicm=+4 | |magicm=+4 | ||
|skillm= | |skillm=−1 | ||
|spdm=+2 | |spdm=+2 | ||
|luckm=0 | |luckm=0 | ||
|defm= | |defm=−1 | ||
|resm=+2 | |resm=+2 | ||
|recruit=[[SpotPass]], hire her for 9,600 [[Gold|G]] or defeat her in a [[skirmish]] | |recruit=[[SpotPass]], hire her for 9,600 [[Gold|G]] or defeat her in a [[skirmish]] | ||
| Line 181: | Line 233: | ||
===Growth rates when reclassed=== | ===Growth rates when reclassed=== | ||
{{ | {{Tab | ||
|tab1=Tactician/Grandmaster | |||
|tab2=Cavalier | |||
|tab3=Paladin | |||
|tab4=Knight | |||
|tab5=Great Knight | |||
|tab6=General | |||
|tab7=Mercenary/Hero | |||
|tab8=Bow Knight | |||
|tab9=Archer | |||
|tab10=Sniper | |||
|tab11=Myrmidon | |||
|tab12=Swordmaster | |||
|tab13=Assassin | |||
|tab14=Thief | |||
|tab15=Trickster | |||
|content1={{GrowthRates FE13|Tactician|Grandmaster}} | |||
|content2={{GrowthRates FE13|Cavalier}} | |||
|content3={{GrowthRates FE13|Paladin}} | |||
|content4={{GrowthRates FE13|Knight}} | |||
|content5={{GrowthRates FE13|Great Knight}} | |||
|content6={{GrowthRates FE13|General}} | |||
|content7={{GrowthRates FE13|Mercenary|Hero}} | |||
|content8={{GrowthRates FE13|Bow Knight}} | |||
|content9={{GrowthRates FE13|Archer}} | |||
|content10={{GrowthRates FE13|Sniper}} | |||
|content11={{GrowthRates FE13|Myrmidon}} | |||
|content12={{GrowthRates FE13|Swordmaster}} | |||
|content13={{GrowthRates FE13|Assassin}} | |||
|content14={{GrowthRates FE13|Thief}} | |||
|content15={{GrowthRates FE13|Trickster}} | |||
}} | |||
{{Tab | |||
|tab1=Pegasus Knight | |||
|tab2=Falcon Knight | |||
|tab3=Dark Flier | |||
|tab4=Wyvern Rider/Wyvern Lord | |||
|tab5=Griffon Rider | |||
|tab6=Troubadour | |||
|tab7=Cleric | |||
|tab8=War Cleric | |||
|tab9=Mage | |||
|tab10=Dark Mage | |||
|tab11=Dark Knight | |||
|tab12=Sorcerer | |||
|tab13=Troubadour/Valkyrie | |||
|tab14=Bride | |||
|content1={{GrowthRates FE13|Pegasus Knight}} | |||
|content2={{GrowthRates FE13|Falcon Knight}} | |||
|content3={{GrowthRates FE13|Dark Flier}} | |||
|content4={{GrowthRates FE13|Wyvern Rider|Wyvern Lord}} | |||
|content5={{GrowthRates FE13|Griffon Rider}} | |||
|content6={{GrowthRates FE13|Troubadour}} | |||
|content7={{GrowthRates FE13|Cleric}} | |||
|content8={{GrowthRates FE13|War Cleric}} | |||
|content9={{GrowthRates FE13|Mage}} | |||
|content10={{GrowthRates FE13|Dark Mage}} | |||
|content11={{GrowthRates FE13|Dark Knight}} | |||
|content12={{GrowthRates FE13|Sorcerer}} | |||
|content13={{GrowthRates FE13|Troubadour|Valkyrie}} | |||
|content14={{GrowthRates FE13|Bride}} | |||
}} | |||
===Promotion stat gains=== | ===Promotion stat gains=== | ||
| Line 218: | Line 331: | ||
=={{FEH}}== | =={{FEH}}== | ||
===Role=== | ===Role=== | ||
There are | There are four different variations of Julia available to ''Heroes'', all of which are tied to her storyline appearance in {{title|Genealogy of the Holy War}}. The normal variation of Julia is one of the characters added to the game in the [[Family Bonds]] update, and became available for summoning by players on February 15, 2017; she is one of the first four characters added to the game whose data was not present in the game at its launch. A variation of Julia termed "Crusader of Light" was first made available to players on August 28, 2019 as the game's eighteenth Legendary Hero; she is notably the first Legendary Hero to repeat an exact attribute combination of a previous Legendary Hero, repeating the Earth/Duel combination previously seen on the Legendary Hero variation of [[Alm]]. A corrupted variation of Julia, based on her brainwashing by [[Manfroy]], was first made available to be summoned by players on May 8, 2020 as part of the summoning event surrounding the launch of the [[Steeped in Twilight]] update. A festival-themed variation of Julia was made available between the period of September 7, 2021 through October 7, 2021 as part of the summoning event surrounding the launch of the [[Scions of Twelve]] update. | ||
===Julia: | ===Julia: Naga's Blood=== | ||
====Starting stats==== | ====Starting stats==== | ||
:''Julia: Naga's Blood is only available at 5{{star}} rarity.'' | :''Julia: Naga's Blood is only available at 5{{star}} rarity.'' | ||
{{CharStats FEH | {{CharStats FEH | ||
|portrait=[[File:Portrait julia feh.png|100px]] | |portrait=[[File:Portrait julia naga's blood feh.png|100px]] | ||
|rarity=5 | |rarity=5 | ||
|wpntype=Green tome | |wpntype=Green tome | ||
| Line 233: | Line 346: | ||
|def=4 | |def=4 | ||
|res=8 | |res=8 | ||
| | |HP_gr=50 | ||
| | |atk_gr=60 | ||
| | |spd_gr=45 | ||
| | |def_gr=30 | ||
| | |res_gr=55 | ||
|offense=[[Naga (tome)|Naga]]{{hover|*|If equipped}} | |offense=[[Naga (tome)|Naga]]{{hover|*|If equipped}} | ||
|special=[[Dragon Gaze]] | |special=[[Dragon Gaze]] | ||
}} | }} | ||
====Skill set==== | ====Skill set==== | ||
{| | {{FEH skill set | ||
|name=Julia: Naga's Blood | |||
|minrarity=5 | |||
|- | |||
|weapon1=Wind | |||
|weapon1auto=1 | |||
|weapon1cost=50 | |||
|- | |||
|weapon2=Elwind | |||
|weapon2unlock=2 | |||
|weapon2auto=3 | |||
|weapon2cost=100 | |||
|- | |||
|weapon3=Rexcalibur | |||
|weapon3unlock=3 | |||
|weapon3auto=4 | |||
|weapon3cost=200 | |||
|- | |||
|weapon4=Naga | |||
|weapon4article=Naga (tome) | |||
|weapon4auto=5 | |||
|weapon4cost=400 | |||
|- | |- | ||
|special1=Dragon Gaze | |||
|special1unlock=3 | |||
|special1auto=4 | |||
|special1cost=100 | |||
| | |||
| | |||
| | |||
| | |||
|- | |- | ||
|special2=Dragon Fang | |||
|} | |special2unlock=4 | ||
|special2cost=200 | |||
|- | |||
|passa1=Resistance +1 | |||
|passa1unlock=1 | |||
|passa1cost=30 | |||
|- | |||
|passa2=Resistance +2 | |||
|passa2unlock=2 | |||
|passa2cost=60 | |||
|- | |||
|passa3=Resistance +3 | |||
|passa3unlock=4 | |||
|passa3cost=120 | |||
|- | |||
|passc1=Breath of Life 1 | |||
|passc1unlock=3 | |||
|passc1cost=50 | |||
|- | |||
|passc2=Breath of Life 2 | |||
|passc2unlock=4 | |||
|passc2cost=100 | |||
|- | |||
|passc3=Breath of Life 3 | |||
|passc3unlock=5 | |||
|passc3cost=200 | |||
}} | |||
===Julia: | ===Julia: Crusader of Light=== | ||
====Starting stats==== | ====Starting stats==== | ||
:''Julia: | :''Julia: Crusader of Light is only available at 5{{star}} rarity.'' | ||
{{CharStats FEH | {{CharStats FEH | ||
|portrait=[[File:Portrait julia crusader of light feh.png|100px]] | |portrait=[[File:Portrait julia crusader of light feh.png|100px]] | ||
| Line 323: | Line 427: | ||
|def=4 | |def=4 | ||
|res=10 | |res=10 | ||
| | |HP_gr=50 | ||
| | |atk_gr=70 | ||
| | |spd_gr=50 | ||
| | |def_gr=35 | ||
| | |res_gr=60 | ||
|offense=[[Virtuous Naga]] | |offense=[[Virtuous Naga]] | ||
|special=[[Dragon Gaze]] | |special=[[Dragon Gaze]] | ||
}} | }} | ||
====Skill set==== | ====Skill set==== | ||
{| | {{FEH skill set | ||
|name=Julia: Crusader of Light | |||
|minrarity=5 | |||
|- | |||
|weapon1=Light | |||
|weapon1article=Lightning | |||
|weapon1auto=1 | |||
|weapon1cost=50 | |||
|- | |||
|weapon2=Ellight | |||
|weapon2unlock=2 | |||
|weapon2auto=3 | |||
|weapon2cost=100 | |||
|- | |||
|weapon3=Shine | |||
|weapon3unlock=3 | |||
|weapon3auto=4 | |||
|weapon3cost=200 | |||
|- | |||
|weapon4=Virtuous Naga | |||
|weapon4auto=5 | |||
|weapon4cost=400 | |||
|- | |||
|special1=Dragon Gaze | |||
|special1unlock=3 | |||
|special1auto=4 | |||
|special1cost=100 | |||
|- | |||
|special2=Dragon Fang | |||
|special2unlock=4 | |||
|special2cost=200 | |||
|- | |||
|passa1=Warding Blow 1 | |||
|passa1unlock=2 | |||
|passa1cost=50 | |||
|- | |||
|passa2=Mirror Strike 1 | |||
|passa2unlock=3 | |||
|passa2cost=120 | |||
|- | |||
|passa3=Mirror Strike 2 | |||
|passa3unlock=4 | |||
|passa3cost=240 | |||
|- | |||
|passa4=Mirror Impact | |||
|passa4unlock=5 | |||
|passa4cost=300 | |||
|- | |||
|passb1=Light and Dark | |||
|passb1article=Light and Dark (skill) | |||
|passb1unlock=5 | |||
|passb1cost=300 | |||
|- | |||
|passb2=Light and Dark II | |||
|passb2unlock=5 | |||
|passb2cost=300 | |||
|- | |||
|passc1=Atk/Res Oath 1 | |||
|passc1unlock=1 | |||
|passc1cost=60 | |||
|- | |||
|passc2=Atk/Res Oath 2 | |||
|passc2unlock=2 | |||
|passc2cost=120 | |||
|- | |||
|passc3=Atk/Res Oath 3 | |||
|passc3unlock=4 | |||
|passc3cost=240 | |||
|- | |||
|passc4=Threaten Res 1 | |||
|passc4unlock=2 | |||
|passc4cost=50 | |||
|- | |- | ||
|passc5=Threat. Atk/Res 1 | |||
|passc5unlock=3 | |||
|passc5cost=100 | |||
| | |||
| | |||
| | |||
|- | |- | ||
| | |passc6=Threat. Atk/Res 2 | ||
|passc6unlock=4 | |||
|passc6cost=200 | |||
| | |||
| | |||
|- | |- | ||
|passc7=Atk/Res Menace | |||
|passc7unlock=5 | |||
|passc7cost=300 | |||
}} | |||
===Julia: | ===Julia: Heart Usurped=== | ||
====Starting stats==== | ====Starting stats==== | ||
:''Julia: | :''Julia: Heart Usurped is only available at 5{{star}} rarity.'' | ||
{{CharStats FEH | {{CharStats FEH | ||
|portrait=[[File:Portrait julia heart usurped feh.png|100px]] | |portrait=[[File:Portrait julia heart usurped feh.png|100px]] | ||
| Line 422: | Line 536: | ||
|def=4 | |def=4 | ||
|res=10 | |res=10 | ||
| | |HP_gr=50 | ||
| | |atk_gr=70 | ||
| | |spd_gr=45 | ||
| | |def_gr=30 | ||
| | |res_gr=70 | ||
|offense=[[Dark Scripture]] | |offense=[[Dark Scripture]] | ||
|special=[[Chilling Wind]] | |special=[[Chilling Wind]] | ||
}} | }} | ||
====Skill set==== | ====Skill set==== | ||
{| | {{FEH skill set | ||
|name=Julia: Heart Usurped | |||
|minrarity=5 | |||
|- | |||
|weapon1=Flux | |||
|weapon1auto=1 | |||
|weapon1cost=50 | |||
|- | |||
|weapon2=Ruin | |||
|weapon2auto=2 | |||
|weapon2cost=100 | |||
|- | |||
|weapon3=Fenrir | |||
|weapon3unlock=3 | |||
|weapon3auto=4 | |||
|weapon3cost=200 | |||
|- | |||
|weapon4=Dark Scripture | |||
|weapon4auto=5 | |||
|weapon4cost=400 | |||
|- | |||
|special1=Chilling Wind | |||
|special1unlock=3 | |||
|special1auto=4 | |||
|special1cost=100 | |||
|- | |||
|special2=Iceberg | |||
|special2unlock=4 | |||
|special2cost=200 | |||
|- | |||
|passa1=Atk/Res Solo 1 | |||
|passa1unlock=2 | |||
|passa1cost=60 | |||
|- | |||
|passa2=Atk/Res Solo 2 | |||
|passa2unlock=3 | |||
|passa2cost=120 | |||
|- | |||
|passa3=Atk/Res Solo 3 | |||
|passa3unlock=4 | |||
|passa3cost=240 | |||
|- | |||
|passa4=Atk/Res Solo 4 | |||
|passa4unlock=5 | |||
|passa4cost=300 | |||
|- | |||
|passb1=Light and Dark | |||
|passb1article=Light and Dark (skill) | |||
|passb1unlock=5 | |||
|passb1cost=300 | |||
|- | |||
|passc1=Panic Smoke 1 | |||
|passc1unlock=1 | |||
|passc1cost=60 | |||
|- | |||
|passc2=Panic Smoke 2 | |||
|passc2unlock=2 | |||
|passc2cost=120 | |||
|- | |||
|passc3=Panic Smoke 3 | |||
|passc3unlock=4 | |||
|passc3cost=240 | |||
}} | |||
===Julia: Scion of the Saint=== | |||
====Starting stats==== | |||
:''Julia: Scion of the Saint is only available at 5{{star}} rarity.'' | |||
{{CharStats FEH | |||
|portrait=[[File:Portrait julia scion of the saint feh.png|100px]] | |||
|rarity=5 | |||
|wpntype=Red tome | |||
|unittype=Flying | |||
|HP=17 | |||
|atk=12 | |||
|spd=9 | |||
|def=3 | |||
|res=7 | |||
|HP_gr=50 | |||
|atk_gr=70 | |||
|spd_gr=60 | |||
|def_gr=30 | |||
|res_gr=65 | |||
|offense=[[Luminous Grace+]] | |||
|support=[[Rally Resistance]] | |||
}} | |||
====Skill set==== | |||
{{FEH skill set | |||
|name=Julia: Scion of the Saint | |||
|minrarity=5 | |||
|- | |||
|weapon1=Fire | |||
|weapon1auto=1 | |||
|weapon1cost=50 | |||
|- | |||
|weapon2=Elfire | |||
|weapon2auto=2 | |||
|weapon2cost=100 | |||
|- | |||
|weapon3=Luminous Grace | |||
|weapon3auto=3 | |||
|weapon3cost=200 | |||
|- | |||
|weapon4=Luminous Grace+ | |||
|weapon4auto=5 | |||
|weapon4cost=300 | |||
|- | |||
|assist1=Rally Resistance | |||
|assist1unlock=3 | |||
|assist1auto=4 | |||
|assist1cost=150 | |||
|- | |||
|assist2=Rally Spd/Res | |||
|assist2unlock=4 | |||
|assist2cost=300 | |||
|- | |||
|assist3=Rally Spd/Res+ | |||
|assist3unlock=5 | |||
|assist3cost=400 | |||
|- | |||
|passa1=Atk/Spd Push 1 | |||
|passa1unlock=2 | |||
|passa1cost=60 | |||
|- | |||
|passa2=Atk/Spd Push 2 | |||
|passa2unlock=3 | |||
|passa2cost=120 | |||
|- | |- | ||
|passa3=Atk/Spd Push 3 | |||
|passa3unlock=4 | |||
|passa3cost=240 | |||
| | |||
| | |||
|- | |- | ||
|passa4=Atk/Spd Push 4 | |||
|} | |passa4unlock=5 | ||
|passa4cost=300 | |||
|- | |||
|passb1=Light and Dark | |||
|passb1article=Light and Dark (skill) | |||
|passb1unlock=5 | |||
|passb1cost=300 | |||
}} | |||
==Personality | ==Personality== | ||
At the time she joined Seliph's army, Julia was timid and quiet, possibly a result of the trauma or amnesia inflicted by Julius's attack on her. While wary of others and being forced out of Lewyn's care, she quickly developed a strong trusting bond in Seliph, and also got along well with [[Lana]].<ref>{{Cite|'''Lana:''' Hello, Julia. I bet you miss Lewyn.<br>'''Julia:''' You're Lana, right? No, I'm fine.<br>'''Lana:''' Well, His Highness is pretty concerned about you. But if you have any problems, come to me. Okay?<br>'''Julia:''' Thank you.|[[Lana]] and Julia (If [[Muirne]] is present instead, dialogue is identical)|Genealogy of the Holy War}}</ref> As the war developed, she developed a strong concern for Seliph, as well as an equally strong trust in his ability to save Jugdral and rescue her should she be captured.<ref>{{Cite|They locked me up in this castle, but I knew you'd come for me.|Julia|Genealogy of the Holy War}}</ref> At the war's end, when she met Julius with her memory restored, she was significantly more confident than before, which remained following Seliph freeing her from Manfroy's hypnosis. | At the time she joined Seliph's army, Julia was timid and quiet, possibly a result of the trauma or amnesia inflicted by Julius's attack on her. While wary of others and being forced out of Lewyn's care, she quickly developed a strong trusting bond in Seliph, and also got along well with [[Lana]].<ref>{{Cite|'''Lana:''' Hello, Julia. I bet you miss Lewyn.<br>'''Julia:''' You're Lana, right? No, I'm fine.<br>'''Lana:''' Well, His Highness is pretty concerned about you. But if you have any problems, come to me. Okay?<br>'''Julia:''' Thank you.|[[Lana]] and Julia (If [[Muirne]] is present instead, dialogue is identical)|Genealogy of the Holy War}}</ref> As the war developed, she developed a strong concern for Seliph, as well as an equally strong trust in his ability to save Jugdral and rescue her should she be captured.<ref>{{Cite|They locked me up in this castle, but I knew you'd come for me.|Julia|Genealogy of the Holy War}}</ref> At the war's end, when she met Julius with her memory restored, she was significantly more confident than before, which remained following Seliph freeing her from Manfroy's hypnosis. | ||
Julia appears to possess a minor ability to sense impending danger, which alerted her to the threat of [[Ishtar]]'s sheer power during the [[Munster District]] campaign.<ref>{{Cite|...I'm scared. I sense something evil in this area. [...] ...Seliph, be careful... Ishtar is extremely powerful... You must not fight her! [...] ...Huh? W-what's going on!?|Julia|Genealogy of the Holy War}}</ref> | Julia appears to possess a minor ability to sense impending danger, which alerted her to the threat of [[Ishtar]]'s sheer power during the [[Munster District]] campaign.<ref>{{Cite|...I'm scared. I sense something evil in this area. [...] ...Seliph, be careful... Ishtar is extremely powerful... You must not fight her! [...] ...Huh? W-what's going on!?|Julia|Genealogy of the Holy War}}</ref> | ||
==Endings== | ==Endings== | ||
| Line 583: | Line 697: | ||
And, at ''[Seliph's]'' side, there is the presence of<br> | And, at ''[Seliph's]'' side, there is the presence of<br> | ||
[...]<br> | [...]<br> | ||
The Imperial Princess Julia, | The Imperial Princess Julia, who's watching over him warmly. | ||
==Quotes== | ==Quotes== | ||
| Line 595: | Line 709: | ||
{{Quote|I fight for Seliph, my lord brother!|Julia, as an enemy in ''[[Champions of Yore 3]]'' in {{title|Awakening}}.}} | {{Quote|I fight for Seliph, my lord brother!|Julia, as an enemy in ''[[Champions of Yore 3]]'' in {{title|Awakening}}.}} | ||
{{Quote|No war could be worse than the one my | {{Quote|No war could be worse than the one my elder brothers fought. [...] Er, no. I mean it was heartbreaking to...Never mind. Have at you!|Julia, when fighting [[Lissa]] as an enemy in ''[[Champions of Yore 3]]'' in {{title|Awakening}}.}} | ||
{{Quote|No one will ever manipulate me again. I decide my own future!|Julia, as an enemy in ''[[Lost Bloodlines 1]]'' in {{title|Awakening}}.}} | {{Quote|No one will ever manipulate me again. I decide my own future!|Julia, as an enemy in ''[[Lost Bloodlines 1]]'' in {{title|Awakening}}.}} | ||
| Line 614: | Line 728: | ||
{{Quote|Ahh, Sir Seliph...|Julia, in the [[The Final Holy War|Final Chapter]] of {{title|Genealogy of the Holy War}}.}} | {{Quote|Ahh, Sir Seliph...|Julia, in the [[The Final Holy War|Final Chapter]] of {{title|Genealogy of the Holy War}}.}} | ||
{{Quote|Uuh... ("awakens" from | {{Quote|Uuh... ("awakens" from Manfroy's spell) Ahh... Sir Seliph...|Julia, as an enemy in the [[The Final Holy War|Final Chapter]] of {{title|Genealogy of the Holy War}}.}} | ||
{{Quote|Are you... truly brigands?|Julia, as an enemy in ''[[Champions of Yore 1]]'' in {{title|Awakening}}.}} | {{Quote|Are you... truly brigands?|Julia, as an enemy in ''[[Champions of Yore 1]]'' in {{title|Awakening}}.}} | ||
| Line 632: | Line 746: | ||
==Other appearances== | ==Other appearances== | ||
=== | ==={{TCG}}=== | ||
Julia was featured on five TCG cards. | Julia was featured on five TCG cards. | ||
{{TCGData Character | {{TCGData Character | ||
| Line 648: | Line 762: | ||
|no1=046 | |no1=046 | ||
|rarity1=★ | |rarity1=★ | ||
|artist1=[[ | |artist1=[[Mayumi Hirota]] | ||
|image2=[[File:TCG 1-083.jpg|100px]] | |image2=[[File:TCG 1-083.jpg|100px]] | ||
|class2=[[Light Priestess]] | |class2=[[Light Priestess]] | ||
| Line 662: | Line 776: | ||
|no2=083 | |no2=083 | ||
|rarity2=★★ | |rarity2=★★ | ||
|artist2=[[ | |artist2=[[Katsuyoshi Koya|Katusyoshi Koya]] | ||
|image3=[[File:TCG 3-023.jpg|100px]] | |image3=[[File:TCG 3-023.jpg|100px]] | ||
|class3=[[Sage]] | |class3=[[Sage]] | ||
| Line 676: | Line 790: | ||
|no3=3-023 | |no3=3-023 | ||
|rarity3=★★ | |rarity3=★★ | ||
|artist3=[[ | |artist3=[[Katsuyoshi Koya|Katusyoshi Koya]] | ||
|image4=[[File:TCG AN-006.jpg|100px]] | |image4=[[File:TCG AN-006.jpg|100px]] | ||
|class4=[[Light Priestess]] | |class4=[[Light Priestess]] | ||
| Line 704: | Line 818: | ||
|no5=P013 | |no5=P013 | ||
|rarity5=★★ | |rarity5=★★ | ||
|artist5=[[ | |artist5=[[Katsuyoshi Koya|Katusyoshi Koya]]}} | ||
}} | |||
=== | ==={{TCGCipher}}=== | ||
Julia is | Julia is featured on five cards in {{TCGCipher}}. | ||
{{TCGCipherData | {{TCGCipherData | ||
|name=Julia | |name=Julia | ||
| Line 728: | Line 833: | ||
|gender1=Female | |gender1=Female | ||
|weapon1=Tome | |weapon1=Tome | ||
|quote1={{hover|Oh my… What a strange feeling… I feel like | |quote1={{hover|Oh my… What a strange feeling… I feel like I've known this all my life…|SR}}"<br>"{{hover|For the first time, I know why I've survived for for all these years... I am fated to fight. I will never run!|SR+}} | ||
|attack1=60 | |attack1=60 | ||
|support1=20 | |support1=20 | ||
| Line 774: | Line 879: | ||
|class3article=Light Priestess | |class3article=Light Priestess | ||
|tier3=Base | |tier3=Base | ||
|skill3='''Maiden of Fate:''' {{CipherTrigger}} When this unit is deployed, you may choose a card in your hand and place it into the Bond Area, and if you do: Choose one of the face-up cards in your Bond Area and place it in your hand.<br>[[File:Is TCGCipher Defend.png|20px|Defend Support]] '''Miracle Emblem:''' {{CipherSupport}} Until the end of this battle, your | |skill3='''Maiden of Fate:''' {{CipherTrigger}} When this unit is deployed, you may choose a card in your hand and place it into the Bond Area, and if you do: Choose one of the face-up cards in your Bond Area and place it in your hand.<br>[[File:Is TCGCipher Defend.png|20px|Defend Support]] '''Miracle Emblem:''' {{CipherSupport}} Until the end of this battle, your opponent's attacking unit cannot perform a Critical Hit. | ||
|no3=B08-056HN, P08-006PR | |no3=B08-056HN, P08-006PR | ||
|artist3={{CipherIllust|海鵜げそ}} <small>(B08-056HN)</small>, {{CipherIllust|みわべさくら}} <small>(P08-006PR)</small> | |artist3={{CipherIllust|海鵜げそ}} <small>(B08-056HN)</small>, {{CipherIllust|みわべさくら}} <small>(P08-006PR)</small> | ||
| Line 781: | Line 886: | ||
|altimage4=[[File:TCGCipher B19-054SR+.png|150px]] | |altimage4=[[File:TCGCipher B19-054SR+.png|150px]] | ||
|altlabel4=SR+ | |altlabel4=SR+ | ||
|title4= | |title4=Shining Maiden of Saintly Lineage | ||
|name4=Julia | |name4=Julia | ||
|affil4=Jugdral | |affil4=Jugdral | ||
| Line 799: | Line 904: | ||
|- | |- | ||
|image5=[[File:TCGCipher B19-055N.png|150px]] | |image5=[[File:TCGCipher B19-055N.png|150px]] | ||
|title5= | |title5=Heiress to the Will of Light | ||
|name5=Julia | |name5=Julia | ||
|affil5=Jugdral | |affil5=Jugdral | ||
| Line 816: | Line 921: | ||
|artist5={{CipherIllust|長浜めぐみ}} | |artist5={{CipherIllust|長浜めぐみ}} | ||
}} | }} | ||
===Notable merchandise=== | |||
{{MerchInfo | |||
|imagelast=[[File:FEH Mini Acrylic Julia vol.1.png|150px]] | |||
|desclast=Julia appears in volume 1 of the [[Fire Emblem Heroes: Mini Acrylic Figure Collection]]. Her volume 1 appearance is based on her standard appearance in {{title|Heroes}}. | |||
|pricelast=¥350 | |||
|releaselast=February 2018{{JP}} | |||
}} | |||
==Flavor text== | |||
{{DescriptionHdr}} | |||
{{DescriptionCell | |||
|game={{title|Heroes}}<br><small>(Julia: Naga's Blood)</small> | |||
|english=Inheritor of the Book of Naga. Seliph's<br>half sister by a different father. Gentle, yet<br>faces her destiny with strength. Appears in<br>Fire Emblem: Genealogy of the Holy War. | |||
|japanese=聖なる光の書【ナーガ】の継承者。セリスの異父妹。<br>物静かな性格だが、運命に立ち向かう強さも持つ。<br>(登場:『ファイアーエムブレム 聖戦の系譜』) | |||
}} | |||
{{DescriptionCell | |||
|game={{title|Heroes}}<br><small>(Julia: Crusader of Light)</small> | |||
|english=Princess of Grannvale. As the inheritor of the<br>Book of Naga, she must perform her duties in<br>spite of the obstacles before her. Appears in<br>Fire Emblem: Genealogy of the Holy War. | |||
|japanese=グランベル皇女。【ナーガ】の継承者として<br>運命に弄ばれながらもその使命を果たす。<br>(登場:『ファイアーエムブレム 聖戦の系譜』) | |||
}} | |||
{{DescriptionCell | |||
|game={{title|Heroes}}<br><small>(Julia: Heart Usurped)</small> | |||
|english=Inheritor of the Book of Naga. Manipulated by<br>Manfroy, she has grown hostile toward Seliph.<br>Appears in Fire Emblem: Genealogy of the<br>Holy War. | |||
|japanese=光の書【ナーガ】の継承者。<br>マンフロイに心を支配され、セリスと敵対する。<br>(登場:『ファイアーエムブレム 聖戦の系譜』) | |||
}} | |||
{{DescriptionCell | |||
|game={{title|Heroes}}<br><small>(Julia: Scion of the Saint)</small> | |||
|english=Imperial princess, descended from Saint Heim<br>of the 12 crusaders, and heir to the Book of<br>Naga. Appears in Fire Emblem: Genealogy of<br>the Holy War. | |||
|japanese=グランベル皇女にして【ナーガ】の継承者。<br>十二聖戦士の一人、聖者ヘイムの血を継ぐ。<br>(登場:『ファイアーエムブレム 聖戦の系譜』) | |||
}} | |||
{{DescriptionFtr}} | |||
==[[Meet some of the Heroes]] entries== | |||
{{Tab | |||
|tab1=Naga's Blood | |||
|tab2=Crusader of Light | |||
|tab3=Heart Usurped | |||
|tab4=Scion of the Saint | |||
|content1={{MtH | |||
|full_name=Julia: Naga's Blood | |||
|name=Julia Naga's Blood | |||
|blurb1=Julia is the princess of the Grannvale Empire. During her early childhood, she had a happy upbringing, surrounded by a warm and kind family. | |||
|blurb2=But one day, her older brother Julius changed completely! He stole the throne from their father, Emperor Arvis, and even attempted to kill Julia. | |||
|blurb3=Julia was so shocked and devastated that she lost her memories. Protected by Lewyn, she was then entrusted to Seliph, who was fighting against Grannvale. | |||
|blurb4=At the time, neither had any idea that they were actually half siblings, though they would learn that later on. The bonds shared by Heroes really can be surprising at times! | |||
|Related_name1=Seliph | |||
|Related_blurb1=Inheritor of the sacred sword Tyrfing. A savior in his time, but dislikes battle. Julia's half brother. | |||
|Related_name2=Deirdre | |||
|Related_blurb2=A central figure of the tragedy at Belhalla. Brought three children into the world as dictated by the whims of fate. Julia's mother. | |||
|Related_name3=Lewyn | |||
|Related_blurb3=Prince of Silesse. A descendant of Ced, one of the 12 legendary crusaders, and inheritor of the wind tome Forseti. Protects Julia. | |||
}} | |||
|content2={{MtH | |||
|full_name=Julia: Crusader of Light | |||
|name=Julia Crusader of Light | |||
|blurb1=Julia is descended from the bloodlines of two of the Twelve Crusaders who once saved the continent of Jugdral long ago. She inherited the power of Heim through her mother, Deirdre, and that of Fjalar through her father, Arvis. | |||
|blurb2=She also had a twin brother: the fearsome Julius, who was possessed by the dark dragon Loptous. Corrupted by Loptous, Julius seized control of the Grannvale Empire, and his rule was marked by tyranny and cruelty. | |||
|blurb3=Julius tried to kill Julia, but she managed to escape with her mother's intervention. However, the trauma of what happened that day caused her to lose her memories. | |||
|blurb4=Eventually, she found her half-brother, Seliph, and together they challenged Loptous. With the power of the Crusaders awakened, Julia and Seliph succeeded in triumphing over the darkness! | |||
|Related_name1=Seliph | |||
|Related_blurb1=Inheritor of the sacred sword Tyrfing. A savior in his time, but dislikes battle. Julia's half-brother. | |||
|Related_name2=Julius | |||
|Related_blurb2=Prince of the Grannvale Empire and Julia's brother. Was once a kind boy but suddenly developed a cruel nature. | |||
}} | |||
|content3={{MtH | |||
|full_name=Julia: Heart Usurped | |||
|name=Julia Heart Usurped | |||
|blurb1=Julia's always been so sweet and gentle, but… Is it just me, or are her eyes burning red right now? Do you think she's having trouble sleeping? | |||
|blurb2=No, that's not it at all! It looks like Manfroy, the leader of the Loptr Church, is controlling her with his magic! | |||
|blurb3=While under the influence of Manfroy's spell, Julia was a loyal servant of the dark god Loptous. She showed no mercy to anyone who defied Loptous, no matter who they were! | |||
|blurb4=I fear that Julia will remain this way as long as Manfroy's black magic is in effect… I hope Seliph comes to save her soon! | |||
|Related_name1=Julius | |||
|Related_blurb1=Prince of the Grannvale Empire. Was once a kind boy but suddenly came to have a cruel nature. Older brother of Julia. | |||
|Related_name2=Seliph | |||
|Related_blurb2=Inheritor of the sacred sword Tyrfing. A savior in his time, but dislikes battle. Julia's half brother. | |||
}} | |||
|content4={{MtH | |||
|full_name=Julia: Scion of the Saint | |||
|name=Julia Scion of the Saint | |||
|blurb1=The 12 crusaders once saved the continent of Jugdral. Julia is descended from Saint Heim, one of their number, and she's here to take part in the Day of the Twelve festival! | |||
|blurb2=The outfit she's wearing is based on the one worn by her ancestor, who once wielded the Book of Naga. She positively glows in that attire—almost as if she is surrounded by a warm, gentle light! | |||
|blurb3=In fact, even the long shawl around her neck shines like a saint's halo! Her outfit for the festival truly does bring out her ethereal charms. | |||
|blurb4=Julia is more than worthy of being called the Crusader of Light. I can't wait to see her shining brightly at the festival! | |||
|Related_name1=Seliph | |||
|Related_blurb1=Inheritor of the sacred sword Tyrfing. A savior in his time, but dislikes battle. Julia's half brother. | |||
|Related_name2=Julius | |||
|Related_blurb2=Prince of the Grannvale Empire. Was once a kind boy but suddenly came to have a cruel nature. Older brother of Julia. | |||
|Related_name3=Lewyn | |||
|Related_blurb3=Prince of Silesse. A descendant of Ced, one of the legendary 12 crusaders. He once looked after Julia when she lost her memory. | |||
}} | |||
}} | |||
==[[Choose Your Legends]] placement history== | |||
{{CYL results}} | |||
==Trivia== | ==Trivia== | ||
* {{TRS|Julia}} is also the name of a character appearing in {{TRS1}}, though the katakana renderings are slightly different. | * {{TRS|Julia}} is also the name of a character appearing in {{TRS1}}, though the katakana renderings are slightly different. | ||
* Despite having a negative [[love]] growth with [[Seliph]], it is possible to pair Seliph and Julia as lovers by exploiting the [[jealousy]] system if the game was not reset. | |||
** Provided that none of them have lovers, [[Lana]]/[[Muirne]] and [[Larcei]]/[[Creidne]] can be placed adjacent to both Seliph and Julia in a square formation; jealousy will cause Julia to "steal" 5 love points each from Lana/Muirne and Larcei/Creidne, for a total of 10 love points. Julia's negative growth of -5 will be negated for a net result of +5 love points, and if enough turns pass while in this formation, Seliph and Julia will become lovers. | |||
==Etymology and other languages== | ==Etymology and other languages== | ||
| Line 824: | Line 1,026: | ||
|eng-name=Julia | |eng-name=Julia | ||
|eng-mean=As of {{FE13}}. Feminine form of [[Julius]].<ref>{{cite web |url=https://www.behindthename.com/name/julia |title=Behind the Name: Meaning, origin and history of the name Julia|site=www.behindthename.com |retrieved=8 September 2018}}</ref> | |eng-mean=As of {{FE13}}. Feminine form of [[Julius]].<ref>{{cite web |url=https://www.behindthename.com/name/julia |title=Behind the Name: Meaning, origin and history of the name Julia|site=www.behindthename.com |retrieved=8 September 2018}}</ref> | ||
| | |jpn-name={{h|ユリア|Yuria}} | ||
| | |jpn-mean=Officially romanized as '''Yuria'''. Literal reading of one of the standard Japanese renderings of "Julia". | ||
|span-name=Julia | |||
|span-mean=As above. | |||
|fren-name=Julia | |fren-name=Julia | ||
|fren-mean=As above. | |fren-mean=As above. | ||
|ger-name=Julia | |ger-name=Julia | ||
|ger-mean=As above. | |ger-mean=As above. | ||
|ital-name=Julia | |ital-name=Julia | ||
|ital-mean=As above. | |ital-mean=As above. | ||
| Line 841: | Line 1,043: | ||
==Gallery== | ==Gallery== | ||
{| class="mw-collapsible mw-collapsed" style="width: 75%; border: 1px solid {{Color2}}; background: {{Color1}}; border-radius: 15px; | {| class="mw-collapsible mw-collapsed" style="width: 75%; border: 1px solid {{Color2}}; background: {{Color1}}; border-radius: 15px; margin: auto; text-align: center" | ||
! style="border: 1px solid {{Color2}}; background: {{Color1}}; border-radius: 15px" | Sprite Gallery | |||
! style="border: 1px solid {{Color2}} | |||
|- | |- | ||
| style="border: 1px solid {{Color2}} | | style="border: 1px solid {{Color2}}; background: {{Color1}}; border-radius: 15px" | '''''Genealogy of the Holy War''''' | ||
{| style="width: 100%; background: {{Color3}}; border-radius: 15px | {| style="width: 100%; background: {{Color3}}; border-radius: 15px; border: 1px solid {{Color2}}; margin: auto; border-spacing: 0" | ||
| | | rowspan="2" | [[File:Portrait julia fe04.png]] [[File:Portrait julia 02 fe04.png]] [[File:Portrait julia 03 fe04.png]] | ||
| style="border-left: 1px solid {{Color2}}; border-bottom: 1px solid {{Color2}} | | style="border-left: 1px solid {{Color2}}; border-bottom: 1px solid {{Color2}}" colspan="2" | [[File:Ma snes02 light priestess enemy.gif]] [[Light Priestess]] [[File:Ma snes02 light priestess playable.gif]] | ||
| style="border-left: 1px solid {{Color2}}; border-bottom: 1px solid {{Color2}} | | style="border-left: 1px solid {{Color2}}; border-bottom: 1px solid {{Color2}}" colspan="2" | [[File:Ma snes02 sage female enemy.gif]] [[Sage]] [[File:Ma snes02 sage female playable.gif]] | ||
|- | |- | ||
| style="border-left: 1px solid {{Color2}} | | style="border-left: 1px solid {{Color2}}" | [[File:Bs fe04 julia light priestess light.png]]<br>[[Light (magic)|Light]]<br><small>(all tomes)</small> | ||
| [[File:Bs fe04 julia light priestess staff.png]]<br>[[Staff]]<br><small>([[Heal]])</small> | |||
| style="border-left: 1px solid {{Color2}} | | style="border-left: 1px solid {{Color2}}" | [[File:Bs fe04 julia sage magic.png]]<br>[[Magic (element)|Magic]]<br><small>(all tomes)</small> | ||
| [[File:Bs fe04 julia sage staff.png]]<br>[[Staff]]<br><small>([[Heal]])</small> | |||
|} | |} | ||
|- | |- | ||
| style="border: 1px solid {{Color2}} | | style="border: 1px solid {{Color2}}; background: {{Color1}}; border-radius: 15px" | '''''Thracia 776''''' | ||
{| style="width: 100%; background: {{Color3}}; border-radius: 15px | {| style="width: 100%; background: {{Color3}}; border-radius: 15px; border: 1px solid {{Color2}}" | ||
| [[File:Portrait julia fe05.png]] | |||
|} | |} | ||
|} | |} | ||
===Official artwork=== | ===Official artwork=== | ||
<gallery> | <gallery> | ||
FE776 Julia Lewyn.png|Artwork of [[Lewyn]] and Julia from {{title| | FE776 Julia Lewyn.png|Artwork of Julia and [[Lewyn]] from {{title|Treasure}} and {{title|Thracia 776}}. | ||
FESK Julia 02.png|Artwork of Julia from the {{title|Trading Card Game}}. | |||
FESK Julia 01.png|Artwork of Julia from the {{title|Trading Card Game}}. | |||
FESK Second Generation.jpg|Artwork of Julia, [[Seliph]], [[Ares]], [[Larcei]], [[Shannan]] and [[Lana]] from {{title|Genealogy of the Holy War}}. | |||
Portrait spotpass julia fe13.png|Portrait of Julia from {{title|Awakening}}. | Portrait spotpass julia fe13.png|Portrait of Julia from {{title|Awakening}}. | ||
</gallery> | </gallery> | ||
==={{title|Heroes}} artwork=== | ==={{title|Heroes}} artwork=== | ||
====Character artwork==== | |||
<gallery> | |||
FEH Julia Naga's Blood 01.png|Artwork of Julia: Naga's Blood. | |||
FEH Julia Naga's Blood 02.png|Artwork of Julia: Naga's Blood. | |||
FEH Julia Naga's Blood 02a.png|Artwork of Julia: Naga's Blood. | |||
FEH Julia Naga's Blood 03.png|Artwork of Julia: Naga's Blood. | |||
FEH Wallpaper Julia.png|Artwork of Julia: Naga's Blood. | |||
FEH Julia Naga's Blood R01.png|Artwork of Resplendent Julia: Naga's Blood. | |||
FEH Julia Naga's Blood R02.png|Artwork of Resplendent Julia: Naga's Blood. | |||
FEH Julia Naga's Blood R02a.png|Artwork of Resplendent Julia: Naga's Blood. | |||
FEH Julia Naga's Blood R03.png|Artwork of Resplendent Julia: Naga's Blood. | |||
FEH Julia Crusader of Light 01.png|Artwork of Julia: Crusader of Light. | |||
FEH Julia Crusader of Light 02.png|Artwork of Julia: Crusader of Light. | |||
FEH Julia Crusader of Light 02a.png|Artwork of Julia: Crusader of Light. | |||
FEH Julia Crusader of Light 03.png|Artwork of Julia: Crusader of Light. | |||
FEH Julia Heart Usurped 01.png|Artwork of Julia: Heart Usurped. | |||
FEH Julia Heart Usurped 02.png|Artwork of Julia: Heart Usurped. | |||
FEH Julia Heart Usurped 02a.png|Artwork of Julia: Heart Usurped. | |||
FEH Julia Heart Usurped 03.png|Artwork of Julia: Heart Usurped. | |||
FEH Julia Scion of the Saint 01.png|Artwork of Julia: Scion of the Saint. | |||
FEH Julia Scion of the Saint 02.png|Artwork of Julia: Scion of the Saint. | |||
FEH Julia Scion of the Saint 02a.png|Artwork of Julia: Scion of the Saint. | |||
FEH Julia Scion of the Saint 03.png|Artwork of Julia: Scion of the Saint. | |||
</gallery> | |||
====Meet some of the Heroes artwork==== | |||
<gallery> | <gallery> | ||
FEH Julia | FEH mth Julia Naga's Blood 01.png|Artwork of Julia: Naga's Blood. | ||
FEH mth Julia Naga's Blood 02.png|Artwork of Julia: Naga's Blood. | |||
FEH Julia | FEH mth Julia Naga's Blood 03.png|Artwork of Julia: Naga's Blood. | ||
FEH mth Julia Naga's Blood 04.png|Artwork of Julia: Naga's Blood. | |||
FEH Julia Naga's Blood | FEH mth Julia Crusader of Light 01.png|Artwork of Julia: Crusader of Light. | ||
FEH Julia Naga's Blood | FEH mth Julia Crusader of Light 02.png|Artwork of Julia: Crusader of Light. | ||
FEH Julia | FEH mth Julia Crusader of Light 03.png|Artwork of Julia: Crusader of Light. | ||
FEH Julia | FEH mth Julia Crusader of Light 04.png|Artwork of Julia: Crusader of Light. | ||
FEH Julia Crusader of Light | FEH mth Julia Heart Usurped 01.png|Artwork of Julia: Heart Usurped. | ||
FEH Julia Crusader of Light | FEH mth Julia Heart Usurped 02.png|Artwork of Julia: Heart Usurped. | ||
FEH Julia | FEH mth Julia Heart Usurped 03.png|Artwork of Julia: Heart Usurped. | ||
FEH Julia | FEH mth Julia Heart Usurped 04.png|Artwork of Julia: Heart Usurped. | ||
FEH Julia Heart Usurped | FEH mth Julia Scion of the Saint 01.png|Artwork of Julia: Scion of the Saint. | ||
FEH Julia Heart Usurped | FEH mth Julia Scion of the Saint 02.png|Artwork of Julia: Scion of the Saint. | ||
FEH Julia | FEH mth Julia Scion of the Saint 03.png|Artwork of Julia: Scion of the Saint. | ||
FEH Julia | FEH mth Julia Scion of the Saint 04.png|Artwork of Julia: Scion of the Saint. | ||
FEH mth Julius Scion of Darkness 02.png|Julia in artwork of Julius: Scion of Darkness. | |||
</gallery> | </gallery> | ||
===Other appearances=== | ===Other appearances=== | ||
<gallery> | <gallery> | ||
TCGCipher Julia 01.png|Artwork of Julia from {{title|Cipher}}. | |||
TCGCipher Julia 02.png|Artwork of Julia from {{title|Cipher}}. | |||
TCGCipher Julia | TCGCipher Julia 03.jpg|Artwork of Julia from {{title|Cipher}}. | ||
TCGCipher Julia 04.jpg|Artwork of Julia from {{title|Cipher}}. | |||
TCGCipher Seliph Julia 01.jpg|Artwork of Julia, [[Seliph]], [[Sigurd]] and [[Deirdre]] from {{title|Cipher}}. | |||
TCGCipher Seliph Julia 02.jpg|Artwork of Julia and [[Seliph]] with other characters from {{title|Cipher}}. | |||
TCGCipher Seliph 03.jpg|Julia in an artwork of [[Seliph]] from {{title|Cipher}}. | |||
TCGCipher Seliph 06.jpg|Julia in an artwork of [[Seliph]] from {{title|Cipher}}. | |||
</gallery> | </gallery> | ||
Latest revision as of 22:52, 7 June 2024
- For the character from TearRing Saga: Yutona Heroes War Chronicles, see Saga:Julia.
| ||||||||||||||||
|

| “ | For the first time in my life I know what I'm here for. And that's to fight... I'm not scared anymore, Seliph. | ” | — Julia |
|---|
Julia (pronounced /ˈdʒuliə/[key][1]; Japanese: ユリア Yuria) is a princess of Grannvale, the daughter of Arvis and Deirdre, twin sister of Prince Julius and a full-blooded descendant of Saint Heim of the Twelve Crusaders. Born some time after the Battle of Belhalla, her father's ascension to the Grannvale throne and the rise of Grannvale as an empire, as a child she was attacked by her brother shortly after he first claimed the Book of Loptous, escaping only with the last of her mother's strength. She was found, taken in and raised by Lewyn, who later entrusted her to the protection of Seliph at the beginning of his revolution in Grann 776. She developed a strong trust in Seliph and was a close ally of his throughout the campaigns in Isaach, the Munster District and Thracia, and proved instrumental in the final confrontation with Julius.
Biography
Early life
In approximately Grann 770, seven years prior to their eventual reunion,[2] when Julius first received the Book of Loptous, under Loptous's influence he attempted to kill Julia to exterminate the only possible threat to him. She was severely wounded by Julius, but survived through Deirdre's intervention, who warped her away from Julius at the cost of her own life. Afterward, now amnesiac, she was found by Lewyn and was taken by him to a remote hideaway in Silesse to recover, where she remained for the following seven years.[3]
With Seliph
Years later, in response to the situation in Silesse worsening, Lewyn and Julia fled the area and eventually arrived in Ganeishire Castle in Grannvale-controlled Isaach, where they met her then-unknowing half-brother Seliph, who had just launched an offensive against the House Dozel occupation of the nation. Lewyn left Julia in Seliph's care while he travelled to Leonster. Using a light tome looted from an Isaach castle, she fought in Seliph's army and acted as an advisor and confidante to him throughout it.
Eventually, at Peruluke Castle in Miletos, Julia was found and cornered by Manfroy of the Loptr Church, who abducted her while nobody was looking. Manfroy initially took Julia to Chalphy Castle for temporary imprisonment; there, she was reunited with Arvis, who attempted to set her free with Palmarch and other captive children. He was stopped by Manfroy, who took her straight to Belhalla to see Julius, but not before Arvis surreptitiously passed on her late mother's circlet to her. Although Julius wanted Julia to be killed without delay, at Manfroy's insistence she was spared and instead hypnotized by Manfroy into serving him.
During Seliph's final attack on Grannvale, Julia was deployed by Manfroy from Velthomer Castle to fight Seliph. She was freed from Manfroy's control following his death. On the advice of the steward Felipe, Julia entered the Velthomer treasury and used her circlet to unlock Naga for use against Julius.
Fire Emblem: Genealogy of the Holy War
Role
Julia is a playable character during the second generation. In Chapter 6, she appears as a player unit once Ganeishire is seized. If Julia is defeated in battle, she will be available again at the start of the following chapter. At the start of Chapter 10, Julia is removed from the party. In the Endgame, after Friege has been seized, Julia appears as an enemy unit affilated with Belhalla. She is re-recruited when talked to by Seliph once Manfroy is killed. Alternatively, if Julius is killed first, she will automatically re-recruit herself.
Starting stats and growth rates
|
| ||||||||||||||||||||||||||||||||||||||||
Promotion stat gains
| Class | HP | Str | Mag | Skill | Spd | Lck | Def | Res | Mov | Weapon level |
|---|---|---|---|---|---|---|---|---|---|---|
| Sage | +0 | +0 | +7 | +5 | +8 | +0 | +0 | +2 | +1 |
Love growths and events
|
- In Chapter 6, Lana/Muirne can initiate a conversation with Julia any time after she joins, which gives Julia a Mend staff.
- In Chapter 6, Julia can talk to Seliph after conquering either Sophara or Isaach. This rewards Julia with a light tome, depending on which castle was conquered – Nosferatu for Isaach, and Aura for Sophara.
- In Chapter 8, Julia can talk to Seliph at any point before Ishtar appears on the map, awarding Seliph +1 luck.
- In Chapter 9, Julia can talk to Seliph after conquering Grutia, awarding Seliph +3 resistance.
- In the Endgame, Julia can visit Velthomer, giving her the Naga tome.
Analysis
| This character analysis section may not be accurate to every player's experience. |
Julia is available from the start of the second generation. She has Adept, Follow-Up, and Nihil, three useful combat skills. Julia has major Naga blood and minor Fjalar blood, granting her a very high magic growth and a high resistance growth; her magic growth in particular is 100%, and will always increase when she levels up, capping at level 13. Julia's damage output can become extremely high, although she can have trouble doubling enemies due to her rather low speed growth and the high weight of many light magic tomes.
In Chapter 6, Julia can get the Mend staff from her conversation with Lana/Muirne. Also in Chapter 6, Julia can obtain the Aura or Nosferatu tomes from a conversation with Seliph after seizing Sophara or Isaach; which tome she receives is determined by which castle is seized—Aura is obtained by seizing Sophara, and Nosferatu by seizing Isaach. Nosferatu is the better tome; it has slightly less might than Aura, but significantly less weight and heals the user whenever they deal damage with it. Additionally, seizing Sophara for Aura creates a longer journey to Ribaut castle—the end goal of the chapter—for Seliph, making obtaining Nosferatu ideal for faster play, such as in ranked runs. Her promotion bonuses are excellent; while she does not get a mount, she gains significant statistical bonuses, that includes +7 in magic, +5 in skill, and +8 in speed, improving her combat significantly. Julia will also gain B levels in thunder and wind magics, and A in fire due to her Fjalar blood, making her and a promoted Leif the only two units able to use Bolganone if Tine, Arthur, or Ced's father is not Azelle; light magic has weapon triangle advantage against all other types of magic—except dark magic, which it is neutral against—but many non-light tomes have less weight, and may allow Julia to double more reliably.
With Nosferatu, Julia has a useful niche in Chapter 7, where she can fight enemy dark mages, especially those that start fairly close to the home castle. With her very high magic and resistance, she can deal significant damage and take very little in return, healing what damage she does take with Nosferatu. Julia can sometimes miss with Nosferatu, but it is generally reliable. Julia can also be used to fight the mage sisters encountered in Chapters 7 and 8 for the same reasons. While the sisters—Banba, Eriu, and Fotla—can perform the triangle attack, Julia is immune to it due to Nihil, giving her an additional advantage when fighting them.
In the final chapter, Julia obtains the Naga tome from Velthomer castle. The tome makes her arguably the most powerful combat unit in the game; it has 30 might, 50 uses, and gives her +20 to skill, speed, defense, and resistance. She will have no trouble doubling most enemies, her durability will increase substantially, and she also ignores the attack-halving effect of Loptous when wielding it. Even if she is level 1, with Naga, Julia is capable of taking one hit from Julius, doubling him, and dealing 6 damage to him—for comparison, Seliph with Tyrfing and the lowest speed he can inherit can double Julius, but cannot survive an attack from him without resistance or HP growths, and will only deal 5 damage with capped strength and the Power Ring.
Julia additionally has staff utility; she can use staves like Warp before promotion, which allows her to gain experience without engaging enemies, and with her excellent magic, she will also be a great healer when others like Lana have already used their turn or are too far away. If Julia is left at the home castle with a staff like Warp or Return and another unit to use them on, she can safely gain more experience faster than she could by attempting to fight enemies on the map; this is particularly useful for ranked runs.
Julia's primary negative aspect is her permanent lack of a mount. This limits her movement to 5 (6 when promoted), which is a significant detriment on the large maps of Genealogy of the Holy War, where mounted units with 8 or 9 movement—which can move up to 12 tiles with roads—can defeat enemies before unmounted units could possibly reach them. There are opportunities in the second generation where unmounted units can contribute, but it is still an issue. Julia is unlikely to participate in significant combat because of it, unless the player limits their mounted units to allow the infantry to keep up.
Julia also has an availability gap to consider—she is not available in Chapter 10 and most of the endgame. This does not impede her abilities significantly, but temporarily lacking access to her may hurt the player. Additionally, re-recruiting her will take a while, and–while difficult–it is possible to beat the Endgame without her.
Fire Emblem: Thracia 776
Role
Julia appears in the opening cutscene of Chapter 21, accompanying Seliph in his first meeting with Leif.
Fire Emblem Awakening
Julia is playable as a SpotPass character, released in the Genealogy of the Holy War second-generation character set. She is also present as an enemy in the first and third installments of the Champions of Yore DLC series, the first and third installments of Lost Bloodlines, and the second and third installments of Rogues & Redeemers.
Starting stats and growth rates
|
| ||||||||||||||||||||||||||||||

Reclassing options
Growth rates when reclassed
Tactician/Grandmaster Cavalier Paladin Knight Great Knight General Mercenary/Hero Bow Knight Archer Sniper Myrmidon Swordmaster Assassin Thief Trickster
| Class | HP | Str | Mag | Skill | Spd | Lck | Def | Res |
|---|---|---|---|---|---|---|---|---|
| Tactician/ |
80% | 45% | 65% | 45% | 55% | 55% | 35% | 35% |
Pegasus Knight Falcon Knight Dark Flier Wyvern Rider/Wyvern Lord Griffon Rider Troubadour Cleric War Cleric Mage Dark Mage Dark Knight Sorcerer Troubadour/Valkyrie Bride
| Class | HP | Str | Mag | Skill | Spd | Lck | Def | Res |
|---|---|---|---|---|---|---|---|---|
| Pegasus Knight | 80% | 45% | 55% | 55% | 65% | 55% | 30% | 35% |
Promotion stat gains
Archer Cavalier Cleric Dark Mage Wyvern Rider Knight Mage Mercenary Myrmidon Pegasus Knight Tactician Thief Troubadour
| Class | HP | Str | Mag | Skill | Spd | Lck | Def | Res | Mov | Weapon level |
|---|---|---|---|---|---|---|---|---|---|---|
| Sniper | +4 | +2 | +1 | +4 | +3 | +0 | +5 | +3 | +1 | -- |
| Bow Knight | +8 | +3 | +0 | +2 | +4 | +0 | +1 | +2 | +3 |
Skill set
Like all female bonus units in Awakening, Julia has access to all base class and advanced class skills available to standard female units.
Fire Emblem Heroes
Role
There are four different variations of Julia available to Heroes, all of which are tied to her storyline appearance in Genealogy of the Holy War. The normal variation of Julia is one of the characters added to the game in the Family Bonds update, and became available for summoning by players on February 15, 2017; she is one of the first four characters added to the game whose data was not present in the game at its launch. A variation of Julia termed "Crusader of Light" was first made available to players on August 28, 2019 as the game's eighteenth Legendary Hero; she is notably the first Legendary Hero to repeat an exact attribute combination of a previous Legendary Hero, repeating the Earth/Duel combination previously seen on the Legendary Hero variation of Alm. A corrupted variation of Julia, based on her brainwashing by Manfroy, was first made available to be summoned by players on May 8, 2020 as part of the summoning event surrounding the launch of the Steeped in Twilight update. A festival-themed variation of Julia was made available between the period of September 7, 2021 through October 7, 2021 as part of the summoning event surrounding the launch of the Scions of Twelve update.
Julia: Naga's Blood
Starting stats
- Julia: Naga's Blood is only available at 5★ rarity.
|
Initial Stats Level 40 Stats
|
| ||||||||||||||||||||||

Skill set
| Skill set | ||||
|---|---|---|---|---|
| Skill | Unlock | Auto-unlock | SP cost | |
| Wind | ★★★★★ | ★★★★★ | 50 | |
| Elwind | ★★★★★ | ★★★★★ | 100 | |
| Rexcalibur | ★★★★★ | ★★★★★ | 200 | |
| Naga | ★★★★★ | ★★★★★ | 400 | |
| Dragon Gaze | ★★★★★ | ★★★★★ | 100 | |
| Dragon Fang | ★★★★★ | — | 200 | |
| Resistance +1 | ★★★★★ | — | 30 | |
| Resistance +2 | ★★★★★ | — | 60 | |
| Resistance +3 | ★★★★★ | — | 120 | |
| Breath of Life 1 | ★★★★★ | — | 50 | |
| Breath of Life 2 | ★★★★★ | — | 100 | |
| Breath of Life 3 | ★★★★★ | — | 200 | |
Julia: Crusader of Light
Starting stats
- Julia: Crusader of Light is only available at 5★ rarity.
|
Initial Stats Level 40 Stats
|
| ||||||||||||||||||||||||

Skill set
| Skill set | ||||
|---|---|---|---|---|
| Skill | Unlock | Auto-unlock | SP cost | |
| Light | ★★★★★ | ★★★★★ | 50 | |
| Ellight | ★★★★★ | ★★★★★ | 100 | |
| Shine | ★★★★★ | ★★★★★ | 200 | |
| Virtuous Naga | ★★★★★ | ★★★★★ | 400 | |
| Dragon Gaze | ★★★★★ | ★★★★★ | 100 | |
| Dragon Fang | ★★★★★ | — | 200 | |
| Warding Blow 1 | ★★★★★ | — | 50 | |
| Mirror Strike 1 | ★★★★★ | — | 120 | |
| Mirror Strike 2 | ★★★★★ | — | 240 | |
| Mirror Impact | ★★★★★ | — | 300 | |
| Light and Dark | ★★★★★ | — | 300 | |
| Light and Dark II | ★★★★★ | — | 300 | |
| Atk/Res Oath 1 | ★★★★★ | — | 60 | |
| Atk/Res Oath 2 | ★★★★★ | — | 120 | |
| Atk/Res Oath 3 | ★★★★★ | — | 240 | |
| Threaten Res 1 | ★★★★★ | — | 50 | |
| Threat. Atk/Res 1 | ★★★★★ | — | 100 | |
| Threat. Atk/Res 2 | ★★★★★ | — | 200 | |
| Atk/Res Menace | ★★★★★ | — | 300 | |
Julia: Heart Usurped
Starting stats
- Julia: Heart Usurped is only available at 5★ rarity.
|
Initial Stats Level 40 Stats
|
| ||||||||||||||||||||||

Skill set
| Skill set | ||||
|---|---|---|---|---|
| Skill | Unlock | Auto-unlock | SP cost | |
| Flux | ★★★★★ | ★★★★★ | 50 | |
| Ruin | ★★★★★ | ★★★★★ | 100 | |
| Fenrir | ★★★★★ | ★★★★★ | 200 | |
| Dark Scripture | ★★★★★ | ★★★★★ | 400 | |
| Chilling Wind | ★★★★★ | ★★★★★ | 100 | |
| Iceberg | ★★★★★ | — | 200 | |
| Atk/Res Solo 1 | ★★★★★ | — | 60 | |
| Atk/Res Solo 2 | ★★★★★ | — | 120 | |
| Atk/Res Solo 3 | ★★★★★ | — | 240 | |
| Atk/Res Solo 4 | ★★★★★ | — | 300 | |
| Light and Dark | ★★★★★ | — | 300 | |
| Panic Smoke 1 | ★★★★★ | — | 60 | |
| Panic Smoke 2 | ★★★★★ | — | 120 | |
| Panic Smoke 3 | ★★★★★ | — | 240 | |
Julia: Scion of the Saint
Starting stats
- Julia: Scion of the Saint is only available at 5★ rarity.
|
Initial Stats Level 40 Stats
|
| ||||||||||||||||||||||

Skill set
| Skill set | ||||
|---|---|---|---|---|
| Skill | Unlock | Auto-unlock | SP cost | |
| Fire | ★★★★★ | ★★★★★ | 50 | |
| Elfire | ★★★★★ | ★★★★★ | 100 | |
| Luminous Grace | ★★★★★ | ★★★★★ | 200 | |
| Luminous Grace+ | ★★★★★ | ★★★★★ | 300 | |
| Rally Resistance | ★★★★★ | ★★★★★ | 150 | |
| Rally Spd/Res | ★★★★★ | — | 300 | |
| Rally Spd/Res+ | ★★★★★ | — | 400 | |
| Atk/Spd Push 1 | ★★★★★ | — | 60 | |
| Atk/Spd Push 2 | ★★★★★ | — | 120 | |
| Atk/Spd Push 3 | ★★★★★ | — | 240 | |
| Atk/Spd Push 4 | ★★★★★ | — | 300 | |
| Light and Dark | ★★★★★ | — | 300 | |
Personality
At the time she joined Seliph's army, Julia was timid and quiet, possibly a result of the trauma or amnesia inflicted by Julius's attack on her. While wary of others and being forced out of Lewyn's care, she quickly developed a strong trusting bond in Seliph, and also got along well with Lana.[4] As the war developed, she developed a strong concern for Seliph, as well as an equally strong trust in his ability to save Jugdral and rescue her should she be captured.[5] At the war's end, when she met Julius with her memory restored, she was significantly more confident than before, which remained following Seliph freeing her from Manfroy's hypnosis.
Julia appears to possess a minor ability to sense impending danger, which alerted her to the threat of Ishtar's sheer power during the Munster District campaign.[6]
Endings
Genealogy of the Holy War
And, at [Seliph's] side, there is the presence of
[...]
The Imperial Princess Julia, who's watching over him warmly.
Quotes
Battle quotes
| “ | Heheheh...... | ” | — Julia, as an enemy in the Final Chapter of Genealogy of the Holy War. |
|---|
| “ | You will fall here, scoundrel... | ” | — Julia, as an enemy in Champions of Yore 1 in Awakening. |
|---|
| “ | You speak poetry, milady. But not reality. | ” | — Julia, when fighting Lissa as an enemy in Champions of Yore 1 in Awakening. |
|---|
| “ | I fight for Seliph, my lord brother! | ” | — Julia, as an enemy in Champions of Yore 3 in Awakening. |
|---|
| “ | No war could be worse than the one my elder brothers fought. [...] Er, no. I mean it was heartbreaking to...Never mind. Have at you! | ” | — Julia, when fighting Lissa as an enemy in Champions of Yore 3 in Awakening. |
|---|
| “ | No one will ever manipulate me again. I decide my own future! | ” | — Julia, as an enemy in Lost Bloodlines 1 in Awakening. |
|---|
| “ | Then I beg you stand down, sir, for I cannot. | ” | — Julia, when fighting Morgan (male) as an enemy in Lost Bloodlines 1 in Awakening. |
|---|
| “ | Stand aside! | ” | — Julia, as an enemy in Lost Bloodlines 3 in Awakening. |
|---|
| “ | Why do you insist on tormenting us? | ” | — Julia, as an enemy in Rogues & Redeemers 2 in Awakening. |
|---|
| “ | Go home! You have nothing more to gain from this! | ” | — Julia, as an enemy in Rogues & Redeemers 3 in Awakening. |
|---|
| “ | I don't want to avoid it. I'm tired of running! | ” | — Julia, when fighting Sumia as an enemy in Rogues & Redeemers 3 in Awakening. |
|---|
Death quote
| “ | Please stop! Where am I being taken?! | ” | — Julia, in Chapters 6-9 of Genealogy of the Holy War. |
|---|
| “ | Ahh, Sir Seliph... | ” | — Julia, in the Final Chapter of Genealogy of the Holy War. |
|---|
| “ | Uuh... ("awakens" from Manfroy's spell) Ahh... Sir Seliph... | ” | — Julia, as an enemy in the Final Chapter of Genealogy of the Holy War. |
|---|
| “ | Are you... truly brigands? | ” | — Julia, as an enemy in Champions of Yore 1 in Awakening. |
|---|
| “ | Aaah...stay vigilant, brother...Their might is great... | ” | — Julia, as an enemy in Champions of Yore 3 in Awakening. |
|---|
| “ | I chose to fight...I regret...nothing... | ” | — Julia, as an enemy in Lost Bloodlines 1 in Awakening. |
|---|
| “ | Press on, then...if your cause be true... | ” | — Julia, as an enemy in Lost Bloodlines 3 in Awakening. |
|---|
| “ | Nngh... This is just the beginning...isn't it... | ” | — Julia, as an enemy in Rogues & Redeemers 2 in Awakening. |
|---|
| “ | Why do you persist... Is there some...purpose? | ” | — Julia, as an enemy in Rogues & Redeemers 3 in Awakening. |
|---|
Fire Emblem Heroes
- Main article:
Julia/Quotes (Heroes)
Other appearances
Fire Emblem Trading Card Game
Julia was featured on five TCG cards.
| Fire Emblem Trading Card Game data for Julia | |||
|---|---|---|---|

|
Class: Light Priestess | Level 1 Infantry | Recovery |
| Energy: 3 | Atk.: -- / Counter: -- / Recovery: 1 | WLv.: | |
| Equip: Heal | Skills: Follow-Up • Adept • Nihil | ||
| Card #046 • Rarity: ★ • Artist: Mayumi Hirota | |||

|
Class: Light Priestess | Level 10 Infantry | Magic Attack |
| Energy: 5 | Atk.: 3 / Counter: 1 | WLv.: | |
| Equip: Lightning | Skills: Follow-Up • Adept • Nihil | ||
| Card #083 • Rarity: ★★ • Artist: Katusyoshi Koya | |||

|
Class: Sage | Level 20 Infantry | Magic Attack |
| Energy: 6 | Atk.: 3 / Counter: 1 | WLv.: | |
| Equip: Lightning | Skills: Class Change • Skilfulness • Training • (Skill chip consumption -1) • Follow-Up • Adept • Nihil | ||
| Card #3-023 • Rarity: ★★ • Artist: Katusyoshi Koya | |||

|
Class: Light Priestess | Level 15 Infantry | Magic Attack |
| Energy: 5 | Atk.: 2 / Counter: 1 | WLv.: | |
| Equip: Nosferatu • Barrier Ring | Skills: Follow-Up • Adept • Nihil | ||
| Card #AN-006 • Rarity: ★★ • Artist: Kamui Fujiwara | |||

|
Class: Sage | Level 20 Infantry | Magic Attack |
| Energy: 6 | Atk.: 3 / Counter: 1 | WLv.: | |
| Equip: Lightning | Skills: Class Change • Skilfulness • Training • (Skill chip consumption -1) • Follow-Up • Adept • Nihil | ||
| Card #P013 • Rarity: ★★ • Artist: Katusyoshi Koya | |||
| Card scans and information translation provided by Aquantis. | |||
Fire Emblem Cipher
Julia is featured on five cards in Fire Emblem Cipher.
| Fire Emblem Cipher data for Julia | |||||
|---|---|---|---|---|---|
Normal SR+
|
The God of Light's Descendant, Julia | ||||
| "Oh my… What a strange feeling… I feel like I've known this all my life…" "For the first time, I know why I've survived for for all these years... I am fated to fight. I will never run!" | |||||
| Attack: 60 | Support: 20 | Range: 1-2 | Deploy Cost: 4 | ||
| Class: Sage | Tier: Advanced | Class Change Cost: 3 | |||
| Light Magic: Naga: [Trigger] [ Dragon King's Descendant: [Activate] [Once per turn] [Send a card in your Bond Area to the Retreat] Until the end of the turn, this unit gains +20 attack. | |||||
| Card #B08-054SR(+) • Artist: Geso Umiu (B08-054SR), Rika Suzuki (B08-054SR+) | |||||

|
Tragic Princess, Julia | ||||
| "I... All I can feel is dread... I feel as if I'll be torn from you, and we'll never see each other again..." | |||||
| Attack: 40 | Support: 20 | Range: 1-2 | Deploy Cost: 2 | ||
| Class: Light Priestess | Tier: Base | Class Change Cost: -- | |||
| Nosferatu: [Trigger] If this unit's attack destroys an enemy, until the end of your opponent's turn, this unit gains +10 attack. | |||||
| Card #B08-055N • Artist: Daken | |||||
Normal Promo Pack 8
|
Imperial Princess of Grannvale, Julia | ||||
| "I am alright. I'm not lonely." "HA HA HA... DEATH TO ALL... WHO DARE TO CHALLENGE LORD MANFROY..." | |||||
| Attack: 30 | Support: 20 | Range: 1-2 | Deploy Cost: 1 | ||
| Class: Light Priestess | Tier: Base | Class Change Cost: -- | |||
| Maiden of Fate: [Trigger] When this unit is deployed, you may choose a card in your hand and place it into the Bond Area, and if you do: Choose one of the face-up cards in your Bond Area and place it in your hand. | |||||
| Card #B08-056HN, P08-006PR • Artist: Geso Umiu (B08-056HN), Sakura Miwabe (P08-006PR) | |||||
Normal SR+
|
Shining Maiden of Saintly Lineage, Julia | ||||
| "My brother... My real brother, the kind and caring boy, he... He died that night. And you're all that was left in his place: a devil of a man... Who are you? WHAT are you? Why must you do this to us?!" "Yes, my lord... I mean, my lord brother. I want to help you every step of the way. I know this won't be easy... But no matter how dire things get, I'll never abandon you. Never." | |||||
| Attack: 60 | Support: 20 | Range: 1-2 | Deploy Cost: 5 | ||
| Class: Sage | Tier: Advanced | Class Change Cost: 4 | |||
| Ode to the Crusaders: [Activate] [Once per turn] [Flip 2 Darkness-Searing Dragonlight: [Trigger] Each time you play 1 card in the Bond Area, until the end of the turn, this unit gains +10 attack. | |||||
| Card #B19-054SR(+) • Artist: Saori Toyota (B19-054SR), Rika Suzuki (B19-054SR+) | |||||

|
Heiress to the Will of Light, Julia | ||||
| "Aura...That name, it...it sounds so oddly familiar." | |||||
| Attack: 30 | Support: 20 | Range: 1-2 | Deploy Cost: 1 | ||
| Class: Light Priestess | Tier: Base | Class Change Cost: -- | |||
| Successor of Light Magic: [Activate] [Once per turn] [Send 1 face-up Bond card to the Retreat Area] Reveal the topmost card of your Deck, and play it in the Bond Area. | |||||
| Card #B19-055N • Artist: Megumi Nagahama | |||||
| Some card information translation provided by Serenes Forest. For more detailed strategic information on these cards, see their TCG wiki article on Julia . | |||||


Notable merchandise
| Image | Information | Price | Release date |
|---|---|---|---|

|
Julia appears in volume 1 of the Fire Emblem Heroes: Mini Acrylic Figure Collection. Her volume 1 appearance is based on her standard appearance in Heroes. | ¥350 | February 2018JP |
Flavor text
| Game | Text (English) |
Text (Japanese) |
|---|---|---|
| Heroes (Julia: Naga's Blood) |
Inheritor of the Book of Naga. Seliph's
half sister by a different father. Gentle, yet faces her destiny with strength. Appears in Fire Emblem: Genealogy of the Holy War. |
聖なる光の書【ナーガ】の継承者。セリスの異父妹。
物静かな性格だが、運命に立ち向かう強さも持つ。 (登場:『ファイアーエムブレム 聖戦の系譜』) |
| Heroes (Julia: Crusader of Light) |
Princess of Grannvale. As the inheritor of the
Book of Naga, she must perform her duties in spite of the obstacles before her. Appears in Fire Emblem: Genealogy of the Holy War. |
グランベル皇女。【ナーガ】の継承者として
運命に弄ばれながらもその使命を果たす。 (登場:『ファイアーエムブレム 聖戦の系譜』) |
| Heroes (Julia: Heart Usurped) |
Inheritor of the Book of Naga. Manipulated by
Manfroy, she has grown hostile toward Seliph. Appears in Fire Emblem: Genealogy of the Holy War. |
光の書【ナーガ】の継承者。
マンフロイに心を支配され、セリスと敵対する。 (登場:『ファイアーエムブレム 聖戦の系譜』) |
| Heroes (Julia: Scion of the Saint) |
Imperial princess, descended from Saint Heim
of the 12 crusaders, and heir to the Book of Naga. Appears in Fire Emblem: Genealogy of the Holy War. |
グランベル皇女にして【ナーガ】の継承者。
十二聖戦士の一人、聖者ヘイムの血を継ぐ。 (登場:『ファイアーエムブレム 聖戦の系譜』) |
Meet some of the Heroes entries
Naga's Blood Crusader of Light Heart Usurped Scion of the Saint
| Julia: Naga's Blood | |||||||||
|---|---|---|---|---|---|---|---|---|---|

|

|

|

| ||||||
| Julia is the princess of the Grannvale Empire. During her early childhood, she had a happy upbringing, surrounded by a warm and kind family. | But one day, her older brother Julius changed completely! He stole the throne from their father, Emperor Arvis, and even attempted to kill Julia. | Julia was so shocked and devastated that she lost her memories. Protected by Lewyn, she was then entrusted to Seliph, who was fighting against Grannvale. | At the time, neither had any idea that they were actually half siblings, though they would learn that later on. The bonds shared by Heroes really can be surprising at times! | ||||||
| Closely Associated Characters | |||||||||
| |||||||||


Choose Your Legends placement history
| Round | Placement | Character | Votes |
|---|
| CYL 1 (2017) |
315 |  Julia Genealogy of the Holy War |
624 |
| CYL 2 (2018) |
146 (−169) |
Julia Genealogy of the Holy War |
1,749 (+1,125) |
| CYL 3 (2019) |
142 (−6) |
Julia Genealogy of the Holy War |
1,888 (+139) |
| CYL 4 (2020) |
143 (−4) |
Julia Genealogy of the Holy War |
1,109 (−779) |
| CYL 5 (2021) |
77 (−66) |
Julia Genealogy of the Holy War |
1,340 (+231) |
| CYL 6 (2022) |
84 (+7) |
Julia Genealogy of the Holy War |
1,207 (−133) |
| CYL 7 (2023) |
67 (−17) |
Julia Genealogy of the Holy War |
1,000 (−207) |
| CYL 8 (2024) |
92 (+25) |
Julia Genealogy of the Holy War |
780 (−220) |
| Total results | This character has 8 entries across all Choose Your Legends polls. | 9,697 |
|---|
Trivia
- Julia is also the name of a character appearing in TearRing Saga: Yutona Heroes War Chronicles, though the katakana renderings are slightly different.
- Despite having a negative love growth with Seliph, it is possible to pair Seliph and Julia as lovers by exploiting the jealousy system if the game was not reset.
- Provided that none of them have lovers, Lana/Muirne and Larcei/Creidne can be placed adjacent to both Seliph and Julia in a square formation; jealousy will cause Julia to "steal" 5 love points each from Lana/Muirne and Larcei/Creidne, for a total of 10 love points. Julia's negative growth of -5 will be negated for a net result of +5 love points, and if enough turns pass while in this formation, Seliph and Julia will become lovers.
Etymology and other languages
| Names, etymology, and in other regions | ||
|---|---|---|
| Language | Name | Definition, etymology, and notes |
| English |
Julia |
As of Fire Emblem Awakening. Feminine form of Julius.[7] |
| Japanese |
ユリア |
Officially romanized as Yuria. Literal reading of one of the standard Japanese renderings of "Julia". |
| Spanish |
Julia |
As above. |
| French |
Julia |
As above. |
| German |
Julia |
As above. |
| Italian |
Julia |
As above. |
| Portuguese (Brazil) |
Julia |
As above. |
| Traditional Chinese |
尤莉亞 |
Yuria |
Gallery
| Sprite Gallery | |||||||||
|---|---|---|---|---|---|---|---|---|---|
Genealogy of the Holy War
| |||||||||
| Thracia 776
| |||||||||
Official artwork

Artwork of Julia and Lewyn from Treasure and Thracia 776.

Artwork of Julia from the Trading Card Game.

Artwork of Julia from the Trading Card Game.
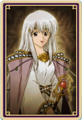
Portrait of Julia from Awakening.


Heroes artwork
Character artwork

Artwork of Julia: Naga's Blood.

Artwork of Julia: Naga's Blood.

Artwork of Julia: Naga's Blood.

Artwork of Julia: Naga's Blood.

Artwork of Julia: Naga's Blood.

Artwork of Resplendent Julia: Naga's Blood.

Artwork of Resplendent Julia: Naga's Blood.

Artwork of Resplendent Julia: Naga's Blood.

Artwork of Resplendent Julia: Naga's Blood.

Artwork of Julia: Crusader of Light.

Artwork of Julia: Crusader of Light.

Artwork of Julia: Crusader of Light.

Artwork of Julia: Crusader of Light.

Artwork of Julia: Heart Usurped.

Artwork of Julia: Heart Usurped.

Artwork of Julia: Heart Usurped.

Artwork of Julia: Heart Usurped.

Artwork of Julia: Scion of the Saint.

Artwork of Julia: Scion of the Saint.

Artwork of Julia: Scion of the Saint.

Artwork of Julia: Scion of the Saint.


Meet some of the Heroes artwork

Artwork of Julia: Naga's Blood.

Artwork of Julia: Naga's Blood.

Artwork of Julia: Naga's Blood.

Artwork of Julia: Naga's Blood.

Artwork of Julia: Crusader of Light.

Artwork of Julia: Crusader of Light.

Artwork of Julia: Crusader of Light.

Artwork of Julia: Crusader of Light.

Artwork of Julia: Heart Usurped.

Artwork of Julia: Heart Usurped.

Artwork of Julia: Heart Usurped.

Artwork of Julia: Heart Usurped.

Artwork of Julia: Scion of the Saint.

Artwork of Julia: Scion of the Saint.

Artwork of Julia: Scion of the Saint.

Artwork of Julia: Scion of the Saint.

Julia in artwork of Julius: Scion of Darkness.

Other appearances

Artwork of Julia from Cipher.

Artwork of Julia from Cipher.

Artwork of Julia from Cipher.

Artwork of Julia from Cipher.


References
- ↑ Julius in Fire Emblem Heroes
- ↑ "Ha! Your memory is still intact... And to think it's been 7 years." — Julius, Fire Emblem: Genealogy of the Holy War
- ↑ "I found her in Belhalla when she was real little. She was hurt pretty bad. So I took her to a remote area of Silesia and have been taking care of her all this time." — Lewyn, Fire Emblem: Genealogy of the Holy War
- ↑ "Lana: Hello, Julia. I bet you miss Lewyn.
Julia: You're Lana, right? No, I'm fine.
Lana: Well, His Highness is pretty concerned about you. But if you have any problems, come to me. Okay?
Julia: Thank you." — Lana and Julia (If Muirne is present instead, dialogue is identical), Fire Emblem: Genealogy of the Holy War - ↑ "They locked me up in this castle, but I knew you'd come for me." — Julia, Fire Emblem: Genealogy of the Holy War
- ↑ "...I'm scared. I sense something evil in this area. [...] ...Seliph, be careful... Ishtar is extremely powerful... You must not fight her! [...] ...Huh? W-what's going on!?" — Julia, Fire Emblem: Genealogy of the Holy War
- ↑ Behind the Name: Meaning, origin and history of the name Julia, www.behindthename.com, Retrieved: 8 September 2018

|
This article is part of Project Characters, a project focused on writing articles for every character present in the Fire Emblem series. |
| Fire Emblem: Thracia 776 | ||||||||||||||||||||
|---|---|---|---|---|---|---|---|---|---|---|---|---|---|---|---|---|---|---|---|---|
|
| Fire Emblem Awakening | ||||||||||||||||||||||||||||||||||||||||||||||||||||||||||||||
|---|---|---|---|---|---|---|---|---|---|---|---|---|---|---|---|---|---|---|---|---|---|---|---|---|---|---|---|---|---|---|---|---|---|---|---|---|---|---|---|---|---|---|---|---|---|---|---|---|---|---|---|---|---|---|---|---|---|---|---|---|---|---|
| ||||||||||||||||||||||||||||||||||||||||||||||||||||||||||||||
| Fire Emblem Heroes | |||||||||||||||||||||||||||||||||||||||||||||||||||||||||||||||
|---|---|---|---|---|---|---|---|---|---|---|---|---|---|---|---|---|---|---|---|---|---|---|---|---|---|---|---|---|---|---|---|---|---|---|---|---|---|---|---|---|---|---|---|---|---|---|---|---|---|---|---|---|---|---|---|---|---|---|---|---|---|---|---|
| |||||||||||||||||||||||||||||||||||||||||||||||||||||||||||||||