| Site News |
|---|
| Warning: This wiki contains spoilers. Read at your own risk! Social media: If you would like, please join our Discord server, and/or follow us on Twitter (X) or Tumblr! |
Maria: Difference between revisions
Thecornerman (talk | contribs) m (Text replacement - "|Fire|link=Fire (tome)" to "|Fire") |
Thecornerman (talk | contribs) m (Text replacement - "([Ll])evel (\d+)" to "$1evel $2") |
||
| (22 intermediate revisions by 7 users not shown) | |||
| Line 1: | Line 1: | ||
{{Stub}} | {{Stub}} | ||
{{Character Infobox | {{Character Infobox | ||
|image=[[File:FEMN Maria 01.png|200px]] | |image=[[File:FEMN Maria 01.png|200px]] | ||
| Line 20: | Line 21: | ||
*{{title|Heroes}} | *{{title|Heroes}} | ||
}} | }} | ||
{{Quote|Now then. Shall we be off? I'm coming with you, of course. ...No protesting! I wish to help!|Maria, to [[Marth]]}} | |||
'''Maria''' (Japanese: {{hl|マリア|Maria}} ''Maria'') is the second princess of [[Macedon]], and the younger sister of [[Michalis]] and [[Minerva]]. She appears as a [[cleric]] in {{FE1}}, {{FE3}} and their remakes, {{FE11}} and {{FE12}}. | '''Maria''' (Japanese: {{hl|マリア|Maria}} ''Maria'') is the second princess of [[Macedon]], and the younger sister of [[Michalis]] and [[Minerva]]. She appears as a [[cleric]] in {{FE1}}, {{FE3}} and their remakes, {{FE11}} and {{FE12}}. | ||
| Line 52: | Line 55: | ||
|def1=0 | |def1=0 | ||
|res1=0 | |res1=0 | ||
|recruit=[[Princess Minerva|Chapter 10]], talk to or let her talk with [[Marth]] | |recruit=[[Princess Minerva|Chapter 10]], talk to or let her talk with [[Marth]] | ||
}} | }} | ||
| Line 71: | Line 74: | ||
===Analysis=== | ===Analysis=== | ||
{{analysis}} | {{analysis}} | ||
Maria is a [[Curate]] that joins in Chapter 10. Maria has a [[weapon level]] of 8, which is high enough to use every [[staff]] in the game. This single-handedly gives Maria enough utility to justify using her, as certain staves are extremely useful, such as [[ | Maria is a [[Curate]] that joins in Chapter 10. Maria has a [[weapon level]] of 8, which is high enough to use every [[staff]] in the game. This single-handedly gives Maria enough utility to justify using her, as certain staves are extremely useful, such as [[Warp]] and [[Physic]]. Unfortunately, Maria has many other weaknesses that limit her potential. She has a [[speed]] of 2, with a growth of 20%, meaning she will probably get doubled by any enemy she goes up against. Her [[defense]] is a very low 4 with a growth of 0%, which—when you factor in her low speed, her 19 max HP with a 0% growth, and the fact she only has an avoid of 2 before terrain bonuses—means she will likely die against any enemy she comes up against. These weaknesses can be improved by [[Class change|promoting]] to [[Bishop]], which additionally allows her to use [[tome]]s. Unfortunately, the only way for Maria to gain experience is to survive combat, which is very hard considering her terrible durability. She only starts at level 3, so she needs to gain 7 levels to reach the promotion threshold, and she joins too late in the game to take advantage of weaker enemies in the earlier levels. Additionally, the [[Bishop's Ring]] needed to promote her can't be obtained until [[Manakete Princess|Chapter 19]], so she can't take advantage of the benefits of promotion for most of the game. Still, being able to use every staff gives her enough utility to justify using if you feel you need another staff-user. | ||
=={{FE3}}== | =={{FE3}}== | ||
| Line 104: | Line 107: | ||
|def1=0 | |def1=0 | ||
|res1=3 | |res1=3 | ||
|recruit=[[Princess Minerva|Chapter 8]], talk to with [[Marth]] | |recruit=[[Princess Minerva|Chapter 8]], talk to with [[Marth]] | ||
}} | }} | ||
| Line 142: | Line 145: | ||
|def1=10 | |def1=10 | ||
|res1=3 | |res1=3 | ||
|recruit=[[The Dragon | |recruit=[[The Dragon Altar|Endgame 2 Part 3]], talk to with [[Minerva]] | ||
}} | }} | ||
| Line 174: | Line 177: | ||
|def1=0 | |def1=0 | ||
|res1=50 | |res1=50 | ||
|recruit=[[Princess Minerva|Chapter 10]], talk to with [[Marth]] | |recruit=[[Princess Minerva|Chapter 10]], talk to with [[Marth]] | ||
}} | }} | ||
| Line 211: | Line 214: | ||
===Analysis=== | ===Analysis=== | ||
{{Analysis}} | {{Analysis}} | ||
Maria joins as a level 3 [[Cleric]] in Chapter 10, at the halfway point of ''Shadow Dragon''. Her base stats are low, aside from a relatively high resistance stat, and her level is also low, requiring seven more to promote. Her growth rates except for luck and resistance are also low, so she will not gain many stats from the level-ups she needs. | Maria joins as a level 3 [[Cleric]] in Chapter 10, at the halfway point of ''Shadow Dragon''. Her base stats are low, aside from a relatively high resistance stat, and her level is also low, requiring seven more to promote. Her growth rates except for luck and resistance are also low, so she will not gain many stats from the level-ups she needs. | ||
Maria starts with D rank in staves and 10 weapon experience. While other staff users who join earlier exist, Maria is still better than other units reclassed to [[Curate]] or Cleric, as they would have an E rank in staves. This allows her to reach C rank at a decent speed, and with that, access to [[ | Maria starts with D rank in staves and 10 weapon experience. While other staff users who join earlier exist, Maria is still better than other units reclassed to [[Curate]] or Cleric, as they would have an E rank in staves. This allows her to reach C rank at a decent speed, and with that, access to [[Warp]] and [[Physic]]. Once Maria has reached C rank in staves, she functions well as a support unit. No reclassing options help Maria, as she would have very low stats and weapon ranks after reclassing. It is unlikely that Maria will ever promote, considering how competitive [[Master Seal]]s are, but if she does, [[Bishop]] is her best promotion, as it increases her staff rank. | ||
Maria also has a unique niche—she can use the [[Aum]] staff without reclassing, otherwise limited to [[Elice]]. However, this would require Maria to reach A staves, which may not be feasible, and Elice will always be able to use it at base. | Maria also has a unique niche—she can use the [[Aum]] staff without reclassing, otherwise limited to [[Elice]]. However, this would require Maria to reach A staves, which may not be feasible, and Elice will always be able to use it at base. | ||
| Line 250: | Line 253: | ||
|12=y | |12=y | ||
}} | }} | ||
===Analysis=== | |||
{{sectstub}} | |||
{{analysis}} | |||
Maria is effectively a non-unit: she is primarily there for story purposes, and you do not even have to recruit her to progress. Failure to do so, however, mandates her death, be it by the player or Medeus using her as a sacrifice. | |||
Out of the four sisters, Maria is the worst. She cannot use [[Recover]] without being given an [[Arms Scroll]], and her [[Physic]] heals for only 11 HP. The map is too crowded to afford her time to use an Arms Scroll in the first place, and saving one from her takes one away from other units that could have benefited from it more earlier. 2 Arms Scrolls are required for her to use [[Aum]], which is unnecessary when [[Elice]] and [[Nyna]] can do so at base. | |||
If [[Marth]] is refreshed to fight [[Medeus]] multiple times a turn, Maria can provide weak healing with Physic or [[Mend]], enough to bump Marth over a survival threshold, without consuming the action of a more important staff-user. | |||
=={{FEH}}== | =={{FEH}}== | ||
| Line 271: | Line 283: | ||
|def=3 | |def=3 | ||
|res=9 | |res=9 | ||
| | |HP_gr=45 | ||
| | |atk_gr=50 | ||
| | |spd_gr=60 | ||
| | |def_gr=35 | ||
| | |res_gr=50 | ||
|support=[[Mend]] | |support=[[Mend]] | ||
}} | }} | ||
| Line 288: | Line 300: | ||
|def=3 | |def=3 | ||
|res=10 | |res=10 | ||
| | |HP_gr=45 | ||
| | |atk_gr=50 | ||
| | |spd_gr=60 | ||
| | |def_gr=35 | ||
| | |res_gr=50 | ||
|support=[[Mend]] | |support=[[Mend]] | ||
|special=[[Imbue]] | |special=[[Imbue]] | ||
| Line 306: | Line 318: | ||
|def=4 | |def=4 | ||
|res=10 | |res=10 | ||
| | |HP_gr=45 | ||
| | |atk_gr=50 | ||
| | |spd_gr=60 | ||
| | |def_gr=35 | ||
| | |res_gr=50 | ||
|support=[[Physic]] | |support=[[Physic]] | ||
|special=[[Miracle]] | |special=[[Miracle]] | ||
| Line 317: | Line 329: | ||
====Skill set==== | ====Skill set==== | ||
{| | {{FEH skill set | ||
|name=Maria: Minerva's Sister | |||
|minrarity=3 | |||
|- | |- | ||
|weapon1=Assault | |||
|weapon1unlock=1 | |||
|weapon1cost=50 | |||
|- | |- | ||
| | |weapon2=Panic | ||
|weapon2unlock=3 | |||
| | |weapon2cost=150 | ||
| | |||
|- | |- | ||
| | |weapon3=Panic+ | ||
|weapon3unlock=5 | |||
| | |weapon3cost=300 | ||
| | |||
|- | |- | ||
| | |assist1=Heal | ||
|assist1auto=1 | |||
| | |assist1cost=50 | ||
| | |||
|- | |- | ||
| | |assist2=Mend | ||
| | |assist2unlock=2 | ||
| | |assist2auto=3 | ||
|assist2cost=100 | |||
|- | |- | ||
| | |assist3=Physic | ||
| | |assist3unlock=4 | ||
| | |assist3auto=5 | ||
|assist3cost=200 | |||
|- | |- | ||
| | |assist4=Physic+ | ||
|assist4unlock=5 | |||
| | |assist4cost=300 | ||
| | |||
|- | |- | ||
| | |special1=Imbue | ||
| | |special1unlock=2 | ||
| | |specail1auto=4 | ||
| | |special1cost=50 | ||
|- | |- | ||
| | |special2=Miracle | ||
| | |special2unlock=3 | ||
| | |specail2auto=5 | ||
| | |special2cost=100 | ||
|- | |- | ||
| | |passc1=Fortify Res 1 | ||
|passc1unlock=3 | |||
| | |passc1cost=50 | ||
| | |||
|- | |- | ||
| | |passc2=Fortify Res 2 | ||
|passc2unlock=4 | |||
| | |passc2cost=100 | ||
| | |||
|- | |- | ||
| | |passc3=Fortify Res 3 | ||
|passc3unlock=5 | |||
|passc3cost=200 | |||
}} | |||
| | |||
| 200 | |||
===Maria: Sunny Smile=== | ===Maria: Sunny Smile=== | ||
| Line 408: | Line 409: | ||
====Skill set==== | ====Skill set==== | ||
{| | {{FEH skill set | ||
|name=Maria: Sunny Smile | |||
|minrarity=5 | |||
|- | |- | ||
|weapon1=Iron Axe | |||
|weapon1auto=1 | |||
|weapon1cost=50 | |||
|- | |- | ||
| | |weapon2=Steel Axe | ||
|weapon2auto=2 | |||
| | |weapon2cost=100 | ||
|- | |- | ||
| | |weapon3=Silver Axe | ||
| | |weapon3unlock=3 | ||
| | |weapon3auto=4 | ||
|weapon3cost=200 | |||
|- | |- | ||
| | |weapon4=Pastel Poleaxe | ||
| | |weapon4auto=5 | ||
| | |weapon4cost=400 | ||
|- | |- | ||
| | |assist1=Rally Defense | ||
| | |assist1unlock=3 | ||
| | |assist1auto=4 | ||
|assist1cost=150 | |||
|- | |- | ||
| | |assist2=Rally Spd/Def | ||
| | |assist2unlock=4 | ||
| | |assist2cost=300 | ||
|- | |- | ||
| | |assist3=Rally Spd/Def+ | ||
|assist3unlock=5 | |||
| | |assist3cost=400 | ||
| | |||
|- | |- | ||
| | |passa1=Atk/Def Push 1 | ||
|passa1unlock=2 | |||
| | |passa1cost=60 | ||
| | |||
|- | |- | ||
| | |passa2=Atk/Def Push 2 | ||
|passa2unlock=3 | |||
| | |passa2cost=120 | ||
| | |||
|- | |- | ||
| | |passa3=Atk/Def Push 3 | ||
|passa3unlock=4 | |||
| | |passa3cost=240 | ||
| | |||
|- | |- | ||
| | |passa4=Atk/Def Push 4 | ||
|passa4unlock=5 | |||
| | |passa4cost=300 | ||
| | |||
|- | |- | ||
| | |passb1=Flow Flight 1 | ||
|passb1unlock=1 | |||
| | |passb1cost=60 | ||
| | |||
|- | |- | ||
| | |passb2=Flow Flight 2 | ||
|passb2unlock=2 | |||
| | |passb2cost=120 | ||
| | |||
|- | |- | ||
| | |passb3=Flow Flight 3 | ||
|passb3unlock=4 | |||
|passb3cost=240 | |||
}} | |||
| | |||
| 240 | |||
===Maria: Ritual Sacrifice=== | ===Maria: Ritual Sacrifice=== | ||
| Line 506: | Line 495: | ||
====Skill set==== | ====Skill set==== | ||
{| | {{FEH skill set | ||
|name=Maria: Ritual Sacrifice | |||
|minrarity=5 | |||
|- | |- | ||
|weapon1=Assault | |||
|weapon1unlock=1 | |||
|weapon1cost=50 | |||
|- | |- | ||
| | |weapon2=Sacrifice Staff | ||
|weapon2unlock=5 | |||
| | |weapon2cost=400 | ||
| | |||
|- | |- | ||
| | |assist1=Heal | ||
|assist1auto=1 | |||
| | |assist1cost=50 | ||
| | |||
|- | |- | ||
| | |assist2=Reconcile | ||
| | |assist2unlock=2 | ||
| | |assist2auto=3 | ||
|assist2cost=100 | |||
|- | |- | ||
| | |assist3=Nudge | ||
| | |assist3unlock=3 | ||
| | |assist3auto=4 | ||
|assist3cost=200 | |||
|- | |- | ||
| | |assist4=Nudge+ | ||
| | |assist4auto=5 | ||
| | |assist4cost=300 | ||
|- | |- | ||
| | |special1=Imbue | ||
| | |special1unlock=2 | ||
| | |special1auto=4 | ||
|special1cost=50 | |||
|- | |- | ||
| | |special2=Miracle | ||
| | |special2unlock=3 | ||
| | |special2auto=5 | ||
|special2cost=100 | |||
|- | |- | ||
| | |special3=Holy Panic | ||
| | |special3unlock=5 | ||
| | |special3cost=500 | ||
|- | |- | ||
| | |passa1=Atk/Spd Bond 1 | ||
|passa1unlock=2 | |||
| | |passa1cost=60 | ||
| | |||
|- | |- | ||
| | |passa2=Atk/Spd Bond 2 | ||
|passa2unlock=3 | |||
| | |passa2cost=120 | ||
| | |||
|- | |- | ||
| | |passa3=Atk/Spd Bond 3 | ||
|passa3unlock=4 | |||
| | |passa3cost=240 | ||
| | |||
|- | |- | ||
| | |passa4=Atk/Spd Unity | ||
|passa4unlock=5 | |||
| | |passa4cost=300 | ||
| | |||
|- | |- | ||
| | |passb1=Wrathful Staff 1 | ||
|passb1unlock=2 | |||
| | |passb1cost=60 | ||
| | |||
|- | |- | ||
| | |passb2=Wrathful Staff 2 | ||
|passb2unlock=3 | |||
| | |passb2cost=120 | ||
| | |||
|- | |- | ||
| | |passb3=Wrathful Staff 3 | ||
|passb3unlock=4 | |||
| | |passb3cost=240 | ||
| | |||
|- | |- | ||
| | |passb4=Poetic Justice | ||
|passb4unlock=5 | |||
| | |passb4cost=300 | ||
| | |||
|- | |- | ||
| | |passc1=Even Recovery 1 | ||
|passc1unlock=1 | |||
| | |passc1cost=60 | ||
| | |||
|- | |- | ||
| | |passc2=Even Recovery 2 | ||
|passc2unlock=2 | |||
| | |passc2cost=120 | ||
| | |||
|- | |- | ||
| | |passc3=Even Recovery 3 | ||
|passc3unlock=4 | |||
|passc3cost=240 | |||
}} | |||
| | |||
| 240 | |||
==Personality== | ==Personality== | ||
| Line 820: | Line 794: | ||
}} | }} | ||
{{DescriptionFtr}} | {{DescriptionFtr}} | ||
==[[Meet some of the Heroes]] entries== | |||
{{Tab | |||
|tab1=Minerva's Sister | |||
|tab2=Sunny Smile | |||
|tab3=Ritual Sacrifice | |||
|content1={{MtH | |||
|full_name=Maria: Minerva's Sister | |||
|name=Maria Minerva's Sister | |||
|blurb1=Here's Maria! Does that flaming red hair of hers remind you of someone? That's right, she's the younger sister of Princess Minerva of Macedon! | |||
|blurb2=Maria's a sweet girl who cares about her family. When the relationship between Michalis and Minerva turned sour, Maria worried about whether they would ever be a happy family again. | |||
|blurb3=Later on, Maria was taken hostage by the opposing Dolhr Empire to prevent rebellion by Minerva. | |||
|blurb4=After Marth saved Maria from her captors, she and Minerva joined the Altean army and fought their hardest for peace! | |||
|Related_name1=Michalis | |||
|Related_blurb1=King of Macedon who had great ambitions for his country. Murdered his father. Brother to Minerva and Maria. | |||
|Related_name2=Minerva | |||
|Related_blurb2=Princess of Macedon who took up arms against her brother, Michalis. Maria's older sister. | |||
}} | |||
|content2={{MtH | |||
|full_name=Maria: Sunny Smile | |||
|name=Maria Sunny Smile | |||
|blurb1=Did anyone lose a cute little bunny on the festival grounds? Just kidding—here's Maria, one of the two princesses of Macedon! | |||
|blurb2=For her spring festival outfit, Maria's wearing a pristine white dress and a pair of rabbit ears that stand straight up. She's even accessorized her dress with a polka-dot skirt made from sheer fabric! | |||
|blurb3=And would you look at that! There's another cute little bunny peering out from Maria's festive axe. Come to think of it, it's just like the bunny decoration that her sister, Minerva, had on her spring festival lance! | |||
|blurb4=Minerva did say that Maria would love the festival… I bet she'll have the time of her life hopping around with all the happy little spring bunnies! | |||
|Related_name1=Minerva | |||
|Related_blurb1=Princess of Macedon who took up arms against her brother, Michalis. Maria's older sister who has previously attended the spring festival. | |||
|Related_name2=Michalis | |||
|Related_blurb2=King of Macedon who had great ambitions for his country. Murdered his father. Brother to Minerva and Maria. | |||
}} | |||
|content3={{MtH | |||
|full_name=Maria: Ritual Sacrifice | |||
|name=Maria Ritual Sacrifice | |||
|blurb1=Maria’s normally cheerful, so it doesn’t take much to notice how gloomy she seems today… It’s like she’s turned into someone else entirely! | |||
|blurb2=…Oh no, bad news! Maria’s been hypnotized and turned into a loyal servant of Medeus, the Shadow Dragon! | |||
|blurb3=She won’t listen to a word anyone else says, no matter how much you call out to her. Actually, you should probably avoid getting her attention, or she might fling powerful spells at you! | |||
|blurb4=H-how are we going to get Maria back to normal?! Maybe if someone from her family were here, they might be able to get through to her… | |||
|Related_name1=Michalis | |||
|Related_blurb1=King of Macedon who had great ambitions for his country. Murdered his father. Brother to Minerva and Maria. | |||
|Related_name2=Minerva | |||
|Related_blurb2=Princess of Macedon who took up arms against her brother, Michalis. Maria’s older sister. | |||
}} | |||
}} | |||
==[[Choose Your Legends]] placement history== | |||
{{CYL results}} | |||
==Trivia== | ==Trivia== | ||
| Line 848: | Line 868: | ||
==Gallery== | ==Gallery== | ||
{| | {{SpriteGalleryTable | ||
| | |game1=Shadow Dragon & the Blade of Light | ||
|cell1={{SpriteGalleryCellPA | |||
| | |portrait=[[File:Portrait maria fe01.png]] | ||
| | |class1=[[File:Ma nes01 curate enemy.gif]] [[Curate]] [[File:Ma nes01 curate playable.gif]] | ||
{| | |weapon1=[[File:Bs fe01 enemy curate female staff.png]][[File:Bs fe01 curate female staff.png]]<br>[[Staff]] | ||
| | |||
| | |border2=y | ||
| | |class2=[[Bishop]] [[File:Ma nes01 bishop playable.gif]] | ||
| | |weapon2=[[File:Bs fe01 bishop magic.png]]<br>[[Tome]], [[Staff]] | ||
| | }} | ||
| | |||
| | |game2=Mystery of the Emblem | ||
| | |cell2={{SpriteGalleryCellPA | ||
| | |portrait=[[File:Portrait maria fe03.png]] | ||
{| | |class1=[[File:Ma snes01 cleric enemy.gif]] [[Cleric]] [[File:Ma snes01 cleric playable.gif]] | ||
| | |weapon1=[[File:Bs fe03 enemy cleric staff.png]][[File:Bs fe03 cleric staff.png]]<br>[[Staff]] | ||
| | |||
| | |border2=y | ||
| | |class2=[[File:Ma snes01 bishop female enemy.gif]] [[Bishop]] [[File:Ma snes01 bishop female playable.gif]] | ||
| | |weapon2=[[File:Bs fe03 enemy bishop female magic.png]][[File:Bs fe03 bishop female magic.png]]<br>[[Tome]], [[Staff]] | ||
| | }} | ||
|} | |||
|game3=Shadow Dragon | |||
|SmallPortrait3=[[File:Small portrait maria fe11.png]] | |||
|cell3={{tab | |||
|default=5 | |||
|width=100% | |||
|tab1=Pegasus Knight | |||
|tab2=Archer | |||
|tab3=Myrmidon | |||
|tab4=Mage | |||
|tab5=Cleric | |||
|tab6=Paladin | |||
|tab7=Falcoknight | |||
|content1={{SpriteGalleryCell | |||
|portrait=[[File:Portrait maria fe11.png]] | |||
|class1=[[Pegasus Knight]] [[File:Ma ds01 pegasus knight playable.gif]] | |||
|weapon1=[[File:Bs fe11 red pegasus knight lance.png]]<br>[[Lance]] | |||
|border2=y | |||
|class2wep=2 | |||
|class2=[[Dracoknight]] [[File:Ma ds01 dracoknight playable.gif]] | |||
|weapon2=[[File:Bs fe11 playable dracoknight lance.png]]<br>[[Lance]] | |||
|weapon3=[[File:Bs fe11 playable dracoknight axe.png]]<br>[[Axe]] | |||
}} | |||
|content2={{SpriteGalleryCell | |||
|portrait=[[File:Portrait maria fe11.png]] | |||
|class1=[[Archer]] [[File:Ma ds01 archer female playable.gif]] | |||
|weapon1=[[File:Bs fe11 red archer female bow.png]]<br>[[Bow]] | |||
|border2=y | |||
|class2=[[Sniper]] [[File:Ma ds01 sniper female playable.gif]] | |||
|weapon2=[[File:Bs fe11 red sniper female bow.png]]<br>[[Bow]] | |||
}} | |||
|content3={{SpriteGalleryCell | |||
|portrait=[[File:Portrait maria fe11.png]] | |||
|class1=[[Myrmidon]] [[File:Ma ds01 myrmidon female playable.gif]] | |||
|weapon1=[[File:Bs fe11 red myrmidon female sword.png]]<br>[[Sword]] | |||
|border2=y | |||
|class2=[[Swordmaster]] [[File:Ma ds01 swordmaster female playable.gif]] | |||
|weapon2=[[File:Bs fe11 red swordmaster female sword.png]]<br>[[Sword]] | |||
}} | |||
|content4={{SpriteGalleryCell | |||
|portrait=[[File:Portrait maria fe11.png]] | |||
|class1=[[Mage]] [[File:Ma ds01 mage female playable.gif]] | |||
|weapon1=[[File:Bs fe11 red mage female tome.png]]<br>[[Tome]] | |||
|border2=y | |||
|class2=[[Sage]] [[File:Ma ds01 sage female playable.gif]] | |||
|weapon2=[[File:Bs fe11 red sage female tome.png]]<br>[[Tome]], [[Staff]] | |||
}} | |||
|content5={{SpriteGalleryCell | |||
|portrait=[[File:Portrait maria fe11.png]] | |||
|class1=[[File:Ma ds01 cleric enemy.gif]] [[Cleric]] [[File:Ma ds01 cleric playable.gif]] | |||
|weapon1=[[File:Bs fe11 enemy cleric staff.png]][[File:Bs fe11 red cleric staff.png]]<br>[[Staff]] | |||
|border2=y | |||
|class2=[[Bishop]] [[File:Ma ds01 bishop female playable.gif]] | |||
|weapon2=[[File:Bs fe11 red bishop female tome.png]]<br>[[Tome]], [[Staff]] | |||
}} | |||
|content6={{SpriteGalleryCell | |||
|portrait=[[File:Portrait maria fe11.png]] | |||
|class1wep=2 | |||
|class1=[[Paladin]] [[File:Ma ds01 paladin playable.gif]] | |||
|weapon1=[[File:Bs fe11 playable paladin sword.png]]<br>[[Sword]] | |||
|weapon2=[[File:Bs fe11 playable paladin lance.png]]<br>[[Lance]] | |||
}} | |||
|content7={{SpriteGalleryCell | |||
|portrait=[[File:Portrait maria fe11.png]] | |||
|class1wep=2 | |||
|class1=[[Falcoknight]] [[File:Ma ds01 falcoknight playable.gif]] | |||
|weapon1=[[File:Bs fe11 red falcoknight lance.png]]<br>[[Lance]] | |||
|weapon2=[[File:Bs fe11 red falcoknight sword.png]]<br>[[Sword]] | |||
}} | |||
}} | |||
|game4=New Mystery of the Emblem | |||
|SmallPortrait4=[[File:Small portrait maria fe12.png]] | |||
|SmallPortrait4R=[[File:Small portrait possessed maria fe12.png]] | |||
|cell4={{tab | |||
|default=6 | |||
|width=100% | |||
|tab1=Paladin | |||
|tab2=Dracoknight | |||
|tab3=Sniper | |||
|tab4=Swordmaster | |||
|tab5=Sage | |||
|tab6=Bishop | |||
|tab7=General | |||
|content1={{SpriteGalleryCell | |||
|portrait=[[File:Portrait maria fe12.png]] | |||
|class1wep=2 | |||
|class1=[[Paladin]] [[File:Ma ds02 paladin playable.gif]] | |||
|weapon1=[[File:Bs fe11 playable paladin sword.png]]<br>[[Sword]] | |||
|weapon2=[[File:Bs fe11 playable paladin lance.png]]<br>[[Lance]] | |||
}} | |||
|content2={{SpriteGalleryCell | |||
|portrait=[[File:Portrait maria fe12.png]] | |||
|class1wep=2 | |||
|class1=[[Dracoknight]] [[File:Ma ds02 dracoknight playable.gif]] | |||
|weapon1=[[File:Bs fe11 playable dracoknight lance.png]]<br>[[Lance]] | |||
|weapon2=[[File:Bs fe11 playable dracoknight axe.png]]<br>[[Axe]] | |||
}} | |||
|content3={{SpriteGalleryCell | |||
|portrait=[[File:Portrait maria fe12.png]] | |||
|class1=[[Sniper]] [[File:Ma ds02 sniper female playable.gif]] | |||
|weapon1=[[File:Bs fe11 red sniper female bow.png]]<br>[[Bow]] | |||
}} | |||
|content4={{SpriteGalleryCell | |||
|portrait=[[File:Portrait maria fe12.png]] | |||
|class1=[[Swordmaster]] [[File:Ma ds02 swordmaster female playable.gif]] | |||
|weapon1=[[File:Bs fe11 red swordmaster female sword.png]]<br>[[Sword]] | |||
}} | |||
|content5={{SpriteGalleryCell | |||
|portrait=[[File:Portrait maria fe12.png]] | |||
|class1=[[Sage]] [[File:Ma ds02 sage female playable.gif]] | |||
|weapon1=[[File:Bs fe11 red sage female tome.png]]<br>[[Tome]], [[Staff]] | |||
}} | |||
|content6={{SpriteGalleryCell | |||
|portrait=[[File:Portrait maria fe12.png]][[File:Portrait possesed maria fe12.png]] | |||
|class1=[[File:Ma ds02 bishop female enemy.gif]] [[Bishop]] [[File:Ma ds02 bishop female playable.gif]] | |||
|weapon1=[[File:Bs fe12 enemy red bishop female tome.png]][[File:Bs fe11 red bishop female tome.png]]<br>[[Tome]], [[Staff]] | |||
}} | |||
|content7={{SpriteGalleryCell | |||
|portrait=[[File:Portrait maria fe12.png]] | |||
|class1wep=2 | |||
|class1=[[General]] [[File:Ma ds02 general playable.gif]] | |||
|weapon1=[[File:Bs fe12 playable general female lance.png]]<br>[[Lance]] | |||
|weapon2=[[File:Bs fe12 playable general female bow.png]]<br>[[Bow]] | |||
}} | |||
}} | |||
}} | |||
===Official artwork=== | |||
<gallery> | <gallery> | ||
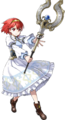
FEARHT Maria.png|Artwork of Maria from {{title|Shadow Dragon & the Blade of Light}}. | FEARHT Maria.png|Artwork of Maria from {{title|Shadow Dragon & the Blade of Light}}. | ||
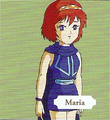
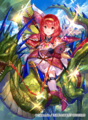
FEMN Maria 01.png|Artwork of Maria from the {{ | FEMN Maria 01.png|Artwork of Maria from the {{title|Trading Card Game}}. | ||
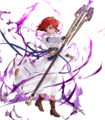
FEMN Maria 02.png|Artwork of Maria from the {{ | FEMN Maria 02.png|Artwork of Maria from the {{title|Trading Card Game}}. | ||
</gallery> | </gallery> | ||
==={{title|Heroes}} artwork=== | ==={{title|Heroes}} artwork=== | ||
====Character artwork==== | |||
<gallery> | |||
FEH Maria Minerva's Sister 01.png|Artwork of Maria: Minerva's Sister. | |||
FEH Maria Minerva's Sister 02.png|Artwork of Maria: Minerva's Sister. | |||
FEH Maria Minerva's Sister 02a.png|Artwork of Maria: Minerva's Sister. | |||
FEH Maria Minerva's Sister 03.png|Artwork of Maria: Minerva's Sister. | |||
FEH Maria Sunny Smile 01.png|Artwork of Maria: Sunny Smile. | |||
FEH Maria Sunny Smile 02.png|Artwork of Maria: Sunny Smile. | |||
FEH Maria Sunny Smile 02a.png|Artwork of Maria: Sunny Smile. | |||
FEH Maria Sunny Smile 03.png|Artwork of Maria: Sunny Smile. | |||
FEH Maria Ritual Sacrifice 01.png|Artwork of Maria: Ritual Sacrifice. | |||
FEH Maria Ritual Sacrifice 02.png|Artwork of Maria: Ritual Sacrifice. | |||
FEH Maria Ritual Sacrifice 02a.png|Artwork of Maria: Ritual Sacrifice. | |||
FEH Maria Ritual Sacrifice 03.png|Artwork of Maria: Ritual Sacrifice. | |||
</gallery> | |||
====[[Meet some of the Heroes]] artwork==== | |||
<gallery> | |||
FEH mth Maria Minerva's Sister 01.png|Artwork of Maria: Minerva's Sister. | |||
FEH mth Maria Minerva's Sister 03.png|Artwork of Maria: Minerva's Sister. | |||
FEH mth Maria Minerva's Sister 04.png|Artwork of Maria: Minerva's Sister. | |||
FEH mth Maria Sunny Smile 01.png|Artwork of Maria: Sunny Smile. | |||
FEH mth Maria Sunny Smile 02.png|Artwork of Maria: Sunny Smile. | |||
FEH mth Maria Sunny Smile 03.png|Artwork of Maria: Sunny Smile. | |||
FEH mth Maria Sunny Smile 04.png|Artwork of Maria: Sunny Smile. | |||
FEH mth Maria Ritual Sacrifice 01.png|Artwork of Maria: Ritual Sacrifice. | |||
FEH mth Maria Ritual Sacrifice 02.png|Artwork of Maria: Ritual Sacrifice. | |||
FEH mth Maria Ritual Sacrifice 03.png|Artwork of Maria: Ritual Sacrifice. | |||
FEH mth Maria Ritual Sacrifice 04.png|Artwork of Maria: Ritual Sacrifice. | |||
FEH mth Minerva Red Dragoon 02.png|Maria in artwork of [[Minerva]]: Red Dragoon. | |||
FEH mth Minerva Princess-Knight 03.png|Maria as a baby in artwork of Minerva: Princess-Knight. | |||
FEH mth Minerva Verdant Dragoon 04.png|Maria in artwork of Minerva: Verdant Dragoon. | |||
</gallery> | |||
====Other artwork==== | |||
<gallery> | <gallery> | ||
FEH Maria | FEH Wallpaper Maria.png|Artwork of Maria: Minerva's Sister. | ||
FEH | FEH anniversary kaya8.png|Artwork of Maria and several other characters for {{title|Heroes}}{{'}}s first anniversary, drawn by kaya8. | ||
FEH 7th anniversary 05.jpg|Artwork of Maria, [[Minerva]] and [[Michalis]] for {{title|Heroes}}{{'}}s seventh anniversary, drawn by [[Kotaro Yamada]]. | |||
FEH anniversary | |||
</gallery> | </gallery> | ||
=== | ==={{title|Cipher}} artwork=== | ||
<gallery> | <gallery> | ||
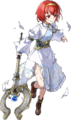
TCGCipher Maria 01.png|Artwork of Maria from {{ | TCGCipher Maria 01.png|Artwork of Maria from {{title|Cipher}}. | ||
</gallery> | </gallery> | ||
Revision as of 20:30, 28 March 2024
| This page has been marked as a stub. Please help improve the page by adding information. |
| ||||||||||||||
|

| “ | Now then. Shall we be off? I'm coming with you, of course. ...No protesting! I wish to help! | ” | — Maria, to Marth |
|---|
Maria (Japanese: マリア Maria) is the second princess of Macedon, and the younger sister of Michalis and Minerva. She appears as a cleric in Fire Emblem: Shadow Dragon & the Blade of Light, Fire Emblem: Mystery of the Emblem and their remakes, Fire Emblem: Shadow Dragon and Fire Emblem: New Mystery of the Emblem.
Fire Emblem: Shadow Dragon & the Blade of Light
Role
Before the events of the game, Maria's older brother Michalis kidnapped her in order to force Minerva and the Whitewings to obey him. Minerva sent her soldier Catria to inform Marth of her predicament, and the prince immediately set out for Castle Deil, despite the misgivings of his army. He was able to rescue the captive princess from General Zharov, and Maria and Minerva promptly joined Marth's forces.
Starting stats and growth rates
|
| |||||||||||||||||||||||||||||||||
Promotion stat gains
| Class | HP | Str | Skill | Spd | Lck | Def | Res | Mov | Weapon level |
|---|---|---|---|---|---|---|---|---|---|
| Bishop | +x to 22 | +x to 3 | +0 | +x to 14 | +0 | +x to 8 | +0 | +x to 6 | +x to 10 |
- In Shadow Dragon & the Blade of Light, promotion gains consist on giving the character as many points as necessary—the "x" value shown in the table—to reach the promoted class's base stats. If the character's stats are higher than their promoted class' base stats, they will not receive any bonus.
Analysis
| This character analysis section may not be accurate to every player's experience. |
Maria is a Curate that joins in Chapter 10. Maria has a weapon level of 8, which is high enough to use every staff in the game. This single-handedly gives Maria enough utility to justify using her, as certain staves are extremely useful, such as Warp and Physic. Unfortunately, Maria has many other weaknesses that limit her potential. She has a speed of 2, with a growth of 20%, meaning she will probably get doubled by any enemy she goes up against. Her defense is a very low 4 with a growth of 0%, which—when you factor in her low speed, her 19 max HP with a 0% growth, and the fact she only has an avoid of 2 before terrain bonuses—means she will likely die against any enemy she comes up against. These weaknesses can be improved by promoting to Bishop, which additionally allows her to use tomes. Unfortunately, the only way for Maria to gain experience is to survive combat, which is very hard considering her terrible durability. She only starts at level 3, so she needs to gain 7 levels to reach the promotion threshold, and she joins too late in the game to take advantage of weaker enemies in the earlier levels. Additionally, the Bishop's Ring needed to promote her can't be obtained until Chapter 19, so she can't take advantage of the benefits of promotion for most of the game. Still, being able to use every staff gives her enough utility to justify using if you feel you need another staff-user.
Fire Emblem: Mystery of the Emblem
Book 1
Role
Before the events of the game, Maria's older brother Michalis kidnapped her in order to force Minerva and the Whitewings to obey him. Minerva sent her soldier Catria to inform Marth of her predicament, and the prince immediately set out for Castle Deil, despite the misgivings of his army. He was able to rescue the captive princess from General Zharov, and Maria and Minerva promptly joined Marth's forces.
Starting stats and growth rates
|
| ||||||||||||||||||||||||||||||||
Promotion stat gains
| Class | HP | Str | Skill | Spd | Lck | Def | Res | Mov | Weapon level |
|---|---|---|---|---|---|---|---|---|---|
| Bishop | +x to 18 | +2 | +2 | +2 | +0 | +1 | +2 | +1 | +x to 12 |
- In Mystery of the Emblem, promotion gains for HP and weapon level consist of giving the character as many points as necessary—the "x" value shown in the table—to reach the promoted class's base value. If the character's value for one of those two stats is higher than their promoted class's base value, they will not receive any bonus in that stat.
Book 2
Role
This section has been marked as a stub. Please help improve the page by adding information.

Starting stats and growth rates
|
| ||||||||||||||||||||||||||||||||
Fire Emblem: Shadow Dragon
Role
Before the events of the game, Maria's older brother Michalis kidnapped her in order to force Minerva and the Whitewings to obey him. Minerva sent her soldier Catria to inform Marth of her predicament, and the prince immediately set out for Castle Deil, despite the misgivings of his army. He was able to rescue the captive princess from General Zharov, and Maria and Minerva promptly joined Marth's forces.
Starting stats and growth rates
|
| |||||||||||||||||||||||||||

Growth rates when reclassed
Paladin Peg. Knight/Falcoknight Dracoknight Archer/Sniper Myrmidon/Swordmaster Mage Sage/Bishop
| Class | HP | Str | Mag | Skill | Spd | Lck | Def | Res |
|---|---|---|---|---|---|---|---|---|
| Paladin | 35% | 15% | 0% | 35% | 15% | 75% | 10% | 15% |
Promotion stat gains
Cleric Peg. Knight Archer Mage Myrmidon
| Class | HP | Str | Mag | Skill | Spd | Lck | Def | Res | Mov | Weapon level |
|---|---|---|---|---|---|---|---|---|---|---|
| Bishop | +6 | +1 | +2 | +1 | +1 | +0 | +2 | +2 | +1 |
Analysis
| This character analysis section may not be accurate to every player's experience. |
Maria joins as a level 3 Cleric in Chapter 10, at the halfway point of Shadow Dragon. Her base stats are low, aside from a relatively high resistance stat, and her level is also low, requiring seven more to promote. Her growth rates except for luck and resistance are also low, so she will not gain many stats from the level-ups she needs.
Maria starts with D rank in staves and 10 weapon experience. While other staff users who join earlier exist, Maria is still better than other units reclassed to Curate or Cleric, as they would have an E rank in staves. This allows her to reach C rank at a decent speed, and with that, access to Warp and Physic. Once Maria has reached C rank in staves, she functions well as a support unit. No reclassing options help Maria, as she would have very low stats and weapon ranks after reclassing. It is unlikely that Maria will ever promote, considering how competitive Master Seals are, but if she does, Bishop is her best promotion, as it increases her staff rank.
Maria also has a unique niche—she can use the Aum staff without reclassing, otherwise limited to Elice. However, this would require Maria to reach A staves, which may not be feasible, and Elice will always be able to use it at base.
Fire Emblem: New Mystery of the Emblem
Role
This section has been marked as a stub. Please help improve the page by adding information.
Starting stats and growth rates
|
| |||||||||||||||||||||||||||

Analysis
This section has been marked as a stub. Please help improve the page by adding information.
| This character analysis section may not be accurate to every player's experience. |
Maria is effectively a non-unit: she is primarily there for story purposes, and you do not even have to recruit her to progress. Failure to do so, however, mandates her death, be it by the player or Medeus using her as a sacrifice.
Out of the four sisters, Maria is the worst. She cannot use Recover without being given an Arms Scroll, and her Physic heals for only 11 HP. The map is too crowded to afford her time to use an Arms Scroll in the first place, and saving one from her takes one away from other units that could have benefited from it more earlier. 2 Arms Scrolls are required for her to use Aum, which is unnecessary when Elice and Nyna can do so at base.
If Marth is refreshed to fight Medeus multiple times a turn, Maria can provide weak healing with Physic or Mend, enough to bump Marth over a survival threshold, without consuming the action of a more important staff-user.
Fire Emblem Heroes
Role
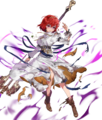
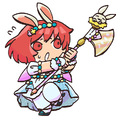
There are three different variations of Maria available to Heroes, each based on her appearance in Mystery of the Emblem. The normal variation of Maria is one of the characters available to be summoned by players from the game's initial launch. A spring variation of Maria was made available between the period of March 8, 2021 through April 8, 2021 as part of the summoning event surrounding the Hop-and-Go-Seek update. A fallen variation of Maria, based on her brainwashing by Medeus in the endgame of New Mystery of the Emblem, was added in the New Heroes & Rearmed Chrom update, and was first available to summon from May 9, 2023.
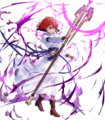
Maria: Minerva's Sister
Starting stats
★★★ ★★★★ ★★★★★
|
Initial Stats Level 40 Stats
|
| ||||||||||||||||||||||

Skill set
| Skill set | ||||
|---|---|---|---|---|
| Skill | Unlock | Auto-unlock | SP cost | |
| Assault | ★★★ | — | 50 | |
| Panic | ★★★ | — | 150 | |
| Panic+ | ★★★★★ | — | 300 | |
| Heal | ★★★ | ★★★ | 50 | |
| Mend | ★★★ | ★★★ | 100 | |
| Physic | ★★★★ | ★★★★★ | 200 | |
| Physic+ | ★★★★★ | — | 300 | |
| Imbue | ★★★ | — | 50 | |
| Miracle | ★★★ | — | 100 | |
| Fortify Res 1 | ★★★ | — | 50 | |
| Fortify Res 2 | ★★★★ | — | 100 | |
| Fortify Res 3 | ★★★★★ | — | 200 | |
Maria: Sunny Smile
Starting stats
- Maria: Sunny Smile is only available at 5★ rarity.
|
Initial Stats Level 40 Stats
|
| ||||||||||||||||||||||

Skill set
| Skill set | ||||
|---|---|---|---|---|
| Skill | Unlock | Auto-unlock | SP cost | |
| Iron Axe | ★★★★★ | ★★★★★ | 50 | |
| Steel Axe | ★★★★★ | ★★★★★ | 100 | |
| Silver Axe | ★★★★★ | ★★★★★ | 200 | |
| Pastel Poleaxe | ★★★★★ | ★★★★★ | 400 | |
| Rally Defense | ★★★★★ | ★★★★★ | 150 | |
| Rally Spd/Def | ★★★★★ | — | 300 | |
| Rally Spd/Def+ | ★★★★★ | — | 400 | |
| Atk/Def Push 1 | ★★★★★ | — | 60 | |
| Atk/Def Push 2 | ★★★★★ | — | 120 | |
| Atk/Def Push 3 | ★★★★★ | — | 240 | |
| Atk/Def Push 4 | ★★★★★ | — | 300 | |
| Flow Flight 1 | ★★★★★ | — | 60 | |
| Flow Flight 2 | ★★★★★ | — | 120 | |
| Flow Flight 3 | ★★★★★ | — | 240 | |
Maria: Ritual Sacrifice
Starting stats
- Maria: Ritual Sacrifice is only available at 5★ rarity.
|
Initial Stats Level 40 Stats
|
| ||||||||||||||||||||||

Skill set
| Skill set | ||||
|---|---|---|---|---|
| Skill | Unlock | Auto-unlock | SP cost | |
| Assault | ★★★★★ | — | 50 | |
| Sacrifice Staff | ★★★★★ | — | 400 | |
| Heal | ★★★★★ | ★★★★★ | 50 | |
| Reconcile | ★★★★★ | ★★★★★ | 100 | |
| Nudge | ★★★★★ | ★★★★★ | 200 | |
| Nudge+ | ★★★★★ | ★★★★★ | 300 | |
| Imbue | ★★★★★ | ★★★★★ | 50 | |
| Miracle | ★★★★★ | ★★★★★ | 100 | |
| Holy Panic | ★★★★★ | — | 500 | |
| Atk/Spd Bond 1 | ★★★★★ | — | 60 | |
| Atk/Spd Bond 2 | ★★★★★ | — | 120 | |
| Atk/Spd Bond 3 | ★★★★★ | — | 240 | |
| Atk/Spd Unity | ★★★★★ | — | 300 | |
| Wrathful Staff 1 | ★★★★★ | — | 60 | |
| Wrathful Staff 2 | ★★★★★ | — | 120 | |
| Wrathful Staff 3 | ★★★★★ | — | 240 | |
| Poetic Justice | ★★★★★ | — | 300 | |
| Even Recovery 1 | ★★★★★ | — | 60 | |
| Even Recovery 2 | ★★★★★ | — | 120 | |
| Even Recovery 3 | ★★★★★ | — | 240 | |
Personality
This section has been marked as a stub. Please help improve the page by adding information.
Supports
Mystery of the Emblem
| |||||||||||||||
Shadow Dragon
| |||||||||||||||||||||||||


New Mystery of the Emblem: Heroes of Light and Shadow
| |||||||||||||||||||||||||||


Base conversations
Maria does not have any base conversations.
Endings
Shadow Dragon & the Blade of Light
Maria
Her enthusiasm for Marth has not diminished.
Mystery of the Emblem
Book 1
Maria, Minerva's Sister
She studied at Khadein and then returned to Macedon. As a cleric she served her citizens.
Book 2
Maria, Minerva's Sister
At Lena's monastery she cared for the orphans who had lost their parents.
Shadow Dragon
Maria, Petit Princess
After studying in Khadein for a while, Princess Maria returned to Macedon to serve her people as a cleric.
New Mystery of the Emblem: Heroes of Light and Shadow
Maria, Minerva's Sister
Maria cared after war orphans at a convent. The children loved her as a big sister.
Quotes
Battle quotes
| “ | THOSE WHO OPPOSE... LORD MEDEUS... MUST DIE... | ” | — Maria, as an enemy in Endgame 2 of Mystery of the Emblem. |
|---|
| “ | WE WILL KILL ALL... WHO DEFY... LORD MEDEUS... | ” | — Maria, as an enemy in the Endgame of New Mystery of the Emblem. |
|---|
Death quote
| “ | Prince Marth… | ” | — Maria in Shadow Dragon & the Blade of Light. |
|---|
| “ | Ah... Minerva, sister... | ” | — Maria, in Mystery of the Emblem. |
|---|
| “ | Ah, Minerva, sister... | ” | — Maria, as an enemy in Endgame 2 of Mystery of the Emblem Book 2. |
|---|
| “ | Ahh! Sister... | ” | — Maria, in Shadow Dragon. |
|---|
| “ | Ahh... Minerva, sister... | ” | — Maria's death quote in Classic Mode in New Mystery of the Emblem. |
|---|
| “ | Did I... come too close...? I'll fall back... to the rear... | ” | — Maria's retreat quote in Casual Mode in New Mystery of the Emblem. |
|---|
| “ | Ah... Minerva...... | ” | — Maria, as an enemy in the Endgame of New Mystery of the Emblem. |
|---|
Heroes quotes
- Main article:
Maria/Quotes (Heroes)
Other appearances
Fire Emblem Cipher
Maria is featured on four cards in Fire Emblem Cipher.
- Two of the below cards' epithets are still in raw, untranslated Japanese; these need translation.
| Fire Emblem Cipher data for Maria | |||||
|---|---|---|---|---|---|

|
Innocent Priestess, Maria | ||||
| "I'll never be able to help you if I don't get strong too, sis!" | |||||
| Attack: 50 | Support: 20 | Range: 1-2 | Deploy Cost: 3 | ||
| Class: Bishop | Tier: Advanced | Class Change Cost: 2 | |||
| Fortify: [Activate] [ | |||||
| Card #B01-032HN • Artist: Shigetaka Kimura | |||||

|
Young Macedonian Princess, Maria | ||||
| "Hey, it's alright if I come along too, right?" | |||||
| Attack: 20 | Support: 20 | Range: – | Deploy Cost: 1 | ||
| Class: Cleric | Tier: Base | Class Change Cost: -- | |||
| Heal: [Activate] [ Maria's Wish: [Always] The attack of allied "Minerva" and "Michalis" cards is increased by 10. | |||||
| Card #B01-033N • Artist: Shigetaka Kimura | |||||

|
飛竜を駆る魔道姫, Maria | ||||
| "Members of the Macedon royal family must all ride wyverns... At least, that's what Minerva told me!" | |||||
| Attack: 50 | Support: 30 | Range: 1-2 | Deploy Cost: 4 | ||
| Class: Dracoknight | Tier: Advanced | Class Change Cost: 3 | |||
| Adorable Wyrmswing: [Special] If you have 1 or more Blue-Sky Mage Knight: [Trigger] [ | |||||
| Card #B15-039SR • Artist: Fuzichoco | |||||

|
飛竜の国の王女, Maria | ||||
| "Oh! You must be Prince Marth! (My, he's so dashing!)" | |||||
| Attack: 30 | Support: 20 | Range: - | Deploy Cost: 1 | ||
| Class: Cleric | Tier: Base | Class Change Cost: -- | |||
| Heal: [Activate] [ | |||||
| Card #B15-040N • Artist: Shigetaka Kimura | |||||
| Some card information translation provided by Serenes Forest. For more detailed strategic information on these cards, see their TCG wiki article on Maria . | |||||
Flavor text
| Game | Text (English) |
Text (Japanese) |
|---|---|---|
| New Mystery of the Emblem | Princess of Macedon. Wishes to be her siblings'
strength. She was imprisoned in the previous war.* |
マケドニアの王女。兄姉の力になりたいと思っている。
暗黒戦争では、囚われていた所をマルスらに救われた。 |
| Heroes (Maria: Minerva's Sister) |
Princess of Macedon. Younger sister of Minerva
and Michalis, whom she loves dearly. Appears in Fire Emblem: Mystery of the Emblem. |
マケドニア王女。ミシェイル、ミネルバの妹。
家族思いで、心優しい性格。 (登場:『ファイアーエムブレム 紋章の謎』) |
| Heroes (Maria: Sunny Smile) |
Youngest princess of Macedon. Her ready
smile adds a touch of joy to the spring festival. Appears in Fire Emblem: Mystery of the Emblem. |
マケドニア王国第二王女。
みんなを癒す笑顔で、春の祭りに幸せを運ぶ。 (登場:『ファイアーエムブレム 紋章の謎』) |
| Heroes (Maria: Ritual Sacrifice) |
Youngest princess of Macedon, kidnapped and
robbed of her consciousness by Gharnef for use as a sacrifice to Medeus. Appears in Fire Emblem: Mystery of the Emblem. |
マケドニア王国第二王女。メディウスの生贄として
ガーネフにさらわれ、意識を奪われる。 (登場:『ファイアーエムブレム 紋章の謎』) |
Meet some of the Heroes entries
Minerva's Sister Sunny Smile Ritual Sacrifice
| Maria: Minerva's Sister | |||||||
|---|---|---|---|---|---|---|---|

|

|

|

| ||||
| Here's Maria! Does that flaming red hair of hers remind you of someone? That's right, she's the younger sister of Princess Minerva of Macedon! | Maria's a sweet girl who cares about her family. When the relationship between Michalis and Minerva turned sour, Maria worried about whether they would ever be a happy family again. | Later on, Maria was taken hostage by the opposing Dolhr Empire to prevent rebellion by Minerva. | After Marth saved Maria from her captors, she and Minerva joined the Altean army and fought their hardest for peace! | ||||
| Closely Associated Characters | |||||||
| |||||||


Choose Your Legends placement history
| Round | Placement | Character | Votes |
|---|
| CYL 1 (2017) |
454 |  Maria Shadow Dragon & the Blade of Light / Shadow Dragon |
278 |
| 589 |  Maria Mystery of the Emblem / New Mystery of the Emblem |
134 |
| CYL 2 (2018) |
474 (+20) |
Maria Shadow Dragon & the Blade of Light / Shadow Dragon |
274 (−4) |
| 609 (+20) |
Maria Mystery of the Emblem / New Mystery of the Emblem |
123 (−11) |
| CYL 3 (2019) |
379 (−21) |
Maria Shadow Dragon & the Blade of Light / Shadow Dragon Mystery of the Emblem / New Mystery of the Emblem |
454 (+55) |
| CYL 4 (2020) |
447 (+29) |
Maria Shadow Dragon & the Blade of Light / Shadow Dragon Mystery of the Emblem / New Mystery of the Emblem |
250 (−204) |
| CYL 5 (2021) |
477 (+30) |
Maria Shadow Dragon & the Blade of Light / Shadow Dragon Mystery of the Emblem / New Mystery of the Emblem |
147 (−103) |
| CYL 6 (2022) |
403 (−76) |
Maria Shadow Dragon & the Blade of Light / Shadow Dragon Mystery of the Emblem / New Mystery of the Emblem |
197 (+50) |
| CYL 7 (2023) |
493 (+90) |
Maria Shadow Dragon & the Blade of Light / Shadow Dragon Mystery of the Emblem / New Mystery of the Emblem |
97 (−100) |
| CYL 8 (2024) |
461 (−32) |
Maria Shadow Dragon & the Blade of Light / Shadow Dragon Mystery of the Emblem / New Mystery of the Emblem |
106 (+9) |
| Total results | This character has 10 entries across all Choose Your Legends polls. | 2,060 |
|---|
Trivia
- Two characters named Maria appear in TearRing Saga: Yutona Heroes War Chronicles, Maria, the Queen of Salia and her daughter, also named Maria. However, Princess Maria goes by the name Katri most of the time.
- In Fire Emblem: New Mystery of the Emblem, Maria has unused Everyone's Conditions quotes. Due to her only being recruitable during the final chapter of the game, her Everyone's Conditions quotes cannot be seen during normal gameplay.[1]
Etymology and other languages
| Names, etymology, and in other regions | ||
|---|---|---|
| Language | Name | Definition, etymology, and notes |
| English |
Maria |
Latin form of "Mary", from the Greek Μαρία María, from Hebrew מִרְיָם Miryām.[2] |
| Japanese |
マリア |
Officially romanized as Maria. |
| Spanish |
Maria |
As above. |
| Spanish (Latin America) |
María |
Spanish form of Maria; used in the American Spanish localization of Heroes. |
| French |
Maria |
As above. |
| German |
Maria |
As above. |
| Italian |
Marian |
Variant of Marion.[3] |
| Portuguese (Brazil) |
Maria |
As above |
| Traditional Chinese |
瑪莉亞 |
Maria |
Gallery
| Sprite Gallery | |||||
|---|---|---|---|---|---|
Shadow Dragon & the Blade of Light
| |||||
Mystery of the Emblem
| |||||
 Shadow Dragon Shadow Dragon
| |||||
 New Mystery of the Emblem New Mystery of the Emblem 
|


Official artwork
Artwork of Maria from Shadow Dragon & the Blade of Light.

Artwork of Maria from the Trading Card Game.

Artwork of Maria from the Trading Card Game.

Heroes artwork
Character artwork

Artwork of Maria: Minerva's Sister.
Artwork of Maria: Minerva's Sister.

Artwork of Maria: Minerva's Sister.
Artwork of Maria: Minerva's Sister.

Artwork of Maria: Sunny Smile.

Artwork of Maria: Sunny Smile.

Artwork of Maria: Sunny Smile.

Artwork of Maria: Sunny Smile.

Artwork of Maria: Ritual Sacrifice.
Artwork of Maria: Ritual Sacrifice.
Artwork of Maria: Ritual Sacrifice.
Artwork of Maria: Ritual Sacrifice.


Meet some of the Heroes artwork

Artwork of Maria: Minerva's Sister.

Artwork of Maria: Minerva's Sister.
Artwork of Maria: Minerva's Sister.

Artwork of Maria: Sunny Smile.

Artwork of Maria: Sunny Smile.
Artwork of Maria: Sunny Smile.

Artwork of Maria: Sunny Smile.

Artwork of Maria: Ritual Sacrifice.
Artwork of Maria: Ritual Sacrifice.
Artwork of Maria: Ritual Sacrifice.
Artwork of Maria: Ritual Sacrifice.

Maria in artwork of Minerva: Red Dragoon.

Maria as a baby in artwork of Minerva: Princess-Knight.

Maria in artwork of Minerva: Verdant Dragoon.


Other artwork

Artwork of Maria: Minerva's Sister.
Artwork of Maria and several other characters for Heroes's first anniversary, drawn by kaya8.

Artwork of Maria, Minerva and Michalis for Heroes's seventh anniversary, drawn by Kotaro Yamada.


Cipher artwork
Artwork of Maria from Cipher.

References
- ↑ Fire Emblem: Shin Monshou no Nazo, tcrf.net, Retrieved: November 11, 2022
- ↑ https://www.behindthename.com/name/maria
- ↑ https://www.behindthename.com/name/marian-1

|
This article is part of Project Characters, a project focused on writing articles for every character present in the Fire Emblem series. |
| Fire Emblem: Mystery of the Emblem | ||||||||||||||||||||||||||||||||||||||
|---|---|---|---|---|---|---|---|---|---|---|---|---|---|---|---|---|---|---|---|---|---|---|---|---|---|---|---|---|---|---|---|---|---|---|---|---|---|---|
| ||||||||||||||||||||||||||||||||||||||
| Fire Emblem: Shadow Dragon | ||||||||||||||||||||
|---|---|---|---|---|---|---|---|---|---|---|---|---|---|---|---|---|---|---|---|---|
|
| Fire Emblem: New Mystery of the Emblem: Heroes of Light and Shadow | ||||||||||||||||||||||||||||||||||
|---|---|---|---|---|---|---|---|---|---|---|---|---|---|---|---|---|---|---|---|---|---|---|---|---|---|---|---|---|---|---|---|---|---|---|
| ||||||||||||||||||||||||||||||||||
| Fire Emblem Heroes | |||||||||||||||||||||||||||||||||||||||||||||||||||||||||||||||
|---|---|---|---|---|---|---|---|---|---|---|---|---|---|---|---|---|---|---|---|---|---|---|---|---|---|---|---|---|---|---|---|---|---|---|---|---|---|---|---|---|---|---|---|---|---|---|---|---|---|---|---|---|---|---|---|---|---|---|---|---|---|---|---|
| |||||||||||||||||||||||||||||||||||||||||||||||||||||||||||||||