| Site News |
|---|
| Warning: This wiki contains spoilers. Read at your own risk! Social media: If you would like, please join our Discord server, and/or follow us on Twitter (X) or Tumblr! |
II: Realms Collide: Difference between revisions
m (Text replacement - "image=3ds chest key" to "image=3ds02 key") |
Thecornerman (talk | contribs) m (Text replacement - "([Cc])hapter (\d+)" to "$1hapter $2") |
||
| (43 intermediate revisions by 9 users not shown) | |||
| Line 1: | Line 1: | ||
{{images}} | {{images}} | ||
{{Chapter Infobox | {{Chapter Infobox | ||
| | |image=[[File:Cm fe14 ii realms collide.png]] | ||
|location=[[Outrealms]] | |||
|boss=[[Shiro|Vallite]] [[Swordmaster]], [[Asugi|Vallite]] [[Ninja]], [[Caeldori|Vallite]] [[Sky Knight]] | |||
|location=[[Outrealms]] | |||
|boss=[[ | |||
}} | }} | ||
{{Quote|Right. I saw this kid in the distance, hanging his head and sobbing. But as soon as I approached him, he started...glowing...and turned into that.|Dwyer}} | {{Quote|Right. I saw this kid in the distance, hanging his head and sobbing. But as soon as I approached him, he started...glowing...and turned into that.|Dwyer}} | ||
This chapter was first made available on March 16, 2016 in Japan | '''II: Realms Collide''' (Japanese: {{hl|記憶の双剣|Ni: Kioku no sōken}} ''II: Twin Swords of Memory'') is a [[Downloadable content in Fire Emblem Fates|downloadable content]] chapter, and the second part of the six-part [[Heirs of Fate]] saga of {{FE14}}. II: Realms Collide is part of the third series of Japanese DLC releases and the second series of international DLC releases. | ||
This chapter was first made available on March 16, 2016 in Japan; May 12, 2016 in North America; July 21 in Europe; and July 22 in Australia. | |||
In this chapter, two small groups of [[Nohr]]ian children characters, one of which led by | In this chapter, two small groups of [[Nohr]]ian children characters, one of which led by [[Forrest]] wielding [[Leo|his father]]'s [[Brynhildr|legendary tome]], forced from their [[Deeprealm]]s by [[Valla|Vallite]] invaders find themselves having to come together and deal with a [[Kana|seemingly-unruly dragon]] carrying [[Corrin|his mother]]'s [[Yato|katana]] while also having to defend themselves from the invaders. | ||
==Plot== | ==Plot== | ||
{{Main|II: | {{Main|II: Realms Collide/Script}} | ||
Briefly recapping one event from the [[I: | {{improve|this is meant to be a synopsis}} | ||
Briefly recapping one event from the [[I: In Endless Dreams|previous chapter]], a [[Shigure|narrator]] begins to explain the plight of another realm, where more children forced from their [[Deeprealm]]s wander apparently empty streets while a dragon roars about. The dragon, stated to be crazed with grief, is revealed to be a second [[Kana]]. | |||
We cut to the streets of a deserted town, where [[Kana]] lets out a roar; [[Sophie]] tells [[Dwyer]] what they're doing isn't working, while Dwyer admits that they should have made a dent in Kana by this point, after which Sophie attacks Kana to attempt to turn him back into a human. | We cut to the streets of a deserted town, where [[Kana]] lets out a roar; [[Sophie]] tells [[Dwyer]] what they're doing isn't working, while Dwyer admits that they should have made a dent in Kana by this point, after which Sophie attacks Kana to attempt to turn him back into a human. After Kana roars again, Sophie notes that the attack didn't make him any less angry and states that she's out of ideas, then asks Dwyer if Kana wasn't a dragon when he first saw him, to which Dwyer confirms—he saw Kana in the distance hanging his head and sobbing, but upon approach Kana started glowing and transformed into a [[Feral Dragon|dragon]]; Sophie asks what would make a dragon cry, to which Dwyer asks if Kana lost [[Corrin|his parents]] like he and Sophie did. Sophie and Dwyer start to get argumentative over whether [[Silas|their]] [[Jakob|fathers]] are acutally dead, revealing that their fathers were last seen attempting to protect them, with Sophie at one point threatening Dwyer with a poke of her spear and Dwyer admitting he doesn't want [[Mischievous|his clothes to be torn of]]; as Kana lets out another roar, Dwyer asks that he and Sophie stop arguing until they've dealt with him, with Sophie admitting that Kana is clearly harder to handle than [[Horse#Notable horse mounts|Avel]], and Dwyer admitting that the strange soldiers are bound to be drawn to this scene. | ||
In another part of town, we find [[ | In another part of town, we find [[Forrest]] asking where he and his group are, after which [[Nina]] states that she also doesn't recognize the area and asks [[Ophelia]] if she's reading their guide right; Ophelia gives an overly-complicated explanation as to imply that they're travelling south, with Nina noting Ophelia's confidence but states she's having second thoughts about trusting a rock, after which Nina and Ophelia start to argue before figuring out that they're lost. Ophelia attempts to apologize, but Forrest opts to compliment Ophelia's directions and her stone, after which Ophelia reveals that the stone was a gift from her [[Odin|father]], who gave it to her as a good-luck charm as she was escaping her Deeprealm, at which point Ophelia and Forrest reveal similar backstory events about their respective [[Leo|fathers]] fighting to protect them as they escaped, Forrest in particular finding his father's [[Brynhildr]] tome along the path; Nina tells Forrest and Ophelia to not assume that their respective fathers are dead, and states that [[Niles|her own father]] is one who wouldn't be mourned much anyway, which ultimately leads to similar backstory in Nina's case as well. After the backstory revelations, Forrest states that he doesn't know what he'd do without Ophelia's and Nina's company, as they've been looking after him and thus he doesn't want to hear about them wishing they hadn't been saved, with the three of them promising to plan to rescue their parents; as they start planning, they hear one of Kana's roars which Forrest notes, after which Ophelia concludes that there's a dragon on the loose, with Nina noting five people surrounding him and assumes they're all suspicious soldiers. As Ophelia laments not being able to see the soldiers surrounding Kana, Nina tells Ophelia not to and reveals that [[Outlaw|thief-types like herself]] are [[Vision|trained to spot things they shouldn't]]; Forrest then notes that some of the people near the dragon (Sophie and Dwyer) are not enemies and thus may also be in danger, with Nina believing that Sophie and Dwyer might get themselves killed. Nina asks Forrest if they should save Kana, Sophie, and Dwyer or simply keep traveling, stating that she and Ophelia will follow his lead as his retainers, after which Ophelia proposes they help Kana, Sophie, and Dwyer; Forrest agrees to the rescue, as doing otherwise would be a disgrace to the bloodline of [[Nohr]], with Nina and Ophelia rallying their support. After a shift of scene in what appears to be a [[Hoshido|Hoshidan]]-style castle, the battle begins. | ||
Should Forrest speak with Dwyer, after Forrest introduces himself, Nina, and Ophelia, they'll fill in their knowledge of the events to each other concerning Kana, with Forrest revealing he's got an escape route planned; as Dwyer introduces himself and Sophie to Forrest, Dwyer then proceeds to mistake Forrest for a woman, to which Forrest makes Dwyer realize his folly. | Should Forrest speak with Dwyer, after Forrest introduces himself, Nina, and Ophelia, they'll fill in their knowledge of the events to each other concerning Kana, with Forrest revealing he's got an escape route planned; as Dwyer introduces himself and Sophie to Forrest, Dwyer then proceeds to mistake Forrest for a woman, to which Forrest makes Dwyer realize his folly. Should Forrest instead speak with Sophie, the events play out similarly, but this time Sophie states that she's glad that there's another girl on the team; Forrest assumes Sophie is about to make the same mistake Dwyer would have, but Sophie then reveals that the girl in question is actually Forrest's horse. | ||
Once the battle ends, Forrest asks if everybody is in one piece, to which Nina and Ophelia confirm, while Sophie notes something is going on with Kana which gets Dwyer's attention; after a brief flash, a now-untransformed Kana appears to feel some pain, to which Forrest welcomes Kana back to reality. | Once the battle ends, Forrest asks if everybody is in one piece, to which Nina and Ophelia confirm, while Sophie notes something is going on with Kana which gets Dwyer's attention; after a brief flash, a now-untransformed Kana appears to feel some pain, to which Forrest welcomes Kana back to reality. Kana asks what happened to him, to which Forrest tells Kana that he had turned into a dragon and notes it being a remarkable sight; Kana states that he doesn't remember turning into a dragon and asks the others if he hurt anyone, to which Sophie states Kana only went on a minirampage and didn't end up attacking any of them, to Kana's relief; Ophelia asks why Kana was a dragon, going on to make guesses of a wizard's curse or the bite of a weredragon, to which Kana states that he doesn't know how he transformed, at this point giving his backstory involving his mother trying to protect him, even giving him her [[Yato|sword]] and asking him to run, ending up in town and falling asleep. After Dwyer, Sophie, and Ophelia tell Kana that he's not alone in this plight, Nina deduces that there must be some reason why they were all attacked at once, with Forrest stating that Kana's power could go a long way into helping them solve the mysteries of their parents; Kana then asks why he was able to turn into a dragon at this time and not when his mother needed him, after which Kana starts to get emotional with Dwyer and Forrest noticing, Forrest having to cast Brynhildr on Kana to attempt to keep him in check. Forrest then tells Kana that he can still help his mother, but only by looking forward rather than backward—then states that none of the others could help their parents yet none of them are frozen with grief; Forrest explains that all of them have similar plights, yet nobody other than Kana was grieving, and proceeds to welcome Kana into their group, after which Kana promises not to cry anymore and learn to control his dragon powers. | ||
At this point, the Brynhildr begins glowing to Forrest's notice, after which Kana notices the Yato is also glowing and assumes that it's because it's close to the Brynhildr; at this point, the Yato transforms into the Grim Yato, after which Kana notes the transformation and Forrest confirming its new name. | At this point, the Brynhildr begins glowing to Forrest's notice, after which Kana notices the Yato is also glowing and assumes that it's because it's close to the Brynhildr; at this point, the Yato transforms into the Grim Yato, after which Kana notes the transformation and Forrest confirming its new name. Forrest states that his father told him about the sacred weapons of the world at one point, and that Yato transforms into the Grim Yato upon exposure to one and deduces that Brynhildr qualifies as one of them; he then states that a [[Siegfried|second sacred weapon]] would result in the Shadow Yato, after which Kana contemplates how the Yato's transformation mechanics work. As the group talk about the contributions they can make now that they have the Grim Yato, Forrest then states that they haven't all formally introduced themselves to each other, after which it is revealed that some of them know who the others are yet some do not, at which point an offscreen voice assures Kana that once this ordeal is over, everyone will be restored to normal along with their lost memories; the owner of the voice, a ghost, appears, to which Kana recognizes the ghost as that of [[Azura]], who in turn deduces that Kana remembered her, with Kana remembering that Azura was a good friend to his mother. As Kana begins to ask Azura why she's a ghost, he then states that he thinks he remembers, only to reveal that he's forgotten; after some more talk about lost memories, as Kana talks about his Grim Yato and transformation abilities, Azura tells Kana it would be unwise to transform at this time as he could go berserk without more control over the transformation—then reveals that she has a solution, that she'll crystallize his impulse to transform into a [[Dragonstone|stone]], and with it, he won't give in to his impulses and transform into a dragon against his will. After more talk about the gaps in their memories, Azura notes that these might not actually be lost memories, and opens up the possibility that not everybody may have actually met Kana—memories aren't something that are collected intentionally or abandoned deliberately, then likens the concept of memories to rain; Azura then goes on to state that she could tell everyone the truth right then and there, but it would only evaporate from their minds and thus the group can only press onward, then states that everyone's memories can be restored once the ordeal is over, and those that aren't would be practically the same as having never known them and thus there'd be nothing to be sad about, after which the group continue talking about the concept of memories. | ||
We cut to another area, where Shigure, the narrator from earlier, sings the second verse of [[Lost in Thoughts All Alone]], stating it to be a song for one who [[Conquest (campaign)|chooses the black rose over the cherry blossom]], going on to state that a curse keeps | We cut to another area, where Shigure, the narrator from earlier, sings the second verse of [[Lost in Thoughts All Alone]], stating it to be a song for one who [[Conquest (campaign)|chooses the black rose over the cherry blossom]], going on to state that a curse keeps [[Anankos|a dragon]] from attaining his own private paradise and affect those who visit the [[Valla|invisible kingdom]]; Shigure continues with a few further words of wisdom. | ||
===Website summary=== | ===Website summary=== | ||
''The youths of Nohr must assist a wild dragon. Part 2 of Heirs of Fate.''<ref>{{cite web|url=https://fireemblem.nintendo.com/fates/dlc/|title=DLC - Fire Emblem™ Fates for Nintendo 3DS - Revelations, Maps|site=fireemblem.nintendo.com (archived by the Wayback Machine)|retrieved=January 8, 2017}}</ref><ref>{{cite web|url=https://www.nintendo.co.uk/games/oms/fire-emblem-fates/dlc-revelation.html|title=Fire Emblem Fates|site=nintendo.co.uk|retrieved=January 8, 2017}}</ref><ref>{{cite web|url=https://web.archive.org/web/20190114041513/http://gamesites.nintendo.com.au:80/fire-emblem-fates/dlc-revelation.html|title=Fire Emblem Fates|site=gamesites.nintendo.com.au (archived by the Wayback Machine)|retrieved=January 8, 2017}}</ref> | |||
===North American eShop summary=== | ===North American eShop summary=== | ||
''The youths of Nohr must assist a wild dragon. | ''The youths of Nohr must assist a wild dragon. Part 2 of Heirs of Fate.<br>Rewards: Magictaker'' | ||
==Chapter data== | ==Chapter data== | ||
{{ChapDataDLC | {{Tab | ||
|victory=Breach with all units | |tab1=Normal | ||
|defeat=The player's army is routed | |tab2=Hard/Lunatic | ||
|content1={{ChapDataDLC | |||
|victory=Breach with all units | |||
|defeat=The player's army is routed | |||
|ally=6 | |ally=6 | ||
|enemy=39 | |enemy=39 | ||
|map= | |map=[[File:Cm fe14 ii realms collide.png]] | ||
|difficulty=★★★ | |difficulty=★★★ | ||
|col=28 | |col=28 | ||
| Line 54: | Line 57: | ||
|battlemusic=A Dark Fall (Fire) | |battlemusic=A Dark Fall (Fire) | ||
|musicnotes= | |musicnotes= | ||
|jpprice={{ | |jpprice={{h|???|Sources conflict as to whether this map is available for individual sale for ¥300, or if all six Heirs of Fate maps are only available together in a ¥1500 bundle}} | ||
|usprice=1.99 | |usprice=1.99 | ||
|caprice=2.89 | |caprice=2.89 | ||
| Line 69: | Line 72: | ||
|aupackprice=10.40 | |aupackprice=10.40 | ||
|nzpackprice=13.60 | |nzpackprice=13.60 | ||
}} | |||
|content2={{ChapDataDLC | |||
|victory=Breach with all units | |||
|defeat=The player's army is routed | |||
|ally=6 | |||
|enemy=44 | |||
|map=[[File:Cm fe14 ii realms collide h.png]] | |||
|difficulty=★★★ | |||
|col=28 | |||
|row=25 | |||
|jpblocks=?? | |||
|usblocks=63 | |||
|palblocks=?? | |||
|mapmusic=A Dark Fall | |||
|battlemusic=A Dark Fall (Fire) | |||
|musicnotes= | |||
|jpprice={{h|???|Sources conflict as to whether this map is available for individual sale for ¥300, or if all six Heirs of Fate maps are only available together in a ¥1500 bundle}} | |||
|usprice=1.99 | |||
|caprice=2.89 | |||
|euprice=1.99 | |||
|ukprice=1.79 | |||
|auprice=2.60 | |||
|nzprice=3.40 | |||
|pack=Series 3 (Japan)<br>Map Pack 2 (international) | |||
|jppackprice=900 | |||
|uspackprice=7.99 | |||
|capackprice=11.29 | |||
|eupackprice=7.99 | |||
|ukpackprice=7.19 | |||
|aupackprice=10.40 | |||
|nzpackprice=13.60 | |||
}} | |||
}} | }} | ||
| Line 82: | Line 117: | ||
|content1={{BossStats FE14 | |content1={{BossStats FE14 | ||
|portrait=[[File:Small portrait kana m fe14.png]] | |portrait=[[File:Small portrait kana m fe14.png]] | ||
|sprite=feral dragon playable | |||
|dv=y | |dv=y | ||
|class=Feral Dragon | |class=Feral Dragon | ||
| Line 94: | Line 130: | ||
|res=9 | |res=9 | ||
|move=5 | |move=5 | ||
|inventory= | |inventory={{Item|14|Draconic Rage|image=breath}}<br>{{Item|14|Yato|image=katana}} | ||
|skills= | |skills={{Item|14|Draconic Heir}}<br>{{Item|14|Dragon Fang}}<br>{{Item|14|Nobility}} | ||
|br=D | |br=D | ||
}} | }} | ||
|content2={{BossStats FE14 | |content2={{BossStats FE14 | ||
|portrait=[[File:Small portrait dwyer fe14.png]] | |portrait=[[File:Small portrait dwyer fe14.png]] | ||
|sprite=troubadour dwyer playable | |||
|class=Troubadour | |class=Troubadour | ||
|lv=10 | |lv=10 | ||
| Line 109: | Line 146: | ||
|luck=8 | |luck=8 | ||
|def=7 | |def=7 | ||
|res=11{{ | |res=11{{h|+2|Granted by Resistance +2}} | ||
|move=7 | |move=7 | ||
|inventory= | |inventory={{Item|14|Mend|image=staff}}<br>{{Item|14|Physic|image=staff}}<br>{{Item|14|Talisman|image=stat booster}} | ||
|skills= | |skills={{Item|14|Born Steward}}<br>{{Item|14|Resistance +2}}<br>{{Item|14|Gentilhomme}} | ||
|st=C | |st=C | ||
}} | }} | ||
|content3={{BossStats FE14 | |content3={{BossStats FE14 | ||
|portrait=[[File:Small portrait sophie fe14.png]] | |portrait=[[File:Small portrait sophie fe14.png]] | ||
|sprite=cavalier sophie playable | |||
|class=Cavalier | |class=Cavalier | ||
|lv=10 | |lv=10 | ||
| Line 128: | Line 166: | ||
|res=9 | |res=9 | ||
|move=7 | |move=7 | ||
|inventory= | |inventory={{Item|14|Steel Lance|image=lance}}<br>{{Item|14|Iron Sword|image=sword}}<br>{{Item|14|Vulnerary|image=healing}} | ||
|skills= | |skills={{Item|14|Mischievous}}<br>{{Item|14|Shelter}}<br>{{Item|14|Elbow Room}} | ||
|sw=D | |sw=D | ||
|la=C | |la=C | ||
| Line 135: | Line 173: | ||
|content4={{BossStats FE14 | |content4={{BossStats FE14 | ||
|portrait=[[File:Small portrait forrest fe14.png]] | |portrait=[[File:Small portrait forrest fe14.png]] | ||
|sprite=strategist forrest playable | |||
|dv=y | |dv=y | ||
|class=Strategist | |class=Strategist | ||
| Line 145: | Line 184: | ||
|luck=10 | |luck=10 | ||
|def=8 | |def=8 | ||
|res=20{{ | |res=20{{h|+2|Granted by Resistance +2}} | ||
|move=8 | |move=8 | ||
|inventory= | |inventory={{Item|14|Brynhildr|image=tome}}<br>{{Item|14|Fire|image=tome}}<br>{{Item|14|Heal|image=staff}}<br>{{Item|14|Concoction|image=healing}} | ||
|skills= | |skills={{Item|14|Fierce Counter}}<br>{{Item|14|Resistance +2}}<br>{{Item|14|Gentilhomme}} | ||
|to=E | |to=E | ||
|st=D | |st=D | ||
| Line 154: | Line 193: | ||
|content5={{BossStats FE14 | |content5={{BossStats FE14 | ||
|portrait=[[File:Small portrait ophelia fe14.png]] | |portrait=[[File:Small portrait ophelia fe14.png]] | ||
|sprite=dark mage ophelia playable | |||
|class=Dark Mage | |class=Dark Mage | ||
|lv=10 | |lv=10 | ||
| Line 165: | Line 205: | ||
|res=10 | |res=10 | ||
|move=5 | |move=5 | ||
|inventory= | |inventory={{Item|14|Thunder|image=tome}}<br>{{Item|14|Lightning|image=tome}}<br>{{Item|14|Missiletainn|image=tome}} | ||
|skills= | |skills={{Item|14|Bibliophile}}<br>{{Item|14|Malefic Aura}}<br>{{Item|14|Heartseeker}} | ||
|to=C | |to=C | ||
}} | }} | ||
|content6={{BossStats FE14 | |content6={{BossStats FE14 | ||
|portrait=[[File:Small portrait nina fe14.png]] | |portrait=[[File:Small portrait nina fe14.png]] | ||
|sprite=outlaw nina playable | |||
|class=Outlaw | |class=Outlaw | ||
|lv=10 | |lv=10 | ||
| Line 181: | Line 222: | ||
|def=5 | |def=5 | ||
|res=14 | |res=14 | ||
|move=5{{ | |move=5{{h|+1|Granted by Movement +1}} | ||
|inventory= | |inventory={{Item|14|Iron Bow|image=bow}}<br>{{Item|14|Shining Bow|image=bow}}<br>{{Item|14|Vulnerary|image=healing}} | ||
|skills= | |skills={{Item|14|Daydream}}<br>{{Item|14|Movement +1}}<br>{{Item|14|Locktouch}} | ||
|bo=C | |bo=C | ||
}} | }} | ||
| Line 199: | Line 240: | ||
Additionally, numerous enemy units drop items for use specifically in this chapter: | Additionally, numerous enemy units drop items for use specifically in this chapter: | ||
{{ChapItems | {{ChapItems | ||
|platform= | |platform=3ds02 | ||
|item1=Dragon Herbs | |item1=Dragon Herbs | ||
|item1image= | |item1image=stat booster | ||
|obtain1=Dropped by [[Midori|enemy]] [[Apothecary]] | |obtain1=Dropped by [[Midori|enemy]] [[Apothecary]] | ||
|item2=Chest Key | |item2=Chest Key | ||
|item2image= | |item2image=key | ||
|obtain2=Dropped by [[ | |obtain2=Dropped by [[Caeldori|enemy]] [[Sky Knight]] | ||
|item3=Chest Key | |item3=Chest Key | ||
|item3image= | |item3image=key | ||
|obtain3=Dropped by [[ | |obtain3=Dropped by [[Rhajat|enemy]] [[Diviner]] | ||
|item4=Rescue | |item4=Rescue | ||
|item4article=Rescue ( | |item4article=Rescue (staff) | ||
|item4image= | |item4image=rod | ||
|obtain4=Western [[chest]] | |obtain4=Western [[chest]] | ||
|itemlast=Rescue | |itemlast=Rescue | ||
|itemlastarticle=Rescue ( | |itemlastarticle=Rescue (staff) | ||
|itemlastimage= | |itemlastimage=rod | ||
|obtainlast=Eastern chest | |obtainlast=Eastern chest | ||
}} | }} | ||
| Line 230: | Line 267: | ||
===Enemy data=== | ===Enemy data=== | ||
{{ | {{Tab | ||
| | |width=100% | ||
| | |tab1=Normal | ||
| | |tab2=Hard | ||
| | |tab3=Lunatic | ||
| | |content1={{ChapUnitHdr|type=Enemy|platform=3ds02}} | ||
| | {{ChapUnitCellFE14 | ||
| | |name=[[Shiro|Vallite]] | ||
|class=Swordmaster | |||
| | |version=shiro vallite | ||
| | |lv=1 | ||
| | |#=1 | ||
| | |hp=26 | ||
|# | |str=13{{h|+4|Granted by Raijinto}} | ||
| | |mag=2 | ||
| | |skill=12 | ||
| | |spd=14{{h|+1|Granted by Raijinto}} | ||
| | |lck=10 | ||
| | |def=13{{h|−1|Penalized by Raijinto}} | ||
| | |res=10{{h|−1|Penalized by Raijinto}} | ||
| | |mov=5 | ||
| | |inventory={{Item|14|Raijinto|image=katana}}<br>{{Item|14|Noble Cause}} • {{Item|14|Seal Defense}} • {{Item|14|Vantage}} • {{Item|14|Swap}} • {{Item|14|Duelist's Blow}} | ||
|notes=• Starts in a [[Terrain/Nintendo 3DS games#Fire Emblem Fates|chamber]].<br>• Begins moving unprovoked on turn 6. | |||
| | }} | ||
| | {{ChapUnitCellFE14 | ||
| | |name=[[Valla|Vallite]] | ||
| | |class=Spear Fighter | ||
| | |version=vallite | ||
| | |lv=9 | ||
| | |#=1 | ||
| | |hp=19 | ||
| | |str=9 | ||
| | |mag=0 | ||
| | |skill=9 | ||
| | |spd=8 | ||
| | |lck=0 | ||
|def=7{{h|+1|Granted by Iron Naginata}} | |||
| | |res=3{{h|+1|Granted by Iron Naginata}} | ||
| | |mov=5 | ||
| | |inventory={{Item|14|Iron Naginata|image=naginata}} | ||
| | |notes=Begins moving unprovoked on turn 2. | ||
|# | }} | ||
| | {{ChapUnitCellFE14 | ||
| | |name=[[Valla|Vallite]] | ||
| | |class=Oni Savage | ||
| | |version=vallite | ||
| | |lv=9 | ||
| | |#=3 | ||
| | |hp=20 | ||
| | |str=10 | ||
|mag=1 | |||
| | |skill=4 | ||
| | |spd=6 | ||
| | |lck=0 | ||
| | |def=9 | ||
|# | |res=1 | ||
| | |mov=5 | ||
| | |inventory={{Item|14|Iron Club|image=club}} | ||
| | |notes=The one in the chamber begins moving unprovoked on turn 2. | ||
| | }} | ||
| | {{ChapUnitCellFE14 | ||
| | |name=[[Valla|Vallite]] | ||
| | |class=Ninja | ||
| | |version=vallite | ||
|lv=8 | |||
| | |#=6 | ||
| | |hp=17 | ||
| | |str=5 | ||
| | |mag=0 | ||
|# | |skill=10 | ||
| | |spd=8{{h|+2|Granted by Iron Shuriken}} | ||
| | |lck=0 | ||
| | |def=3 | ||
| | |res=4 | ||
| | |mov=5 | ||
| | |inventory={{Item|14|Iron Shuriken|image=shuriken}} | ||
| | |notes=The two in the chamber begin moving unprovoked on turn 4. | ||
| | }} | ||
| | {{ChapUnitCellFE14 | ||
| | |name=[[Valla|Vallite]] | ||
| | |class=Samurai | ||
| | |version=vallite | ||
| | |lv=9 | ||
|# | |#=4 | ||
| | |hp=20 | ||
| | |str=7 | ||
| | |mag=0 | ||
| | |skill=8 | ||
| | |spd=8{{h|+1|Granted by Iron Katana}} | ||
| | |lck=0 | ||
| | |def=5{{h|−1|Penalized by Iron Katana}} | ||
| | |res=6{{h|−1|Penalized by Iron Katana}} | ||
| | |mov=5 | ||
| | |inventory={{Item|14|Iron Katana|image=katana}} | ||
| | }} | ||
| | {{ChapUnitCellFE14 | ||
| | |name=[[Asugi|Vallite]] | ||
|# | |class=Ninja | ||
| | |version=asugi vallite | ||
|lv=10 | |||
| | |#=1 | ||
| | |hp=22 | ||
| | |str=10 | ||
| | |mag=4 | ||
|# | |skill=15 | ||
| | |spd=14{{h|+2|Granted by Steel Shuriken}} | ||
| | |lck=10 | ||
| | |def=7 | ||
| | |res=12 | ||
| | |inventory={{Item|14|Steel Shuriken|image=shuriken}} • {{Item|14|Flame Shuriken|image=shuriken}}<br>{{Item|14|Sweet Tooth}} • {{Item|14|Poison Strike}} • {{Item|14|Locktouch}} | ||
| | |notes=• Stands on a [[Terrain/Nintendo 3DS games#Fire Emblem Fates|cushion]].<br>• Defeat opens the northwestern screen. | ||
| | }} | ||
| | {{ChapUnitCellFE14 | ||
| | |name=[[Valla|Vallite]] | ||
|class=Automaton | |||
| | |version=vallite | ||
| | |lv=7 | ||
| | |#=2 | ||
| | |hp=19 | ||
| | |str=4 | ||
| | |mag=0 | ||
| | |skill=10 | ||
| | |spd=8 | ||
| | |lck=0 | ||
| | |def=5 | ||
| | |res=7 | ||
| | |mov=5 | ||
| | |inventory={{Item|14|Saw}} | ||
| | }} | ||
| | {{ChapUnitCellFE14 | ||
| | |name=[[Valla|Vallite]] | ||
| | |class=Spear Fighter | ||
| | |version=vallite | ||
|lv=9 | |||
|#=1 | |||
|hp=19 | |||
|str=9 | |||
|mag=0 | |||
|skill=9 | |||
|spd=8 | |||
|lck=0 | |||
|def=7{{h|+5|Granted by Guard Naginata}} | |||
|res=3{{h|+5|Granted by Guard Naginata}} | |||
|mov=5 | |||
|inventory={{Item|14|Guard Naginata|image=naginata}} | |||
}} | |||
{{ChapUnitCellFE14 | |||
|name=[[Midori|Vallite]] | |||
|class=Apothecary | |||
|version=midori vallite | |||
|lv=10 | |||
|#=1 | |||
|hp=26 | |||
|str=12 | |||
|mag=2 | |||
|skill=14 | |||
|spd=8 | |||
|lck=12 | |||
|def=10 | |||
|res=4{{h|+2|Granted by Steel Yumi}} | |||
|mov=5 | |||
|inventory={{Item|14|Steel Yumi|image=yumi}} • {{Item|14|Vulnerary|image=healing}} • {{Item|14|Dragon Herbs|image=stat booster|type=drop}}<br>{{Item|14|Lucky Charm}} • {{Item|14|Potent Potion}} • {{Item|14|Quick Salve}} | |||
}} | |||
{{ChapUnitCellFE14 | |||
|name=[[Valla|Vallite]] | |||
|class=Samurai | |||
|version=vallite | |||
|lv=9 | |||
|#=2 | |||
|hp=20 | |||
|str=7 | |||
|mag=0 | |||
|skill=8 | |||
|spd=8{{h|+4|Granted by Pair Up with Samurai}} | |||
|lck=0{{h|+2|Granted by Pair Up with Samurai}} | |||
|def=5 | |||
|res=6 | |||
|mov=5 | |||
|inventory={{Item|14|Wyrmslayer|image=sword}} | |||
|notes=• [[Pair Up|Paired up]] together.<br>• Immediately begins moving unprovoked. | |||
}} | |||
{{ChapUnitCellFE14 | |||
|name=[[Valla|Vallite]] | |||
|class=Samurai | |||
|version=vallite | |||
|lv=9 | |||
|#=1 | |||
|hp=20 | |||
|str=7 | |||
|mag=0 | |||
|skill=8 | |||
|spd=8 | |||
|lck=0 | |||
|def=5 | |||
|res=6 | |||
|mov=5 | |||
|inventory={{Item|14|Wyrmslayer|image=sword}} | |||
|notes=Immediately begins moving unprovoked. | |||
}} | |||
{{ChapUnitCellFE14 | |||
|name=[[Valla|Vallite]] | |||
|class=Samurai | |||
|version=vallite | |||
|lv=9 | |||
|#=1 | |||
|hp=20 | |||
|str=7 | |||
|mag=0 | |||
|skill=8 | |||
|spd=8{{h|+5|+4 granted by Pair Up with Samurai, +1 granted by Kodachi}} | |||
|lck=0{{h|+2|Granted by Pair Up with Samurai}} | |||
|def=5{{h|−1|Penalized by Kodachi}} | |||
|res=6{{h|−1|Penalized by Kodachi}} | |||
|mov=5 | |||
|inventory={{Item|14|Kodachi|image=katana}} | |||
|notes=Lead unit of [[pair up]] with a [[Wyrmslayer]] Samurai. | |||
}} | |||
{{ChapUnitCellFE14 | |||
|name=[[Valla|Vallite]] | |||
|class=Samurai | |||
|version=vallite | |||
|lv=9 | |||
|#=1 | |||
|hp=20 | |||
|str=7 | |||
|mag=0 | |||
|skill=8 | |||
|spd=8{{h|+4|Granted by Pair Up with Samurai}} | |||
|lck=0{{h|+2|Granted by Pair Up with Samurai}} | |||
|def=5 | |||
|res=6 | |||
|mov=5 | |||
|inventory={{Item|14|Wyrmslayer|image=sword}} | |||
|notes=Supporting unit of [[pair up]] with [[Kodachi]] Samurai. | |||
}} | |||
{{ChapUnitCellFE14 | |||
|name=[[Valla|Vallite]] | |||
|class=Ninja | |||
|version=vallite | |||
|lv=8 | |||
|#=2 | |||
|hp=17 | |||
|str=5 | |||
|mag=0 | |||
|skill=10 | |||
|spd=8{{h|+2|Granted by Steel Shuriken}} | |||
|lck=0 | |||
|def=3 | |||
|res=4 | |||
|mov=5 | |||
|inventory={{Item|14|Steel Shuriken|image=shuriken}}<br>{{Item|14|Poison Strike}} | |||
}} | |||
{{ChapUnitCellFE14 | |||
|name=[[Valla|Vallite]] | |||
|class=Oni Savage | |||
|version=vallite | |||
|lv=9 | |||
|#=1 | |||
|hp=20 | |||
|str=10 | |||
|mag=1 | |||
|skill=4 | |||
|spd=6 | |||
|lck=0 | |||
|def=9 | |||
|res=1 | |||
|mov=5 | |||
|inventory={{Item|14|Throwing Club|image=club}} | |||
}} | |||
{{ChapUnitCellFE14 | |||
|name=[[Valla|Vallite]] | |||
|class=Oni Savage | |||
|version=vallite | |||
|lv=9 | |||
|#=3 | |||
|hp=20 | |||
|str=10 | |||
|mag=1 | |||
|skill=4 | |||
|spd=6 | |||
|lck=0 | |||
|def=9 | |||
|res=1 | |||
|mov=5 | |||
|inventory={{Item|14|Steel Club|image=club}} | |||
}} | |||
{{ChapUnitCellFE14 | |||
|name=[[Valla|Vallite]] | |||
|class=Samurai | |||
|version=vallite | |||
|lv=9 | |||
|#=3 | |||
|hp=20 | |||
|str=7 | |||
|mag=0 | |||
|skill=8 | |||
|spd=8{{h|+1|Granted by Steel Katana}} | |||
|lck=0 | |||
|def=5{{h|−1|Penalized by Steel Katana}} | |||
|res=6{{h|−1|Penalized by Steel Katana}} | |||
|mov=5 | |||
|inventory={{Item|14|Steel Katana|image=katana}} | |||
}} | |||
{{ChapUnitCellFE14 | |||
|name=[[Valla|Vallite]] | |||
|class=Spear Fighter | |||
|version=vallite | |||
|lv=9 | |||
|#=2 | |||
|hp=19 | |||
|str=9 | |||
|mag=0 | |||
|skill=9 | |||
|spd=8 | |||
|lck=0 | |||
|def=7{{h|+1|Granted by Steel Naginata}} | |||
|res=3{{h|+1|Granted by Steel Naginata}} | |||
|mov=5 | |||
|inventory={{Item|14|Steel Naginata|image=naginata}} | |||
}} | |||
{{ChapUnitCellFE14 | |||
|name=[[Caeldori|Vallite]] | |||
|class=Sky Knight | |||
|version=caeldori vallite | |||
|lv=10 | |||
|#=1 | |||
|hp=24 | |||
|str=11 | |||
|mag=3 | |||
|skill=10 | |||
|spd=13 | |||
|lck=13 | |||
|def=7{{h|+1|Granted by Steel Naginata}} | |||
|res=12{{h|+1|Granted by Steel Naginata}} | |||
|mov=7 | |||
|inventory={{Item|14|Steel Naginata|image=naginata}} • {{Item|14|Swordcatcher|image=naginata}} • {{Item|14|Chest Key|image=key|type=drop}}<br>{{Item|14|Prodigy}} • {{Item|14|Darting Blow}} • {{Item|14|Camaraderie}} | |||
|notes=Defeat opens the northeastern screen. | |||
}} | |||
{{ChapUnitCellFE14 | |||
|name=[[Rhajat|Vallite]] | |||
|class=Diviner | |||
|version=rhajat vallite | |||
|lv=8 | |||
|#=1 | |||
|hp=23 | |||
|str=1 | |||
|mag=14{{h|+2|Granted by Magic +2}} | |||
|skill=5 | |||
|spd=13{{h|+1|Granted by Tiger Spirit}} | |||
|lck=7 | |||
|def=6 | |||
|res=15 | |||
|mov=5 | |||
|inventory={{Item|14|Tiger Spirit|image=scroll}} • {{Item|14|Chest Key|image=key|type=drop}}<br>{{Item|14|Vendetta|link=Vendetta (Fates)}} • {{Item|14|Magic +2}} • {{Item|14|Future Sight}} | |||
}} | |||
{{ChapUnitCellFE14 | |||
|name=[[Valla|Vallite]] | |||
|class=Diviner | |||
|version=vallite | |||
|lv=8 | |||
|#=1 | |||
|hp=16 | |||
|str=0 | |||
|mag=8 | |||
|skill=6 | |||
|spd=8 | |||
|lck=0 | |||
|def=1{{h|+1|Granted by Ox Spirit}} | |||
|res=4 | |||
|mov=5 | |||
|inventory={{Item|14|Ox Spirit|image=scroll}} | |||
|last=y | |||
}} | |||
{{ChapUnitFtr}} | |||
|content2={{ChapUnitHdr|type=Enemy|platform=3ds02}} | |||
{{ChapUnitCellFE14 | |||
|name=[[Shiro|Vallite]] | |||
|class=Swordmaster | |||
|version=shiro vallite | |||
|lv=1 | |||
|#=1 | |||
|hp=26 | |||
|str=13{{h|+4|Granted by Raijinto}} | |||
|mag=2 | |||
|skill=12 | |||
|spd=14{{h|+1|Granted by Raijinto}} | |||
|lck=10 | |||
|def=13{{h|−1|Penalized by Raijinto}} | |||
|res=10{{h|−1|Penalized by Raijinto}} | |||
|mov=5 | |||
|inventory={{Item|14|Raijinto|image=katana}}<br>{{Item|14|Noble Cause}} • {{Item|14|Seal Defense}} • {{Item|14|Vantage}} • {{Item|14|Swap}} • {{Item|14|Duelist's Blow}} | |||
|notes=• Starts in a [[Terrain/Nintendo 3DS games#Fire Emblem Fates|chamber]].<br>• Begins moving unprovoked on turn 6. | |||
}} | |||
{{ChapUnitCellFE14 | |||
|name=[[Valla|Vallite]] | |||
|class=Spear Fighter | |||
|version=vallite | |||
|lv=9 | |||
|#=1 | |||
|hp=23 | |||
|str=11 | |||
|mag=0 | |||
|skill=10 | |||
|spd=10 | |||
|lck=4 | |||
|def=10{{h|+1|Granted by Steel Naginata}} | |||
|res=5{{h|+1|Granted by Steel Naginata}} | |||
|mov=5 | |||
|inventory={{Item|14|Steel Naginata|image=naginata}}<br>{{Item|14|Pavise}} | |||
|notes=Begins moving unprovoked on turn 2. | |||
}} | |||
{{ChapUnitCellFE14 | |||
|name=[[Valla|Vallite]] | |||
|class=Oni Savage | |||
|version=vallite | |||
|lv=9 | |||
|#=1 | |||
|hp=24 | |||
|str=12 | |||
|mag=1 | |||
|skill=5 | |||
|spd=8 | |||
|lck=1 | |||
|def=12 | |||
|res=3 | |||
|mov=5 | |||
|inventory={{Item|14|Steel Club|image=club}}<br>{{Item|14|Certain Blow}} | |||
|notes=Begins moving unprovoked on turn 2. | |||
}} | |||
{{ChapUnitCellFE14 | |||
|name=[[Valla|Vallite]] | |||
|class=Ninja | |||
|version=vallite | |||
|lv=8 | |||
|#=6 | |||
|hp=20 | |||
|str=6 | |||
|mag=0 | |||
|skill=13 | |||
|spd=12{{h|+2|Granted by Steel Shuriken}} | |||
|lck=3 | |||
|def=5 | |||
|res=7 | |||
|mov=5 | |||
|inventory={{Item|14|Steel Shuriken|image=shuriken}} | |||
|notes=The two in the chamber begin moving unprovoked on turn 4. | |||
}} | |||
{{ChapUnitCellFE14 | |||
|name=[[Valla|Vallite]] | |||
|class=Samurai | |||
|version=vallite | |||
|lv=9 | |||
|#=7 | |||
|hp=23 | |||
|str=9 | |||
|mag=0 | |||
|skill=9 | |||
|spd=13{{h|+1|Granted by Steel Katana}} | |||
|lck=6 | |||
|def=7{{h|−1|Penalized by Steel Katana}} | |||
|res=8{{h|−1|Penalized by Steel Katana}} | |||
|mov=5 | |||
|inventory={{Item|14|Steel Katana|image=katana}} | |||
}} | |||
{{ChapUnitCellFE14 | |||
|name=[[Asugi|Vallite]] | |||
|class=Ninja | |||
|version=asugi vallite | |||
|lv=10 | |||
|#=1 | |||
|hp=22 | |||
|str=10 | |||
|mag=4 | |||
|skill=15 | |||
|spd=14{{h|+2|Granted by Steel Shuriken}} | |||
|lck=10 | |||
|def=7 | |||
|res=12 | |||
|inventory={{Item|14|Steel Shuriken|image=shuriken}} • {{Item|14|Flame Shuriken|image=shuriken}}<br>{{Item|14|Sweet Tooth}} • {{Item|14|Poison Strike}} • {{Item|14|Locktouch}} | |||
|notes=• Stands on a [[Terrain/Nintendo 3DS games#Fire Emblem Fates|cushion]].<br>• Defeat opens the northwestern screen. | |||
}} | |||
{{ChapUnitCellFE14 | |||
|name=[[Valla|Vallite]] | |||
|class=Automaton | |||
|version=vallite | |||
|lv=7 | |||
|#=2 | |||
|hp=22 | |||
|str=6 | |||
|mag=0 | |||
|skill=12 | |||
|spd=10 | |||
|lck=0 | |||
|def=7 | |||
|res=9 | |||
|mov=5 | |||
|inventory={{Item|14|Saw}} | |||
}} | |||
{{ChapUnitCellFE14 | |||
|name=[[Valla|Vallite]] | |||
|class=Spear Fighter | |||
|version=vallite | |||
|lv=9 | |||
|#=1 | |||
|hp=23 | |||
|str=11 | |||
|mag=0 | |||
|skill=10 | |||
|spd=10 | |||
|lck=4 | |||
|def=10{{h|+5|Granted by Guard Naginata}} | |||
|res=5{{h|+5|Granted by Guard Naginata}} | |||
|mov=5 | |||
|inventory={{Item|14|Guard Naginata|image=naginata}} | |||
}} | |||
{{ChapUnitCellFE14 | |||
|name=[[Midori|Vallite]] | |||
|class=Apothecary | |||
|version=midori vallite | |||
|lv=10 | |||
|#=1 | |||
|hp=26 | |||
|str=12 | |||
|mag=2 | |||
|skill=14 | |||
|spd=8 | |||
|lck=12 | |||
|def=10 | |||
|res=4{{h|+2|Granted by Steel Yumi}} | |||
|mov=5 | |||
|inventory={{Item|14|Steel Yumi|image=yumi}} • {{Item|14|Vulnerary|image=healing}} • {{Item|14|Dragon Herbs|image=stat booster|type=drop}}<br>{{Item|14|Lucky Charm}} • {{Item|14|Potent Potion}} • {{Item|14|Quick Salve}} | |||
}} | |||
{{ChapUnitCellFE14 | |||
|name=[[Valla|Vallite]] | |||
|class=Samurai | |||
|version=vallite | |||
|lv=9 | |||
|#=2 | |||
|hp=23 | |||
|str=9 | |||
|mag=0 | |||
|skill=9 | |||
|spd=13{{h|+5|+4 granted by Pair Up with Samurai, +1 granted by Steel Katana}} | |||
|lck=6{{h|+2|Granted by Pair Up with Samurai}} | |||
|def=7{{h|−1|Penalized by Steel Katana}} | |||
|res=8{{h|−1|Penalized by Steel Katana}} | |||
|mov=5 | |||
|inventory={{Item|14|Steel Katana|image=katana}} • {{Item|14|Wyrmslayer|image=sword}} | |||
|notes=• [[Pair Up|Paired up]] together.<br>• Immediately begins moving unprovoked. | |||
}} | |||
{{ChapUnitCellFE14 | |||
|name=[[Valla|Vallite]] | |||
|class=Samurai | |||
|version=vallite | |||
|lv=9 | |||
|#=1 | |||
|hp=23 | |||
|str=9 | |||
|mag=0 | |||
|skill=9 | |||
|spd=13{{h|+1|Granted by Steel Katana}} | |||
|lck=6 | |||
|def=7{{h|−1|Penalized by Steel Katana}} | |||
|res=8{{h|−1|Penalized by Steel Katana}} | |||
|mov=5 | |||
|inventory={{Item|14|Steel Katana|image=katana}} • {{Item|14|Wyrmslayer|image=sword}} | |||
|notes=Immediately begins moving unprovoked. | |||
}} | |||
{{ChapUnitCellFE14 | |||
|name=[[Valla|Vallite]] | |||
|class=Samurai | |||
|version=vallite | |||
|lv=9 | |||
|#=1 | |||
|hp=23 | |||
|str=9 | |||
|mag=0 | |||
|skill=9 | |||
|spd=13{{h|+5|+4 granted by Pair Up with Samurai, +1 granted by Kodachi}} | |||
|lck=6{{h|+2|Granted by Pair Up with Samurai}} | |||
|def=7{{h|−1|Penalized by Kodachi}} | |||
|res=8{{h|−1|Penalized by Kodachi}} | |||
|mov=5 | |||
|inventory={{Item|14|Kodachi|image=katana}}<br>{{Item|14|Strong Riposte}} | |||
|notes=Lead unit of [[pair up]] with a [[Wyrmslayer]] Samurai. | |||
}} | |||
{{ChapUnitCellFE14 | |||
|name=[[Valla|Vallite]] | |||
|class=Samurai | |||
|version=vallite | |||
|lv=9 | |||
|#=1 | |||
|hp=23 | |||
|str=9 | |||
|mag=0 | |||
|skill=9 | |||
|spd=13{{h|+4|Granted by Pair Up with Samurai}} | |||
|lck=6{{h|+2|Granted by Pair Up with Samurai}} | |||
|def=7 | |||
|res=8 | |||
|mov=5 | |||
|inventory={{Item|14|Wyrmslayer|image=sword}}<br>{{Item|14|Quick Draw}} | |||
|notes=Supporting unit of [[pair up]] with [[Kodachi]] Samurai. | |||
}} | |||
{{ChapUnitCellFE14 | |||
|name=[[Valla|Vallite]] | |||
|class=Oni Savage | |||
|version=vallite | |||
|lv=9 | |||
|#=5 | |||
|hp=24 | |||
|str=12 | |||
|mag=1 | |||
|skill=5 | |||
|spd=8 | |||
|lck=1 | |||
|def=12 | |||
|res=3 | |||
|mov=5 | |||
|inventory={{Item|14|Steel Club|image=club}} | |||
}} | |||
{{ChapUnitCellFE14 | |||
|name=[[Valla|Vallite]] | |||
|class=Automaton | |||
|version=vallite | |||
|lv=7 | |||
|#=2 | |||
|hp=22 | |||
|str=6 | |||
|mag=0 | |||
|skill=12 | |||
|spd=10 | |||
|lck=0 | |||
|def=7 | |||
|res=9 | |||
|mov=5 | |||
|inventory={{Item|14|Saw}} • {{Item|14|Steel Yumi|image=yumi}} | |||
}} | |||
{{ChapUnitCellFE14 | |||
|name=[[Valla|Vallite]] | |||
|class=Ninja | |||
|version=vallite | |||
|lv=8 | |||
|#=5 | |||
|hp=20 | |||
|str=6 | |||
|mag=0 | |||
|skill=13 | |||
|spd=12{{h|+2|Granted by Steel Shuriken}} | |||
|lck=3 | |||
|def=5 | |||
|res=7 | |||
|mov=5 | |||
|inventory={{Item|14|Steel Shuriken|image=shuriken}}<br>{{Item|14|Poison Strike}} | |||
}} | |||
{{ChapUnitCellFE14 | |||
|name=[[Valla|Vallite]] | |||
|class=Oni Savage | |||
|version=vallite | |||
|lv=9 | |||
|#=1 | |||
|hp=24 | |||
|str=12 | |||
|mag=1 | |||
|skill=5 | |||
|spd=8 | |||
|lck=1 | |||
|def=12 | |||
|res=3 | |||
|mov=5 | |||
|inventory={{Item|14|Throwing Club|image=club}} | |||
}} | |||
{{ChapUnitCellFE14 | |||
|name=[[Valla|Vallite]] | |||
|class=Spear Fighter | |||
|version=vallite | |||
|lv=9 | |||
|#=2 | |||
|hp=23 | |||
|str=11 | |||
|mag=0 | |||
|skill=10 | |||
|spd=10 | |||
|lck=4 | |||
|def=10{{h|+1|Granted by Steel Naginata}} | |||
|res=5{{h|+1|Granted by Steel Naginata}} | |||
|mov=5 | |||
|inventory={{Item|14|Steel Naginata|image=naginata}} | |||
}} | |||
{{ChapUnitCellFE14 | |||
|name=[[Caeldori|Vallite]] | |||
|class=Sky Knight | |||
|version=caeldori vallite | |||
|lv=10 | |||
|#=1 | |||
|hp=24 | |||
|str=11 | |||
|mag=3 | |||
|skill=10 | |||
|spd=13 | |||
|lck=13 | |||
|def=7{{h|+1|Granted by Steel Naginata}} | |||
|res=12{{h|+1|Granted by Steel Naginata}} | |||
|mov=7 | |||
|inventory={{Item|14|Steel Naginata|image=naginata}} • {{Item|14|Swordcatcher|image=naginata}} • {{Item|14|Chest Key|image=key|type=drop}}<br>{{Item|14|Prodigy}} • {{Item|14|Darting Blow}} • {{Item|14|Camaraderie}} | |||
|notes=Defeat opens the northeastern screen. | |||
}} | |||
{{ChapUnitCellFE14 | |||
|name=[[Rhajat|Vallite]] | |||
|class=Diviner | |||
|version=rhajat vallite | |||
|lv=10 | |||
|#=1 | |||
|hp=23 | |||
|str=1 | |||
|mag=14{{h|+2|Granted by Magic +2}} | |||
|skill=5 | |||
|spd=13{{h|+1|Granted by Tiger Spirit}} | |||
|lck=7 | |||
|def=6 | |||
|res=15 | |||
|mov=5 | |||
|inventory={{Item|14|Tiger Spirit|image=scroll}} • {{Item|14|Chest Key|image=key|type=drop}}<br>{{Item|14|Vendetta|link=Vendetta (Fates)}} • {{Item|14|Magic +2}} • {{Item|14|Future Sight}} | |||
}} | |||
{{ChapUnitCellFE14 | |||
|name=[[Valla|Vallite]] | |||
|class=Diviner | |||
|version=vallite | |||
|lv=8 | |||
|#=1 | |||
|hp=19 | |||
|str=0 | |||
|mag=8 | |||
|skill=8 | |||
|spd=10{{h|+1|Granted by Tiger Spirit}} | |||
|lck=2 | |||
|def=3 | |||
|res=6 | |||
|mov=5 | |||
|inventory={{Item|14|Tiger Spirit|image=scroll}} | |||
|last=y | |||
}} | |||
{{ChapUnitFtr}} | |||
|content3={{ChapUnitHdr|type=Enemy|platform=3ds02}} | |||
{{ChapUnitCellFE14 | |||
|name=[[Shiro|Vallite]] | |||
|class=Swordmaster | |||
|version=shiro vallite | |||
|lv=1 | |||
|#=1 | |||
|hp=26 | |||
|str=13{{h|+4|Granted by Raijinto}} | |||
|mag=2 | |||
|skill=12 | |||
|spd=14{{h|+1|Granted by Raijinto}} | |||
|lck=10 | |||
|def=13{{h|−1|Penalized by Raijinto}} | |||
|res=10{{h|−1|Penalized by Raijinto}} | |||
|mov=6 | |||
|inventory={{Item|14|Raijinto|image=katana}}<br>{{Item|14|Noble Cause}} • {{Item|14|Seal Defense}} • {{Item|14|Vantage}} • {{Item|14|Swap}} • {{Item|14|Duelist's Blow}} | |||
|notes=• Starts in a [[Terrain/Nintendo 3DS games#Fire Emblem Fates|chamber]].<br>• Begins moving unprovoked on turn 6. | |||
}} | |||
{{ChapUnitCellFE14 | |||
|name=[[Valla|Vallite]] | |||
|class=Spear Fighter | |||
|version=vallite | |||
|lv=9 | |||
|#=1 | |||
|hp=23 | |||
|str=11 | |||
|mag=0 | |||
|skill=10 | |||
|spd=10 | |||
|lck=4 | |||
|def=10{{h|+1|Granted by Steel Naginata}} | |||
|res=5{{h|+1|Granted by Steel Naginata}} | |||
|mov=5 | |||
|inventory={{Item|14|Steel Naginata|image=naginata}}<br>{{Item|14|Pavise}} | |||
|notes=Begins moving unprovoked on turn 2. | |||
}} | |||
{{ChapUnitCellFE14 | |||
|name=[[Valla|Vallite]] | |||
|class=Oni Savage | |||
|version=vallite | |||
|lv=9 | |||
|#=1 | |||
|hp=24 | |||
|str=12 | |||
|mag=1 | |||
|skill=5 | |||
|spd=8 | |||
|lck=1 | |||
|def=12 | |||
|res=3 | |||
|mov=5 | |||
|inventory={{Item|14|Steel Club|image=club}}<br>{{Item|14|Certain Blow}} | |||
|notes=Begins moving unprovoked on turn 2. | |||
}} | |||
{{ChapUnitCellFE14 | |||
|name=[[Valla|Vallite]] | |||
|class=Ninja | |||
|version=vallite | |||
|lv=8 | |||
|#=6 | |||
|hp=20 | |||
|str=6 | |||
|mag=0 | |||
|skill=13 | |||
|spd=12{{h|+2|Granted by Steel Shuriken}} | |||
|lck=3 | |||
|def=5 | |||
|res=7 | |||
|mov=5 | |||
|inventory={{Item|14|Steel Shuriken|image=shuriken}} | |||
|notes=The two in the chamber begin moving unprovoked on turn 4. | |||
}} | |||
{{ChapUnitCellFE14 | |||
|name=[[Valla|Vallite]] | |||
|class=Samurai | |||
|version=vallite | |||
|lv=9 | |||
|#=7 | |||
|hp=23 | |||
|str=9 | |||
|mag=0 | |||
|skill=9 | |||
|spd=13{{h|+1|Granted by Steel Katana}} | |||
|lck=6 | |||
|def=7{{h|−1|Penalized by Steel Katana}} | |||
|res=8{{h|−1|Penalized by Steel Katana}} | |||
|mov=5 | |||
|inventory={{Item|14|Steel Katana|image=katana}} | |||
}} | |||
{{ChapUnitCellFE14 | |||
|name=[[Asugi|Vallite]] | |||
|class=Ninja | |||
|version=asugi vallite | |||
|lv=10 | |||
|#=1 | |||
|hp=22 | |||
|str=10 | |||
|mag=4 | |||
|skill=15 | |||
|spd=14{{h|+2|Granted by Steel Shuriken}} | |||
|lck=10 | |||
|def=7 | |||
|res=12 | |||
|inventory={{Item|14|Steel Shuriken|image=shuriken}} • {{Item|14|Flame Shuriken|image=shuriken}}<br>{{Item|14|Sweet Tooth}} • {{Item|14|Poison Strike}} • {{Item|14|Locktouch}} | |||
|notes=• Stands on a [[Terrain/Nintendo 3DS games#Fire Emblem Fates|cushion]].<br>• Defeat opens the northwestern screen. | |||
}} | |||
{{ChapUnitCellFE14 | |||
|name=[[Valla|Vallite]] | |||
|class=Automaton | |||
|version=vallite | |||
|lv=7 | |||
|#=2 | |||
|hp=22 | |||
|str=6 | |||
|mag=0 | |||
|skill=12 | |||
|spd=10 | |||
|lck=0 | |||
|def=7 | |||
|res=9 | |||
|mov=5 | |||
|inventory={{Item|14|Saw}} | |||
}} | |||
{{ChapUnitCellFE14 | |||
|name=[[Valla|Vallite]] | |||
|class=Spear Fighter | |||
|version=vallite | |||
|lv=9 | |||
|#=1 | |||
|hp=23 | |||
|str=11 | |||
|mag=0 | |||
|skill=10 | |||
|spd=10 | |||
|lck=4 | |||
|def=10{{h|+5|Granted by Guard Naginata}} | |||
|res=5{{h|+5|Granted by Guard Naginata}} | |||
|mov=5 | |||
|inventory={{Item|14|Guard Naginata|image=naginata}} | |||
}} | |||
{{ChapUnitCellFE14 | |||
|name=[[Midori|Vallite]] | |||
|class=Apothecary | |||
|version=midori vallite | |||
|lv=10 | |||
|#=1 | |||
|hp=26 | |||
|str=12 | |||
|mag=2 | |||
|skill=14 | |||
|spd=8 | |||
|lck=12 | |||
|def=10 | |||
|res=4{{h|+2|Granted by Steel Yumi}} | |||
|mov=5 | |||
|inventory={{Item|14|Steel Yumi|image=yumi}} • {{Item|14|Vulnerary|image=healing}} • {{Item|14|Dragon Herbs|image=stat booster|type=drop}}<br>{{Item|14|Lucky Charm}} • {{Item|14|Potent Potion}} • {{Item|14|Quick Salve}} | |||
}} | |||
{{ChapUnitCellFE14 | |||
|name=[[Valla|Vallite]] | |||
|class=Samurai | |||
|version=vallite | |||
|lv=9 | |||
|#=2 | |||
|hp=23 | |||
|str=9 | |||
|mag=0 | |||
|skill=9 | |||
|spd=13{{h|+5|+4 granted by Pair Up with Samurai, +1 granted by Steel Katana}} | |||
|lck=6{{h|+2|Granted by Pair Up with Samurai}} | |||
|def=7{{h|−1|Penalized by Steel Katana}} | |||
|res=8{{h|−1|Penalized by Steel Katana}} | |||
|mov=5 | |||
|inventory={{Item|14|Steel Katana|image=katana}} • {{Item|14|Wyrmslayer|image=sword}} | |||
|notes=• [[Pair Up|Paired up]] together.<br>• Immediately begins moving unprovoked. | |||
}} | |||
{{ChapUnitCellFE14 | |||
|name=[[Valla|Vallite]] | |||
|class=Samurai | |||
|version=vallite | |||
|lv=9 | |||
|#=1 | |||
|hp=23 | |||
|str=9 | |||
|mag=0 | |||
|skill=9 | |||
|spd=13{{h|+1|Granted by Steel Katana}} | |||
|lck=6 | |||
|def=7{{h|−1|Penalized by Steel Katana}} | |||
|res=8{{h|−1|Penalized by Steel Katana}} | |||
|mov=5 | |||
|inventory={{Item|14|Steel Katana|image=katana}} • {{Item|14|Wyrmslayer|image=sword}} | |||
|notes=Immediately begins moving unprovoked. | |||
}} | |||
{{ChapUnitCellFE14 | |||
|name=[[Valla|Vallite]] | |||
|class=Samurai | |||
|version=vallite | |||
|lv=9 | |||
|#=1 | |||
|hp=23 | |||
|str=9 | |||
|mag=0 | |||
|skill=9 | |||
|spd=13{{h|+5|+4 granted by Pair Up with Samurai, +1 granted by Kodachi}} | |||
|lck=6{{h|+2|Granted by Pair Up with Samurai}} | |||
|def=7{{h|−1|Penalized by Kodachi}} | |||
|res=8{{h|−1|Penalized by Kodachi}} | |||
|mov=5 | |||
|inventory={{Item|14|Kodachi|image=katana}}<br>{{Item|14|Strong Riposte}} | |||
|notes=Lead unit of [[pair up]] with a [[Wyrmslayer]] Samurai. | |||
}} | |||
{{ChapUnitCellFE14 | |||
|name=[[Valla|Vallite]] | |||
|class=Samurai | |||
|version=vallite | |||
|lv=9 | |||
|#=1 | |||
|hp=23 | |||
|str=9 | |||
|mag=0 | |||
|skill=9 | |||
|spd=13{{h|+4|Granted by Pair Up with Samurai}} | |||
|lck=6{{h|+2|Granted by Pair Up with Samurai}} | |||
|def=7 | |||
|res=8 | |||
|mov=5 | |||
|inventory={{Item|14|Wyrmslayer|image=sword}}<br>{{Item|14|Quick Draw}} | |||
|notes=Supporting unit of [[pair up]] with [[Kodachi]] Samurai. | |||
}} | |||
{{ChapUnitCellFE14 | |||
|name=[[Valla|Vallite]] | |||
|class=Oni Savage | |||
|version=vallite | |||
|lv=9 | |||
|#=2 | |||
|hp=24 | |||
|str=12 | |||
|mag=1 | |||
|skill=5 | |||
|spd=8 | |||
|lck=1 | |||
|def=12 | |||
|res=3 | |||
|mov=5 | |||
|inventory={{Item|14|Steel Club|image=club}}<br>{{Item|14|Lancebreaker}} | |||
}} | |||
{{ChapUnitCellFE14 | |||
|name=[[Valla|Vallite]] | |||
|class=Automaton | |||
|version=vallite | |||
|lv=7 | |||
|#=2 | |||
|hp=22 | |||
|str=6 | |||
|mag=0 | |||
|skill=12 | |||
|spd=10 | |||
|lck=0 | |||
|def=7 | |||
|res=9 | |||
|mov=5 | |||
|inventory={{Item|14|Saw}} • {{Item|14|Steel Yumi|image=yumi}} | |||
}} | |||
{{ChapUnitCellFE14 | |||
|name=[[Valla|Vallite]] | |||
|class=Ninja | |||
|version=vallite | |||
|lv=8 | |||
|#=5 | |||
|hp=20 | |||
|str=6 | |||
|mag=0 | |||
|skill=13 | |||
|spd=12{{h|+2|Granted by Steel Shuriken}} | |||
|lck=3 | |||
|def=5 | |||
|res=7 | |||
|mov=5 | |||
|inventory={{Item|14|Steel Shuriken|image=shuriken}}<br>{{Item|14|Poison Strike}} | |||
}} | |||
{{ChapUnitCellFE14 | |||
|name=[[Valla|Vallite]] | |||
|class=Oni Savage | |||
|version=vallite | |||
|lv=9 | |||
|#=1 | |||
|hp=24 | |||
|str=12 | |||
|mag=1 | |||
|skill=5 | |||
|spd=8 | |||
|lck=1 | |||
|def=12 | |||
|res=3 | |||
|mov=5 | |||
|inventory={{Item|14|Throwing Club|image=club}} | |||
}} | |||
{{ChapUnitCellFE14 | |||
|name=[[Valla|Vallite]] | |||
|class=Oni Savage | |||
|version=vallite | |||
|lv=9 | |||
|#=3 | |||
|hp=24 | |||
|str=12 | |||
|mag=1 | |||
|skill=5 | |||
|spd=8 | |||
|lck=1 | |||
|def=12 | |||
|res=3 | |||
|mov=5 | |||
|inventory={{Item|14|Steel Club|image=club}} | |||
}} | |||
{{ChapUnitCellFE14 | |||
|name=[[Valla|Vallite]] | |||
|class=Spear Fighter | |||
|version=vallite | |||
|lv=9 | |||
|#=2 | |||
|hp=23 | |||
|str=11 | |||
|mag=0 | |||
|skill=10 | |||
|spd=10 | |||
|lck=4 | |||
|def=10{{h|+1|Granted by Steel Naginata}} | |||
|res=5{{h|+1|Granted by Steel Naginata}} | |||
|mov=5 | |||
|inventory={{Item|14|Steel Naginata|image=naginata}} | |||
}} | |||
{{ChapUnitCellFE14 | |||
|name=[[Caeldori|Vallite]] | |||
|class=Sky Knight | |||
|version=caeldori vallite | |||
|lv=10 | |||
|#=1 | |||
|hp=24 | |||
|str=11 | |||
|mag=3 | |||
|skill=10 | |||
|spd=13 | |||
|lck=13 | |||
|def=7{{h|+1|Granted by Steel Naginata}} | |||
|res=12{{h|+1|Granted by Steel Naginata}} | |||
|mov=7 | |||
|inventory={{Item|14|Steel Naginata|image=naginata}} • {{Item|14|Swordcatcher|image=naginata}} • {{Item|14|Chest Key|image=key|type=drop}}<br>{{Item|14|Prodigy}} • {{Item|14|Darting Blow}} • {{Item|14|Camaraderie}} | |||
|notes=Defeat opens the northeastern screen. | |||
}} | |||
{{ChapUnitCellFE14 | |||
|name=[[Rhajat|Vallite]] | |||
|class=Diviner | |||
|version=rhajat vallite | |||
|lv=10 | |||
|#=1 | |||
|hp=23 | |||
|str=1 | |||
|mag=14{{h|+2|Granted by Magic +2}} | |||
|skill=5 | |||
|spd=13{{h|+1|Granted by Tiger Spirit}} | |||
|lck=7 | |||
|def=6 | |||
|res=15 | |||
|mov=5 | |||
|inventory={{Item|14|Tiger Spirit|image=scroll}} • {{Item|14|Chest Key|image=key|type=drop}}<br>{{Item|14|Vendetta|link=Vendetta (Fates)}} • {{Item|14|Magic +2}} • {{Item|14|Future Sight}} | |||
}} | |||
{{ChapUnitCellFE14 | |||
|name=[[Valla|Vallite]] | |||
|class=Diviner | |||
|version=vallite | |||
|lv=8 | |||
|#=1 | |||
|hp=19 | |||
|str=0 | |||
|mag=8 | |||
|skill=8 | |||
|spd=10{{h|+1|Granted by Tiger Spirit}} | |||
|lck=2 | |||
|def=3 | |||
|res=6 | |||
|mov=5 | |||
|inventory={{Item|14|Tiger Spirit|image=scroll}} | |||
|last=y | |||
}} | |||
{{ChapUnitFtr}} | |||
}} | }} | ||
==Boss data== | ===Boss data=== | ||
{{Tab | {{Tab | ||
|tab1=Swordmaster | |tab1=Swordmaster | ||
| Line 373: | Line 1,405: | ||
|content1={{BossStats FE14 | |content1={{BossStats FE14 | ||
|portrait=[[File:Small portrait shiro vallite fe14.png]] | |portrait=[[File:Small portrait shiro vallite fe14.png]] | ||
|sprite=swordmaster shiro vallite enemy | |||
|dv=y | |dv=y | ||
|class=Swordmaster | |class=Swordmaster | ||
|lv=1 | |lv=1 | ||
|HP=26 | |HP=26 | ||
|str=13{{ | |str=13{{h|+4|Granted by Raijinto}} | ||
|magic=2 | |magic=2 | ||
|skill=12 | |skill=12 | ||
|spd=14{{ | |spd=14{{h|+1|Granted by Raijinto}} | ||
|luck=10 | |luck=10 | ||
|def=13{{ | |def=13{{h|−1|Penalized by Raijinto}} | ||
|res=10{{ | |res=10{{h|−1|Penalized by Raijinto}} | ||
|move=5 | |move={{h|5|Normal/Hard}}/{{h|6|Lunatic}} | ||
|inventory= | |inventory={{Item|14|Raijinto|image=katana}} | ||
|skills= | |skills={{Item|14|Noble Cause}}<br>{{Item|14|Seal Defense}}<br>{{Item|14|Vantage}}<br>{{Item|14|Swap}}<br>{{Item|14|Duelist's Blow}} | ||
|sw=E | |sw=E | ||
}} | }} | ||
|content2={{BossStats FE14 | |content2={{BossStats FE14 | ||
|portrait=[[File:Small portrait asugi vallite fe14.png]] | |portrait=[[File:Small portrait asugi vallite fe14.png]] | ||
|sprite=ninja asugi vallite enemy | |||
|class=Ninja | |class=Ninja | ||
|lv=10 | |lv=10 | ||
| Line 398: | Line 1,431: | ||
|magic=4 | |magic=4 | ||
|skill=15 | |skill=15 | ||
|spd=14{{ | |spd=14{{h|+2|Granted by Steel Shuriken}} | ||
|luck=10 | |luck=10 | ||
|def=7 | |def=7 | ||
|res=12 | |res=12 | ||
| | |inventory={{Item|14|Steel Shuriken|image=shuriken}}<br>{{Item|14|Flame Shuriken|image=shuriken}} | ||
| | |skills={{Item|14|Sweet Tooth}}<br>{{Item|14|Poison Strike}}<br>{{Item|14|Locktouch}} | ||
|skills= | |||
|da=C | |da=C | ||
}} | }} | ||
|content3={{BossStats FE14 | |content3={{BossStats FE14 | ||
|portrait=[[File:Small portrait caeldori vallite fe14.png]] | |portrait=[[File:Small portrait caeldori vallite fe14.png]] | ||
|sprite=sky knight caeldori vallite enemy | |||
|class=Sky Knight | |class=Sky Knight | ||
|lv=10 | |lv=10 | ||
| Line 418: | Line 1,450: | ||
|spd=13 | |spd=13 | ||
|luck=13 | |luck=13 | ||
|def=7{{ | |def=7{{h|+1|Granted by Steel Naginata}} | ||
|res=12{{ | |res=12{{h|+1|Granted by Steel Naginata}} | ||
|move=7 | |move=7 | ||
|inventory= | |inventory={{Item|14|Steel Naginata|image=naginata}}<br>{{Item|14|Swordcatcher|image=naginata}}<br>{{Item|14|Chest Key|image=key|type=drop}} | ||
|skills= | |skills={{Item|14|Prodigy}}<br>{{Item|14|Darting Blow}}<br>{{Item|14|Camaraderie}} | ||
|la=C | |la=C | ||
}} | }} | ||
| Line 431: | Line 1,462: | ||
{{Strategy}} | {{Strategy}} | ||
{{sectstub}} | {{sectstub}} | ||
<!-- | |||
==Trivia== | ==Trivia== | ||
--> | |||
== | ==Etymology and other languages== | ||
{{Names | {{Names | ||
|eng-name=II: | |eng-name=II: Realms Collide | ||
| | |jpn-name={{h|弐:記憶の双剣|Ni: Kioku no sōken}} | ||
| | |jpn-mean=II: Twin Swords of Memory | ||
| | |span-name= | ||
| | |span-mean= | ||
| | |||
|fren-name= | |fren-name= | ||
|fren-mean= | |fren-mean= | ||
|ger-name=II: Welten kollidieren | |||
|ger-mean=II: Worlds collide | |||
|ger-name= | |||
|ger-mean= | |||
|ital-name= | |ital-name= | ||
|ital-mean= | |ital-mean= | ||
|kor-name={{h|2장: 기억의 쌍검|2 jang: gieog-ui ssang-geom}} | |||
|kor-mean=Chapter 2: twin swords of memory | |||
}} | }} | ||
| Line 458: | Line 1,488: | ||
{{ChapterNav | {{ChapterNav | ||
|prechapter=I: | |prechapter=I: In Endless Dreams | ||
|nextchapter=III: The Changing Tide | |||
|nextchapter=III: | }} | ||
{{Nav14}} | {{Nav14}} | ||
[[Category:Downloadable content chapters of Fire Emblem Fates]] | [[Category:Downloadable content chapters of Fire Emblem Fates]] | ||
{{DEFAULTSORT:2 Realms Collide}} | |||
Latest revision as of 15:00, 28 March 2024
| ||||
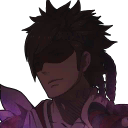
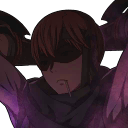
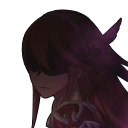
|
| “ | Right. I saw this kid in the distance, hanging his head and sobbing. But as soon as I approached him, he started...glowing...and turned into that. | ” | — Dwyer |
|---|
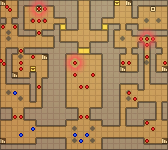
II: Realms Collide (Japanese: 記憶の双剣 II: Twin Swords of Memory) is a downloadable content chapter, and the second part of the six-part Heirs of Fate saga of Fire Emblem Fates. II: Realms Collide is part of the third series of Japanese DLC releases and the second series of international DLC releases.
This chapter was first made available on March 16, 2016 in Japan; May 12, 2016 in North America; July 21 in Europe; and July 22 in Australia.
In this chapter, two small groups of Nohrian children characters, one of which led by Forrest wielding his father's legendary tome, forced from their Deeprealms by Vallite invaders find themselves having to come together and deal with a seemingly-unruly dragon carrying his mother's katana while also having to defend themselves from the invaders.
Plot
- Main article:
II: Realms Collide/Script
|
This article or section does not meet Fire Emblem Wiki's quality standards. Please improve it as you see fit. Editing help is available. This article has been flagged since this is meant to be a synopsis. |
Briefly recapping one event from the previous chapter, a narrator begins to explain the plight of another realm, where more children forced from their Deeprealms wander apparently empty streets while a dragon roars about. The dragon, stated to be crazed with grief, is revealed to be a second Kana.
We cut to the streets of a deserted town, where Kana lets out a roar; Sophie tells Dwyer what they're doing isn't working, while Dwyer admits that they should have made a dent in Kana by this point, after which Sophie attacks Kana to attempt to turn him back into a human. After Kana roars again, Sophie notes that the attack didn't make him any less angry and states that she's out of ideas, then asks Dwyer if Kana wasn't a dragon when he first saw him, to which Dwyer confirms—he saw Kana in the distance hanging his head and sobbing, but upon approach Kana started glowing and transformed into a dragon; Sophie asks what would make a dragon cry, to which Dwyer asks if Kana lost his parents like he and Sophie did. Sophie and Dwyer start to get argumentative over whether their fathers are acutally dead, revealing that their fathers were last seen attempting to protect them, with Sophie at one point threatening Dwyer with a poke of her spear and Dwyer admitting he doesn't want his clothes to be torn of; as Kana lets out another roar, Dwyer asks that he and Sophie stop arguing until they've dealt with him, with Sophie admitting that Kana is clearly harder to handle than Avel, and Dwyer admitting that the strange soldiers are bound to be drawn to this scene.
In another part of town, we find Forrest asking where he and his group are, after which Nina states that she also doesn't recognize the area and asks Ophelia if she's reading their guide right; Ophelia gives an overly-complicated explanation as to imply that they're travelling south, with Nina noting Ophelia's confidence but states she's having second thoughts about trusting a rock, after which Nina and Ophelia start to argue before figuring out that they're lost. Ophelia attempts to apologize, but Forrest opts to compliment Ophelia's directions and her stone, after which Ophelia reveals that the stone was a gift from her father, who gave it to her as a good-luck charm as she was escaping her Deeprealm, at which point Ophelia and Forrest reveal similar backstory events about their respective fathers fighting to protect them as they escaped, Forrest in particular finding his father's Brynhildr tome along the path; Nina tells Forrest and Ophelia to not assume that their respective fathers are dead, and states that her own father is one who wouldn't be mourned much anyway, which ultimately leads to similar backstory in Nina's case as well. After the backstory revelations, Forrest states that he doesn't know what he'd do without Ophelia's and Nina's company, as they've been looking after him and thus he doesn't want to hear about them wishing they hadn't been saved, with the three of them promising to plan to rescue their parents; as they start planning, they hear one of Kana's roars which Forrest notes, after which Ophelia concludes that there's a dragon on the loose, with Nina noting five people surrounding him and assumes they're all suspicious soldiers. As Ophelia laments not being able to see the soldiers surrounding Kana, Nina tells Ophelia not to and reveals that thief-types like herself are trained to spot things they shouldn't; Forrest then notes that some of the people near the dragon (Sophie and Dwyer) are not enemies and thus may also be in danger, with Nina believing that Sophie and Dwyer might get themselves killed. Nina asks Forrest if they should save Kana, Sophie, and Dwyer or simply keep traveling, stating that she and Ophelia will follow his lead as his retainers, after which Ophelia proposes they help Kana, Sophie, and Dwyer; Forrest agrees to the rescue, as doing otherwise would be a disgrace to the bloodline of Nohr, with Nina and Ophelia rallying their support. After a shift of scene in what appears to be a Hoshidan-style castle, the battle begins.
Should Forrest speak with Dwyer, after Forrest introduces himself, Nina, and Ophelia, they'll fill in their knowledge of the events to each other concerning Kana, with Forrest revealing he's got an escape route planned; as Dwyer introduces himself and Sophie to Forrest, Dwyer then proceeds to mistake Forrest for a woman, to which Forrest makes Dwyer realize his folly. Should Forrest instead speak with Sophie, the events play out similarly, but this time Sophie states that she's glad that there's another girl on the team; Forrest assumes Sophie is about to make the same mistake Dwyer would have, but Sophie then reveals that the girl in question is actually Forrest's horse.
Once the battle ends, Forrest asks if everybody is in one piece, to which Nina and Ophelia confirm, while Sophie notes something is going on with Kana which gets Dwyer's attention; after a brief flash, a now-untransformed Kana appears to feel some pain, to which Forrest welcomes Kana back to reality. Kana asks what happened to him, to which Forrest tells Kana that he had turned into a dragon and notes it being a remarkable sight; Kana states that he doesn't remember turning into a dragon and asks the others if he hurt anyone, to which Sophie states Kana only went on a minirampage and didn't end up attacking any of them, to Kana's relief; Ophelia asks why Kana was a dragon, going on to make guesses of a wizard's curse or the bite of a weredragon, to which Kana states that he doesn't know how he transformed, at this point giving his backstory involving his mother trying to protect him, even giving him her sword and asking him to run, ending up in town and falling asleep. After Dwyer, Sophie, and Ophelia tell Kana that he's not alone in this plight, Nina deduces that there must be some reason why they were all attacked at once, with Forrest stating that Kana's power could go a long way into helping them solve the mysteries of their parents; Kana then asks why he was able to turn into a dragon at this time and not when his mother needed him, after which Kana starts to get emotional with Dwyer and Forrest noticing, Forrest having to cast Brynhildr on Kana to attempt to keep him in check. Forrest then tells Kana that he can still help his mother, but only by looking forward rather than backward—then states that none of the others could help their parents yet none of them are frozen with grief; Forrest explains that all of them have similar plights, yet nobody other than Kana was grieving, and proceeds to welcome Kana into their group, after which Kana promises not to cry anymore and learn to control his dragon powers.
At this point, the Brynhildr begins glowing to Forrest's notice, after which Kana notices the Yato is also glowing and assumes that it's because it's close to the Brynhildr; at this point, the Yato transforms into the Grim Yato, after which Kana notes the transformation and Forrest confirming its new name. Forrest states that his father told him about the sacred weapons of the world at one point, and that Yato transforms into the Grim Yato upon exposure to one and deduces that Brynhildr qualifies as one of them; he then states that a second sacred weapon would result in the Shadow Yato, after which Kana contemplates how the Yato's transformation mechanics work. As the group talk about the contributions they can make now that they have the Grim Yato, Forrest then states that they haven't all formally introduced themselves to each other, after which it is revealed that some of them know who the others are yet some do not, at which point an offscreen voice assures Kana that once this ordeal is over, everyone will be restored to normal along with their lost memories; the owner of the voice, a ghost, appears, to which Kana recognizes the ghost as that of Azura, who in turn deduces that Kana remembered her, with Kana remembering that Azura was a good friend to his mother. As Kana begins to ask Azura why she's a ghost, he then states that he thinks he remembers, only to reveal that he's forgotten; after some more talk about lost memories, as Kana talks about his Grim Yato and transformation abilities, Azura tells Kana it would be unwise to transform at this time as he could go berserk without more control over the transformation—then reveals that she has a solution, that she'll crystallize his impulse to transform into a stone, and with it, he won't give in to his impulses and transform into a dragon against his will. After more talk about the gaps in their memories, Azura notes that these might not actually be lost memories, and opens up the possibility that not everybody may have actually met Kana—memories aren't something that are collected intentionally or abandoned deliberately, then likens the concept of memories to rain; Azura then goes on to state that she could tell everyone the truth right then and there, but it would only evaporate from their minds and thus the group can only press onward, then states that everyone's memories can be restored once the ordeal is over, and those that aren't would be practically the same as having never known them and thus there'd be nothing to be sad about, after which the group continue talking about the concept of memories.
We cut to another area, where Shigure, the narrator from earlier, sings the second verse of Lost in Thoughts All Alone, stating it to be a song for one who chooses the black rose over the cherry blossom, going on to state that a curse keeps a dragon from attaining his own private paradise and affect those who visit the invisible kingdom; Shigure continues with a few further words of wisdom.
Website summary
The youths of Nohr must assist a wild dragon. Part 2 of Heirs of Fate.[1][2][3]
North American eShop summary
The youths of Nohr must assist a wild dragon. Part 2 of Heirs of Fate.
Rewards: Magictaker
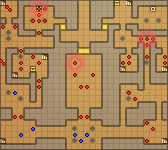
Chapter data
Normal Hard/Lunatic
Character data
In this chapter, the player controls characters separate from their normal game progress. As such, these setups are used only in this chapter and do not affect gameplay in any other instance.
Kana♂ Dwyer Sophie Forrest Ophelia Nina
|
|
| ||||||||||||||||||||||||||||||||||||||||||||||||||
Item data
This item is obtained as a reward to be used in the player's actual game progress:
| ||||||
|
Additionally, numerous enemy units drop items for use specifically in this chapter:
| ||||||||||||||||||
|
Event tile data
There are no event tiles in this chapter.
Dragon Vein data
There are no Dragon Veins in this chapter.
Enemy data
Normal Hard Lunatic
| ||||||||||||||||||||||||||||||||||||||||||||||||||||||||||||||||||||||||||||||||||||||||||||||||||||||||||||||||||||||||||||||||||||||||||||||||||||||||||||||||||||||||||||||||||||||||||||||||||||||||||||||||||||||||||||||||||||||||||||||||||||||||||||||||||||||||||||||||||||||||||||||||||||||||||||||||||||||||||||||||||||||||||||||||||||||||||||||||||||||||||||||||||||||||||||||||||||||||||||||||||||||||||||||||||||||||||||||||||||||||||||||||||||||||||||||||||||||||||||||||||||||||||||||||||||||||||||||||||||||||||||||||||||||||||||||||||||||||||||||||||||||||||||||||||||||
| ||||||||||||||||||||||||||||||||||||||||||||||||||||||||||||||||||||||||||||||||||||||||||||||||||||||||||||||||||||||||||||||||||||||||||||||||||||||||||||||||||||||||||||||||||||||||||||||||||||||||||||||||||||||||||||||||||||||||||||||||||||||||||||||||||||||||||||||||||||||||||||||||||||||||||||||||||||||||||||||||||||||||||||||||||||||||||||||||||||||||||||||||||||||||||||||||||||||||||||||||||||||||||||||||||||||||||||||||||||||||||||||||||||||||||||||||||||||||||||||||||||||||||||||||||||||||||||||||||||||||||||||||||||||||||||||||||||||||||||||||||||||||||||||||||||||
Boss data
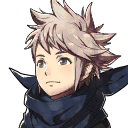
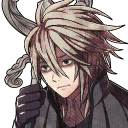
Swordmaster Ninja Sky Knight
|
|
| ||||||||||||||||||||||||||||||||||||||||||||||||||
Strategy
| This section details unofficial strategies that may help with completion of the chapter. This may not work for everybody. |
This section has been marked as a stub. Please help improve the page by adding information.
Etymology and other languages
| Names, etymology, and in other regions | ||
|---|---|---|
| Language | Name | Definition, etymology, and notes |
| English |
II: Realms Collide |
-- |
| Japanese |
弐:記憶の双剣 |
II: Twin Swords of Memory |
| German |
II: Welten kollidieren |
II: Worlds collide |
| Korean |
2장: 기억의 쌍검 |
Chapter 2: twin swords of memory |
Gallery
This section has been marked as a stub. Please help improve the page by adding information.
References
- ↑ DLC - Fire Emblem™ Fates for Nintendo 3DS - Revelations, Maps, fireemblem.nintendo.com (archived by the Wayback Machine), Retrieved: January 8, 2017
- ↑ Fire Emblem Fates, nintendo.co.uk, Retrieved: January 8, 2017
- ↑ Fire Emblem Fates, gamesites.nintendo.com.au (archived by the Wayback Machine), Retrieved: January 8, 2017
| ← I: In Endless Dreams • | II: Realms Collide | • III: The Changing Tide → |
|---|
| Fire Emblem Fates | ||||||||||||||||||||||||||||||||||||||||||||||||||||
|---|---|---|---|---|---|---|---|---|---|---|---|---|---|---|---|---|---|---|---|---|---|---|---|---|---|---|---|---|---|---|---|---|---|---|---|---|---|---|---|---|---|---|---|---|---|---|---|---|---|---|---|---|
| ||||||||||||||||||||||||||||||||||||||||||||||||||||

