| Site News |
|---|
| Warning: This wiki contains spoilers. Read at your own risk! Social media: If you would like, please join our Discord server, and/or follow us on X (Twitter) or Tumblr! |
Bitter Intrigue
| ||||||||||
|
| “ | The Nohrian princess is sick, is she? I can tell she means a lot to you. Well then, I believe a trade is in order. Her life for yours. Come back to Hoshido with me, and I shall withdraw my troops immediately. | ” | — Ryoma |
|---|
Bitter Intrigue (Japanese: 昏き企み Dark Plot) is the twelfth chapter of the Conquest campaign in Fire Emblem Fates. In this chapter, Corrin and their army arrive in Macarath for relaxation, only for Elise to be gripped by an illness contracted on Notre Sagesse and the Hoshidan army led by Ryoma at the gates of the palace. The Nohrians must quickly deal with the Hoshidans with Elise's life on the line.
Plot
- Main article:
Bitter Intrigue/Script
Inside the throne room at Castle Krakenberg, Iago reports to Garon concerning the events at Notre Sagesse, which pleases him and Garon commands Iago to make Corrin suffer but not kill them, to which he gladly replies; Garon then reveals his ambitions to rule Hoshido and sacrifice Corrin to Anankos, after which Iago states that he has an idea.
We cut to Corrin, Azura, and Elise leading the trek back to Castle Krakenberg, with Corrin noting that they should be back at the castle within days and Elise promising that she won't let Corrin down; as the group continues walking, Elise suddenly stops and falls dizzy, with Corrin noting Elise having a fever and Azura noting her having a rash. Azura deduces that Elise is suffering from an illness endemic to Notre Sagesse that progresses quickly, and she could die if they don't act fast; Azura states that a Hoshidan plant could cure these symptoms, but that plant has no Nohrian equivalent, after which Corrin vows to not let Elise die. Silas arrives on the scene and states that the group has received orders from Iago—they are to travel to the royal palace in Macarath for rest and relaxation; after Corrin explains Elise's plight to Silas, Silas states that Macarath should have what they need to heal Elise, revealing that the best doctors in Nohr live in Macarath and have an unrivaled stock of medicines.
Upon arriving at Palace Macarath, Corrin notices a crowd in the area before recognizing the "crowd" as the Hoshidan army, and that the army is not alone; Ryoma appears on the scene, stating he's been waiting for Corrin and Corrin asks how he knew they were coming to Macarath. Ryoma doesn't answer and challenges Corrin to battle, after which Corrin explains Elise's plight to Ryoma. He tells Corrin he'll withdraw his troops if Corrin comes back with him to Hoshido. Corrin refuses and explains that they do not wish to be an enemy of Hoshido despite fighting for Nohr and seeks peace. Ryoma brushes off Corrin's words and deduces Corrin has been brainwashed by Garon and vows to bring Corrin back to their senses. Corrin begs Ryoma not to do this, as Ryoma again attempts to get Corrin to surrender, two mysterious figures arrive on the scene and charge Ryoma, figures revealed to be a man by the name of Laslow and a woman by the name of Peri, who eventually introduce themselves as Xander's retainers sent to look after Corrin. As Ryoma compares Xander's retainers to his own, he calls his troops into battle; Corrin once again attempts to get Ryoma to stand down, but Peri states that Ryoma does not appear to be the type to back down, while Laslow attempts to get Corrin to smile--something Corrin states they can't do until Elise is safe, after which they explain Elise's plight to Laslow and Peri. As Corrin calls their troops into battle, they state that they are not to kill anyone, much to Peri's disappointment; Corrin states that they do not wish to face Ryoma, but has been left with no other option, vowing not to let Elise die and not to have to return to Hoshido. Preparations take place at this point; the battle begins once preparations are complete, with an explanation as to how the breakable medicine and poison pots in the area work.
Should the end of turn 16 enemy phase be reached with neither Ryoma defeated nor Corrin escaped, Azura states that it appears that they have run out of time, telling Corrin they did all they could; Elise's implied death comes in the form of the Game Over screen.
Once the battle ends, Ryoma states that the Hoshidan line has been breached and that the Hoshidans have no choice but to retreat before Nohrian reinforcements arrive; once Corrin gets wind of the Hoshidan retreat, they tell Elise that it won't be long until she can be healed, with Azura stating that they're running out of time and tells Elise to tough it out. A short while later, Azura states that the worst has passed, as Elise should be able to make a full recovery provided she gets enough rest; Corrin and Azura then discuss the possibility of some within Nohr wishing to see Corrin fall as a possible explanation as to how Ryoma knew they were in the area. Elise briefly stirs awake and explains that she was dreaming about speaking with Gunter before falling back asleep; Corrin wonders why Elise saw Gunter in her dream, explains how Gunter died in the Bottomless Canyon and that they'll never see him again no matter how much they want to, then deduces that Gunter might have been trying to subconsciously send Corrin a message from the afterlife via Elise's dream.
Summary
After triumphing at Notre Sagesse and gaining the Rainbow Sage's power, Corrin heads to Macarath to recover. However, an unexpected battle awaits.
Chapter data
Normal Hard Lunatic
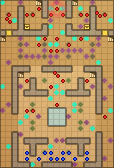
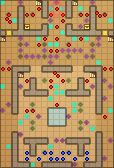
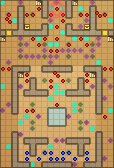
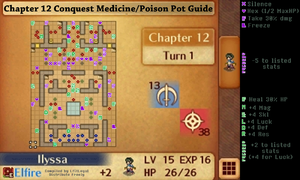
This chapter features destructible pots. There are positive "Medicine" pots and negative "Poison" pots; destroying one will apply one of various effects to all units, player or enemy, within two spaces of the pot.
Medicine pots can provide one of the following effects:
- Restore 30% of units' maximum HP
- Grant +4 to one of the units' stats for the rest of the chapter
- Grant +2 to two of the units' stats for the rest of the chapter
Poison pots can provide one of the following effects:
- Inflict silence status on units for one turn
- Inflict stun status on units for one turn
- Reduces units' maximum HP by 1/2 for the rest of the chapter
- Deal 30% of units' maximum HP as damage to them
- Inflict −5 debuff to one of the units' stats
The effects that each pot gives are static, and will be the same through every playthrough of the chapter.
Character data
| Characters | ||||||||||||||||||||||
|---|---|---|---|---|---|---|---|---|---|---|---|---|---|---|---|---|---|---|---|---|---|---|
New units
| ||||||||||||||||||||||
| ||||||||||||||||||||||
Required characters
| ||||||||||||||||||||||
  
| ||||||||||||||||||||||
Available characters
| ||||||||||||||||||||||
           
| ||||||||||||||||||||||
Undeployable characters
| ||||||||||||||||||||||

| ||||||||||||||||||||||
Note: Felicia is only a returning character if Corrin is male, while Jakob is only a returning character if Corrin is female. The returning characters list does not include any characters recruitable in paralogues or xenologues, as the player may not have taken on any available paralogue chapters yet. The list also does not include any bonus units, as they are recruitable at the player's discretion.
Item data
| ||||||||||||||||||||||||
|
Dragon Vein data
The Dragon Vein in this chapter is stated to have the effect "Call an earthquake to break all the pots". Its location changes depending on what difficulty the chapter is played on.
- On Normal and Hard mode:
- On Lunatic mode:
Enemy data
Normal Hard Lunatic
| |||||||||||||||||||||||||||||||||||||||||||||||||||||||||||||||||||||||||||||||||||||||||||||||||||||||||||||||||||||||||||||||||||||||||||||||||||||||||||||||||||||||||||||||||||||||||||||||||||||||||||||||||||||||||||||||||||||||||||||||||||||||||||||||||||||||||||||||||||||||||||||||||||||||||||||||||||||||||||||||||||||||||||||||||||||||||||||||||||||||||||||||||||||||||||||||||||||||||||||||||||||||||||||||||||||||||||||||||||||||||||||||||||||||||||||||||||||||||||||||||||||||||||||||||||||
| |||||||||||||||||||||||||||||||||||||||||||||||||||||||||||||||||||||||||||||||||||||||||||||||||||||||||||||||||||||||||||||||||||||||||||||||||||||||||||||||||||||||||||||||||||||||||||||||||||||||||||||||||||||||||||||||||||||||||||||||||||||||||||||||||||||||||||||||||||||||||||||||||||||||||||||||||||||||||||||||||||||||||||||||||||||||||||||||||||||||||||||||||||||||||||||||||||||||||||||||||||||||||||||||||||||||||||||||||||||||||||||||||||||||||||||||||||||||||||||||||||||||||||||||||||||
| |||||||||||||||||||||||||||||||||||||||||||||||||||||||||||||||||||||||||||||||||||||||||||||||||||||||||||||||||||||||||||||||||||||||||||||||||||||||||||||||||||||||||||||||||||||||||||||||||||||||||||||||||||||||||||||||||||||||||||||||||||||||||||||||||||||||||||||||||||||||||||||||||||||||||||||||||||||||||||||||||||||||||||||||||||||||||||||||||||||||||||||||||||||||||||||||||||||||||||||||||||||||||||||||||||||||||||||||||||||||||||||||||||||||||||||||||||||||||||||||||||||||||||||||||||||
| |||||||||||||||||||||||||||||||||||||||||||||||||||||||||||||||||||||||||||||||||||||||||||||||||||||||||||||||||||||||||||||||||||||||||||||||||||||||||||||||||||||||||||||||||||||||||||||||||||||||||||||||||||||||||||||||||||||||||||||||||||||||||||||||||||||||||||||||||||||||||||||||||||||||||||||||||||||||||||||||||||||||||||||||||||||||||||||||||||||||||||||||||||||||||||||||||||||||||||||||||||||||||||||||||||||||||||||||||||||||||||||||||||||||||||||||||||||||||||||||||||||||||||||||||||||
Reinforcements
- After passing the garden area (reaching row 11)
- 2 (Normal)/4 (Hard/Lunatic) Apothecaries with Steel Yumis; one (Normal)/two (Hard/Lunatic) from the southwestern and southeastern corners of the map each
- 4 Apothecaries with Iron Yumis; two from the southwestern and southeastern corners of the map each
Boss data
- Main article:
Ryoma
Normal Hard/Lunatic
|
|
| ||||||||||||||||||||||||||||||||||||||||||||||||||
Strategy
| This section details unofficial strategies that may help with completion of the chapter. This may not work for everybody. |
The pots in this chapter have a number of potential effects applied to units within a two-square radius of the pot when broken. Medicine pots can restore up to 30% of the target's maximum HP (akin to the Renewal skill), apply +4 to a single one of the target's stats for the remainder of the battle (akin to two triggers of a -taker skill), or apply +2 to two of the target's stats for the remainder of the battle (akin to the usage of a tonic or one trigger of a -taker skill). Poison pots can deal damage equal to 30% of the target's maximum HP (akin to the Renewal skill in reverse), debuff two stats by -5 each (akin to the Defense and Resistance drop caused by an A-rank dagger or shuriken), drop the user's movement to 0 and avoid by -20 for one turn (akin to the Freeze staff and its skill variants), inflict silence (akin to the Silence rod), or halve the target's maximum HP for the remainder of the battle (akin to the Hexing Rod). The terrain indicator, when the cursor is over a pot, will reveal whether a pot is medicine or poison, but will not narrow down specific effects.
If Jakob has or nearly has Swordbreaker and you've recruited Dwyer, you're in very good shape. Elise has a severe case of plot-itis, so she's not allowed to take part in this chapter. Dwyer serves as the best option for a healer in her absence since Jakob does far better as a combat unit. You also receive Laslow and Peri at the beginning of the chapter. Laslow is a Mercenary with better HP and Strength than Selena, but worse Speed, Defense, and Resistance. Peri is one of the only Cavaliers to specialize in lances instead of swords (the other being Gunter), and she has better Speed and weapon levels than Silas is likely to have.
You only have 16 turns to skewer Ryoma or escape, so let's move, move, move! The medicine pot to the right buffs your Magic by 4, while the one in the center buffs your Defense by 4. If you can buff Nyx/Odin and Dwyer with the right pot and your bulkier units with the center, it'll help quite a bit. Afterwards, a Wyvern with a Hand Axe can wound the Ninja from relative safety in the central lake. Effie and Wyvern Lord Jakob's high Defense can help you tear through Saizo, Kagero, and their cronies. As you push north, beware the Shrine Maiden with Silence. Camilla makes good bait for her since she's primarily a physical unit. Nyx/Odin and Dwyer, on the other hand, will be crippled for a turn should they be silenced.
The biggest problem with this map is making it through the horde of Apothecaries without getting yourself killed. Complicating matters is the fact that none of your royals will be able to safely trip the Dragon Vein because they are riding wyverns (Corrin and Camilla), defenseless (Dwyer), or indisposed (Elise). The poison jar directly to the left of the bottom-right pillar only deals a negligible amount of damage, so that's the safest one to break and slip through. Beware the Freeze Shrine Maiden and ESPECIALLY the Entrap Shrine Maiden, as they can cripple an unsuspecting unit or even get them killed if you're not careful. Sending Effie into the Entrap range is a good way to take care of that Shrine Maiden and her Samurai cronies. Carefully make your way to Ryoma's position. You definitely want to get your hands on the two chests, so make sure you get them before escaping or defeating Ryoma. Jakob's Swordbreaker makes Ryoma an utter pushover. If you don't have Swordbreaker, throw Effie at him and hope for the best.
Etymology and other languages
| Names, etymology, and in other regions | ||
|---|---|---|
| Language | Name | Definition, etymology, and notes |
| English |
Bitter Intrigue |
-- |
| Japanese |
昏き企み |
Dark Plot |
| Spanish |
Intriga amarga |
Bitter intrigue |
| French |
Cruelle intrigue |
Cruel intrigue |
| German |
Bittere Intrigen |
Bitter Intrigue |
| Italian |
Un amaro intrigo |
A bitter intrigue |
| Korean |
어둠의 계략 |
Dark scheme |
Gallery
This section has been marked as a stub. Please help improve the page by adding information.
References
| ← Rainbow Sage • | Bitter Intrigue | • Uprising → |
|---|

