| Site News |
|---|
| Warning: This wiki contains spoilers. Read at your own risk! Social media: If you would like, please join our Discord server, and/or follow us on Twitter (X) or Tumblr! |
Preparations: Difference between revisions
Thecornerman (talk | contribs) m (Text replacement - "\b([Aa])ct (\d+)" to "$1ct $2") |
|||
| (37 intermediate revisions by 8 users not shown) | |||
| Line 1: | Line 1: | ||
:''This page is about the gameplay mechanic. For the chapter in | :''This page is about the gameplay mechanic. For the chapter in ''The Blazing Blade'', see [[Battle Preparations]].'' | ||
{{images}} | {{images}} | ||
[[File:Ss fe08 preparations menu.png|thumb|The preparations menu in {{title|The Sacred Stones}}.]] | |||
{{quote|Sire, I believe it prudent that we start taking time to prepare our troops before each battle. We should select the warriors best suited for the situation and outfit them with the right weapons and items accordingly.|[[Malledus]]}} | |||
The '''preparations''' menu (Japanese: {{hl|進撃準備|Shingeki junbi}} ''advance preparation''), also known as '''battle preparations''' or '''battle prep''' in {{title|Three Houses}}, is a pre-battle management system that allows players to make adjustments to their army to prepare for an upcoming battle. It usually takes place after a chapter's opening cutscene, though some games may include additional cutscenes after preparations are concluded. Before starting a chapter, players can use the preparations menu to manage unit inventories, view the map, change unit starting positions, as well as several other options. The preparations menu appears in every game except for {{FE2}} and {{FE4}}; in the former's case, the player's army is managed on the [[world map]], while for the latter, it is managed from within [[castle]]s. | The '''preparations''' menu (Japanese: {{hl|進撃準備|Shingeki junbi}} ''advance preparation''), also known as '''battle preparations''' or '''battle prep''' in {{title|Three Houses}}, is a pre-battle management system that allows players to make adjustments to their army to prepare for an upcoming battle. It usually takes place after a chapter's opening cutscene, though some games may include additional cutscenes after preparations are concluded. Before starting a chapter, players can use the preparations menu to manage unit inventories, view the map, change unit starting positions, as well as several other options. The preparations menu appears in every game except for {{FE2}} and {{FE4}}; in the former's case, the player's army is managed on the [[world map]], while for the latter, it is managed from within [[castle]]s. | ||
| Line 11: | Line 14: | ||
The preparations menu becomes available at the start of the following chapters: | The preparations menu becomes available at the start of the following chapters: | ||
*{{FE1}}: [[Battle in the Lea|Chapter 4]] onward | *{{FE1}}: [[Battle in the Lea|Chapter 4]] onward | ||
*{{FE3}} | *{{FE3}} | ||
**Book 1: [[ | **Book 1: [[The Pirates of Galder|Chapter 2]] onward | ||
**Book 2: [[ | **Book 2: [[Rebellion at Macedon|Chapter 2]] through [[The Dragon Altar|Endgame 2 part 1]] | ||
*{{FE5}}: [[ | *{{FE5}}: [[Mount Violdrake|Chapter 8]] onward | ||
*{{FE6}}: [[Ensnared|Chapter 6]] through [[Legends and Lies|Chapter 24]] | *{{FE6}}: [[Ensnared|Chapter 6]] through [[Legends and Lies|Chapter 24]] | ||
*{{FE7}} | *{{FE7}} | ||
**Lyn's tale: [[Siblings Abroad|Chapter 7]] onward | **Lyn's tale: [[Siblings Abroad|Chapter 7]] onward | ||
**Eliwood's and Hector's tales: [[False Friends|Chapter 14]] through [[Light (part 1)|Final Chapter part 1]] | **Eliwood's and Hector's tales: [[False Friends|Chapter 14]] through [[Light (part 1)|Final Chapter part 1]] | ||
*{{FE8}}: [[Ancient Horrors|Chapter 4]] onward, except for [[Unbroken Heart|Chapter 5x]] and [[Sacred Stone (part 2)|Final Chapter part 2]] | *{{FE8}}: [[Ancient Horrors|Chapter 4]] onward, except for [[Unbroken Heart|Chapter 5x]] and [[Sacred Stone (part 2)|Final Chapter part 2]] | ||
*{{FE9}}: [[Pirates Aground|Chapter 3]] onward | *{{FE9}}: [[Pirates Aground|Chapter 3]] onward | ||
*{{FE10}} | *{{FE10}} | ||
**Part 1: [[A Distant Voice|Chapter 4]] through [[Daein, Arise!|Endgame]] | **Part 1: [[A Distant Voice|Chapter 4]] through [[Daein, Arise!|Endgame]] | ||
**Part 2: [[Geoffrey's Charge|Chapter 3]] through [[Elincia's Gambit|Endgame]] | **Part 2: [[Geoffrey's Charge|Chapter 3]] through [[Elincia's Gambit|Endgame]] | ||
**Part 3: [[Stormclouds|Chapter 2]] through [[From Pain, Awakening|Endgame]] | **Part 3: [[Stormclouds|Chapter 2]] through [[From Pain, Awakening|Endgame]] | ||
**Part 4: [[Chaos Named (chapter)|Prologue]] onward | **Part 4: [[Chaos Named (chapter)|Prologue]] onward | ||
*{{FE11}}: [[Battle in the Lea|Chapter 4]] onward | *{{FE11}}: [[Battle in the Lea|Chapter 4]] onward | ||
*{{FE12}}: [[Bonds|Prologue 6]] onward | *{{FE12}}: [[Bonds|Prologue 6]] onward | ||
*{{FE13}}: [[Warrior Realm|Chapter 3]] onward | *{{FE13}}: [[Warrior Realm|Chapter 3]] onward | ||
*{{FE14}}: Chapter 7 of each route onward | *{{FE14}}: Chapter 7 of each route onward | ||
*{{FE15}}: [[Storming of Ram Valley|Act 1 map 4]] onward, except for [[dungeon]] battles, [[skirmish]]es started by enemies, and [[Zofia Castle Battle|Act 2 map 10]] | *{{FE15}}: [[Storming of Ram Valley|Act 1 map 4]] onward, except for [[dungeon]] battles, [[skirmish]]es started by enemies, and [[Zofia Castle Battle|Act 2 map 10]] | ||
*{{FE16}}: [[Three Houses (chapter)|Chapter 1]] onward, except for the [[Reunion at Dawn|first chapter]] of Part 2 (not Crimson Flower) | *{{FE16}}: [[Three Houses (Three Houses chapter)|Chapter 1]] onward, except for the [[Reunion at Dawn|first chapter]] of Part 2 (not Crimson Flower) | ||
*{{FE17}}: [[A Land in Bloom|Chapter 4]] onward | |||
==Features== | ==Features== | ||
===Pick Units=== | ===Pick Units=== | ||
Before the battle begins, players can select which units to deploy for the following battle, as many as the chapter allows. In all games, almost all chapters require the player to deploy the main | [[File:Ss fe03 unit select.png|200px|thumb|Selecting units in {{title|Mystery of the Emblem}}.]] | ||
Before the battle begins, players can select which units to deploy for the following battle, as many as the chapter allows. In all games, almost all chapters require the player to deploy the main character, and is not given the option to un-deploy them. Certain chapters may also force other units to be deployed for plot reasons, or similarly force them to be undeployed. Worth noting is that, while all chapters typically have a maximum number of units that can be deployed, very few have a minimum other than forced units mentioned previously; therefore, if the player has exactly enough units to meet the maximum, but feels certain units may not survive, they can often choose to simply not deploy them at all to save them the risk of [[death]]. | |||
===Inventory=== | ===Inventory=== | ||
{{main|Inventory| | {{main|Inventory|trade}} | ||
The Inventory option, called Items in older games, allows the player to change each unit's equipped items, access the [[supply convoy]], and have units [[trade]] between each other. As well, it allows unit to use certain consumable items such as stat boosters or [[class change]] items, though this cannot be done in ''The Binding Blade''. It can also be used to view a list of all items currently in the convoy or possessed by a unit. | The Inventory option, called Items in older games, allows the player to change each unit's equipped items, access the [[supply convoy]], and have units [[trade]] between each other. As well, it allows unit to use certain consumable items such as stat boosters or [[class change]] items, though this cannot be done in ''The Binding Blade''. It can also be used to view a list of all items currently in the convoy or possessed by a unit. | ||
In ''Thracia 776'', ''The | [[File:Ss fe16 change class prep menu.jpg|200px|thumb|[[Reclass]]ing units in {{title|Three Houses}}.]] | ||
''Three Houses'' expands the Inventory option to allow the player to manage each unit's [[abilities]], [[combat art]]s, and [[battalion]]s, as well as to [[reclass]] units. | |||
====Armory==== | |||
In ''Thracia 776'', ''The Binding Blade'', ''The Sacred Stones'', ''Shadow Dragon'', and ''New Mystery of the Emblem'', the preparations screen also includes an [[armory]] that provides basic weapons (i.e. [[Iron Sword]]s, [[Fire]], etc.) and staves; this armory can also be used to sell unwanted items, just like with any shop. In ''The Binding Blade'' and ''The Sacred Stones'', items in the armory are 50% more expensive; additionally, in ''The Binding Blade'', the armory is disabled on [[Hard Mode]]. In ''Shadow Dragon'' and ''New Mystery of the Emblem'' specifically, the armory also includes a [[forge]], where a single item can be forged to the player's discretion each chapter. In ''The Blazing Blade'', the player can sell items during preparations, but they have no way to purchase any. | |||
'' | {{Tab | ||
|header=Armory | |||
|width=60% | |||
|constyle=text-align: center | |||
|tab1=''Thracia 776'' | |||
|tab2=''The Binding Blade'' | |||
|tab3=''The Sacred Stones'' | |||
|tab4=''Shadow Dragon'' | |||
|tab5=''New Mystery of the Emblem'' | |||
|content1={{tablebegin}} class="wikitable" style="border-radius: 15px; border-collapse: separate; margin: auto; background: none; border: none" | |||
!style="border-top-left-radius: 15px; width: 5%" {{!}} | |||
!style="width: 45%" {{!}} Name | |||
!style="width: 25%" {{!}} Stock | |||
!style="border-top-right-radius: 15px; width: 25%" {{!}} Price | |||
{{!-}} | |||
{{!}} [[File:Is snes03 iron sword.png]] | |||
{{!}} [[Iron Sword]] | |||
{{!}} ∞ | |||
{{!}} 2200 | |||
{{!-}} | |||
{{!}} [[File:Is snes03 iron lance.png]] | |||
{{!}} [[Iron Lance]] | |||
{{!}} ∞ | |||
{{!}} 2200 | |||
{{!-}} | |||
{{!}} [[File:Is snes03 iron axe.png]] | |||
{{!}} [[Iron Axe]] | |||
{{!}} ∞ | |||
{{!}} 1100 | |||
{{!-}} | |||
{{!}} style="border-bottom-left-radius: 15px" {{!}} [[File:Is snes03 iron bow.png]] | |||
{{!}} [[Iron Bow]] | |||
{{!}} ∞ | |||
{{!}} style="border-bottom-right-radius: 15px" {{!}} 2200 | |||
{{tableend}} | |||
|content2={{tablebegin}} class="wikitable" style="border-radius: 15px; border-collapse: separate; margin: auto; background: none; border: none" | |||
!style="border-top-left-radius: 15px; width: 5%" {{!}} | |||
!style="width: 45%" {{!}} Name | |||
!style="width: 25%" {{!}} Stock | |||
!style="border-top-right-radius: 15px; width: 25%" {{!}} Price | |||
{{!-}} | |||
{{!}} [[File:Is gba iron sword.png]] | |||
{{!}} [[Iron Sword]] | |||
{{!}} ∞ | |||
{{!}} 690 | |||
{{!-}} | |||
{{!}} [[File:Is gba iron lance.png]] | |||
{{!}} [[Iron Lance]] | |||
{{!}} ∞ | |||
{{!}} 540 | |||
{{!-}} | |||
{{!}} [[File:Is gba iron axe.png]] | |||
{{!}} [[Iron Axe]] | |||
{{!}} ∞ | |||
{{!}} 405 | |||
{{!-}} | |||
{{!}} [[File:Is gba iron bow.png]] | |||
{{!}} [[Iron Bow]] | |||
{{!}} ∞ | |||
{{!}} 810 | |||
{{!-}} | |||
{{!}} [[File:Is gba fire.png]] | |||
{{!}} [[Fire]] | |||
{{!}} ∞ | |||
{{!}} 630 | |||
{{!-}} | |||
{{!}} style="border-bottom-left-radius: 15px" {{!}} [[File:Is gba heal.png]] | |||
{{!}} [[Heal]] | |||
{{!}} ∞ | |||
{{!}} style="border-bottom-right-radius: 15px" {{!}} 900 | |||
{{tableend}} | |||
|content3={{tablebegin}} class="wikitable" style="border-radius: 15px; border-collapse: separate; margin: auto; background: none; border: none" | |||
!style="border-top-left-radius: 15px; width: 5%" {{!}} | |||
!style="width: 45%" {{!}} Name | |||
!style="width: 25%" {{!}} Stock | |||
!style="border-top-right-radius: 15px; width: 25%" {{!}} Price | |||
{{!-}} | |||
{{!}} [[File:Is gba iron sword.png]] | |||
{{!}} [[Iron Sword]] | |||
{{!}} ∞ | |||
{{!}} 690 | |||
{{!-}} | |||
{{!}} [[File:Is gba iron lance.png]] | |||
{{!}} [[Iron Lance]] | |||
{{!}} ∞ | |||
{{!}} 540 | |||
{{!-}} | |||
{{!}} [[File:Is gba iron axe.png]] | |||
{{!}} [[Iron Axe]] | |||
{{!}} ∞ | |||
{{!}} 405 | |||
{{!-}} | |||
{{!}} [[File:Is gba iron bow.png]] | |||
{{!}} [[Iron Bow]] | |||
{{!}} ∞ | |||
{{!}} 810 | |||
{{!-}} | |||
{{!}} [[File:Is gba fire.png]] | |||
{{!}} [[Fire]] | |||
{{!}} ∞ | |||
{{!}} 840 | |||
{{!-}} | |||
{{!}} [[File:Is gba flux.png]] | |||
{{!}} [[Flux]] | |||
{{!}} ∞ | |||
{{!}} 1350 | |||
{{!-}} | |||
{{!}} [[File:Is gba lightning.png]] | |||
{{!}} [[Lightning]] | |||
{{!}} ∞ | |||
{{!}} 945 | |||
{{!-}} | |||
{{!}} style="border-bottom-left-radius: 15px" {{!}} [[File:Is gba heal.png]] | |||
{{!}} [[Heal]] | |||
{{!}} ∞ | |||
{{!}} style="border-bottom-right-radius: 15px" {{!}} 900 | |||
{{tableend}} | |||
|content4={{tablebegin}} class="wikitable" style="border-radius: 15px; border-collapse: separate; margin: auto; background: none; border: none" | |||
!style="border-top-left-radius: 15px; width: 5%" {{!}} | |||
!style="width: 45%" {{!}} Name | |||
!style="width: 25%" {{!}} Stock | |||
!style="border-top-right-radius: 15px; width: 25%" {{!}} Price | |||
{{!-}} | |||
{{!}} [[File:Is ds iron sword.png]] | |||
{{!}} [[Iron Sword]] | |||
{{!}} ∞ | |||
{{!}} 400 | |||
{{!-}} | |||
{{!}} [[File:Is ds iron lance.png]] | |||
{{!}} [[Iron Lance]] | |||
{{!}} ∞ | |||
{{!}} 480 | |||
{{!-}} | |||
{{!}} [[File:Is ds iron axe.png]] | |||
{{!}} [[Iron Axe]] | |||
{{!}} ∞ | |||
{{!}} 320 | |||
{{!-}} | |||
{{!}} [[File:Is ds iron bow.png]] | |||
{{!}} [[Iron Bow]] | |||
{{!}} ∞ | |||
{{!}} 440 | |||
{{!-}} | |||
{{!}} [[File:Is ds fire.png]] | |||
{{!}} [[Fire]] | |||
{{!}} ∞ | |||
{{!}} 300 | |||
{{!-}} | |||
{{!}} style="border-bottom-left-radius: 15px" {{!}} [[File:Is ds heal.png]] | |||
{{!}} [[Heal]] | |||
{{!}} ∞ | |||
{{!}} style="border-bottom-right-radius: 15px" {{!}} 800 | |||
{{tableend}} | |||
|content5={{tablebegin}} class="wikitable" style="border-radius: 15px; border-collapse: separate; margin: auto; background: none; border: none" | |||
!style="border-top-left-radius: 15px; width: 5%" {{!}} | |||
!style="width: 45%" {{!}} Name | |||
!style="width: 25%" {{!}} Stock | |||
!style="border-top-right-radius: 15px; width: 25%" {{!}} Price | |||
{{!-}} | |||
{{!}} [[File:Is ds iron sword.png]] | |||
{{!}} [[Iron Sword]] | |||
{{!}} ∞ | |||
{{!}} 400 | |||
{{!-}} | |||
{{!}} [[File:Is ds iron lance.png]] | |||
{{!}} [[Iron Lance]] | |||
{{!}} ∞ | |||
{{!}} 480 | |||
{{!-}} | |||
{{!}} [[File:Is ds iron axe.png]] | |||
{{!}} [[Iron Axe]] | |||
{{!}} ∞ | |||
{{!}} 320 | |||
{{!-}} | |||
{{!}} [[File:Is ds iron bow.png]] | |||
{{!}} [[Iron Bow]] | |||
{{!}} ∞ | |||
{{!}} 440 | |||
{{!-}} | |||
{{!}} [[File:Is ds fire.png]] | |||
{{!}} [[Fire]] | |||
{{!}} ∞ | |||
{{!}} 300 | |||
{{!-}} | |||
{{!}} [[File:Is ds heal.png]] | |||
{{!}} [[Heal]] | |||
{{!}} ∞ | |||
{{!}} 800 | |||
{{!-}} | |||
{{!}} [[File:Is ds energy drop.png]] | |||
{{!}} [[Energy Drop]] | |||
{{!}} Limited: 3 | |||
{{!}} 2500 | |||
{{!-}} | |||
{{!}} [[File:Is ds spirit dust.png]] | |||
{{!}} [[Spirit Dust]] | |||
{{!}} Limited: 3 | |||
{{!}} 2500 | |||
{{!-}} | |||
{{!}} [[File:Is ds secret book.png]] | |||
{{!}} [[Secret Book]] | |||
{{!}} Limited: 3 | |||
{{!}} 2500 | |||
{{!-}} | |||
{{!}} [[File:Is ds speedwing.png]] | |||
{{!}} [[Speedwing]] | |||
{{!}} Limited: 3 | |||
{{!}} 2500 | |||
{{!-}} | |||
{{!}} [[File:Is ds goddess icon.png]] | |||
{{!}} [[Goddess Icon]] | |||
{{!}} Limited: 3 | |||
{{!}} 2500 | |||
{{!-}} | |||
{{!}} [[File:Is ds dracoshield.png]] | |||
{{!}} [[Dracoshield]] | |||
{{!}} Limited: 3 | |||
{{!}} 2500 | |||
{{!-}} | |||
{{!}} [[File:Is ds talisman.png]] | |||
{{!}} [[Talisman]] | |||
{{!}} Limited: 3 | |||
{{!}} 2500 | |||
{{!-}} | |||
{{!}} [[File:Is ds seraph robe.png]] | |||
{{!}} [[Seraph Robe]] | |||
{{!}} Limited: 3 | |||
{{!}} 2500 | |||
{{!-}} | |||
{{!}} style="border-bottom-left-radius: 15px" {{!}} [[File:Is ds arms scroll.png]] | |||
{{!}} [[Arms Scroll]] | |||
{{!}} Limited: 3 | |||
{{!}} style="border-bottom-right-radius: 15px" {{!}} 2500 | |||
{{tableend}} | |||
*<small>Note: The stat boosters in ''New Mystery of the Emblem'' are only purchasable after completing Lunatic Mode at least once.</small> | |||
}} | |||
===Support=== | ===Support=== | ||
{{main|Support}} | {{main|Support}} | ||
In | In ''The Blazing Blade'' and ''The Sacred Stones'', this option presents a list of all units, their [[Affinity|affinities]], and each of their available support partners. It additionally displays which of the supports the unit has achieved, as well as how many more supports the unit can achieve for the rest of the game. | ||
In ''Awakening'' and ''Fates'', on top of the aforementioned features, the support option also allows players to view new support conversations in full, as opposed to in previous games, where they were instead viewed during the battle. | In ''Awakening'' and ''Fates'', on top of the aforementioned features, the support option also allows players to view new support conversations in full, as opposed to in previous games, where they were instead viewed during the battle. | ||
| Line 55: | Line 300: | ||
Before the battle begins, the entire map can be viewed, along with each enemy unit and their stats. Examining the map beforehand is key to forming a viable strategy, as foreknowledge of factors such as [[terrain]] and how far units can move will much better allow players to plan out each turn. | Before the battle begins, the entire map can be viewed, along with each enemy unit and their stats. Examining the map beforehand is key to forming a viable strategy, as foreknowledge of factors such as [[terrain]] and how far units can move will much better allow players to plan out each turn. | ||
By selecting "Formation"/"Reposition", the position of each playable unit can also be selected based on a set of given starting positions. In most cases, the main | By selecting "Formation"/"Reposition", the position of each playable unit can also be selected based on a set of given starting positions. In most cases, the main character's position cannot be changed. Some games, such as ''The Blazing Blade'', ''The Sacred Stones'', and ''Fates'' allow forced units other than the main character to change their position, while others such as ''Radiant Dawn'' force them to a certain starting position that cannot be changed. From ''Radiant Dawn'' onward, the "Formation" option was merged into the general "View Map" option. In ''Fates'', units can also be chosen to start in [[pair up]] when the battle begins. | ||
In very rare cases, [[reinforcement]]s may appear on the map just after preparations are concluded, though later games this is handled by showing them on the map during preparations, then making them appear to arrive on the map through a scripted sequence after preparations are concluded. | In very rare cases, [[reinforcement]]s may appear on the map just after preparations are concluded, though later games this is handled by showing them on the map during preparations, then making them appear to arrive on the map through a scripted sequence after preparations are concluded. | ||
In ''Thracia 776'', the option to view the map is disabled during chapters that take place in [[Fog of War]], unlike later games, which allowed the map to be viewed regardless in most cases. This is likely due to Fog of War being depicted as pitch black in said game. | |||
===Options=== | ===Options=== | ||
| Line 84: | Line 331: | ||
===Guide=== | ===Guide=== | ||
Available only in ''Awakening'', ''Fates'', ''Echoes: Shadows of Valentia'', and ''Three Houses'', previous tutorial slide guides can be viewed at the player's leisure. If the chapter has additional guides to explain map-specific features, such as the pots in [[Bitter Intrigue|''Conquest'' Chapter 12]], those can be viewed as well. In ''Three Houses'', this option is a subset of the "System" option. | Available only in ''Awakening'', ''Fates'', ''Echoes: Shadows of Valentia'', and ''Three Houses'', previous tutorial slide guides can be viewed at the player's leisure. If the chapter has additional guides to explain map-specific features, such as the pots in [[Bitter Intrigue|''Conquest'' Chapter 12]], those can be viewed as well. In ''Three Houses'', this option is a subset of the "System" option. | ||
===Marketplace=== | ===Marketplace=== | ||
Available | Available in ''Three Houses'' and ''Engage'', the player can freely buy items from the same [[Armory]], Item Shop, Battalion Guild, and [[Forge|Blacksmith]] that appear in [[Garreg Mach Monastery]] for the former, and only the Armory and Item Shop on the [[Somniel]] for the latter. This does not include merchants that arrive from completing certain quests, however. | ||
===Fight=== | ===Fight=== | ||
After the player is done, preparations will end and the battle will begin when this option is selected. The menu cannot be accessed again until the beginning of the next chapter. Certain chapters in certain games may also play a cutscene between the end of preparations and the start of the battle proper. | After the player is done, preparations will end and the battle will begin when this option is selected. The menu cannot be accessed again until the beginning of the next chapter. Certain chapters in certain games may also play a cutscene between the end of preparations and the start of the battle proper. | ||
Earlier games do not have a separate "Fight" option in the menu, but instead the chapter is started by pressing the Start button. Certain games require the Start button to be pressed in the "Pick Units" menu, while others allow it to be pressed in other parts of the preparations menu. | |||
==In ''Fire Emblem Warriors''== | ==In ''Fire Emblem Warriors''== | ||
The spinoff game {{ | The spinoff game {{FEWA1}} also features a similar preparations menu to the one included in most games, albeit with some alterations to fit the gameplay. Like in the main {{FES}}, the preparations menu allows players to manage unit inventories and starting positions. Unique to the game, however, are the options to give units orders and commands, manage [[Auto-Battle|autobattle]] behaviors, as well as to change their [[Costumes in Warriors|costumes]]. The menu also displays the chapter's victory and defeat conditions, as well as the conditions for obtaining [[Anna's Memento]]s. The menu additionally allows the player to return to camp, though this will close the preparations menu prematurely. | ||
The preparations menu becomes available starting in [[Dragon Valley Temple|Chapter 3]]. | |||
<!-- | |||
==Trivia== | ==Trivia== | ||
--> | |||
==Etymology and other languages== | ==Etymology and other languages== | ||
{{sectstub}} | {{sectstub}} | ||
{{Names | {{Names | ||
|eng-name=Preparations | |eng-name=Preparations | ||
| | |jpn-name={{h|進撃準備|Shingeki junbi}} | ||
| | |jpn-mean=Advance preparation (i.e., preparation for an advance) | ||
|span-name= | |span-name= | ||
|span-mean= | |span-mean= | ||
|fren-name=Préparatifs de bataille | |fren-name=Préparatifs de bataille | ||
|fren-mean=Battle preparations | |fren-mean=Battle preparations | ||
|ger-name= | |ger-name=*Vorbereitungen | ||
|ger-mean= | *Kampfvorbereitungen | ||
|ger-mean=*Preparations | |||
*Battle Preparations | |||
|ital-name= | |ital-name= | ||
|ital-mean= | |ital-mean= | ||
| Line 118: | Line 368: | ||
==Gallery== | ==Gallery== | ||
{{sectstub}} | {{sectstub}} | ||
<gallery> | |||
Ss fe03 preparations.png|The preparations menu in {{title|Mystery of the Emblem}}. | |||
Ss fe08 preparations menu.png|The preparations menu in {{title|The Sacred Stones}}. | |||
</gallery> | |||
{{NavMech}} | {{NavMech}} | ||
Latest revision as of 21:52, 28 March 2024
- This page is about the gameplay mechanic. For the chapter in The Blazing Blade, see Battle Preparations.

|
It has been requested that image(s) be placed in this page or section. Please submit images to help improve this page and talk on this page's talk page about what images are needed. Remove this when this has been fixed. |

| “ | Sire, I believe it prudent that we start taking time to prepare our troops before each battle. We should select the warriors best suited for the situation and outfit them with the right weapons and items accordingly. | ” | — Malledus |
|---|
The preparations menu (Japanese: 進撃準備 advance preparation), also known as battle preparations or battle prep in Three Houses, is a pre-battle management system that allows players to make adjustments to their army to prepare for an upcoming battle. It usually takes place after a chapter's opening cutscene, though some games may include additional cutscenes after preparations are concluded. Before starting a chapter, players can use the preparations menu to manage unit inventories, view the map, change unit starting positions, as well as several other options. The preparations menu appears in every game except for Fire Emblem Gaiden and Fire Emblem: Genealogy of the Holy War; in the former's case, the player's army is managed on the world map, while for the latter, it is managed from within castles.
Every iteration of the preparations menu has allowed the player to select which units to deploy. Most have also included options to select the initial positions of units on the map, and to manage inventories. The menu typically also allows players to view the chapter's victory and defeat conditions, as well as the number of units initially on the field. In games that also feature a world map or base, the preparations menu can usually be prematurely ended to return to either, though this is not the case for Fire Emblem: The Sacred Stones.
Access
The preparations menu typically becomes available early on in the game, though it is only given after a few chapters. After become available, it remains available for the rest of the game, except for certain cases, mainly when the game's final chapter has multiple maps.
The preparations menu becomes available at the start of the following chapters:
- Fire Emblem: Shadow Dragon & the Blade of Light: Chapter 4 onward
- Fire Emblem: Mystery of the Emblem
- Book 1: Chapter 2 onward
- Book 2: Chapter 2 through Endgame 2 part 1
- Fire Emblem: Thracia 776: Chapter 8 onward
- Fire Emblem: The Binding Blade: Chapter 6 through Chapter 24
- Fire Emblem: The Blazing Blade
- Lyn's tale: Chapter 7 onward
- Eliwood's and Hector's tales: Chapter 14 through Final Chapter part 1
- Fire Emblem: The Sacred Stones: Chapter 4 onward, except for Chapter 5x and Final Chapter part 2
- Fire Emblem: Path of Radiance: Chapter 3 onward
- Fire Emblem: Radiant Dawn
- Fire Emblem: Shadow Dragon: Chapter 4 onward
- Fire Emblem: New Mystery of the Emblem: Prologue 6 onward
- Fire Emblem Awakening: Chapter 3 onward
- Fire Emblem Fates: Chapter 7 of each route onward
- Fire Emblem Echoes: Shadows of Valentia: Act 1 map 4 onward, except for dungeon battles, skirmishes started by enemies, and Act 2 map 10
- Fire Emblem: Three Houses: Chapter 1 onward, except for the first chapter of Part 2 (not Crimson Flower)
- Fire Emblem Engage: Chapter 4 onward
Features
Pick Units

Before the battle begins, players can select which units to deploy for the following battle, as many as the chapter allows. In all games, almost all chapters require the player to deploy the main character, and is not given the option to un-deploy them. Certain chapters may also force other units to be deployed for plot reasons, or similarly force them to be undeployed. Worth noting is that, while all chapters typically have a maximum number of units that can be deployed, very few have a minimum other than forced units mentioned previously; therefore, if the player has exactly enough units to meet the maximum, but feels certain units may not survive, they can often choose to simply not deploy them at all to save them the risk of death.
Inventory
The Inventory option, called Items in older games, allows the player to change each unit's equipped items, access the supply convoy, and have units trade between each other. As well, it allows unit to use certain consumable items such as stat boosters or class change items, though this cannot be done in The Binding Blade. It can also be used to view a list of all items currently in the convoy or possessed by a unit.

Three Houses expands the Inventory option to allow the player to manage each unit's abilities, combat arts, and battalions, as well as to reclass units.
Armory
In Thracia 776, The Binding Blade, The Sacred Stones, Shadow Dragon, and New Mystery of the Emblem, the preparations screen also includes an armory that provides basic weapons (i.e. Iron Swords, Fire, etc.) and staves; this armory can also be used to sell unwanted items, just like with any shop. In The Binding Blade and The Sacred Stones, items in the armory are 50% more expensive; additionally, in The Binding Blade, the armory is disabled on Hard Mode. In Shadow Dragon and New Mystery of the Emblem specifically, the armory also includes a forge, where a single item can be forged to the player's discretion each chapter. In The Blazing Blade, the player can sell items during preparations, but they have no way to purchase any.
Thracia 776 The Binding Blade The Sacred Stones Shadow Dragon New Mystery of the Emblem
| Name | Stock | Price | |
|---|---|---|---|
| Iron Sword | ∞ | 2200 | |
| Iron Lance | ∞ | 2200 | |
| Iron Axe | ∞ | 1100 | |
| Iron Bow | ∞ | 2200 |
Support
- Main article:
Support
In The Blazing Blade and The Sacred Stones, this option presents a list of all units, their affinities, and each of their available support partners. It additionally displays which of the supports the unit has achieved, as well as how many more supports the unit can achieve for the rest of the game.
In Awakening and Fates, on top of the aforementioned features, the support option also allows players to view new support conversations in full, as opposed to in previous games, where they were instead viewed during the battle.
View Map
Before the battle begins, the entire map can be viewed, along with each enemy unit and their stats. Examining the map beforehand is key to forming a viable strategy, as foreknowledge of factors such as terrain and how far units can move will much better allow players to plan out each turn.
By selecting "Formation"/"Reposition", the position of each playable unit can also be selected based on a set of given starting positions. In most cases, the main character's position cannot be changed. Some games, such as The Blazing Blade, The Sacred Stones, and Fates allow forced units other than the main character to change their position, while others such as Radiant Dawn force them to a certain starting position that cannot be changed. From Radiant Dawn onward, the "Formation" option was merged into the general "View Map" option. In Fates, units can also be chosen to start in pair up when the battle begins.
In very rare cases, reinforcements may appear on the map just after preparations are concluded, though later games this is handled by showing them on the map during preparations, then making them appear to arrive on the map through a scripted sequence after preparations are concluded.
In Thracia 776, the option to view the map is disabled during chapters that take place in Fog of War, unlike later games, which allowed the map to be viewed regardless in most cases. This is likely due to Fog of War being depicted as pitch black in said game.
Options
The player can adjust game speed, battle animations, among other things. These options are also available during battle, or on the world map or base if the game includes either. In Three Houses, this is a subset of the "System" option.
Save
Players can save their game progress in the preparations menu; doing so will also save any changes to unit inventories or starting positions made beforehand. This can be used to avoid re-doing all preparation work from the beginning if the chapter is failed or restarted.
Conditions
Starting in The Binding Blade, the preparations menu would display the chapter's victory condition. In Path of Radiance and Radiant Dawn, the chapter's victory and defeat conditions can be viewed through the "Conditions" option, along with the initial number of units in the ally army, the enemy army, as well as the partner and neutral factions if applicable. Shadow Dragon through Echoes: Shadows of Valentia would later simply display the conditions on the DS's top screen or the 3DS's bottom screen.
Reclass
- Main article:
Reclass
Available in Shadow Dragon and New Mystery of the Emblem only, units can change their classes to any other class available to them, so long as the army has not reached the maximum number of that class's class group.
Talk
Available only in New Mystery of the Emblem, the player can view conversations providing information on the upcoming chapter, or simply providing character development and dialogue. This feature can be seen as an analogue to Path of Radiance's and Radiant Dawn's base conversations.
Check Others
- Main article:
Everyone's Conditions
Available only in New Mystery of the Emblem, the player can view randomly generated clock-based events that can grant temporary stat boosts to units, special items, experience, or support points.
Equip Skills
- Main article:
Skills
In Awakening and Fates only, units can change their currently equipped skills just before battle, as well as reorder them.
Guide
Available only in Awakening, Fates, Echoes: Shadows of Valentia, and Three Houses, previous tutorial slide guides can be viewed at the player's leisure. If the chapter has additional guides to explain map-specific features, such as the pots in Conquest Chapter 12, those can be viewed as well. In Three Houses, this option is a subset of the "System" option.
Marketplace
Available in Three Houses and Engage, the player can freely buy items from the same Armory, Item Shop, Battalion Guild, and Blacksmith that appear in Garreg Mach Monastery for the former, and only the Armory and Item Shop on the Somniel for the latter. This does not include merchants that arrive from completing certain quests, however.
Fight
After the player is done, preparations will end and the battle will begin when this option is selected. The menu cannot be accessed again until the beginning of the next chapter. Certain chapters in certain games may also play a cutscene between the end of preparations and the start of the battle proper.
Earlier games do not have a separate "Fight" option in the menu, but instead the chapter is started by pressing the Start button. Certain games require the Start button to be pressed in the "Pick Units" menu, while others allow it to be pressed in other parts of the preparations menu.
In Fire Emblem Warriors
The spinoff game Fire Emblem Warriors also features a similar preparations menu to the one included in most games, albeit with some alterations to fit the gameplay. Like in the main Fire Emblem series, the preparations menu allows players to manage unit inventories and starting positions. Unique to the game, however, are the options to give units orders and commands, manage autobattle behaviors, as well as to change their costumes. The menu also displays the chapter's victory and defeat conditions, as well as the conditions for obtaining Anna's Mementos. The menu additionally allows the player to return to camp, though this will close the preparations menu prematurely.
The preparations menu becomes available starting in Chapter 3.
Etymology and other languages
This section has been marked as a stub. Please help improve the page by adding information.
| Names, etymology, and in other regions | ||
|---|---|---|
| Language | Name | Definition, etymology, and notes |
| English |
Preparations |
-- |
| Japanese |
進撃準備 |
Advance preparation (i.e., preparation for an advance) |
| French |
Préparatifs de bataille |
Battle preparations |
| German |
|
|
Gallery
This section has been marked as a stub. Please help improve the page by adding information.
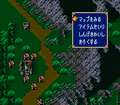
The preparations menu in Mystery of the Emblem.
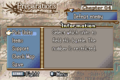
The preparations menu in The Sacred Stones.
