| Reunion at Dawn
|
|
|
|
|
|
| “
|
Even though our swords may cross as they do now... ...there's no denying that our chosen paths never will.
|
”
|
— Edelgard
|
| “
|
I should've known...that one day...you would be haunting me as well.
|
”
|
— Dimitri
|
| “
|
You overslept, Teach! Pretty rude to keep a fella waiting like that. Wouldn't you say?
|
”
|
— Claude
|
Reunion at Dawn is the thirteenth chapter of Fire Emblem: Three Houses on the Silver Snow, Azure Moon, and Verdant Wind routes. It consists solely of a mission, Hunting by Daybreak.
Plot
- Main article: Reunion at Dawn/Script
Five years have passed since the Battle of Garreg Mach. The Adrestian Empire has captured the capital of Faerghus, Fhirdiad, the Leicester Alliance has fallen into civil disarray between an anti-Imperial faction and a pro-Imperial faction, and Rhea has vanished. Byleth hears Sothis' voice demanding that they wake up, and wakes to find that five years have passed, Garreg Mach Monastery has been abandoned, and thieves are roaming the area.
Silver Snow
Byleth heads to the monastery and discovers Edelgard, who kept her promise to return to Garreg Mach despite her war. She asks Byleth to return with her to the Empire, but Byleth refuses. The two have a brief sword fight, and Edelgard declares that one of them will have to die the next time they meet before departing. Byleth makes their way to the chapel and reunites with Seteth, who asks them to lead the remnants of the Church of Seiros against the Empire. A soldier reports that thieves have broken into the monastery and stolen weapons, and Byleth and Seteth set out to rout them; they are reinforced by most of the former Black Eagles. After the battle, Seteth recounts the state of the war up to this point. He and the Black Eagles decide the time has come to launch their counterattack against the Empire. Seteth takes Byleth to the Holy Mausoleum, where they reunite with Flayn; she explains that she and Seteth returned to Garreg Mach to reclaim something she had forgotten in the Mausoleum.
Azure Moon
Byleth heads to the monastery and discovers Dimitri, now a haggard, broken, and vengeance-obsessed vagrant. The two set out to rout the thieves holed up in the monastery outskirts, and are reinforced by most of the former Blue Lions and Gilbert.
After the battle, Gilbert reveals that Dimitri was presumed dead. Dimitri explains that he escaped execution when Dedue sacrificed himself and was executed in his place. Gilbert further explains that the western half of Faerghus led by the traitor Cornelia has pledged loyalty to the Empire and is now being called the Faerghus Dukedom. Houses Gautier and Fraldarius lead the resistance in the eastern half of the Kingdom. Gilbert begs Dimitri to reclaim Fhirdiad and become a beacon of hope for his people, and Dimitri declares his intention to slaughter every last Imperial. Afterwards, in the monastery, Gilbert reveals that Rhea has vanished and that the Knights of Seiros have been searching for both her and Byleth. He recounts how Rufus, Dimitri's uncle and the king regent, was murdered, and Dimitri was falsely accused of the crime and apparently executed. Three years ago, Gilbert heard rumors of Imperial generals and troops being brutally slaughtered, and came to believe that Dimitri had somehow survived. Realizing how far Dimitri has fallen, Gilbert asks Byleth to guide him back to sanity.
Verdant Wind
Byleth heads to the monastery and discovers Claude, who never lost hope that they would reunite. Claude recounts the state of the war up to this point and briefly questions whether Rhea should return to her role as archbishop. The two set out to rout the thieves holed up in the monastery outskirts, and are reinforced by the former Golden Deer.
After the battle, the group heads back to the monastery. Claude decides to make use of the monastery as a base of operations for their upcoming battle with the Empire. He decides to allow House Gloucester to continue to maintain its Imperial ties until they can raise an army and revolt. Claude asks Byleth to aid him in his quest, hoping to use them to bring the Church of Seiros over to their side. The former Knights of Seiros arrive and agree to work with the Alliance forces.
Chapter data
Character data
Silver Snow Azure Moon Verdant Wind
At the beginning of the battle, only Byleth and Seteth are available. Dorothea, Caspar, and Petra arrive as friendly reinforcements on turn 3 while Bernadetta, Linhardt, and Ferdinand arrive as friendly reinforcements after a unit reaches column 9 and the first set of reinforcements have already arrived.
- Note: At the start of the chapter, Dimitri will class change to High Lord automatically.
At the beginning of the battle, only Byleth and Dimitri are available. Gilbert, Ashe, Mercedes, and Annette arrive as friendly reinforcements on turn 3 while Sylvain, Ingrid, and Felix arrive as friendly reinforcements after a unit reaches column 9 and the first set of reinforcements have already arrived.
- Note: At the start of the chapter, Claude will class change to Wyvern Master automatically.
At the beginning of the battle, only Byleth and Claude are available. Lorenz, Ignatz, Hilda, and Leonie arrive as friendly reinforcements on turn 3 while Raphael, Lysithea, and Marianne arrive as friendly reinforcements after a unit reaches column 9 and the first set of reinforcements have already arrived.
Item data
Enemy data
|
|
|
|
Name
|
Class
|
Lv
|
#
|
Inventory and Skills
|
Notes
|
|
|
Bandit
|
Thief
|
25
|
2
|
 Steel Sword • Steel Sword •  Concoction Concoction
 Steal • Steal •  Locktouch Locktouch
|
--
|
|
|
Bandit
|
Mercenary
|
25
|
1
|
Silver Sword
|
Begins moving if the nearby Archer is provoked.
|
|
|
Bandit
|
Archer
|
25
|
1
|
 Blessed Bow Blessed Bow
 Bowrange +1 Bowrange +1
|
--
|
|
|
Bandit
|
Mercenary
|
25
|
1
|
Steel Sword
|
--
|
|
|
Bandit
|
Thief
|
25
|
1
|
Steel Sword •  Door Key Door Key
Steal • Locktouch
|
Begins moving if the adjacent Assassin is provoked.
|
|
|
Bandit
|
Assassin
|
25
|
1
|
Silver Sword •  Hexlock Shield Hexlock Shield
 Swordfaire • Locktouch • Swordfaire • Locktouch •  Stealth Stealth
 Bandits Lv. 3: Bandits Lv. 3:  Disturbance Disturbance
|
--
|
|
|
Bandit
|
Brawler
|
25
|
1
|
 Steel Gauntlets • Unarmed Steel Gauntlets • Unarmed
 Unarmed Combat Unarmed Combat
|
--
|
|
|
Bandit
|
Thief
|
25
|
1
|
Steel Sword • Chest Key
Steal • Locktouch
|
Begins moving if the adjacent Assassin is provoked.
|
|
|
Bandit
|
Assassin
|
25
|
1
|
Silver Sword • Leather Shield
Swordfaire • Locktouch • Stealth
Bandits Lv. 3: Disturbance
|
--
|
|
|
Bandit
|
Mercenary
|
25
|
1
|
Steel Sword • Antitoxin
|
Begins moving if a nearby Thief, Brawler, or Archer is provoked.
|
|
|
Bandit
|
Thief
|
25
|
3
|
Steel Sword
Steal • Locktouch
|
The eastern one begins moving if a nearby Mercenary, Brawler, or Archer is provoked.
|
|
|
Bandit
|
Brawler
|
25
|
1
|
Steel Gauntlets •  Bullion • Unarmed Bullion • Unarmed
Unarmed Combat
Bandits Lv. 3: Disturbance
|
Begins moving if a nearby Mercenary, Thief, Brawler, or Archer is provoked.
|
|
|
Bandit
|
Assassin
|
25
|
1
|
Venin Edge • Bullion
Swordfaire • Locktouch • Stealth
|
--
|
|
|
Bandit
|
Archer
|
25
|
1
|
Venin Bow • Chest Key
Bowrange +1
|
--
|
|
|
Bandit
|
Archer
|
25
|
1
|
Venin Bow
Bowrange +1
Bandits Lv. 3: Disturbance
|
Begins moving if a nearby Mercenary, Thief, or Brawler is provoked.
|
|
|
Bandit
|
Assassin
|
25
|
3
|
Silver Sword
Swordfaire • Locktouch • Stealth
|
The eastern one begins moving one turn after the squad west of him is provoked, or if the nearby Sniper is provoked.
|
|
|
Bandit
|
Sniper
|
25
|
1
|
Silver Bow
 Bowfaire • Bowrange +1 Bowfaire • Bowrange +1
|
Begins moving one turn after the squad west of him is provoked.
|
|
|
Bandit
|
Archer
|
25
|
1
|
Steel Bow • Chest Key
Bowrange +1
|
Begins moving one turn after the squad west of him is provoked, or if the nearby Sniper is provoked.
|
|
|
Bandit
|
Mercenary
|
25
|
1
|
Steel Sword • Concoction
|
--
|
|
|
Bandit
|
Mercenary
|
25
|
1
|
Steel Sword • Concoction
|
--
|
|
|
Bandit
|
Brawler
|
25
|
1
|
Steel Gauntlets • Antitoxin • Unarmed
Unarmed Combat
|
--
|
|
|
Bandit
|
Thief
|
25
|
1
|
Steel Sword • Bullion
Steal • Locktouch
Bandits Lv. 3: Disturbance
|
--
|
|
|
Bandit
|
Brawler
|
25
|
1
|
Steel Gauntlets • Door Key • Unarmed
Unarmed Combat
Bandits Lv. 3: Disturbance
|
Begins moving if a nearby Mercenary, Thief, Archer, or Brawler is provoked.
|
|
|
Bandit
|
Assassin
|
25
|
1
|
Venin Edge • Door Key
Swordfaire • Locktouch • Stealth
Bandits Lv. 3: Disturbance
|
--
|
|
|
Bandit
|
Archer
|
25
|
1
|
Steel Bow • Bullion
Bowrange +1
|
--
|
|
|
Pallardó
(Decoy)
|
Thief
|
27
|
1
|
Silver Sword
Steal • Locktouch •  Sword Prowess Lv 3 Sword Prowess Lv 3
Pallardó Bodyguards Lv. 3: Poison Tactic
|
Immobile; stands on a heal tile+.
|
|
|
|
|
|
|
|
|
|
Name
|
Class
|
Lv
|
#
|
Inventory and Skills
|
Notes
|
|
|
Bandit
|
Thief
|
26
|
2
|
Silver Sword • Concoction
Steal • Locktouch •  Sword Prowess Lv 2 Sword Prowess Lv 2
|
The eastern one begins moving if the nearby Brawler is provoked.
|
|
|
Bandit
|
Mercenary
|
26
|
1
|
Silver Sword
Sword Prowess Lv 2
|
Begins moving if the nearby Archer or Brawler is provoked.
|
|
|
Bandit
|
Archer
|
26
|
1
|
Blessed Bow
Bowrange +1 •  Bow Prowess Lv 2 Bow Prowess Lv 2
|
Begins moving if the nearby Brawler is provoked.
|
|
|
Bandit
|
Mercenary
|
26
|
1
|
Silver Sword
Sword Prowess Lv 2
|
Begins moving if the nearby Sniper is provoked.
|
|
|
Bandit
|
Thief
|
26
|
1
|
Silver Sword • Door Key
Steal • Locktouch • Sword Prowess Lv 2
|
Begins moving if the adjacent Assassin is provoked.
|
|
|
Bandit
|
Assassin
|
26
|
1
|
Silver Sword • Hexlock Shield
Swordfaire • Locktouch • Stealth • Sword Prowess Lv 3
Bandits Lv. 3: Disturbance
|
--
|
|
|
Bandit
|
Brawler
|
26
|
1
|
Silver Gauntlets • Unarmed
Unarmed Combat •  Brawling Prowess Lv 2 Brawling Prowess Lv 2
|
--
|
|
|
Bandit
|
Thief
|
26
|
1
|
Silver Sword • Chest Key
Steal • Locktouch • Sword Prowess Lv 2
|
Begins moving if the adjacent Assassin is provoked.
|
|
|
Bandit
|
Assassin
|
26
|
1
|
Silver Sword • Leather Shield
Swordfaire • Locktouch • Stealth • Sword Prowess Lv 3
Bandits Lv. 3: Disturbance
|
--
|
|
|
Bandit
|
Mercenary
|
26
|
1
|
Silver Sword • Antitoxin
Sword Prowess Lv 2
|
Begins moving if a nearby Thief, Brawler, or Archer is provoked.
|
|
|
Bandit
|
Thief
|
26
|
3
|
Silver Sword
Steal • Locktouch • Sword Prowess Lv 2
|
The eastern one begins moving if a nearby Mercenary, Brawler, or Archer is provoked.
|
|
|
Bandit
|
Brawler
|
26
|
1
|
Silver Gauntlets • Bullion • Unarmed
Unarmed Combat • Brawling Prowess Lv 2
Bandits Lv. 3: Disturbance
|
Begins moving if a nearby Mercenary, Thief, Brawler, or Archer is provoked.
|
|
|
Bandit
|
Assassin
|
26
|
1
|
Venin Edge • Bullion
Swordfaire • Locktouch • Stealth • Sword Prowess Lv 3
|
--
|
|
|
Bandit
|
Archer
|
26
|
1
|
Venin Bow • Chest Key
Bowrange +1 • Bow Prowess Lv 2
|
--
|
|
|
Bandit
|
Archer
|
26
|
1
|
Venin Bow
Bowrange +1 • Bow Prowess Lv 2
Bandits Lv. 3: Disturbance
|
--
|
|
|
Bandit
|
Assassin
|
26
|
1
|
Venin Edge
Swordfaire • Locktouch • Stealth • Sword Prowess Lv 3
|
Begins moving one turn after the squad west of him is provoked, or if a nearby Sniper is provoked.
|
|
|
Bandit
|
Sniper
|
26
|
1
|
Silver Bow • Bullion
Bowfaire • Bowrange +1 •  Bow Prowess Lv 3 Bow Prowess Lv 3
|
Begins moving one turn after the squad west of him is provoked.
|
|
|
Bandit
|
Archer
|
26
|
1
|
Silver Bow • Chest Key
Bowrange +1 • Bow Prowess Lv 2
|
Begins moving one turn after the squad west of him is provoked, or if a nearby Sniper is provoked.
|
|
|
Bandit
|
Mercenary
|
26
|
1
|
Silver Sword • Concoction
Sword Prowess Lv 2
|
--
|
|
|
Bandit
|
Mercenary
|
26
|
1
|
Silver Sword • Concoction
Sword Prowess Lv 2
|
Begins moving if the nearby Sniper is provoked.
|
|
|
Bandit
|
Brawler
|
26
|
1
|
Silver Gauntlets • Antitoxin • Unarmed
Unarmed Combat • Brawling Prowess Lv 2
|
Begins moving if the nearby Sniper is provoked.
|
|
|
Bandit
|
Thief
|
26
|
1
|
Silver Sword • Bullion
Steal • Locktouch • Sword Prowess Lv 2
Bandits Lv. 3: Disturbance
|
--
|
|
|
Bandit
|
Brawler
|
26
|
1
|
Silver Gauntlets • Door Key • Unarmed
Unarmed Combat • Brawling Prowess Lv 2
Bandits Lv. 3: Disturbance
|
Begins moving if a nearby Mercenary, Thief, Brawler, or Archer is provoked.
|
|
|
Bandit
|
Assassin
|
26
|
1
|
Venin Edge • Door Key
Swordfaire • Locktouch • Stealth • Sword Prowess Lv 3
Bandits Lv. 3: Disturbance
|
--
|
|
|
Bandit
|
Archer
|
26
|
1
|
Silver Bow • Bullion
Bowrange +1 • Bow Prowess Lv 2
|
--
|
|
|
Bandit
|
Assassin
|
26
|
2
|
Silver Sword
Swordfaire • Locktouch • Stealth • Sword Prowess Lv 3
|
--
|
|
|
Bandit
|
Sniper
|
26
|
1
|
Silver Bow
Bowfaire • Bowrange +1 • Bow Prowess Lv 3
Bandits Lv. 3: Disturbance
|
--
|
|
|
Bandit
|
Sniper
|
26
|
4
|
Silver Bow
Bowfaire • Bowrange +1 • Bow Prowess Lv 3
Bandits Lv. 3: Disturbance
|
The eastern one begins moving one turn after the squad west of Pallardó is provoked, or if the other nearby Sniper is provoked.
|
|
|
Pallardó
(Decoy)
|
Thief
|
28
|
1
|
Silver Sword
Steal • Locktouch • Sword Prowess Lv 3
Pallardó Bodyguards Lv. 3: Poison Tactic
|
Immobile; stands on a heal tile+.
|
|
|
|
|
|
|
|
|
|
Name
|
Class
|
Lv
|
#
|
Inventory and Skills
|
Notes
|
|
|
Bandit
|
Thief
|
31
|
2
|
Silver Sword • Concoction
Steal • Locktouch •  Sword Prowess Lv 4 • Sword Prowess Lv 4 •  Pass Pass
|
The eastern one begins moving if the nearby Brawler is provoked.
|
|
|
Bandit
|
Mercenary
|
31
|
1
|
Silver Sword
Sword Prowess Lv 4 •  Axebreaker+ Axebreaker+
|
Begins moving if the nearby Archer or Brawler is provoked.
|
|
|
Bandit
|
Archer
|
31
|
1
|
Blessed Bow
Bowrange +1 • Sword Prowess Lv 4 •  Poison Strike Poison Strike
|
Begins moving if the nearby Brawler is provoked.
|
|
|
Bandit
|
Mercenary
|
31
|
1
|
Silver Sword
Sword Prowess Lv 4 • Axebreaker+
|
Begins moving if the nearby Sniper is provoked.
|
|
|
Bandit
|
Thief
|
31
|
1
|
Silver Sword • Door Key
Steal • Locktouch • Sword Prowess Lv 4 • Pass
|
Begins moving if the adjacent Assassin is provoked.
|
|
|
Bandit
|
Assassin
|
31
|
1
|
Silver Sword • Hexlock Shield
Swordfaire • Locktouch • Stealth •  Sword Prowess Lv 5 • Pass • Sword Prowess Lv 5 • Pass •  Poison Poison
Bandits Lv. 3: Disturbance
|
--
|
|
|
Bandit
|
Brawler
|
31
|
1
|
Silver Gauntlets • Unarmed
Unarmed Combat •  Brawling Prowess Lv 4 • Brawling Prowess Lv 4 •  Tomebreaker Tomebreaker
|
--
|
|
|
Bandit
|
Thief
|
31
|
1
|
Silver Sword • Chest Key
Steal • Locktouch • Sword Prowess Lv 4 • Pass
|
Begins moving if the adjacent Assassin is provoked.
|
|
|
Bandit
|
Assassin
|
31
|
1
|
Silver Sword • Leather Shield
Swordfaire • Locktouch • Stealth • Sword Prowess Lv 5 • Pass • Poison
Bandits Lv. 3: Disturbance
|
--
|
|
|
Bandit
|
Mercenary
|
31
|
1
|
Silver Sword • Antitoxin
Sword Prowess Lv 4 • Axebreaker+
|
Begins moving if a nearby Thief, Brawler, or Archer is provoked.
|
|
|
Bandit
|
Thief
|
31
|
3
|
Silver Sword
Steal • Locktouch • Sword Prowess Lv 4 • Pass
|
The eastern one begins moving if a nearby Mercenary, Brawler, or Archer is provoked.
|
|
|
Bandit
|
Brawler
|
31
|
1
|
Silver Gauntlets • Bullion • Unarmed
Unarmed Combat • Brawling Prowess Lv 4 • Tomebreaker
Bandits Lv. 3: Disturbance
|
Begins moving if a nearby Mercenary, Thief, Brawler, or Archer is provoked.
|
|
|
Bandit
|
Assassin
|
31
|
1
|
Venin Edge • Bullion
Swordfaire • Locktouch • Stealth • Sword Prowess Lv 5 • Pass • Poison
|
--
|
|
|
Bandit
|
Archer
|
31
|
1
|
Venin Bow • Chest Key
Bowrange +1 •  Bow Prowess Lv 4 • Poison Strike Bow Prowess Lv 4 • Poison Strike
|
--
|
|
|
Bandit
|
Archer
|
31
|
1
|
Venin Bow
Bowrange +1 • Bow Prowess Lv 4 • Poison Strike
Bandits Lv. 3: Disturbance
|
--
|
|
|
Bandit
|
Assassin
|
31
|
1
|
Venin Edge
Swordfaire • Locktouch • Stealth • Sword Prowess Lv 5 • Pass • Poison
|
Begins moving one turn after the squad west of him is provoked, or if a nearby Sniper is provoked.
|
|
|
Bandit
|
Sniper
|
31
|
1
|
Silver Bow • Bullion
Bowfaire • Bowrange +1 •  Bow Prowess Lv 5 • Poison Strike • Bow Prowess Lv 5 • Poison Strike •  Vantage Vantage
|
Begins moving one turn after the squad west of him is provoked.
|
|
|
Bandit
|
Archer
|
31
|
1
|
Silver Bow • Chest Key
Bowrange +1 • Bow Prowess Lv 4 • Poison Strike
|
Begins moving one turn after the squad west of him is provoked, or if a nearby Sniper is provoked.
|
|
|
Bandit
|
Mercenary
|
31
|
1
|
Silver Sword • Concoction
Sword Prowess Lv 4 • Axebreaker+
|
--
|
|
|
Bandit
|
Mercenary
|
31
|
1
|
Silver Sword • Concoction
Sword Prowess Lv 4 • Axebreaker+
|
Begins moving if the nearby Sniper is provoked.
|
|
|
Bandit
|
Brawler
|
31
|
1
|
Silver Gauntlets • Antitoxin • Unarmed
Unarmed Combat • Brawling Prowess Lv 4 • Tomebreaker
|
Begins moving if the nearby Sniper is provoked.
|
|
|
Bandit
|
Thief
|
31
|
1
|
Silver Sword • Bullion
Steal • Locktouch • Sword Prowess Lv 4 • Pass
Bandits Lv. 3: Disturbance
|
--
|
|
|
Bandit
|
Brawler
|
31
|
1
|
Silver Gauntlets • Door Key • Unarmed
Unarmed Combat • Brawling Prowess Lv 4 • Tomebreaker
Bandits Lv. 3: Disturbance
|
Begins moving if a nearby Mercenary, Thief, Brawler, or Archer is provoked.
|
|
|
Bandit
|
Assassin
|
31
|
1
|
Venin Edge • Door Key
Swordfaire • Locktouch • Stealth • Sword Prowess Lv 5 • Pass • Poison
Bandits Lv. 3: Disturbance
|
--
|
|
|
Bandit
|
Archer
|
31
|
1
|
Silver Bow • Bullion
Bowrange +1 • Bow Prowess Lv 4 • Poison Strike
|
--
|
|
|
Bandit
|
Assassin
|
31
|
2
|
Silver Sword
Swordfaire • Locktouch • Stealth • Sword Prowess Lv 5 • Pass • Poison
|
--
|
|
|
Bandit
|
Sniper
|
31
|
1
|
Silver Bow
Bowfaire • Bowrange +1 • Bow Prowess Lv 5 • Poison Strike • Vantage
Bandits Lv. 3: Disturbance
|
--
|
|
|
Bandit
|
Sniper
|
31
|
4
|
Silver Bow
Bowfaire • Bowrange +1 • Bow Prowess Lv 5 • Poison Strike • Vantage
Bandits Lv. 3: Disturbance
|
The eastern one begins moving one turn after the squad west of Pallardó is provoked, or if the other nearby Sniper is provoked.
|
|
|
Bandit
|
Grappler
|
31
|
3
|
Silver Gauntlets • Unarmed
 Fistfaire • Unarmed Combat • Fistfaire • Unarmed Combat •  Brawling Prowess Lv 5 • Tomebreaker • Brawling Prowess Lv 5 • Tomebreaker •  Defiant Spd Defiant Spd
|
--
|
|
|
Pallardó
(Decoy)
|
Thief
|
33
|
1
|
Silver Sword
Steal • Locktouch • Sword Prowess Lv 3
Pallardó Bodyguards Lv. 3: Poison Tactic
|
Immobile; stands on a heal tile+.
|
|
|
|
|
|
Reinforcements
This section has been marked as a stub. Please help improve the page by adding information.
- Upon defeating Pallardó's decoy, the real Pallardó appears from the door north or south of the decoy. Depending on which door he comes from, different other reinforcements will appear.
- If Pallardó went north
- 1 Mercenary from the door north of the decoy
- 1 Thief that drops a Bullion from the door north of the decoy
- If Pallardó went south
- 1 Thief from the door south of the decoy
- 1 Brawler from the door south of the decoy
Boss data
- Main article: Pallardó
- Decoy
|
|
|
|
|
|
|
Skill Levels

|

|

|

|

|

|

|

|

|

|

|

|
| B
|
E
|
E
|
E
|
E
|
E
|
E
|
E
|
E
|
E
|
E
|

|
|
|
|
|
|
|
|
|
|
Skill Levels
|
|
|
|
|
|
|
|
|
|
|
|
|
| B
|
E
|
E
|
E
|
E
|
E
|
E
|
E
|
E
|
E
|
E
|
|
|
|
|
|
|
|
|
|
|
Skill Levels
|
|
|
|
|
|
|
|
|
|
|
|
|
| B
|
E
|
E
|
E
|
E
|
E
|
E
|
E
|
E
|
E
|
E
|
|
|
|
- Real
|
|
|
|
|
|
|
Skill Levels
|
|
|
|
|
|
|
|
|
|
|
|
|
| B
|
E
|
E
|
E
|
E
|
E
|
E
|
E
|
E
|
E
|
E
|
|
|
|
|
|
|
|
|
|
|
Skill Levels
|
|
|
|
|
|
|
|
|
|
|
|
|
| B
|
E
|
E
|
E
|
E
|
E
|
E
|
E
|
E
|
E
|
E
|
|
|
|
|
|
|
|
|
|
|
Skill Levels
|
|
|
|
|
|
|
|
|
|
|
|
|
| B
|
E
|
E
|
E
|
E
|
E
|
E
|
E
|
E
|
E
|
E
|
|
|
|
Strategy
| This section details unofficial strategies that may help with completion of the chapter. This may not work for everybody.
|
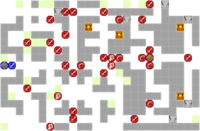
At the beginning of this chapter, your entire inventory will be repaired. Dimitri and Claude will automatically be reclassed to High Lord and Wyvern Master, respectively, both get powerful battalions (with Claude's Immortal Corps being a strong contender for the best offensive battalion in the game), and Claude receives his Relic weapon, Failnaught. You don't get an opportunity to visit the monastery and are instead thrust straight into the battle, so you'll need to survive with what you've got. Claude and Seteth need to take particular caution, as there are lots of Snipers lurking about hoping to take a chunk or three out of them, and you may need to dismount to keep them alive. In addition, on Verdant Wind, neither of your main medics (Marianne or Lysithea) arrive until you reach column 9, so you'll have to use caution. Don't overextend yourself and you should be fine. Don't forget to nab all four chests before you leave. On Azure Moon, Gilbert makes a decent replacement for Dedue; he isn't quite as bulky, but he has a much easier time reaching Great Knight. When you kill Pallardó, it will be revealed that the man you just killed was a body double and the real Pallardó appears and makes a break for it. By the time you reach him, you should have wiped out all the other enemies, so taking him out before he escapes should be no problem.
Trivia
Etymology and other languages
This section has been marked as a stub. Please help improve the page by adding information.
| Names, etymology, and in other regions
|
| Language
|
Name
|
Definition, etymology, and notes
|
| English
|
Reunion at Dawn
|
|
|
|
| Names, etymology, and in other regions
|
| Language
|
Name
|
Definition, etymology, and notes
|
| English
|
Hunting by Daybreak
|
|
|
|
Gallery
This section has been marked as a stub. Please help improve the page by adding information.
References


