| Site News |
|---|
| Warning: This wiki contains spoilers. Read at your own risk! Social media: If you would like, please join our Discord server, and/or follow us on Twitter (X) or Tumblr! |
Princess Minerva: Difference between revisions
Thecornerman (talk | contribs) (→Chapter data: Added FE11 enemy stats) |
Thecornerman (talk | contribs) m (Text replacement - "([Ll])evel (\d+)" to "$1evel $2") |
||
| (24 intermediate revisions by 6 users not shown) | |||
| Line 1: | Line 1: | ||
:''This article is about the chapter from ''Shadow Dragon & the Blade of Light'' and its remakes. For the | :''This article is about the chapter from ''Shadow Dragon & the Blade of Light'' and its remakes. For the character, see [[Minerva]]. For the History Mode map in ''Warriors'', see ''[[Princess Minerva (Warriors)|''Princess Minerva (''Warriors'')'']]''.'' | ||
{{Chapter Infobox | {{Chapter Infobox | ||
|image=[[File:Cm fe11 10.png|200px]] | |image=[[File:Cm fe11 10.png|200px]] | ||
| Line 5: | Line 5: | ||
|new units=[[Maria]], [[Minerva]] | |new units=[[Maria]], [[Minerva]] | ||
|boss=[[Zharov]] | |boss=[[Zharov]] | ||
|previous=*[[Port Warren | |previous=*[[Port Warren]] <small>(''Mystery of the Emblem'')</small> | ||
*[[The Pyrathi Dragon]] | |||
|next=[[Knorda Market]] | |next=[[Knorda Market]] | ||
}} | }} | ||
'''Princess Minerva''' (Japanese: {{hl|プリンセス・ミネルバ|Purinsesu mineruba}} ''Princess Minerva'') is the tenth chapter in {{FE1}} and {{FE11}} and the eighth chapter in Book | '''Princess Minerva''' (Japanese: {{hl|プリンセス・ミネルバ|Purinsesu mineruba}} ''Princess Minerva'') is the tenth chapter in {{FE1}} and {{FE11}} and the eighth chapter in Book I of {{FE3}}. | ||
==Plot== | ==Plot== | ||
| Line 26: | Line 26: | ||
|defeat=[[Marth]] dies | |defeat=[[Marth]] dies | ||
|ally=14{{h|+2|Upon Maria and Minerva being recruited}} | |ally=14{{h|+2|Upon Maria and Minerva being recruited}} | ||
|enemy=20{{h|+8|Reinforcements}}{{h| | |enemy=20{{h|+8|Reinforcements}}{{h|−2|Upon Maria and Minerva being recruited}} | ||
|map=[[File:Cm fe01 10.png]] | |map=[[File:Cm fe01 10.png]] | ||
|col=30 | |||
|row=28 | |||
}} | }} | ||
Units are arranged based on their position in deployment order after Marth. | Units are arranged based on their position in deployment order after Marth. | ||
|content2={{ChapData | |content2={{ChapData | ||
|victory=Seize | |victory=Seize | ||
|defeat=[[Marth]] dies | |defeat=[[Marth]] dies | ||
|ally= | |ally=1–13{{h|+2|Upon Maria and Minerva being recruited}} | ||
|enemy=19{{h|+8|Reinforcements}}{{h| | |enemy=19{{h|+8|Reinforcements}}{{h|−2|Upon Maria and Minerva being recruited}} | ||
|map=[[File:Cm fe03 b1 8.png]] | |map=[[File:Cm fe03 b1 8.png]] | ||
|col=30 | |||
|row=28 | |||
}} | }} | ||
|content3={{ChapData | |content3={{ChapData | ||
|victory=Seize | |victory=Seize | ||
|defeat=[[Marth]] dies | |defeat=[[Marth]] dies | ||
|ally= | |ally=1–14{{h|+2|Upon Maria and Minerva being recruited}} | ||
|enemy=20{{h|+16|Reinforcements}}{{h| | |enemy=20{{h|+16|Reinforcements}}{{h|−2|Upon Maria and Minerva being recruited}} | ||
|map=[[File:Cm fe11 10.png|512px]] | |map=[[File:Cm fe11 10.png|512px]] | ||
|col=30 | |||
|row=28 | |||
}} | }} | ||
}} | }} | ||
| Line 49: | Line 54: | ||
===Character data=== | ===Character data=== | ||
{{Tab | {{Tab | ||
|width=100% | |||
|default=3 | |default=3 | ||
|tab1=''Shadow Dragon & the Blade of Light'' | |tab1=''Shadow Dragon & the Blade of Light'' | ||
| Line 67: | Line 73: | ||
|name=Minerva | |name=Minerva | ||
|portrait=[[File:Portrait minerva fe01.png]] | |portrait=[[File:Portrait minerva fe01.png]] | ||
|class= | |class=Wyvern Knight | ||
|classarticle=Dracoknight | |||
|HP=22 | |HP=22 | ||
|lv=1 | |lv=1 | ||
| Line 73: | Line 80: | ||
|recruitment method=Enemy, let her talk to [[Marth]] after recruiting [[Maria]]{{h|*|Minerva will not attack your units; instead she will seek out Marth and, once Maria is recruited, automatically initiate her own recruitment.}} | |recruitment method=Enemy, let her talk to [[Marth]] after recruiting [[Maria]]{{h|*|Minerva will not attack your units; instead she will seek out Marth and, once Maria is recruited, automatically initiate her own recruitment.}} | ||
}} | }} | ||
|return1= | |forced1=marth | ||
|return2= | |return1=jagen | ||
|return3= | |return2=cain | ||
|return4= | |return3=abel | ||
|return5= | |return4=draug | ||
|return6= | |return5=gordin | ||
|return7= | |return6=caeda | ||
|return8= | |return7=wrys | ||
|return9= | |return8=bord | ||
|return10= | |return9=cord | ||
|return11= | |return10=barst | ||
|return12= | |return11=ogma | ||
|return13= | |return12=darros | ||
|return14= | |return13=castor | ||
|return15= | |return14=julian | ||
|return16= | |return15=lena | ||
|return17= | |return16=navarre | ||
|return17=merric | |||
|return18=matthis | |return18=matthis | ||
|return19= | |return19=hardin | ||
|return20= | |return20=wolf | ||
|return21= | |return21=sedgar | ||
|return22= | |return22=roshea | ||
|return23= | |return23=vyland | ||
|return24=wendell | |||
|return24= | |return25=rickard | ||
|return25= | |return26=bantu | ||
|return26= | |return27=caesar | ||
|return27= | |return28=radd | ||
|return28= | |return29=roger | ||
|return29= | |return30=jeorge | ||
|return30 | |||
}} | }} | ||
|content2={{ChapChars | |content2={{ChapChars | ||
| Line 126: | Line 132: | ||
|recruitment method=Enemy, talk to with [[Marth]] after recruiting [[Maria]] | |recruitment method=Enemy, talk to with [[Marth]] after recruiting [[Maria]] | ||
}} | }} | ||
| | |forced1=marth 01 | ||
| | |forced1article=Marth | ||
| | |return1=abel | ||
| | |return2=cain | ||
| | |return3=jagen | ||
| | |return4=gordin | ||
| | |return5=draug | ||
| | |return6=caeda 01 | ||
| | |return6article=Caeda | ||
| | |return7=bord | ||
| | |return8=cord | ||
| | |return9=barst | ||
| | |return10=ogma | ||
| | |return11=castor | ||
| | |return12=julian | ||
| | |return13=lena | ||
| | |return14=navarre | ||
| | |return15=roshea | ||
| | |return16=vyland | ||
| | |return17=sedgar | ||
| | |return18=wolf | ||
| | |return19=hardin 01 | ||
|return19article=Hardin | |||
| | |return20=matthis | ||
| | |return21=merric | ||
| | |return22=wendell | ||
| | |return23=rickard | ||
| | |return24=bantu | ||
| | |return25=caesar | ||
| | |return26=radd | ||
| | |||
}} | }} | ||
|content3={{ChapChars | |content3={{ChapChars | ||
| Line 178: | Line 183: | ||
|recruitment method=Enemy, talk to with [[Marth]] after recruiting [[Maria]]{{h|*|If Maria is recruited, Minerva will stop attacking your units; instead, she will seek out Marth and automatically initiate her own recruitment.}} | |recruitment method=Enemy, talk to with [[Marth]] after recruiting [[Maria]]{{h|*|If Maria is recruited, Minerva will stop attacking your units; instead, she will seek out Marth and automatically initiate her own recruitment.}} | ||
}} | }} | ||
|return1= | |forced1=marth | ||
|return1=abel | |||
|return2=frey | |return2=frey | ||
|return3= | |return3=jagen | ||
|return4=cain | |return4=cain | ||
|return5= | |return5=gordin | ||
|return6= | |return6=draug | ||
|return7= | |return7=norne | ||
|return8= | |return8=caeda | ||
|return9= | |return9=wrys | ||
|return10= | |return10=ogma | ||
|return11= | |return11=barst | ||
|return12= | |return12=bord | ||
|return13= | |return13=cord | ||
|return14= | |return14=darros | ||
|return15= | |return15=castor | ||
|return16= | |return16=julian | ||
|return17= | |return17=lena | ||
|return18= | |return18=navarre | ||
|return19= | |return19=merric | ||
|return20=matthis | |return20=matthis | ||
|return21= | |return21=wolf | ||
|return22= | |return22=sedgar | ||
|return23= | |return23=roshea | ||
|return24= | |return24=vyland | ||
|return25= | |return25=hardin | ||
|return26=wendell | |||
|return26= | |return27=rickard | ||
|return27= | |return28=athena | ||
|return28= | |return29=bantu | ||
|return29= | |return30=caesar | ||
|return30= | |return31=radd | ||
|return31= | |return32=roger | ||
|return32= | |return33=jeorge | ||
|return33 | |||
}} | }} | ||
}} | }} | ||
| Line 231: | Line 235: | ||
|item2image=none | |item2image=none | ||
|obtain2=Left [[chest]] | |obtain2=Left [[chest]] | ||
|item3= | |item3=Speed Ring | ||
|item3image=none | |item3image=none | ||
|obtain3=Dropped by | |obtain3=Dropped by [[Zharov]] | ||
|item4=Hero Crest | |item4=Hero Crest | ||
|item4image=none | |item4image=none | ||
|obtain4=Dropped by enemy [[Hero]] | |obtain4=Dropped by enemy [[Hero]] | ||
|item5= | |item5=Silver Bow | ||
|item5image=none | |item5image=none | ||
|obtain5=Dropped by [[ | |obtain5=Dropped by enemy [[Sniper]] | ||
|itemlast= | |itemlast=Levin Sword | ||
|itemlastimage=none | |itemlastimage=none | ||
|obtainlast=Dropped by [[ | |obtainlast=Dropped by [[Minerva]] | ||
}} | }} | ||
|content2={{ChapItems | |content2={{ChapItems | ||
| Line 252: | Line 256: | ||
|item3=Wyrmslayer | |item3=Wyrmslayer | ||
|obtain3=Western [[chest]] | |obtain3=Western [[chest]] | ||
|item4= | |item4=Speed Ring | ||
|obtain4=Dropped by | |obtain4=Dropped by [[Zharov]] | ||
|item5=Hero Crest | |item5=Hero Crest | ||
|obtain5=Dropped by enemy [[Hero]] | |obtain5=Dropped by enemy [[Hero]] | ||
|item6=Steel Lance | |item6=Steel Lance | ||
|obtain6=Dropped by enemy [[Cavalier]] | |obtain6=Dropped by enemy [[Cavalier]] | ||
|itemlast= | |itemlast=Steel Bow | ||
|obtainlast=Dropped by [[ | |obtainlast=Dropped by enemy [[Archer]] | ||
}} | }} | ||
|content3={{ChapItems | |content3={{ChapItems | ||
| Line 267: | Line 271: | ||
|item2=Physic | |item2=Physic | ||
|obtain2=Right [[chest]] | |obtain2=Right [[chest]] | ||
|item3= | |item3=Speedwing | ||
|obtain3=Dropped by | |obtain3=Dropped by [[Zharov]] | ||
|item4=Master Seal | |item4=Master Seal | ||
|obtain4=Dropped by enemy [[Hero]] | |obtain4=Dropped by enemy [[Hero]] | ||
|item5= | |item5=Silver Bow | ||
|obtain5=Dropped by [[ | |obtain5=Dropped by enemy [[Sniper]] | ||
|itemlast= | |itemlast=Hauteclere | ||
|obtainlast=Dropped by [[ | |obtainlast=Dropped by [[Minerva]] | ||
}} | }} | ||
}} | }} | ||
| Line 293: | Line 297: | ||
|swcost3=900 | |swcost3=900 | ||
|lance1=Lance | |lance1=Lance | ||
|lance1article=Lance ( | |lance1article=Lance (Famicom) | ||
|lacost1=450 | |lacost1=450 | ||
|lance2=Silver Lance | |lance2=Silver Lance | ||
| Line 330: | Line 334: | ||
|stcost1=1000 | |stcost1=1000 | ||
|tome1=Fire | |tome1=Fire | ||
|tocost1=500 | |tocost1=500 | ||
|tome2=Thunder | |tome2=Thunder | ||
|tocost2=630 | |tocost2=630 | ||
}} | }} | ||
| Line 352: | Line 354: | ||
|axcost4=1100 | |axcost4=1100 | ||
|bow1=Steel Bow | |bow1=Steel Bow | ||
| | |bocost1=770 | ||
|item1=Door Key | |item1=Door Key | ||
|itcost1=500 | |itcost1=500 | ||
| Line 373: | Line 375: | ||
|tab3=''Shadow Dragon'' | |tab3=''Shadow Dragon'' | ||
|content1={{ChapUnitHdr|type=Enemy|platform=nes01}} | |content1={{ChapUnitHdr|type=Enemy|platform=nes01}} | ||
{{ChapUnitCellFE1 | |||
|name=[[Zharov]] | |||
|class=General | |||
|lv=3 | |||
|#=1 | |||
|hp=31 | |||
|str=10 | |||
|skill=2 | |||
|spd=5 | |||
|def=15 | |||
|mov=5 | |||
|inventory=[[Steel Sword]] | |||
|notes=Drops a {{drop|Speed Ring}} upon defeat.<br>Does not move; stands on a [[Terrain/Family Computer games#Fire Emblem: Shadow Dragon & the Blade of Light|gate]], the chapter's seize point. | |||
}} | |||
{{ChapUnitCellFE1 | {{ChapUnitCellFE1 | ||
|name=Grust | |name=Grust | ||
| Line 412: | Line 428: | ||
|def=12 | |def=12 | ||
|mov=5 | |mov=5 | ||
|inventory=[[Lance ( | |inventory=[[Lance (Famicom)|Lance]] | ||
|notes=• The northwest one moves to attack any player unit in range; moves next to the gate if no one is in range.<br>• The central one moves to attack any player unit in range; moves south of the chests if no one is in range. | |notes=• The northwest one moves to attack any player unit in range; moves next to the gate if no one is in range.<br>• The central one moves to attack any player unit in range; moves south of the chests if no one is in range. | ||
}} | }} | ||
| Line 439: | Line 455: | ||
|def=8 | |def=8 | ||
|mov=9 | |mov=9 | ||
|inventory=[[Lance ( | |inventory=[[Lance (Famicom)|Lance]] | ||
}} | }} | ||
{{ChapUnitCellFE1 | {{ChapUnitCellFE1 | ||
| Line 480: | Line 496: | ||
|def=14 | |def=14 | ||
|mov=10 | |mov=10 | ||
|inventory=[[Lance ( | |inventory=[[Lance (Famicom)|Lance]] | ||
}} | }} | ||
{{ChapUnitCellFE1 | {{ChapUnitCellFE1 | ||
| Line 591: | Line 607: | ||
|inventory=[[Javelin]] | |inventory=[[Javelin]] | ||
|notes=Drops a {{drop|Levin Sword}} upon defeat.<br>Moves to Marth, waits if blocked by a door or other units; attempts to initiate her recruitment after recruiting [[Maria]]. | |notes=Drops a {{drop|Levin Sword}} upon defeat.<br>Moves to Marth, waits if blocked by a door or other units; attempts to initiate her recruitment after recruiting [[Maria]]. | ||
|last=y | |last=y | ||
}} | }} | ||
| Line 619: | Line 621: | ||
|def=12 | |def=12 | ||
|mov=5 | |mov=5 | ||
|inventory=[[Lance ( | |inventory=[[Lance (Famicom)|Lance]] | ||
}} | }} | ||
{{ChapUnitCellFE1 | {{ChapUnitCellFE1 | ||
| Line 651: | Line 653: | ||
|content2={{ChapUnitHdr|type=Enemy|platform=snes01}} | |content2={{ChapUnitHdr|type=Enemy|platform=snes01}} | ||
{{ChapUnitCellFE3 | {{ChapUnitCellFE3 | ||
|name=Grust | |name=[[Zharov]] | ||
|class=Armored Knight | |class=General | ||
|lv=3 | |lv=1 | ||
|#=3 | |#=1 | ||
|hp=20 | |hp=37 | ||
|str=11 | |||
|skill=6 | |||
|spd=5 | |||
|def=17 | |||
|res=3 | |||
|mov=5 | |||
|inventory={{Item|3|Steel Lance}} • {{Item|3|Speed Ring|type=drop}} | |||
|notes=Does not move; stands on a [[Terrain/Super Famicom games#Fire Emblem: Mystery of the Emblem|gate]], the chapter's seize point. | |||
}} | |||
{{ChapUnitCellFE3 | |||
|name=Grust | |||
|class=Armored Knight | |||
|lv=3 | |||
|#=3 | |||
|hp=20 | |||
|str=7 | |str=7 | ||
|skill=3 | |skill=3 | ||
| Line 882: | Line 899: | ||
|inventory={{Item|3|Javelin}} | |inventory={{Item|3|Javelin}} | ||
|notes=• Not present during preparations.<br>• Initially avoids combat. If [[Maria]] is recruited, Minerva will move to [[Marth]] and initiate her recruitment. If Maria is killed as an enemy, Minerva will become hostile. | |notes=• Not present during preparations.<br>• Initially avoids combat. If [[Maria]] is recruited, Minerva will move to [[Marth]] and initiate her recruitment. If Maria is killed as an enemy, Minerva will become hostile. | ||
|last=y | |last=y | ||
}} | }} | ||
| Line 941: | Line 943: | ||
|content1={{ChapUnitHdr|type=Enemy|platform=ds01}} | |content1={{ChapUnitHdr|type=Enemy|platform=ds01}} | ||
{{ChapUnitCellFE11 | {{ChapUnitCellFE11 | ||
|name= | |name=[[Zharov]] | ||
|class= | |class=General | ||
|lv= | |lv=3 | ||
|#=1 | |#=1 | ||
|hp=23.4 | |hp=31 | ||
|str=10 | |||
|mag=1 | |||
|skill=2 | |||
|spd=5 | |||
|lck=0 | |||
|def=15 | |||
|res=3 | |||
|inventory={{Item|ds|Javelin}} • {{Item|ds|Steel Lance}} • {{Item|ds|Speedwing|type=drop}} | |||
|notes=Stands on a [[Terrain/Nintendo DS games#Fire Emblem: Shadow Dragon|gate]], the chapter's seize point. | |||
}} | |||
{{ChapUnitCellFE11 | |||
|name=Grust | |||
|class=Knight | |||
|lv=7 | |||
|#=1 | |||
|hp=23.4 | |||
|str=7.8 | |str=7.8 | ||
|mag=0 | |mag=0 | ||
| Line 955: | Line 973: | ||
|mov=5 | |mov=5 | ||
|inventory={{Item|ds|Steel Lance}} | |inventory={{Item|ds|Steel Lance}} | ||
|notes=Does not move until he or an [[Archer]] or [[Sniper]] is provoked. | |||
}} | }} | ||
{{ChapUnitCellFE11 | {{ChapUnitCellFE11 | ||
| Line 971: | Line 990: | ||
|mov=8 | |mov=8 | ||
|inventory={{Item|ds|Armorslayer}} • {{Item|ds|Master Seal|type=drop}} | |inventory={{Item|ds|Armorslayer}} • {{Item|ds|Master Seal|type=drop}} | ||
|notes=Begins moving if [[Zharov]] or the westernmost [[Knight]] is provoked. | |||
}} | }} | ||
{{ChapUnitCellFE11 | {{ChapUnitCellFE11 | ||
| Line 987: | Line 1,007: | ||
|mov=5 | |mov=5 | ||
|inventory={{Item|ds|Iron Lance}} | |inventory={{Item|ds|Iron Lance}} | ||
|notes=Moves to attack units in range. | |||
}} | }} | ||
{{ChapUnitCellFE11 | {{ChapUnitCellFE11 | ||
| Line 1,105: | Line 1,126: | ||
|mov=5 | |mov=5 | ||
|inventory={{Item|ds|Heal}} | |inventory={{Item|ds|Heal}} | ||
|notes=Moves to heal units within twice his movement; returns to his starting position if no one is in range. | |||
}} | }} | ||
{{ChapUnitCellFE11 | {{ChapUnitCellFE11 | ||
| Line 1,121: | Line 1,143: | ||
|mov=5 | |mov=5 | ||
|inventory={{Item|ds|Steel Bow}} | |inventory={{Item|ds|Steel Bow}} | ||
|notes=Moves to attack units in range. | |||
}} | }} | ||
{{ChapUnitCellFE11 | {{ChapUnitCellFE11 | ||
| Line 1,137: | Line 1,160: | ||
|mov=7 | |mov=7 | ||
|inventory={{Item|ds|Silver Bow|type=drop}} | |inventory={{Item|ds|Silver Bow|type=drop}} | ||
|notes=Moves to attack units in range. | |||
}} | }} | ||
{{ChapUnitCellFE11 | {{ChapUnitCellFE11 | ||
| Line 1,153: | Line 1,177: | ||
|mov=7 | |mov=7 | ||
|inventory={{Item|ds|Iron Sword}} | |inventory={{Item|ds|Iron Sword}} | ||
|notes= | |notes=Moves to open the left [[chest]], then moves to escape northwest; ignores combat, except to attack player units blocking the escape point. | ||
}} | }} | ||
{{ChapUnitCellFE11 | {{ChapUnitCellFE11 | ||
| Line 1,170: | Line 1,194: | ||
|mov=5 | |mov=5 | ||
|inventory={{Item|ds|Heal}} | |inventory={{Item|ds|Heal}} | ||
|notes=Does not act. | |||
}} | }} | ||
{{ChapUnitCellFE11 | {{ChapUnitCellFE11 | ||
| Line 1,186: | Line 1,211: | ||
|mov=10 | |mov=10 | ||
|inventory={{Item|ds|Hauteclere|type=drop}} | |inventory={{Item|ds|Hauteclere|type=drop}} | ||
|notes=• | |notes=• Moves toward the northeast corner of the map (column 26, row 1).<br>• If [[Maria]] has been recruited, begins moving to [[Marth]] to initiate her recruitment, and ignores combat. | ||
|last=y | |last=y | ||
}} | }} | ||
| Line 1,275: | Line 1,283: | ||
|content2={{ChapUnitHdr|type=Enemy|platform=ds01}} | |content2={{ChapUnitHdr|type=Enemy|platform=ds01}} | ||
{{ChapUnitCellFE11 | {{ChapUnitCellFE11 | ||
|name=Grust | |name=[[Zharov]] | ||
|class=General | |||
|lv=3 | |||
|#=1 | |||
|hp=33.7 | |||
|str=10.9 | |||
|mag=1 | |||
|skill=2.9 | |||
|spd=5.6 | |||
|lck=0 | |||
|def=15 | |||
|res=3 | |||
|inventory={{Item|ds|Javelin}} • {{Item|ds|Steel Lance}} • {{Item|ds|Speedwing|type=drop}} | |||
|notes=Stands on a [[Terrain/Nintendo DS games#Fire Emblem: Shadow Dragon|gate]], the chapter's seize point. | |||
}} | |||
{{ChapUnitCellFE11 | |||
|name=Grust | |||
|class=Knight | |class=Knight | ||
|lv=7 | |lv=7 | ||
| Line 1,289: | Line 1,313: | ||
|mov=5 | |mov=5 | ||
|inventory={{Item|ds|Steel Lance}} | |inventory={{Item|ds|Steel Lance}} | ||
|notes=Does not move until he or an [[Archer]] or [[Sniper]] is provoked. | |||
}} | }} | ||
{{ChapUnitCellFE11 | {{ChapUnitCellFE11 | ||
| Line 1,305: | Line 1,330: | ||
|mov=8 | |mov=8 | ||
|inventory={{Item|ds|Armorslayer}} • {{Item|ds|Master Seal|type=drop}} | |inventory={{Item|ds|Armorslayer}} • {{Item|ds|Master Seal|type=drop}} | ||
|notes=Begins moving if [[Zharov]] or the westernmost [[Knight]] is provoked. | |||
}} | }} | ||
{{ChapUnitCellFE11 | {{ChapUnitCellFE11 | ||
| Line 1,321: | Line 1,347: | ||
|mov=5 | |mov=5 | ||
|inventory={{Item|ds|Iron Lance}} | |inventory={{Item|ds|Iron Lance}} | ||
|notes=Moves to attack units in range. | |||
}} | }} | ||
{{ChapUnitCellFE11 | {{ChapUnitCellFE11 | ||
| Line 1,439: | Line 1,466: | ||
|mov=5 | |mov=5 | ||
|inventory={{Item|ds|Heal}} | |inventory={{Item|ds|Heal}} | ||
|notes=Moves to heal units within twice his movement; returns to his starting position if no one is in range. | |||
}} | }} | ||
{{ChapUnitCellFE11 | {{ChapUnitCellFE11 | ||
| Line 1,455: | Line 1,483: | ||
|mov=5 | |mov=5 | ||
|inventory={{Item|ds|Steel Bow}} | |inventory={{Item|ds|Steel Bow}} | ||
|notes=Moves to attack units in range. | |||
}} | }} | ||
{{ChapUnitCellFE11 | {{ChapUnitCellFE11 | ||
| Line 1,471: | Line 1,500: | ||
|mov=7 | |mov=7 | ||
|inventory={{Item|ds|Silver Bow|type=drop}} | |inventory={{Item|ds|Silver Bow|type=drop}} | ||
|notes=Moves to attack units in range. | |||
}} | }} | ||
{{ChapUnitCellFE11 | {{ChapUnitCellFE11 | ||
| Line 1,487: | Line 1,517: | ||
|mov=7 | |mov=7 | ||
|inventory={{Item|ds|Iron Sword}} | |inventory={{Item|ds|Iron Sword}} | ||
|notes= | |notes=Moves to open the left [[chest]], then moves to escape northwest; ignores combat, except to attack player units blocking the escape point. | ||
}} | }} | ||
{{ChapUnitCellFE11 | {{ChapUnitCellFE11 | ||
| Line 1,504: | Line 1,534: | ||
|mov=5 | |mov=5 | ||
|inventory={{Item|ds|Heal}} | |inventory={{Item|ds|Heal}} | ||
|notes=Does not act. | |||
}} | }} | ||
{{ChapUnitCellFE11 | {{ChapUnitCellFE11 | ||
| Line 1,520: | Line 1,551: | ||
|mov=10 | |mov=10 | ||
|inventory={{Item|ds|Hauteclere|type=drop}} | |inventory={{Item|ds|Hauteclere|type=drop}} | ||
|notes=• | |notes=• Moves toward the northeast corner of the map (column 26, row 1).<br>• If [[Maria]] has been recruited, begins moving to [[Marth]] to initiate her recruitment, and ignores combat. | ||
|last=y | |last=y | ||
}} | }} | ||
| Line 1,609: | Line 1,623: | ||
|content3={{ChapUnitHdr|type=Enemy|platform=ds01}} | |content3={{ChapUnitHdr|type=Enemy|platform=ds01}} | ||
{{ChapUnitCellFE11 | {{ChapUnitCellFE11 | ||
|name=Grust | |name=[[Zharov]] | ||
|class=General | |||
|lv=3 | |||
|#=1 | |||
|hp=36.4 | |||
|str=11.8 | |||
|mag=1 | |||
|skill=3.8 | |||
|spd=6.2 | |||
|lck=0 | |||
|def=15 | |||
|res=3 | |||
|inventory={{Item|ds|Javelin}} • {{Item|ds|Steel Lance}} • {{Item|ds|Speedwing|type=drop}} | |||
|notes=Stands on a [[Terrain/Nintendo DS games#Fire Emblem: Shadow Dragon|gate]], the chapter's seize point. | |||
}} | |||
{{ChapUnitCellFE11 | |||
|name=Grust | |||
|class=Knight | |class=Knight | ||
|lv=7 | |lv=7 | ||
| Line 1,623: | Line 1,653: | ||
|mov=5 | |mov=5 | ||
|inventory={{Item|ds|Steel Lance}} | |inventory={{Item|ds|Steel Lance}} | ||
|notes=Does not move until he or an [[Archer]] or [[Sniper]] is provoked. | |||
}} | }} | ||
{{ChapUnitCellFE11 | {{ChapUnitCellFE11 | ||
| Line 1,639: | Line 1,670: | ||
|mov=8 | |mov=8 | ||
|inventory={{Item|ds|Armorslayer}} • {{Item|ds|Master Seal|type=drop}} | |inventory={{Item|ds|Armorslayer}} • {{Item|ds|Master Seal|type=drop}} | ||
|notes=Begins moving if [[Zharov]] or the westernmost [[Knight]] is provoked. | |||
}} | }} | ||
{{ChapUnitCellFE11 | {{ChapUnitCellFE11 | ||
| Line 1,655: | Line 1,687: | ||
|mov=5 | |mov=5 | ||
|inventory={{Item|ds|Iron Lance}} | |inventory={{Item|ds|Iron Lance}} | ||
|notes=Moves to attack units in range. | |||
}} | }} | ||
{{ChapUnitCellFE11 | {{ChapUnitCellFE11 | ||
| Line 1,773: | Line 1,806: | ||
|mov=5 | |mov=5 | ||
|inventory={{Item|ds|Heal}} | |inventory={{Item|ds|Heal}} | ||
|notes=Moves to heal units within twice his movement; returns to his starting position if no one is in range. | |||
}} | }} | ||
{{ChapUnitCellFE11 | {{ChapUnitCellFE11 | ||
| Line 1,789: | Line 1,823: | ||
|mov=5 | |mov=5 | ||
|inventory={{Item|ds|Steel Bow}} | |inventory={{Item|ds|Steel Bow}} | ||
|notes=Moves to attack units in range. | |||
}} | }} | ||
{{ChapUnitCellFE11 | {{ChapUnitCellFE11 | ||
| Line 1,805: | Line 1,840: | ||
|mov=7 | |mov=7 | ||
|inventory={{Item|ds|Silver Bow|type=drop}} | |inventory={{Item|ds|Silver Bow|type=drop}} | ||
|notes=Moves to attack units in range. | |||
}} | }} | ||
{{ChapUnitCellFE11 | {{ChapUnitCellFE11 | ||
| Line 1,821: | Line 1,857: | ||
|mov=7 | |mov=7 | ||
|inventory={{Item|ds|Iron Sword}} | |inventory={{Item|ds|Iron Sword}} | ||
|notes= | |notes=Moves to open the left [[chest]], then moves to escape northwest; ignores combat, except to attack player units blocking the escape point. | ||
}} | }} | ||
{{ChapUnitCellFE11 | {{ChapUnitCellFE11 | ||
| Line 1,838: | Line 1,874: | ||
|mov=5 | |mov=5 | ||
|inventory={{Item|ds|Heal}} | |inventory={{Item|ds|Heal}} | ||
|notes=Does not act. | |||
}} | }} | ||
{{ChapUnitCellFE11 | {{ChapUnitCellFE11 | ||
| Line 1,854: | Line 1,891: | ||
|mov=10 | |mov=10 | ||
|inventory={{Item|ds|Hauteclere|type=drop}} | |inventory={{Item|ds|Hauteclere|type=drop}} | ||
|notes=• | |notes=• Moves toward the northeast corner of the map (column 26, row 1).<br>• If [[Maria]] has been recruited, begins moving to [[Marth]] to initiate her recruitment, and ignores combat. | ||
|last=y | |last=y | ||
}} | }} | ||
| Line 1,943: | Line 1,963: | ||
|content4={{ChapUnitHdr|type=Enemy|platform=ds01}} | |content4={{ChapUnitHdr|type=Enemy|platform=ds01}} | ||
{{ChapUnitCellFE11 | {{ChapUnitCellFE11 | ||
|name=Grust | |name=[[Zharov]] | ||
|class=General | |||
|lv=3 | |||
|#=1 | |||
|hp=39.1 | |||
|str=12.7 | |||
|mag=1 | |||
|skill=4.7 | |||
|spd=6.8 | |||
|lck=0 | |||
|def=15 | |||
|res=3 | |||
|inventory={{Item|ds|Javelin}} • {{Item|ds|Steel Lance}} • {{Item|ds|Speedwing|type=drop}} | |||
|notes=Stands on a [[Terrain/Nintendo DS games#Fire Emblem: Shadow Dragon|gate]], the chapter's seize point. | |||
}} | |||
{{ChapUnitCellFE11 | |||
|name=Grust | |||
|class=Knight | |class=Knight | ||
|lv=7 | |lv=7 | ||
| Line 1,957: | Line 1,993: | ||
|mov=5 | |mov=5 | ||
|inventory={{Item|ds|Steel Lance}} | |inventory={{Item|ds|Steel Lance}} | ||
|notes=Does not move until he or an [[Archer]] or [[Sniper]] is provoked. | |||
}} | }} | ||
{{ChapUnitCellFE11 | {{ChapUnitCellFE11 | ||
| Line 1,973: | Line 2,010: | ||
|mov=8 | |mov=8 | ||
|inventory={{Item|ds|Armorslayer}} • {{Item|ds|Master Seal|type=drop}} | |inventory={{Item|ds|Armorslayer}} • {{Item|ds|Master Seal|type=drop}} | ||
|notes=Begins moving if [[Zharov]] or the westernmost [[Knight]] is provoked. | |||
}} | }} | ||
{{ChapUnitCellFE11 | {{ChapUnitCellFE11 | ||
| Line 1,989: | Line 2,027: | ||
|mov=5 | |mov=5 | ||
|inventory={{Item|ds|Steel Lance}} | |inventory={{Item|ds|Steel Lance}} | ||
|notes=Moves to attack units in range. | |||
}} | }} | ||
{{ChapUnitCellFE11 | {{ChapUnitCellFE11 | ||
| Line 2,107: | Line 2,146: | ||
|mov=5 | |mov=5 | ||
|inventory={{Item|ds|Heal}} | |inventory={{Item|ds|Heal}} | ||
|notes=Moves to heal units within twice his movement; returns to his starting position if no one is in range. | |||
}} | }} | ||
{{ChapUnitCellFE11 | {{ChapUnitCellFE11 | ||
| Line 2,123: | Line 2,163: | ||
|mov=5 | |mov=5 | ||
|inventory={{Item|ds|Steel Bow}} | |inventory={{Item|ds|Steel Bow}} | ||
|notes=Moves to attack units in range. | |||
}} | }} | ||
{{ChapUnitCellFE11 | {{ChapUnitCellFE11 | ||
| Line 2,139: | Line 2,180: | ||
|mov=7 | |mov=7 | ||
|inventory={{Item|ds|Silver Bow|type=drop}} | |inventory={{Item|ds|Silver Bow|type=drop}} | ||
|notes=Moves to attack units in range. | |||
}} | }} | ||
{{ChapUnitCellFE11 | {{ChapUnitCellFE11 | ||
| Line 2,155: | Line 2,197: | ||
|mov=7 | |mov=7 | ||
|inventory={{Item|ds|Steel Sword}} | |inventory={{Item|ds|Steel Sword}} | ||
|notes= | |notes=Moves to open the left [[chest]], then moves to escape northwest; ignores combat, except to attack player units blocking the escape point. | ||
}} | }} | ||
{{ChapUnitCellFE11 | {{ChapUnitCellFE11 | ||
| Line 2,172: | Line 2,214: | ||
|mov=5 | |mov=5 | ||
|inventory={{Item|ds|Heal}} | |inventory={{Item|ds|Heal}} | ||
|notes=Does not act. | |||
}} | }} | ||
{{ChapUnitCellFE11 | {{ChapUnitCellFE11 | ||
| Line 2,188: | Line 2,231: | ||
|mov=10 | |mov=10 | ||
|inventory={{Item|ds|Hauteclere|type=drop}} | |inventory={{Item|ds|Hauteclere|type=drop}} | ||
|notes=• | |notes=• Moves toward the northeast corner of the map (column 26, row 1).<br>• If [[Maria]] has been recruited, begins moving to [[Marth]] to initiate her recruitment, and ignores combat. | ||
|last=y | |last=y | ||
}} | }} | ||
| Line 2,277: | Line 2,303: | ||
|content5={{ChapUnitHdr|type=Enemy|platform=ds01}} | |content5={{ChapUnitHdr|type=Enemy|platform=ds01}} | ||
{{ChapUnitCellFE11 | {{ChapUnitCellFE11 | ||
|name=Grust | |name=[[Zharov]] | ||
|class=General | |||
|lv=3 | |||
|#=1 | |||
|hp=41.8 | |||
|str=13.6 | |||
|mag=1 | |||
|skill=5.6 | |||
|spd=7.4 | |||
|lck=0 | |||
|def=15 | |||
|res=3 | |||
|inventory={{Item|ds|Javelin}} • {{Item|ds|Steel Lance}} • {{Item|ds|Speedwing|type=drop}} | |||
|notes=Stands on a [[Terrain/Nintendo DS games#Fire Emblem: Shadow Dragon|gate]], the chapter's seize point. | |||
}} | |||
{{ChapUnitCellFE11 | |||
|name=Grust | |||
|class=Knight | |class=Knight | ||
|lv=7 | |lv=7 | ||
| Line 2,291: | Line 2,333: | ||
|mov=5 | |mov=5 | ||
|inventory={{Item|ds|Steel Lance}} | |inventory={{Item|ds|Steel Lance}} | ||
|notes=Does not move until he or an [[Archer]] or [[Sniper]] is provoked. | |||
}} | }} | ||
{{ChapUnitCellFE11 | {{ChapUnitCellFE11 | ||
| Line 2,307: | Line 2,350: | ||
|mov=8 | |mov=8 | ||
|inventory={{Item|ds|Armorslayer}} • {{Item|ds|Master Seal|type=drop}} | |inventory={{Item|ds|Armorslayer}} • {{Item|ds|Master Seal|type=drop}} | ||
|notes=Begins moving if [[Zharov]] or the westernmost [[Knight]] is provoked. | |||
}} | }} | ||
{{ChapUnitCellFE11 | {{ChapUnitCellFE11 | ||
| Line 2,323: | Line 2,367: | ||
|mov=5 | |mov=5 | ||
|inventory={{Item|ds|Steel Lance}} | |inventory={{Item|ds|Steel Lance}} | ||
|notes=Moves to attack units in range. | |||
}} | }} | ||
{{ChapUnitCellFE11 | {{ChapUnitCellFE11 | ||
| Line 2,441: | Line 2,486: | ||
|mov=5 | |mov=5 | ||
|inventory={{Item|ds|Heal}} | |inventory={{Item|ds|Heal}} | ||
|notes=Moves to heal units within twice his movement; returns to his starting position if no one is in range. | |||
}} | }} | ||
{{ChapUnitCellFE11 | {{ChapUnitCellFE11 | ||
| Line 2,457: | Line 2,503: | ||
|mov=5 | |mov=5 | ||
|inventory={{Item|ds|Steel Bow}} | |inventory={{Item|ds|Steel Bow}} | ||
|notes=Moves to attack units in range. | |||
}} | }} | ||
{{ChapUnitCellFE11 | {{ChapUnitCellFE11 | ||
| Line 2,473: | Line 2,520: | ||
|mov=7 | |mov=7 | ||
|inventory={{Item|ds|Silver Bow|type=drop}} | |inventory={{Item|ds|Silver Bow|type=drop}} | ||
|notes=Moves to attack units in range. | |||
}} | }} | ||
{{ChapUnitCellFE11 | {{ChapUnitCellFE11 | ||
| Line 2,489: | Line 2,537: | ||
|mov=7 | |mov=7 | ||
|inventory={{Item|ds|Steel Sword}} | |inventory={{Item|ds|Steel Sword}} | ||
|notes= | |notes=Moves to open the left [[chest]], then moves to escape northwest; ignores combat, except to attack player units blocking the escape point. | ||
}} | }} | ||
{{ChapUnitCellFE11 | {{ChapUnitCellFE11 | ||
| Line 2,506: | Line 2,554: | ||
|mov=5 | |mov=5 | ||
|inventory={{Item|ds|Heal}} | |inventory={{Item|ds|Heal}} | ||
|notes=Does not act. | |||
}} | }} | ||
{{ChapUnitCellFE11 | {{ChapUnitCellFE11 | ||
| Line 2,522: | Line 2,571: | ||
|mov=10 | |mov=10 | ||
|inventory={{Item|ds|Hauteclere|type=drop}} | |inventory={{Item|ds|Hauteclere|type=drop}} | ||
|notes=• | |notes=• Moves toward the northeast corner of the map (column 26, row 1).<br>• If [[Maria]] has been recruited, begins moving to [[Marth]] to initiate her recruitment, and ignores combat. | ||
|last=y | |last=y | ||
}} | }} | ||
| Line 2,610: | Line 2,642: | ||
{{ChapUnitFtr}} | {{ChapUnitFtr}} | ||
|content6={{ChapUnitHdr|type=Enemy|platform=ds01}} | |content6={{ChapUnitHdr|type=Enemy|platform=ds01}} | ||
{{ChapUnitCellFE11 | |||
|name=[[Zharov]] | |||
|class=General | |||
|lv=3 | |||
|#=1 | |||
|hp=44.5 | |||
|str=14.5 | |||
|mag=1 | |||
|skill=6.5 | |||
|spd=8 | |||
|lck=0 | |||
|def=15 | |||
|res=3 | |||
|inventory={{Item|ds|Javelin|type=forged}} • {{Item|ds|Silver Lance}} • {{Item|ds|Speedwing|type=drop}} | |||
|notes=Stands on a [[Terrain/Nintendo DS games#Fire Emblem: Shadow Dragon|gate]], the chapter's seize point. | |||
}} | |||
{{ChapUnitCellFE11 | {{ChapUnitCellFE11 | ||
|name=Grust | |name=Grust | ||
| Line 2,625: | Line 2,673: | ||
|mov=5 | |mov=5 | ||
|inventory={{Item|ds|Silver Lance}} | |inventory={{Item|ds|Silver Lance}} | ||
|notes=Does not move until he or an [[Archer]] or [[Sniper]] is provoked. | |||
}} | }} | ||
{{ChapUnitCellFE11 | {{ChapUnitCellFE11 | ||
| Line 2,641: | Line 2,690: | ||
|mov=8 | |mov=8 | ||
|inventory={{Item|ds|Armorslayer|type=forged}} • {{Item|ds|Master Seal|type=drop}} | |inventory={{Item|ds|Armorslayer|type=forged}} • {{Item|ds|Master Seal|type=drop}} | ||
|notes=Begins moving if [[Zharov]] or the westernmost [[Knight]] is provoked. | |||
}} | }} | ||
{{ChapUnitCellFE11 | {{ChapUnitCellFE11 | ||
| Line 2,657: | Line 2,707: | ||
|mov=5 | |mov=5 | ||
|inventory={{Item|ds|Silver Lance}} | |inventory={{Item|ds|Silver Lance}} | ||
|notes=Moves to attack units in range. | |||
}} | }} | ||
{{ChapUnitCellFE11 | {{ChapUnitCellFE11 | ||
| Line 2,775: | Line 2,826: | ||
|mov=5 | |mov=5 | ||
|inventory={{Item|ds|Heal}} | |inventory={{Item|ds|Heal}} | ||
|notes=Moves to heal units within twice his movement; returns to his starting position if no one is in range. | |||
}} | }} | ||
{{ChapUnitCellFE11 | {{ChapUnitCellFE11 | ||
| Line 2,791: | Line 2,843: | ||
|mov=5 | |mov=5 | ||
|inventory={{Item|ds|Silver Bow}} | |inventory={{Item|ds|Silver Bow}} | ||
|notes=Moves to attack units in range. | |||
}} | }} | ||
{{ChapUnitCellFE11 | {{ChapUnitCellFE11 | ||
| Line 2,807: | Line 2,860: | ||
|mov=7 | |mov=7 | ||
|inventory={{Item|ds|Silver Bow|type=drop}} | |inventory={{Item|ds|Silver Bow|type=drop}} | ||
|notes=Moves to attack units in range. | |||
}} | }} | ||
{{ChapUnitCellFE11 | {{ChapUnitCellFE11 | ||
| Line 2,823: | Line 2,877: | ||
|mov=7 | |mov=7 | ||
|inventory={{Item|ds|Silver Sword}} | |inventory={{Item|ds|Silver Sword}} | ||
|notes= | |notes=Moves to open the left [[chest]], then moves to escape northwest; ignores combat, except to attack player units blocking the escape point. | ||
}} | }} | ||
{{ChapUnitCellFE11 | {{ChapUnitCellFE11 | ||
| Line 2,840: | Line 2,894: | ||
|mov=5 | |mov=5 | ||
|inventory={{Item|ds|Heal}} | |inventory={{Item|ds|Heal}} | ||
|notes=Does not act. | |||
}} | }} | ||
{{ChapUnitCellFE11 | {{ChapUnitCellFE11 | ||
| Line 2,856: | Line 2,911: | ||
|mov=10 | |mov=10 | ||
|inventory={{Item|ds|Hauteclere|type=drop}} | |inventory={{Item|ds|Hauteclere|type=drop}} | ||
|notes=• | |notes=• Moves toward the northeast corner of the map (column 26, row 1).<br>• If [[Maria]] has been recruited, begins moving to [[Marth]] to initiate her recruitment, and ignores combat. | ||
|last=y | |last=y | ||
}} | }} | ||
| Line 2,943: | Line 2,981: | ||
}} | }} | ||
{{ChapUnitFtr}} | {{ChapUnitFtr}} | ||
All {{forged|forged|article=Forge}} weapons have +4 | All {{forged|forged|article=Forge}} weapons have +4 might and +20 hit. | ||
}} | }} | ||
}} | }} | ||
| Line 2,950: | Line 2,988: | ||
=====''Shadow Dragon & the Blade of Light''===== | =====''Shadow Dragon & the Blade of Light''===== | ||
*Turn 16 | *Turn 16 | ||
** | **Two [[Knight]]s, four [[Cavalier]]s, and two [[Horseman|Horsemen]] to the northeast corner. | ||
=====''Mystery of the Emblem''===== | =====''Mystery of the Emblem''===== | ||
*Turn 15 | *Turn 15 | ||
** | **Five [[Cavalier]]s and three [[Horseman|Horsemen]] from the northeast corner. | ||
=====''Shadow Dragon''===== | =====''Shadow Dragon''===== | ||
*Turns 6 and 10 | *Turns 6 and 10 | ||
** | **Two [[Knight]]s, four [[Cavalier]]s, and two [[Horseman|Horsemen]] from the northeast corner. | ||
All reinforcements are halted when [[Zharov]] is defeated. | |||
===Boss data=== | ===Boss data=== | ||
| Line 3,002: | Line 3,041: | ||
|res=3 | |res=3 | ||
|move=5 | |move=5 | ||
| | |weapons={{Item|3|Steel Lance}} | ||
|items={{Item|3|Speed Ring|type=drop}} | |||
|la=y | |la=y | ||
}} | }} | ||
| Line 3,120: | Line 3,160: | ||
==Strategy== | ==Strategy== | ||
{{Strategy}} | {{Strategy}} | ||
===Merciless difficulty=== | |||
'''1. Enemy Upgrades:''' | |||
* Promoted enemies are more common. They now use both Silver weapons and specialized weapons forged for better power and accuracy. | |||
* Enemy speed stats average in the mid-teens. This outpaces your weaker units, requiring greater strategy. | |||
'''2. Character Recruitment:''' | |||
* '''[[Maria]]:''' [[Cleric]]; primary healer for upcoming chapters; one of four users of the [[Aum]] staff and the strongest healer of those four. | |||
* '''[[Minerva]]:''' [[Dracoknight]] with immediate A-rank in axes and [[Hauteclere]] access; however, a promoted [[Barst]] is superior. | |||
'''3. [[Master Seal]].''' Obtained from an enemy [[Hero]]. Best candidates for immediate promotion: | |||
* '''[[Barst]]:''' +5 speed from [[Fighter]] to [[Hero]]. | |||
* '''[[Caeda]]:''' +4 strength, +5 defense as [[Dracoknight]]. | |||
* '''[[Lena]]:''' Ability to fight and heal. By now, she should be near or at level 20. | |||
* '''[[Merric]]:''' Gains healing ability but is likely lower level than Lena. | |||
* '''[[Gordin]]:''' +5 skill and speed, +2 movement. Alternatively, [[Jeorge]] can be used as a [[Sniper]]. | |||
'''4. Chapter Strategy:''' | |||
* Initial challenge: Four [[Cavalier]]s. Aim to defeat them by turn 3 to intercept the [[Thief]] with the [[Levin Sword]] on turn 4. | |||
* Watch out for four fliers who might either flank or join the cavalry and Dracoknights with 14 speed, 12 strength, and [[Silver Lance]]s. | |||
* Prison navigation: Caution around the Sniper. Recruit Maria. Exit north, defeat the Hero, recruit Minerva, and confront the boss. | |||
* Items: This is the last chance to buy [[Hammer]]s in bulk. Consider stocking up. | |||
'''5. Boss - [[Zharov]]:''' | |||
* Dangerous with a forged [[Javelin]]. Best countered by Barst with a Hammer. | |||
==Trivia== | ==Trivia== | ||
| Line 3,134: | Line 3,192: | ||
{{Names | {{Names | ||
|eng-name=Princess Minerva | |eng-name=Princess Minerva | ||
| | |jpn-name={{h|プリンセス・ミネルバ|Purinsesu mineruba}} | ||
| | |jpn-mean=Princess Minerba | ||
|span-name=La princesa Minerva | |span-name=La princesa Minerva | ||
|span-mean=The princess Minerva | |span-mean=The princess Minerva | ||
| Line 3,155: | Line 3,213: | ||
{{ChapterNav | {{ChapterNav | ||
|prechapter= | |prechapter=The Pyrathi Dragon | ||
|prealternate= | |prealternate=Port Warren{{!}}Port Warren <small>(''Mystery of the Emblem'')</small> | ||
|nextchapter=Knorda Market | |nextchapter=Knorda Market | ||
}} | }} | ||
Revision as of 21:03, 28 March 2024
- This article is about the chapter from Shadow Dragon & the Blade of Light and its remakes. For the character, see Minerva. For the History Mode map in Warriors, see Princess Minerva (Warriors).
| ||||||||||
|

Princess Minerva (Japanese: プリンセス・ミネルバ Princess Minerva) is the tenth chapter in Fire Emblem: Shadow Dragon & the Blade of Light and Fire Emblem: Shadow Dragon and the eighth chapter in Book I of Fire Emblem: Mystery of the Emblem.
Plot
- Main article:
Princess Minerva/Script
Despite the objections of some of his soldiers, Marth agrees to besiege Castle Deil on Minerva's behalf. The mission is a success; Maria is rescued, Minerva turns coat, and General Zharov is killed. Afterwards, Nyna tells Marth about Pontifex Miloah, a powerful sage who was murdered by Gharnef. Nyna explains that his daughter Linde has not been seen since his death and asks Marth to find her.
Chapter data
Shadow Dragon & the Blade of Light Mystery of the Emblem Shadow Dragon


| ||||||
|
| |||||
| Victory: Seize | Player | Enemy | ||||
|---|---|---|---|---|---|---|
| Defeat: Marth dies | 1–14+2 | 20+16−2 | ||||
| ||||||
| Map dimensions: 30 columns by 28 rows | ||||||
Character data
Shadow Dragon & the Blade of Light Mystery of the Emblem Shadow Dragon
| Characters | ||||||||||||||||||||||
|---|---|---|---|---|---|---|---|---|---|---|---|---|---|---|---|---|---|---|---|---|---|---|
New units
| ||||||||||||||||||||||
| ||||||||||||||||||||||
Required characters
| ||||||||||||||||||||||

| ||||||||||||||||||||||
Available characters
| ||||||||||||||||||||||
                                
| ||||||||||||||||||||||


Item data
Shadow Dragon & the Blade of Light Mystery of the Emblem Shadow Dragon
| |||||||||||||||||||||
|
Shop data
Shadow Dragon & the Blade of Light Mystery of the Emblem Shadow Dragon
Enemy data
Shadow Dragon & the Blade of Light Mystery of the Emblem Shadow Dragon
- Stats with a decimal can vary randomly; the decimal represents the chance for the stat to increase to the nearest integer, or otherwise be truncated.
Normal Hard-1 Hard-2 Hard-3 Hard-4 Hard-5
| |||||||||||||||||||||||||||||||||||||||||||||||||||||||||||||||||||||||||||||||||||||||||||||||||||||||||||||||||||||||||||||||||||||||||||||||||||||||||||||||||||||||||||||||||||||||||||||||||||||||||||||||||||||||||||||||||||||||||||||||||||||||||||||||||||||||||||||||||||||||||||||||||||||||||||||||||||||||||||||||||||||||||||||||||||||||||||||||||||||||||||||||||||||||||||||||||||||||||||||||||||||||||||||||||||||||||||||||||||||||||||||||
| |||||||||||||||||||||||||||||||||||||||||||||||||||||||||||||||||||||||||||||||||||||||||||||||||||||||||||||||||||||||||||||||||||||||||||||||||||||||||||||||||||||||||||||||||||||||||||||||||||||||||||||||||||||||||||||||||||||||||||||||||||||||||||||||||||||||||||||||||||||||||||||||||||||||||||||||||||||||||||||||||||||||||||||||||||||||||||||||||||||||||||||||||||||||||||||||||||||||||||||||||||||||||||||||||||||||||||||||||||||||||||||||
| |||||||||||||||||||||||||||||||||||||||||||||||||||||||||||||||||||||||||||||||||||||||||||||||||||||||||||||||||||||||||||||||||||||||||||||||||||||||||||||||||||||||||||||||||||||||||||||||||||||||||||||||||||||||||||||||||||||||||||||||||||||||||||||||||||||||||||||||||||||||||||||||||||||||||||||||||||||||||||||||||||||||||||||||||||||||||||||||||||||||||||||||||||||||||||||||||||||||||||||||||||||||||||||||||||||||||||||||||||||||||||||||
| |||||||||||||||||||||||||||||||||||||||||||||||||||||||||||||||||||||||||||||||||||||||||||||||||||||||||||||||||||||||||||||||||||||||||||||||||||||||||||||||||||||||||||||||||||||||||||||||||||||||||||||||||||||||||||||||||||||||||||||||||||||||||||||||||||||||||||||||||||||||||||||||||||||||||||||||||||||||||||||||||||||||||||||||||||||||||||||||||||||||||||||||||||||||||||||||||||||||||||||||||||||||||||||||||||||||||||||||||||||||||||||||
Reinforcements
Shadow Dragon & the Blade of Light
Mystery of the Emblem
Shadow Dragon
All reinforcements are halted when Zharov is defeated.
Boss data
- Main article:
Zharov
Shadow Dragon & the Blade of Light Mystery of the Emblem Shadow Dragon
- Stats with a decimal can vary randomly; the decimal represents the chance for the stat to increase to the nearest integer, or be otherwise truncated.

Strategy
| This section details unofficial strategies that may help with completion of the chapter. This may not work for everybody. |
Merciless difficulty
1. Enemy Upgrades:
- Promoted enemies are more common. They now use both Silver weapons and specialized weapons forged for better power and accuracy.
- Enemy speed stats average in the mid-teens. This outpaces your weaker units, requiring greater strategy.
2. Character Recruitment:
- Maria: Cleric; primary healer for upcoming chapters; one of four users of the Aum staff and the strongest healer of those four.
- Minerva: Dracoknight with immediate A-rank in axes and Hauteclere access; however, a promoted Barst is superior.
3. Master Seal. Obtained from an enemy Hero. Best candidates for immediate promotion:
- Barst: +5 speed from Fighter to Hero.
- Caeda: +4 strength, +5 defense as Dracoknight.
- Lena: Ability to fight and heal. By now, she should be near or at level 20.
- Merric: Gains healing ability but is likely lower level than Lena.
- Gordin: +5 skill and speed, +2 movement. Alternatively, Jeorge can be used as a Sniper.
4. Chapter Strategy:
- Initial challenge: Four Cavaliers. Aim to defeat them by turn 3 to intercept the Thief with the Levin Sword on turn 4.
- Watch out for four fliers who might either flank or join the cavalry and Dracoknights with 14 speed, 12 strength, and Silver Lances.
- Prison navigation: Caution around the Sniper. Recruit Maria. Exit north, defeat the Hero, recruit Minerva, and confront the boss.
- Items: This is the last chance to buy Hammers in bulk. Consider stocking up.
5. Boss - Zharov:
- Dangerous with a forged Javelin. Best countered by Barst with a Hammer.
Trivia
- On the H5 difficulty of Shadow Dragon, this is the first chapter in the Fire Emblem series to have enemies with forged weaponry.
Etymology and other languages
| Names, etymology, and in other regions | ||
|---|---|---|
| Language | Name | Definition, etymology, and notes |
| English |
Princess Minerva |
-- |
| Japanese |
プリンセス・ミネルバ |
Princess Minerba |
| Spanish |
La princesa Minerva |
The princess Minerva |
| French |
Princesse Minerva |
Princess Minerva |
| German |
Prinzessin Minerva |
Princess Minerva; abbreviated on the save menu as "Pr. Minerva". |
| Italian |
La principessa Minerva |
The princess Minerva |
Gallery
This section has been marked as a stub. Please help improve the page by adding information.
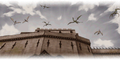
CG image displayed during the intro for Shadow Dragon

References
| ← The Pyrathi Dragon • ← Port Warren (Mystery of the Emblem) • |
Princess Minerva | • Knorda Market → |
|---|
| Fire Emblem: Mystery of the Emblem | ||||||||||||||||||||||||||||||||||||||
|---|---|---|---|---|---|---|---|---|---|---|---|---|---|---|---|---|---|---|---|---|---|---|---|---|---|---|---|---|---|---|---|---|---|---|---|---|---|---|
| ||||||||||||||||||||||||||||||||||||||
| Fire Emblem: Shadow Dragon | ||||||||||||||||||||
|---|---|---|---|---|---|---|---|---|---|---|---|---|---|---|---|---|---|---|---|---|
|