| Site News |
|---|
| Warning: This wiki contains spoilers. Read at your own risk! Social media: If you would like, please join our Discord server, and/or follow us on X (Twitter) or Tumblr! |
The Nest of Evil: Difference between revisions
Thecornerman (talk | contribs) m (Text replacement - "the following sidequest" to "the following side quest") |
|||
| (3 intermediate revisions by 3 users not shown) | |||
| Line 1: | Line 1: | ||
{{Chapter Infobox | {{Chapter Infobox | ||
|image=[[File:Cm fe12 6.png|200px]] | |image=[[File:Cm fe12 6.png|200px]] | ||
| Line 28: | Line 27: | ||
|defeat=[[Marth]] dies | |defeat=[[Marth]] dies | ||
|ally=1–12{{h|+2|Upon Rickard and Samuel being recruited}} | |ally=1–12{{h|+2|Upon Rickard and Samuel being recruited}} | ||
|enemy=20{{h|+20|Reinforcements}}{{h|−2|Upon Rickard and Samuel being recruited}}{{h|*|Rickard will not appear as an enemy if he was killed or recruited in Chapter 5}} | |enemy=20{{h|+20|Reinforcements}}{{h|−2|Upon Rickard and Samuel being recruited}}{{h|*|Rickard will not appear as an enemy if he was killed or recruited in Chapter 5}} | ||
|map=[[File:Cm fe03 b2 6.png]] | |map=[[File:Cm fe03 b2 6.png]] | ||
|col=30 | |col=30 | ||
| Line 41: | Line 40: | ||
|defeat=[[Marth]] or [[Kris]] dies | |defeat=[[Marth]] or [[Kris]] dies | ||
|ally=1–11{{h|+4|Upon Rickard, Frey, Norne, and Samuel being recruited}} | |ally=1–11{{h|+4|Upon Rickard, Frey, Norne, and Samuel being recruited}} | ||
|enemy=20{{h|+12|Reinforcements}}{{h|−2|Upon Rickard and Samuel being recruited}}{{h|*|Rickard will not appear as an enemy if he was killed or recruited in Chapter 5}} | |enemy=20{{h|+12|Reinforcements}}{{h|−2|Upon Rickard and Samuel being recruited}}{{h|*|Rickard will not appear as an enemy if he was killed or recruited in Chapter 5}} | ||
|map=[[File:Cm fe12 6.png|512px]] | |map=[[File:Cm fe12 6.png|512px]] | ||
|col=30 | |col=30 | ||
| Line 50: | Line 49: | ||
|defeat=[[Marth]] or [[Kris]] dies | |defeat=[[Marth]] or [[Kris]] dies | ||
|ally=1–11{{h|+4|Upon Rickard, Frey, Norne, and Samuel being recruited}} | |ally=1–11{{h|+4|Upon Rickard, Frey, Norne, and Samuel being recruited}} | ||
|enemy=21{{h|+12|Reinforcements}}{{h|−2|Upon Rickard and Samuel being recruited}}{{h|*|Rickard will not appear as an enemy if he was killed or recruited in Chapter 5}} | |enemy=21{{h|+12|Reinforcements}}{{h|−2|Upon Rickard and Samuel being recruited}}{{h|*|Rickard will not appear as an enemy if he was killed or recruited in Chapter 5}} | ||
|map=[[File:Cm fe12 6 m.png|512px]] | |map=[[File:Cm fe12 6 m.png|512px]] | ||
|col=30 | |col=30 | ||
| Line 59: | Line 58: | ||
|defeat=[[Marth]] or [[Kris]] dies | |defeat=[[Marth]] or [[Kris]] dies | ||
|ally=1–11{{h|+4|Upon Rickard, Frey, Norne, and Samuel being recruited}} | |ally=1–11{{h|+4|Upon Rickard, Frey, Norne, and Samuel being recruited}} | ||
|enemy=23{{h|+12|Reinforcements}}{{h|−2|Upon Rickard and Samuel being recruited}}{{h|*|Rickard will not appear as an enemy if he was killed or recruited in Chapter 5}} | |enemy=23{{h|+12|Reinforcements}}{{h|−2|Upon Rickard and Samuel being recruited}}{{h|*|Rickard will not appear as an enemy if he was killed or recruited in Chapter 5}} | ||
|map=[[File:Cm fe12 6 l.png|512px]] | |map=[[File:Cm fe12 6 l.png|512px]] | ||
|col=30 | |col=30 | ||
| Line 81: | Line 80: | ||
|lv=3 | |lv=3 | ||
|inventory={{Item|3|Iron Sword}}<br>{{Item|3|VIP Card}} | |inventory={{Item|3|Iron Sword}}<br>{{Item|3|VIP Card}} | ||
|recruitment method=Enemy, talk to with [[Julian]]<br><small>(Does not appear if he was previously killed or recruited in [[Liberation of Grust|Chapter 5]])</small> | |recruitment method=Enemy, talk to with [[Julian]]<br><small>(Does not appear if he was previously killed or recruited in [[Liberation of Grust|Chapter 5]])</small> | ||
}} | }} | ||
|newunit2={{NewUnit | |newunit2={{NewUnit | ||
| Line 136: | Line 135: | ||
|lv=3 | |lv=3 | ||
|inventory={{Item|ds|Iron Sword}}<br>{{Item|ds|VIP Card}} | |inventory={{Item|ds|Iron Sword}}<br>{{Item|ds|VIP Card}} | ||
|recruitment method=Enemy, talk to with [[Julian]]<br><small>(Does not appear if he was previously killed or recruited in [[Liberation of Grust|Chapter 5]])</small> | |recruitment method=Enemy, talk to with [[Julian]]<br><small>(Does not appear if he was previously killed or recruited in [[Liberation of Grust|Chapter 5]])</small> | ||
}} | }} | ||
|newunit2={{NewUnit | |newunit2={{NewUnit | ||
| Line 230: | Line 229: | ||
|obtain8=Dropped by a [[Bishop]] | |obtain8=Dropped by a [[Bishop]] | ||
|itemlast=VIP Card | |itemlast=VIP Card | ||
|obtainlast=Dropped by [[Rickard]]<br><small>(Rickard does not appear if he was killed or recruited in [[Liberation of Grust|Chapter 5]])</small> | |obtainlast=Dropped by [[Rickard]]<br><small>(Rickard does not appear if he was killed or recruited in [[Liberation of Grust|Chapter 5]])</small> | ||
}} | }} | ||
|content2={{ChapItems | |content2={{ChapItems | ||
| Line 259: | Line 258: | ||
|obtain11=Dropped by a [[Bishop]] | |obtain11=Dropped by a [[Bishop]] | ||
|itemlast=VIP Card | |itemlast=VIP Card | ||
|obtainlast=Dropped by [[Rickard]]<br><small>(Rickard does not appear if he was killed or recruited in [[Liberation of Grust|Chapter 5]])</small> | |obtainlast=Dropped by [[Rickard]]<br><small>(Rickard does not appear if he was killed or recruited in [[Liberation of Grust|Chapter 5]])</small> | ||
}} | }} | ||
}} | }} | ||
| Line 317: | Line 316: | ||
}} | }} | ||
{{ChapUnitCellFE3 | {{ChapUnitCellFE3 | ||
|name=[[Navarre]] | |name=[[Samuel|Navarre]] | ||
|class=Mercenary | |class=Mercenary | ||
|lv=5 | |lv=5 | ||
| Line 433: | Line 432: | ||
|mov=7 | |mov=7 | ||
|inventory={{Item|3|Iron Sword}} • {{Item|3|VIP Card|type=drop}} | |inventory={{Item|3|Iron Sword}} • {{Item|3|VIP Card|type=drop}} | ||
|notes=• Not present if he was killed or recruited in [[Liberation of Grust|Chapter 5]].<br>• Does not move. | |notes=• Not present if he was killed or recruited in [[Liberation of Grust|Chapter 5]].<br>• Does not move. | ||
|last=y | |last=y | ||
}} | }} | ||
| Line 571: | Line 570: | ||
}} | }} | ||
{{ChapUnitCellFE12 | {{ChapUnitCellFE12 | ||
|name=[[Navarre]] | |name=[[Samuel|Navarre]] | ||
|class=Myrmidon | |class=Myrmidon | ||
|lv=5 | |lv=5 | ||
| Line 751: | Line 750: | ||
|mov=7 | |mov=7 | ||
|inventory={{Item|12|Iron Sword}} • {{Item|12|VIP Card|type=drop}} | |inventory={{Item|12|Iron Sword}} • {{Item|12|VIP Card|type=drop}} | ||
|notes=• Not present if he was killed or recruited in [[Liberation of Grust|Chapter 5]].<br>• Does not move or initiate combat. | |notes=• Not present if he was killed or recruited in [[Liberation of Grust|Chapter 5]].<br>• Does not move or initiate combat. | ||
|last=y | |last=y | ||
}} | }} | ||
| Line 907: | Line 906: | ||
}} | }} | ||
{{ChapUnitCellFE12 | {{ChapUnitCellFE12 | ||
|name=[[Navarre]] | |name=[[Samuel|Navarre]] | ||
|class=Myrmidon | |class=Myrmidon | ||
|lv=5 | |lv=5 | ||
| Line 1,104: | Line 1,103: | ||
|mov=7 | |mov=7 | ||
|inventory={{Item|12|Iron Sword}} • {{Item|12|VIP Card|type=drop}} | |inventory={{Item|12|Iron Sword}} • {{Item|12|VIP Card|type=drop}} | ||
|notes=• Not present if he was killed or recruited in [[Liberation of Grust|Chapter 5]].<br>• Does not move or initiate combat. | |notes=• Not present if he was killed or recruited in [[Liberation of Grust|Chapter 5]].<br>• Does not move or initiate combat. | ||
|last=y | |last=y | ||
}} | }} | ||
| Line 1,260: | Line 1,259: | ||
}} | }} | ||
{{ChapUnitCellFE12 | {{ChapUnitCellFE12 | ||
|name=[[Navarre]] | |name=[[Samuel|Navarre]] | ||
|class=Myrmidon | |class=Myrmidon | ||
|lv=5 | |lv=5 | ||
| Line 1,440: | Line 1,439: | ||
|mov=7 | |mov=7 | ||
|inventory={{Item|12|Iron Sword}} • {{Item|12|VIP Card|type=drop}} | |inventory={{Item|12|Iron Sword}} • {{Item|12|VIP Card|type=drop}} | ||
|notes=• Not present if he was killed or recruited in [[Liberation of Grust|Chapter 5]].<br>• Does not move or initiate combat. | |notes=• Not present if he was killed or recruited in [[Liberation of Grust|Chapter 5]].<br>• Does not move or initiate combat. | ||
|last=y | |last=y | ||
}} | }} | ||
| Line 1,613: | Line 1,612: | ||
}} | }} | ||
{{ChapUnitCellFE12 | {{ChapUnitCellFE12 | ||
|name=[[Navarre]] | |name=[[Samuel|Navarre]] | ||
|class=Myrmidon | |class=Myrmidon | ||
|lv=5 | |lv=5 | ||
| Line 1,644: | Line 1,643: | ||
|mov=7 | |mov=7 | ||
|inventory={{Item|12|Silver Bow}} • {{Item|12|Vulnerary|type=drop}} | |inventory={{Item|12|Silver Bow}} • {{Item|12|Vulnerary|type=drop}} | ||
|notes=• Will not act until revealed.<br>• Will not move until a player unit is in range of both him and [[Navarre]], at which point he begins moving unprovoked. | |notes=• Will not act until revealed.<br>• Will not move until a player unit is in range of both him and [[Samuel|Navarre]], at which point he begins moving unprovoked. | ||
}} | }} | ||
{{ChapUnitCellFE12 | {{ChapUnitCellFE12 | ||
| Line 1,827: | Line 1,826: | ||
|mov=7 | |mov=7 | ||
|inventory={{Item|12|Iron Sword}} • {{Item|12|VIP Card|type=drop}} | |inventory={{Item|12|Iron Sword}} • {{Item|12|VIP Card|type=drop}} | ||
|notes=• Not present if he was killed or recruited in [[Liberation of Grust|Chapter 5]].<br>• Does not move or initiate combat. | |notes=• Not present if he was killed or recruited in [[Liberation of Grust|Chapter 5]].<br>• Does not move or initiate combat. | ||
|last=y | |last=y | ||
}} | }} | ||
| Line 1,943: | Line 1,942: | ||
|tab4=Lunatic | |tab4=Lunatic | ||
|content1={{BossStats DS | |content1={{BossStats DS | ||
|portrait=[[File: | |portrait=[[File:Portrait lang fe12.png]] | ||
|sprite=general enemy | |sprite=general enemy | ||
|class=General | |class=General | ||
| Line 1,961: | Line 1,960: | ||
}} | }} | ||
|content2={{BossStats DS | |content2={{BossStats DS | ||
|portrait=[[File: | |portrait=[[File:Portrait lang fe12.png]] | ||
|sprite=general enemy | |sprite=general enemy | ||
|class=General | |class=General | ||
| Line 1,979: | Line 1,978: | ||
}} | }} | ||
|content3={{BossStats DS | |content3={{BossStats DS | ||
|portrait=[[File: | |portrait=[[File:Portrait lang fe12.png]] | ||
|sprite=general enemy | |sprite=general enemy | ||
|class=General | |class=General | ||
| Line 1,997: | Line 1,996: | ||
}} | }} | ||
|content4={{BossStats DS | |content4={{BossStats DS | ||
|portrait=[[File: | |portrait=[[File:Portrait lang fe12.png]] | ||
|sprite=general enemy | |sprite=general enemy | ||
|class=General | |class=General | ||
| Line 2,039: | Line 2,038: | ||
==Trivia== | ==Trivia== | ||
--> | --> | ||
==Etymology and other languages== | ==Etymology and other languages== | ||
{{Names | {{Names | ||
| Line 2,044: | Line 2,044: | ||
|eng-fan-mean=• Used in the fan translation of ''[[Fan translation#Fire Emblem: Mystery of the Emblem|Mystery of the Emblem]]''.{{clarify|which?}}<br>• Used in the fan translation of ''[[Fan translation#Fire Emblem: New Mystery of the Emblem|New Mystery of the Emblem]]''.{{clarify|which?}} | |eng-fan-mean=• Used in the fan translation of ''[[Fan translation#Fire Emblem: Mystery of the Emblem|Mystery of the Emblem]]''.{{clarify|which?}}<br>• Used in the fan translation of ''[[Fan translation#Fire Emblem: New Mystery of the Emblem|New Mystery of the Emblem]]''.{{clarify|which?}} | ||
|jpn-name={{h|悪の巣|Aku no su}} | |jpn-name={{h|悪の巣|Aku no su}} | ||
|jpn-mean=Nest of Evil | |jpn-mean=Nest of Evil. Officially romanized as '''The Nest of Vice''' in the [[Fire Emblem: Mystery of the Emblem (guide)|''Mystery of the Emblem'' guide]]. | ||
}} | }} | ||
==Gallery== | ==Gallery== | ||
<gallery> | <gallery> | ||
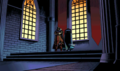
Cg fe03 b2 ch06.png|CG image displayed during the intro for {{title|Mystery of the Emblem}} | Cg fe03 b2 ch06.png|CG image displayed during the intro for {{title|Mystery of the Emblem}}. | ||
Cg fe12 c06.png|CG image displayed during the intro for {{title|New Mystery of the Emblem}} | Cg fe12 c06.png|CG image displayed during the intro for {{title|New Mystery of the Emblem}}. | ||
</gallery> | </gallery> | ||
{{Notes}} | {{Notes}} | ||
<!-- | |||
{{refbar}} | {{refbar}} | ||
--> | |||
{{ChapterNav | {{ChapterNav | ||
Latest revision as of 10:42, 28 April 2024
| ||||||||||
|

The Nest of Evil (Japanese: 悪の巣 Nest of Evil) is the sixth chapter of Fire Emblem: Mystery of the Emblem Book II and Fire Emblem: New Mystery of the Emblem.
Plot
- Main articles:
The Nest of Evil/Script and The Nest of Evil/Conversations
Marth's forces storm the inside of Olbern Castle, which is being defended by General Lang. Lang tells one of his mercenaries, Navarre, to wait for the Altean army to open the gate and then charge—Navarre is in fact Samuel in disguise, who is terrified at the prospect of facing the Altean army, particularly Ogma.
The battle begins, and during it, Julian may find Rickard and recruit him into Marth's army. Caeda and Ogma can also both recruit Samuel. Eventually, the battle ends with Lang's death and with Marth's army finding Bishop Wendell held captive in the castle. Wendell tells Marth about the Starsphere, which has been split into twelve fragments that scattered across the continent, and which must be put back together. He suggests that Marth go to the Fane of Raman in order to find more shards, and Marth agrees, as it is along the way to Altea, his next destination.
Chapter data
Mystery of the Emblem New Mystery of the Emblem


Character data
Mystery of the Emblem New Mystery of the Emblem
| Characters | |||||||||||||||||||||||||||||||||||||||||||||||||||||||
|---|---|---|---|---|---|---|---|---|---|---|---|---|---|---|---|---|---|---|---|---|---|---|---|---|---|---|---|---|---|---|---|---|---|---|---|---|---|---|---|---|---|---|---|---|---|---|---|---|---|---|---|---|---|---|---|
New units
| |||||||||||||||||||||||||||||||||||||||||||||||||||||||
| |||||||||||||||||||||||||||||||||||||||||||||||||||||||
Required characters
| |||||||||||||||||||||||||||||||||||||||||||||||||||||||

| |||||||||||||||||||||||||||||||||||||||||||||||||||||||
Available characters
| |||||||||||||||||||||||||||||||||||||||||||||||||||||||
                         
| |||||||||||||||||||||||||||||||||||||||||||||||||||||||


Item data
Mystery of the Emblem New Mystery of the Emblem
| |||||||||||||||||||||||||||||||||||||||
|
Enemy data
Mystery of the Emblem New Mystery of the Emblem
- Stats with a decimal can vary randomly; the decimal represents the chance for the stat to increase to the nearest integer, or otherwise be truncated.
Normal Hard Maniac Lunatic
| ||||||||||||||||||||||||||||||||||||||||||||||||||||||||||||||||||||||||||||||||||||||||||||||||||||||||||||||||||||||||||||||||||||||||||||||||||||||||||||||||||||||||||||||||||||||||||||||||||||||||||||||||||||||||||||||||||||||||||||||||||||||||||||||||||||||||||||||||||||||||||||||||||||||||||||||||||||||||||||||||||||||||||||||||||||||||||||||||||||||||||||||||||||||||||||||||||||||||||||||||||||||||||||||||||||
| ||||||||||||||||||||||||||||||||||||||||||||||||||||||||||||||||||||||||||||||||||||||||||||||||||||||||||||||||||||||||||||||||||||||||||||||||||||||||||||||||||||||||||||||||||||||||||||||||||||||||||||||||||||||||||||||||||||||||||||||||||||||||||||||||||||||||||||||||||||||||||||||||||||||||||||||||||||||||||||||||||||||||||||||||||||||||||||||||||||||||||||||||||||||||||||||||||||||||||||||||||||||||||||||||||||
| ||||||||||||||||||||||||||||||||||||||||||||||||||||||||||||||||||||||||||||||||||||||||||||||||||||||||||||||||||||||||||||||||||||||||||||||||||||||||||||||||||||||||||||||||||||||||||||||||||||||||||||||||||||||||||||||||||||||||||||||||||||||||||||||||||||||||||||||||||||||||||||||||||||||||||||||||||||||||||||||||||||||||||||||||||||||||||||||||||||||||||||||||||||||||||||||||||||||||||||||||||||||||||||||||||||
| ||||||||||||||||||||||||||||||||||||||||||||||||||||||||||||||||||||||||||||||||||||||||||||||||||||||||||||||||||||||||||||||||||||||||||||||||||||||||||||||||||||||||||||||||||||||||||||||||||||||||||||||||||||||||||||||||||||||||||||||||||||||||||||||||||||||||||||||||||||||||||||||||||||||||||||||||||||||||||||||||||||||||||||||||||||||||||||||||||||||||||||||||||||||||||||||||||||||||||||||||||||||||||||||||||||
Reinforcements
Mystery of the Emblem
- Starting turn 3, continuing until 5 of each have appeared; which ones appear each turn is random
- One Armored Knight, two Soldiers—one with a Steel Lance, one a Javelin—and one Archer from below the stairs
New Mystery of the Emblem
- Turns 4, 6, and 7 on lower difficulties; and turns 3, 5, and 6 on Lunatic Mode
- Turns 4–6 on lower difficulties; and turns 3–5 on Lunatic Mode
- Two Soldiers—one with a Steel*/Silver Lance*, one a Javelin—from below the stairs
Boss data
- Main article:
Lang
Mystery of the Emblem New Mystery of the Emblem
- Stats with a decimal can vary randomly; the decimal represents the chance for the stat to increase to the nearest integer, or otherwise be truncated.

Strategy
| This section details unofficial strategies that may help with completion of the chapter. This may not work for everybody. |
This section has been marked as a stub. Please help improve the page by adding information.
In order to access the following side quest, the player must have recruited Rickard and kept him alive, or must clear this chapter in a certain number of turns. The turn count of the latter requirement varies by difficulty, as follows:
| Difficulty | Turn count |
|---|---|
| Normal | 20 |
| Hard | 24 |
| Maniac | 28 |
| Lunatic | 32 |
| Lunatic′ | 36 |
Etymology and other languages
| Names, etymology, and in other regions | ||
|---|---|---|
| Language | Name | Definition, etymology, and notes |
| English (unofficial) |
• The Nest of Vice |
• Used in the fan translation of Mystery of the Emblem.[which?] |
| Japanese |
悪の巣 |
Nest of Evil. Officially romanized as The Nest of Vice in the Mystery of the Emblem guide. |
Gallery

CG image displayed during the intro for Mystery of the Emblem.
CG image displayed during the intro for New Mystery of the Emblem.


Notes
- ↑ If he was not killed or recruited in Chapter 5.
- ↑ 2.0 2.1 Only in New Mystery of the Emblem.
| ← Liberation of Grust • | The Nest of Evil | • The Scarlet Sword → • Mercenary Squad (New Mystery only) → |
|---|
| Fire Emblem: New Mystery of the Emblem: Heroes of Light and Shadow | ||||||||||||||||||||||||||||||||||
|---|---|---|---|---|---|---|---|---|---|---|---|---|---|---|---|---|---|---|---|---|---|---|---|---|---|---|---|---|---|---|---|---|---|---|
| ||||||||||||||||||||||||||||||||||