| Site News |
|---|
| Warning: This wiki contains spoilers. Read at your own risk! Social media: If you would like, please join our Discord server, and/or follow us on Twitter (X) or Tumblr! |
Seven Bracelets: Difference between revisions
m (Fixed minor self made errors) |
mNo edit summary |
||
| (11 intermediate revisions by 4 users not shown) | |||
| Line 1: | Line 1: | ||
{{Chapter Infobox | {{Chapter Infobox | ||
|image= | |image=[[File:Cm fe17fx 6.png|200px]] | ||
|location=Somniel | |location=Fallen Somniel | ||
| | |new units=[[Zelestia]], [[Gregory]], [[Madeline]], [[Nel]], [[Rafal]] | ||
|boss=[[Fell Nil]], [[Corrupted]] royals | |||
|previous=[[The Fell Heir]] | |previous=[[The Fell Heir]] | ||
}} | }} | ||
'''Seven Bracelets''' sixth and final chapter of {{FE17}} | '''Seven Bracelets'''<!-- (Japanese: {{hl|?|?}} ''?'')--> is the sixth and final chapter of the {{FE17}} expansion [[Fell Xenologue]]. In this chapter, [[Alear]] and [[Nel]] fight against [[Nil]] for the future of the parallel world. | ||
Completing this chapter will unlock [[Zelestia]], [[Gregory]], [[Madeline]], Nel, and [[Rafal]] for use in the main story for that save file. | |||
==Plot== | ==Plot== | ||
{{main|Seven Bracelets/Script}} | {{main|Seven Bracelets/Script}} | ||
[[Nil]] | At the fallen remains of the [[Somniel]], [[Nil]] recounts on his past powerlessness as a child. [[Nel]] begs him to stop trying to rule over a dead world, urging him to remember the time he shared with her as family, but he reveals that he is merely pretending to be her twin, who had died long ago. He then declares his desire to fight against her, and for her to end his life. Though he briefly considers their time as "family", he grows restless and announces that he will carry out his father [[Sombron]]'s legacy. Soon after, [[Alear]] arrives, and Nil demands that he dispel a magical ward that was placed on the final [[Emblem Bracelet]]—the Bracelet of the Three Houses—by their world's Alear; otherwise, he would kill Nel. Alear obliges, however Nil uses the seven bracelets' power to transform himself into a dragon, and reneges on his promise to keep Nel alive. | ||
[[Zelestia]], [[Gregory]], and [[Madeline]] soon reunite with the group, explaining that [[Mauvier]] had used a [[Warp]] staff to teleport them to safety while he alone remained underneath the crumbling temple. Disgusted by the survival of three of the [[Four Winds]], Nil threatens to kill all of them. Alear, Nel, and the others refuse to back down, and engage against Nil in one final battle, albeit not before the Alear of this world grants them their power. | |||
Despite his newfound power, Nil is defeated and reverts to his human form, with the Emblem Bracelets disappearing as well. Unable to fulfill Sombron's will, Nil deems himself worthless, though Nel refutes this feeling. Nil then reveals that he is not Nel's twin, but another Fell Dragon whose twin died when he was very young. In the past, he met the real [[Nil (backstory character)|Nil]], who was nearly identical to him. When the real Nil died, he gave the false one Nel's dragonstone, and asked him to take his place to keep Nel from grieving. Nel then tells him that she had always known about his ruse, and chose to accept him as her brother regardless. She also reveals that she had left flowers for the real Nil back when they were mourning their world's Alear at [[Lythos]] Castle. | |||
With these words on his mind, Nil requests Nel to kill him. She refuses, stabbing herself instead, stating that she would rather die than lose another brother. Her last words are to ask Nil what his true name is; she then dies, causing her dragonstone to shatter in front of Nil. Grieving, he reveals his name to be [[Rafal]], and laments his failure to be her other half. Alear and Zelestia then sense Sombron's magic within the shards of the dragonstone, and reason that it must have sown hatred in Rafal's heart to keep him and Nel from conspiring against Sombron; with its destruction, the spell is released. Despite learning of this, Rafal refuses to allow anyone else to take responsibility for his misdeeds. Using [[Lumera]]'s revival of Alear as inspiration, Rafal then pledges to pour his life force into Nel to revive her, even if it takes a thousand years. Impressed by his resolve, Alear then invites Rafal and Nel to join them in their world's Somniel when he completes his goal. Rafal agrees to his invitation, though only when Nel is revived and if she has forgiven him. Zelestia then thanks Rafal, and expresses her desire to meet him again. | |||
Alear, the remaining Winds, and the others return to Lythos Castle. After reflecting on the events that have passed, the Winds discuss their next plans. Gregory suggests they try to rebuild the world, but Madeline protests that, without any other living people in it, it would be a fruitless endeavor. Alear then invites the Winds to join them in their world. Though Madeline is reluctant to leave Mauvier behind in the world, Gregory reminds her that Mauvier's last wishes were that they all be happy. The two argue briefly, and Madeline weeps over Mauvier's death again, but the three Winds ultimately accept Alear's invitation. As the group departs, the Alear of the dead world thanks them and asks them to take care of their people. | |||
Back in their Somniel, Alear basks in the good weather. Suddenly, Rafal and Nel approach them. | |||
===Beginning log=== | |||
Having lost Nel and the bracelets, the Divine Dragon journeys to a once-floating island to find Nil. | |||
==Chapter data== | ==Chapter data== | ||
| Line 19: | Line 35: | ||
|content1={{ChapData | |content1={{ChapData | ||
|victory=Defeat [[Fell Nil]] | |victory=Defeat [[Fell Nil]] | ||
|defeat=[[ | |defeat=[[Nel]] or [[Alear]] dies | ||
|ally=5–14 | |ally=5–14 | ||
|enemy=44{{h|+ | |enemy=44{{h|+13|Reinforcements}}{{h|+∞|Vortex Summons (infinite)}} | ||
|map=[[File:Cm | |map=[[File:Cm fe17fx 6.png|200px]] | ||
|col=30 | |col=30 | ||
|row=30 | |row=30 | ||
| Line 28: | Line 44: | ||
|content2={{ChapData | |content2={{ChapData | ||
|victory=Defeat [[Fell Nil]] | |victory=Defeat [[Fell Nil]] | ||
|defeat=[[ | |defeat=[[Nel]] or [[Alear]] dies | ||
|ally=5–14 | |ally=5–14 | ||
|enemy=55{{h|+36|Reinforcements}}{{h|+36|Pattern B (see strategy)}}{{h|+∞|Vortex Summons (infinite)}} | |enemy=55{{h|+36|Reinforcements}}{{h|+36|Pattern B (see strategy)}}{{h|+∞|Vortex Summons (infinite)}} | ||
|map=[[File:Cm | |map=[[File:Cm fe17fx 6 h.png|200px]] | ||
|col=30 | |col=30 | ||
|row=30 | |row=30 | ||
| Line 37: | Line 53: | ||
|content3={{ChapData | |content3={{ChapData | ||
|victory=Defeat [[Fell Nil]] | |victory=Defeat [[Fell Nil]] | ||
|defeat=[[ | |defeat=[[Nel]] or [[Alear]] dies | ||
|ally=5–14 | |ally=5–14 | ||
|enemy=62{{h|+57|Reinforcements}}{{h|+25|Pattern B (see strategy)}}{{h|+∞|Vortex Summons (infinite)}} | |enemy=62{{h|+57|Reinforcements}}{{h|+25|Pattern B (see strategy)}}{{h|+∞|Vortex Summons (infinite)}} | ||
|map=[[File:Cm | |map=[[File:Cm fe17fx 6 m.png|200px]] | ||
|col=30 | |col=30 | ||
|row=30 | |row=30 | ||
| Line 54: | Line 70: | ||
|forced2=nel | |forced2=nel | ||
|forced3=zelestia | |forced3=zelestia | ||
|forced4= | |forced4=madeline | ||
|forced5= | |forced5=gregory | ||
|return1=vander | |return1=vander | ||
|return2=clanne | |return2=clanne | ||
| Line 119: | Line 135: | ||
}} | }} | ||
Additionally, [[Terrain/Nintendo Switch games#Fire Emblem Engage|Emblem Energy]] appears in the following locations: | |||
*Column 1, row 12: Southwest of the northwestern [[Terrain/Nintendo Switch games#Fire Emblem Engage|Fell Sigil]] | |||
*Column 2, row 20: Just southeast of [[Fogado]]'s starting position | |||
*Column 4, row 26: South of the southwestern Fell Sigil | |||
*Column 7, row 13: Southeast of the northwestern Fell Sigil | |||
*Column 17, row 21: Just southeast of a [[Sniper]] in woods | |||
*Column 20, row 17: East of the center Fell Sigil | |||
*Column 24, row 7: West of the northeastern Fell Sigil | |||
*Column 30, row 15: On the eastern border of the map, between two small patches of open water | |||
===Item data=== | |||
The following items are obtained as a reward to be used in the main story: | |||
{{ChapItems | |||
|platform=ns02 | |||
|item1=Mystic Satchel | |||
|obtain1=Automatically upon returning to the [[Somniel]] after clearing the Fell Xenologue | |||
|item2=Mage Cannon | |||
|obtain2=Automatically upon returning to the [[Somniel]] after clearing the Fell Xenologue | |||
|item3=HP Tonic | |||
|obtain3=Automatically upon returning to the [[Somniel]] after clearing the Fell Xenologue | |||
|item4=Strength Tonic | |||
|obtain4=Automatically upon returning to the [[Somniel]] after clearing the Fell Xenologue | |||
|item5=Dexterity Tonic | |||
|obtain5=Automatically upon returning to the [[Somniel]] after clearing the Fell Xenologue | |||
|item6=Speed Tonic | |||
|obtain6=Automatically upon returning to the [[Somniel]] after clearing the Fell Xenologue | |||
|item7=Standard Blast (×2) | |||
|item7article=Standard Blast | |||
|item7image=standard blast | |||
|obtain7=Automatically upon returning to the [[Somniel]] after clearing the Fell Xenologue | |||
|item8=Magic Blast | |||
|obtain8=Automatically upon returning to the [[Somniel]] after clearing the Fell Xenologue | |||
|item9=Venom Blast | |||
|obtain9=Automatically upon returning to the [[Somniel]] after clearing the Fell Xenologue | |||
|item10=Novice Book (×3) | |||
|item10article=Novice Book | |||
|item10image=novice book | |||
|obtain10=Automatically upon returning to the [[Somniel]] after clearing the Fell Xenologue | |||
|item11=Adept Book (×3) | |||
|item11article=Adept Book | |||
|item11image=adept book | |||
|obtain11=Automatically upon returning to the [[Somniel]] after clearing the Fell Xenologue | |||
|item12=Expert Book (×3) | |||
|item12article=Expert Book | |||
|item12image=expert book | |||
|obtain12=Automatically upon returning to the [[Somniel]] after clearing the Fell Xenologue | |||
|item13=Master Seal | |||
|obtain13=Automatically upon returning to the [[Somniel]] after clearing the Fell Xenologue | |||
|itemlast=Second Seal | |||
|obtainlast=Automatically upon returning to the [[Somniel]] after clearing the Fell Xenologue | |||
}} | |||
Additionally, numerous enemy units drop items for use specifically in this chapter: | |||
{{ChapItems | |||
|platform=ns02 | |||
|item1=Lendabair | |||
|obtain1=Dropped by enemy [[Fogado]]<br><small>(Normal/Maddening only)</small> | |||
|item2=Rescue | |||
|item2article=Rescue (staff) | |||
|obtain2=Dropped by enemy [[General]] | |||
|item3=Venomous | |||
|obtain3=Dropped by enemy [[Alcryst]]<br><small>(Normal/Maddening only)</small> | |||
|item4=Rescue | |||
|item4article=Rescue (staff) | |||
|obtain4=Dropped by enemy [[General]] | |||
|item5=Ukonvasara | |||
|obtain5=Dropped by enemy [[Timerra]]<br><small>(Normal/Maddening only)</small> | |||
|item6=Divine Fist Art | |||
|obtain6=Dropped by enemy [[Diamant]]<br><small>(Normal/Maddening only)</small> | |||
|item7=Nodus | |||
|obtain7=Dropped by enemy [[Ivy]]<br><small>(Normal/Maddening only)</small> | |||
|item8=Fortify | |||
|obtain8=Dropped by enemy [[Hortensia]] | |||
|item9=Georgios | |||
|obtain9=Dropped by enemy [[Alfred]]<br><small>(Normal/Maddening only)</small> | |||
|item10=Nova | |||
|obtain10=Dropped by enemy [[Céline]]<br><small>(Normal/Maddening only)</small> | |||
|itemlast=Rescue | |||
|itemlastarticle=Rescue (staff) | |||
|obtainlast=Dropped by enemy [[Sage]] | |||
}} | |||
===Enemy data=== | ===Enemy data=== | ||
{{sectstub}} | {{sectstub}} | ||
{{Tab | |||
|width=100% | |||
|tab1=Normal | |||
|tab2=Hard | |||
|tab3=Maddening | |||
|content1={{ChapUnitHdr|type=Enemy|platform=ns02}} | |||
{{ChapUnitCellFE17 | |||
|name=[[Fell Nil]] | |||
|class=Great Fell Dragon | |||
|version=nil | |||
|lv=35 | |||
|#=1 | |||
|hp=80<br>{{RevivalStone}} | |||
|str=20 | |||
|mag=25 | |||
|dex=29 | |||
|spd=13{{h|−1|Penalized by weapon weight}} | |||
|def=14 | |||
|res=18 | |||
|lck=22 | |||
|bld=19 | |||
|mov=0 | |||
|inventory={{Item|17|Fell Assault}} • {{Item|17|Devastation}} • {{Item|17|Drain Essence}} • {{Item|17|Summon Vortex}} • {{Item|17|Fell Beam}}<br>{{Item|17|Bond Breaker+}} • {{Item|17|Veteran+}} • {{Item|17|Sigil Protection}}{{h|*|Granted by Fell Sigil terrain}} | |||
|notes=• Does not initiate combat.<br>• Uses [[Devastation]], [[Drain Essence]], [[Summon Vortex]], and [[Fell Beam]] in a predetermined order; see {{sect|Seven Bracelets|Nil}} for more information.<br>• Automatically equips [[Fell Assault]] after using Devastation, Drain Essence, Summon Vortex, or Fell Beam. | |||
}} | |||
{{ChapUnitCellFE17 | |||
|name=[[Fogado]] & [[Tiki|???]] | |||
|class=Watcher | |||
|version=fogado | |||
|lv=10 | |||
|#=1 | |||
|hp=25{{h|+10|Granted by Emblem Tiki}} | |||
|str=14{{h|+5|Granted by Emblem Tiki}} | |||
|mag=5{{h|+5|Granted by Emblem Tiki}} | |||
|dex=18{{h|+5|Granted by Emblem Tiki}} | |||
|spd=18{{h|+5|Granted by Emblem Tiki}} | |||
|def=10{{h|+5|Granted by Emblem Tiki}} | |||
|res=15{{h|+5|Granted by Emblem Tiki}} | |||
|lck=5{{h|+5|Granted by Emblem Tiki}} | |||
|bld=10{{h|+5|Granted by Emblem Tiki}} | |||
|mov=6 | |||
|inventory={{Item|17|Eternal Claw}} • {{Item|17|Tail Smash}} • {{Item|17|Fire Breath|image=divinestone}} • {{Item|17|Silver Bow}} • {{Item|17|Lendabair|type=drop}}<br>{{Item|17|Wear Down}} • {{Item|17|Lightsphere|link=Lightsphere (skill)}} • {{Item|17|Lifesphere++}} • {{Item|17|Geosphere+}} • {{Item|17|Draconic Form}} • {{Item|17|Divine Blessing}} | |||
|notes=Begins moving unprovoked on turn 30. | |||
}} | |||
{{ChapUnitCellFE17 | |||
|name=[[Corrupted]] | |||
|class=General | |||
|version=corrupted axe | |||
|lv=8 | |||
|#=2 | |||
|hp=50 | |||
|str=19 | |||
|mag=1 | |||
|dex=21 | |||
|spd=9 | |||
|def=19 | |||
|res=0 | |||
|lck=8 | |||
|bld=17 | |||
|mov=4 | |||
|inventory={{Item|17|Tomahawk}} | |||
|notes=• The eastern one is immobile.<br>• The western one begins moving unprovoked on turn 30, or if [[Ivy]], [[Hortensia]], or a northwestern General or [[Mage Knight]] is provoked. | |||
}} | |||
{{ChapUnitCellFE17 | |||
|name=[[Corrupted]] | |||
|class=General | |||
|version=corrupted lance | |||
|lv=8 | |||
|#=1 | |||
|hp=50 | |||
|str=19 | |||
|mag=1 | |||
|dex=21 | |||
|spd=9 | |||
|def=19 | |||
|res=0 | |||
|lck=8 | |||
|bld=17 | |||
|mov=4 | |||
|inventory={{Item|17|Spear}} • {{Item|17|Rescue|link=Rescue (staff)|type=drop}} | |||
|notes=Immobile. | |||
}} | |||
{{ChapUnitCellFE17 | |||
|name=[[Corrupted]] | |||
|class=Bow Knight | |||
|version=corrupted female | |||
|lv=8 | |||
|#=5 | |||
|hp=39 | |||
|str=13 | |||
|mag=3 | |||
|dex=26 | |||
|spd=21{{h|−1|Penalized by weapon weight}} | |||
|def=0 | |||
|res=5 | |||
|lck=11 | |||
|bld=9 | |||
|mov=6 | |||
|inventory={{Item|17|Silver Bow}} • {{Item|17|Silver Sword}} | |||
|notes=Begins moving unprovoked on turn 30. | |||
}} | |||
{{ChapUnitCellFE17 | |||
|name=[[Alcryst]] & [[Chrom|???]] | |||
|class=Warden | |||
|version=alcryst | |||
|lv=10 | |||
|#=1 | |||
|hp=48 | |||
|str=18 | |||
|mag=4{{h|+10|Granted by Emblem Chrom}} | |||
|dex=26 | |||
|spd=18 | |||
|def=7 | |||
|res=13{{h|+5|Granted by Emblem Chrom}} | |||
|lck=18 | |||
|bld=9 | |||
|mov=5{{h|+1|Granted by Emblem Chrom}} | |||
|inventory={{Item|17|Levin Sword|image=levin sword chrom}} • {{Item|17|Thoron|image=thoron chrom}} • {{Item|17|Silver Bow}} • {{Item|17|Venomous|type=drop}}<br>{{Item|17|Show-Off}} • {{Item|17|Surprise Attack}} • {{Item|17|Brute Force}} • {{Item|17|Charm}} • {{Item|17|Other Half}} • {{Item|17|Giga Levin Sword}} | |||
|notes=• Begins moving unprovoked on turn 30.<br>• Can use [[Giga Levin Sword]] again if he has not used it within the previous two turns. | |||
}} | |||
{{ChapUnitCellFE17 | |||
|name=[[Corrupted]] | |||
|class=General | |||
|version=corrupted lance | |||
|lv=10 | |||
|#=1 | |||
|hp=52 | |||
|str=25 | |||
|mag=1 | |||
|dex=22 | |||
|spd=9 | |||
|def=27 | |||
|res=16 | |||
|lck=9 | |||
|bld=17 | |||
|mov=4 | |||
|inventory={{Item|17|Spear}} | |||
|notes=Immobile. | |||
}} | |||
{{ChapUnitCellFE17 | |||
|name=[[Corrupted]] | |||
|class=General | |||
|version=corrupted axe | |||
|lv=10 | |||
|#=1 | |||
|hp=52 | |||
|str=25 | |||
|mag=1 | |||
|dex=22 | |||
|spd=9 | |||
|def=27 | |||
|res=16 | |||
|lck=9 | |||
|bld=17 | |||
|mov=4 | |||
|inventory={{Item|17|Tomahawk}} | |||
|notes=Immobile. | |||
}} | |||
{{ChapUnitCellFE17 | |||
|name=[[Corrupted]] | |||
|class=General | |||
|version=corrupted lance | |||
|lv=8 | |||
|#=5 | |||
|hp=50 | |||
|str=19 | |||
|mag=1 | |||
|dex=21 | |||
|spd=9 | |||
|def=19 | |||
|res=0 | |||
|lck=8 | |||
|bld=17 | |||
|mov=4 | |||
|inventory={{Item|17|Spear}} | |||
|notes=• The eastern four are immobile.<br>• The western one begins moving unprovoked on turn 30, or if [[Ivy]], [[Hortensia]], or a northwestern General or [[Mage Knight]] is provoked. | |||
}} | |||
{{ChapUnitCellFE17 | |||
|name=[[Corrupted]] | |||
|class=General | |||
|version=corrupted axe | |||
|lv=8 | |||
|#=1 | |||
|hp=50 | |||
|str=19 | |||
|mag=1 | |||
|dex=21 | |||
|spd=9 | |||
|def=19 | |||
|res=0 | |||
|lck=8 | |||
|bld=17 | |||
|mov=4 | |||
|inventory={{Item|17|Tomahawk}} • {{Item|17|Rescue|link=Rescue (staff)|type=drop}} | |||
|notes=Immobile. | |||
}} | |||
{{ChapUnitCellFE17 | |||
|name=[[Corrupted]] | |||
|class=Sniper | |||
|version=corrupted | |||
|lv=8 | |||
|#=1 | |||
|hp=39 | |||
|str=18 | |||
|mag=1 | |||
|dex=29 | |||
|spd=18{{h|−1|Penalized by weapon weight}} | |||
|def=3 | |||
|res=1 | |||
|lck=10 | |||
|bld=9 | |||
|mov=5 | |||
|inventory={{Item|17|Silver Bow}} | |||
|notes=• Starts on [[Terrain/Nintendo Switch games#Fire Emblem Engage|woods]].<br>• Begins moving unprovoked on turn 30. | |||
}} | |||
{{ChapUnitCellFE17 | |||
|name=[[Timerra]] & [[Camilla|???]] | |||
|class=Watcher | |||
|version=timerra | |||
|lv=10 | |||
|#=1 | |||
|hp=48 | |||
|str=21 | |||
|mag=21 | |||
|dex=27 | |||
|spd=20{{h|−1|Penalized by weapon weight}} | |||
|def=15 | |||
|res=6 | |||
|lck=14 | |||
|bld=8 | |||
|mov=5{{h|+2|Granted by Emblem Camilla}} | |||
|inventory={{Item|17|Bolt Axe}} • {{Item|17|Lightning}} • {{Item|17|Camilla's Axe}} • {{Item|17|Silver Lance}} • {{Item|17|Ukonvasara|type=drop}}<br>{{Item|17|Dignity of Solm}} • {{Item|17|Dragon Vein|link=Dragon Vein (skill)|image=dragon vein camilla}} • {{Item|17|Decisive Strike+}} • {{Item|17|Detoxify}} • {{Item|17|Groundswell}} • {{Item|17|Soar}} • {{Item|17|Dark Inferno}} | |||
|notes=• Begins moving unprovoked on turn 30.<br>• Can use [[Dark Inferno]] again if she has not used it within the previous two turns. | |||
}} | |||
{{ChapUnitCellFE17 | |||
|name=[[Corrupted]] | |||
|class=Halberdier | |||
|version=corrupted | |||
|lv=8 | |||
|#=2 | |||
|hp=43 | |||
|str=19 | |||
|mag=6 | |||
|dex=26 | |||
|spd=20{{h|−3|Penalized by weapon weight}} | |||
|def=7 | |||
|res=2 | |||
|lck=8 | |||
|bld=10 | |||
|mov=5 | |||
|inventory={{Item|17|Silver Lance}} | |||
|notes=Begins moving unprovoked on turn 30. | |||
}} | |||
{{ChapUnitCellFE17 | |||
|name=[[Diamant]] & [[Veronica|???]] | |||
|class=Warden | |||
|version=diamant | |||
|lv=10 | |||
|#=1 | |||
|hp=51 | |||
|str=20 | |||
|mag=16 | |||
|dex=22 | |||
|spd=17 | |||
|def=14 | |||
|res=11 | |||
|lck=21 | |||
|bld=12 | |||
|mov=4 | |||
|inventory={{Item|17|Hliðskjálf}} • {{Item|17|Fortify+}} • {{Item|17|Élivágar}} • {{Item|17|Silver Blade}} • {{Item|17|Divine Fist Art|type=drop}}<br>{{Item|17|This Ends Here}} • {{Item|17|Reprisal+}} • {{Item|17|Level Boost}} • {{Item|17|Book of Worlds}} • {{Item|17|Contract}} • {{Item|17|Summon Hero}} | |||
|notes=• Starts on [[Terrain/Nintendo Switch games#Fire Emblem Engage|woods]].<br>• Immobile until turn 30, or until he or the nearby [[Corrupted Wyvern]] is provoked, at which point he begins moving. | |||
}} | |||
{{ChapUnitCellFE17 | |||
|name=[[Corrupted]] | |||
|class=Hero | |||
|version=corrupted female axe | |||
|lv=8 | |||
|#=1 | |||
|hp=42 | |||
|str=16 | |||
|mag=0 | |||
|dex=21 | |||
|spd=23{{h|−5|Penalized by weapon weight}} | |||
|def=6 | |||
|res=1 | |||
|lck=12 | |||
|bld=11 | |||
|mov=5 | |||
|inventory={{Item|17|Tomahawk}} | |||
|notes=Begins moving unprovoked on turn 30. | |||
}} | |||
{{ChapUnitCellFE17 | |||
|name=[[Corrupted]] | |||
|class=Hero | |||
|version=corrupted female lance | |||
|lv=8 | |||
|#=2 | |||
|hp=42 | |||
|str=16 | |||
|mag=0 | |||
|dex=21 | |||
|spd=23{{h|−4|Penalized by weapon weight}} | |||
|def=6 | |||
|res=1 | |||
|lck=12 | |||
|bld=11 | |||
|mov=5 | |||
|inventory={{Item|17|Spear}} | |||
|notes=Begins moving unprovoked on turn 30. | |||
}} | |||
{{ChapUnitCellFE17 | |||
|name=[[Corrupted]] | |||
|class=Hero | |||
|version=corrupted female sword | |||
|lv=8 | |||
|#=1 | |||
|hp=42 | |||
|str=16 | |||
|mag=0 | |||
|dex=21 | |||
|spd=23 | |||
|def=6 | |||
|res=1 | |||
|lck=12 | |||
|bld=11 | |||
|mov=5 | |||
|inventory={{Item|17|Silver Sword}} | |||
|notes=• Starts on [[Terrain/Nintendo Switch games#Fire Emblem Engage|woods]].<br>• Begins moving unprovoked on turn 30. | |||
}} | |||
{{ChapUnitCellFE17 | |||
|name=[[Corrupted]] | |||
|class=Mage Cannoneer | |||
|version=corrupted female | |||
|lv=8 | |||
|#=1 | |||
|hp=36 | |||
|str=13 | |||
|mag=5 | |||
|dex=17 | |||
|spd=15{{h|−11|Penalized by weapon weight}} | |||
|def=6 | |||
|res=5 | |||
|lck=14 | |||
|bld=9 | |||
|mov=4 | |||
|inventory={{Item|17|Eldritch Blast}} • {{Item|17|Freeze Blast}} | |||
|notes=• Starts on [[Terrain/Nintendo Switch games#Fire Emblem Engage|woods]].<br>• Begins moving unprovoked on turn 30. | |||
}} | |||
{{ChapUnitCellFE17 | |||
|name=[[Ivy]] & [[Soren|???]] | |||
|class=Trainer | |||
|classarticle=Trainer (class) | |||
|version=ivy | |||
|lv=10 | |||
|#=1 | |||
|hp=48 | |||
|str=9 | |||
|mag=13 | |||
|dex=21 | |||
|spd=14 | |||
|def=12 | |||
|res=20 | |||
|lck=6 | |||
|bld=9 | |||
|mov=6 | |||
|inventory={{Item|17|Bolting}} • {{Item|17|Rexcalibur}} • {{Item|17|Recover}} • {{Item|17|Nodus|type=drop}}<br>{{Item|17|Final Say}} • {{Item|17|Anima Focus}} • {{Item|17|Keen Insight+}} • {{Item|17|Block Recovery}} • {{Item|17|Flare}} • {{Item|17|Cataclysm}} | |||
|notes=• Begins moving unprovoked on turn 30, or if [[Hortensia]] or a northwestern [[General]] or [[Mage Knight]] is provoked.<br>• Can use [[Cataclysm]] again if she has not used it within the previous two turns. | |||
}} | |||
{{ChapUnitCellFE17 | |||
|name=[[Hortensia]] | |||
|class=Trainer | |||
|classarticle=Trainer (class) | |||
|version=hortensia tome | |||
|lv=10 | |||
|#=1 | |||
|hp=40 | |||
|str=12 | |||
|mag=18 | |||
|dex=26 | |||
|spd=18{{h|−8|Penalized by weapon weight}} | |||
|def=10 | |||
|res=23 | |||
|lck=24 | |||
|bld=5 | |||
|mov=6 | |||
|inventory={{Item|17|Elthunder}} • {{Item|17|Fortify|type=drop}}<br>{{Item|17|Stealth Assist}} | |||
|notes=Begins moving unprovoked on turn 30, or if [[Ivy]] or a northwestern [[General]] or [[Mage Knight]] is provoked. | |||
}} | |||
{{ChapUnitCellFE17 | |||
|name=[[Corrupted]] | |||
|class=Mage Knight | |||
|version=corrupted female tome | |||
|lv=8 | |||
|#=1 | |||
|hp=29 | |||
|str=12 | |||
|mag=12 | |||
|dex=14 | |||
|spd=19{{h|−4|Penalized by weapon weight}} | |||
|def=1 | |||
|res=11 | |||
|lck=7 | |||
|bld=9 | |||
|mov=6 | |||
|inventory={{Item|17|Elthunder}} | |||
|notes=Begins moving unprovoked on turn 30, or if [[Ivy]], [[Hortensia]], or a northwestern [[General]] or Mage Knight is provoked. | |||
}} | |||
{{ChapUnitCellFE17 | |||
|name=[[Corrupted]] | |||
|class=Mage Knight | |||
|version=corrupted female tome | |||
|lv=8 | |||
|#=1 | |||
|hp=29 | |||
|str=12 | |||
|mag=12 | |||
|dex=14 | |||
|spd=19 | |||
|def=1 | |||
|res=11 | |||
|lck=7 | |||
|bld=9 | |||
|mov=6 | |||
|inventory={{Item|17|Elfire}} | |||
|notes=Begins moving unprovoked on turn 30, or if [[Ivy]], [[Hortensia]], or a northwestern [[General]] or Mage Knight is provoked. | |||
}} | |||
{{ChapUnitCellFE17 | |||
|name=[[Alfred]] & [[Hector|???]] | |||
|class=Royal | |||
|version=alfred | |||
|lv=10 | |||
|#=1 | |||
|hp=48 | |||
|str=20 | |||
|mag=13 | |||
|dex=26 | |||
|spd=17 | |||
|def=15 | |||
|res=13 | |||
|lck=28 | |||
|bld=10 | |||
|mov=6 | |||
|inventory={{Item|17|Wolf Beil}} • {{Item|17|Runesword}} • {{Item|17|Silver Lance}} • {{Item|17|Georgios|type=drop}}<br>{{Item|17|Self-Defense}} • {{Item|17|Quick Riposte+}} • {{Item|17|Adaptability}} • {{Item|17|Heavy Attack}} • {{Item|17|Piercing Glare}} • {{Item|17|Impenetrable}} • {{Item|17|Storm's Eye}} | |||
|notes=Begins moving unprovoked on turn 30, or if [[Céline]] or a northern [[General]] or [[Swordmaster]] is provoked. | |||
}} | |||
{{ChapUnitCellFE17 | |||
|name=[[Céline]] & [[Edelgard|???]] | |||
|class=Royal | |||
|version=céline | |||
|lv=10 | |||
|#=1 | |||
|hp=45 | |||
|str=16 | |||
|mag=17 | |||
|dex=19 | |||
|spd=19{{h|−5|Penalized by weapon weight}} | |||
|def=8 | |||
|res=20 | |||
|lck=24 | |||
|bld=6 | |||
|mov=5 | |||
|inventory={{Item|17|Aymr|image=aymr edelgard}} • {{Item|17|Areadbhar|image=areadbhar edelgard}} • {{Item|17|Failnaught|image=failnaught edelgard}} • {{Item|17|Levin Sword}} • {{Item|17|Nova|type=drop}}<br>{{Item|17|Fierce Bloom}} • {{Item|17|Friendly Rivalry}} • {{Item|17|Gambit|link=Gambit (Engage skill)}} • {{Item|17|Weapon Sync}} • {{Item|17|Combat Arts|link=Combat Arts (skill)}} • {{Item|17|Houses Unite}} | |||
|notes=• Begins moving unprovoked on turn 30, or if [[Alfred]] or a northern [[General]] or [[Swordmaster]] is provoked.<br>• Can use [[Houses Unite]] again if she has not used it within the previous two turns. | |||
}} | |||
{{ChapUnitCellFE17 | |||
|name=[[Corrupted]] | |||
|class=Swordmaster | |||
|version=corrupted female | |||
|lv=8 | |||
|#=2 | |||
|hp=38 | |||
|str=13 | |||
|mag=4 | |||
|dex=25 | |||
|spd=28{{h|−2|Penalized by weapon weight}} | |||
|def=2 | |||
|res=3 | |||
|lck=14 | |||
|bld=9 | |||
|mov=5 | |||
|inventory={{Item|17|Silver Sword}} | |||
|notes=Both begin moving unprovoked on turn 30, or if either of them, [[Alfred]], [[Céline]], or the northern [[General]] is provoked. | |||
}} | |||
{{ChapUnitCellFE17 | |||
|name=[[Corrupted]] | |||
|class=Wyvern Knight | |||
|classarticle=Wyvern Rider | |||
|version=corrupted female axe | |||
|lv=8 | |||
|#=1 | |||
|hp=47 | |||
|str=15 | |||
|mag=8 | |||
|dex=24 | |||
|spd=19{{h|−4|Penalized by weapon weight}} | |||
|def=6 | |||
|res=3 | |||
|lck=8 | |||
|bld=11 | |||
|mov=6 | |||
|inventory={{Item|17|Silver Axe}} | |||
|notes=Immediately begins moving unprovoked. | |||
}} | |||
{{ChapUnitCellFE17 | |||
|name=[[Corrupted]] | |||
|class=Wyvern Knight | |||
|classarticle=Wyvern Rider | |||
|version=corrupted female lance | |||
|lv=8 | |||
|#=1 | |||
|hp=47 | |||
|str=15 | |||
|mag=8 | |||
|dex=24 | |||
|spd=19{{h|−2|Penalized by weapon weight}} | |||
|def=6 | |||
|res=3 | |||
|lck=8 | |||
|bld=11 | |||
|mov=6 | |||
|inventory={{Item|17|Silver Lance}} | |||
|notes=Immediately begins moving unprovoked. | |||
}} | |||
{{ChapUnitCellFE17 | |||
|name=[[Corrupted]] | |||
|class=Sage | |||
|version=corrupted | |||
|lv=8 | |||
|#=1 | |||
|hp=26 | |||
|str=4 | |||
|mag=18 | |||
|dex=15 | |||
|spd=17{{h|−3|Penalized by weapon weight}} | |||
|def=0 | |||
|res=13 | |||
|lck=11 | |||
|bld=8 | |||
|mov=5 | |||
|inventory={{Item|17|Bolganone}} • {{Item|17|Rescue|link=Rescue (staff)|type=drop}} | |||
|notes=Begins moving unprovoked on turn 30. | |||
}} | |||
{{ChapUnitCellFE17 | |||
|name=Corrupted Wyvern | |||
|class=Corrupted Wyvern | |||
|version=corrupted | |||
|lv=8 | |||
|#=4 | |||
|hp=31 | |||
|str=3 | |||
|mag=7 | |||
|dex=8 | |||
|spd=7 | |||
|def=2 | |||
|res=7 | |||
|lck=5 | |||
|bld=9 | |||
|mov=3 | |||
|inventory={{Item|17|Miasma Breath}} • {{Item|17|Miasma Ball}} | |||
|notes=• Automatically equips [[Miasma Breath]] after initiating combat with [[Miasma Ball]].<br>• The northeastern one begins moving unprovoked on turn 30, or if [[Diamant]] is provoked.<br>• The other three begin moving unprovoked on turn 30. | |||
|last=y | |||
}} | |||
{{ChapUnitReinf|type=Enemy|platform=ns02}} | |||
{{ChapUnitCellFE17 | |||
|name=[[Corrupted]] | |||
|class=General | |||
|version=corrupted lance | |||
|lv=8 | |||
|#=2 | |||
|hp=50 | |||
|str=19 | |||
|mag=1 | |||
|dex=21 | |||
|spd=9 | |||
|def=18 | |||
|res=0 | |||
|lck=8 | |||
|bld=17 | |||
|mov=4 | |||
|inventory={{Item|17|Silver Lance}} | |||
}} | |||
{{ChapUnitCellFE17 | |||
|name=[[Corrupted]] | |||
|class=General | |||
|version=corrupted sword | |||
|lv=8 | |||
|#=1 | |||
|hp=50 | |||
|str=19 | |||
|mag=1 | |||
|dex=21 | |||
|spd=9 | |||
|def=18 | |||
|res=0 | |||
|lck=8 | |||
|bld=17 | |||
|mov=4 | |||
|inventory={{Item|17|Silver Sword}} | |||
}} | |||
{{ChapUnitCellFE17 | |||
|name=[[Corrupted]] | |||
|class=General | |||
|version=corrupted axe | |||
|lv=8 | |||
|#=1 | |||
|hp=50 | |||
|str=19 | |||
|mag=1 | |||
|dex=21 | |||
|spd=9 | |||
|def=18 | |||
|res=0 | |||
|lck=8 | |||
|bld=17 | |||
|mov=4 | |||
|inventory={{Item|17|Silver Axe}} | |||
}} | |||
{{ChapUnitCellFE17 | |||
|name=[[Corrupted]] | |||
|class=Mage Cannoneer | |||
|version=corrupted female | |||
|lv=8 | |||
|#=∞ | |||
|hp=36 | |||
|str=11 | |||
|mag=5 | |||
|dex=17 | |||
|spd=15{{h|−1|Penalized by weapon weight}} | |||
|def=5 | |||
|res=4 | |||
|lck=14 | |||
|bld=9 | |||
|mov=4 | |||
|inventory={{Item|17|Freeze Blast}} | |||
}} | |||
{{ChapUnitCellFE17 | |||
|name=[[Corrupted]] | |||
|class=Mage Cannoneer | |||
|version=corrupted female | |||
|lv=8 | |||
|#=∞ | |||
|hp=36 | |||
|str=11 | |||
|mag=5 | |||
|dex=17 | |||
|spd=15{{h|−1|Penalized by weapon weight}} | |||
|def=5 | |||
|res=4 | |||
|lck=14 | |||
|bld=9 | |||
|mov=4 | |||
|inventory={{Item|17|Break Blast}} | |||
}} | |||
{{ChapUnitCellFE17 | |||
|name=[[Corrupted]] | |||
|class=Mage Cannoneer | |||
|version=corrupted female | |||
|lv=8 | |||
|#=∞ | |||
|hp=36 | |||
|str=11 | |||
|mag=5 | |||
|dex=17 | |||
|spd=15{{h|−1|Penalized by weapon weight}} | |||
|def=5 | |||
|res=4 | |||
|lck=14 | |||
|bld=9 | |||
|mov=4 | |||
|inventory={{Item|17|Venom Blast}} | |||
}} | |||
{{ChapUnitCellFE17 | |||
|name=[[Corrupted]] | |||
|class=Great Knight | |||
|version=corrupted female lance | |||
|lv=8 | |||
|#=∞ | |||
|hp=44 | |||
|str=16 | |||
|mag=2 | |||
|dex=24 | |||
|spd=14 | |||
|def=15 | |||
|res=0 | |||
|lck=11 | |||
|bld=13 | |||
|mov=6 | |||
|inventory={{Item|17|Silver Lance}} | |||
}} | |||
{{ChapUnitCellFE17 | |||
|name=[[Corrupted]] | |||
|class=Sage | |||
|version=corrupted | |||
|lv=8 | |||
|#=∞ | |||
|hp=26 | |||
|str=2 | |||
|mag=21 | |||
|dex=20 | |||
|spd=17 | |||
|def=0 | |||
|res=13 | |||
|lck=11 | |||
|bld=8 | |||
|mov=5 | |||
|inventory={{Item|17|Elfire}} | |||
}} | |||
{{ChapUnitCellFE17 | |||
|name=[[Corrupted]] | |||
|class=Halberdier | |||
|version=corrupted | |||
|lv=8 | |||
|#=∞ | |||
|hp=43 | |||
|str=19 | |||
|mag=6 | |||
|dex=26 | |||
|spd=20{{h|−3|Penalized by weapon weight}} | |||
|def=6 | |||
|res=1 | |||
|lck=8 | |||
|bld=10 | |||
|mov=5 | |||
|inventory={{Item|17|Silver Lance}} | |||
}} | |||
{{ChapUnitCellFE17 | |||
|name=[[Corrupted]] | |||
|class=Sniper | |||
|version=corrupted | |||
|lv=8 | |||
|#=∞ | |||
|hp=39 | |||
|str=18 | |||
|mag=1 | |||
|dex=29 | |||
|spd=18{{h|−1|Penalized by weapon weight}} | |||
|def=2 | |||
|res=0 | |||
|lck=10 | |||
|bld=9 | |||
|mov=5 | |||
|inventory={{Item|17|Silver Bow}} | |||
}} | |||
{{ChapUnitCellFE17 | |||
|name=[[Corrupted]] | |||
|class=Berserker | |||
|version=corrupted | |||
|lv=8 | |||
|#=∞ | |||
|hp=55 | |||
|str=21 | |||
|mag=0 | |||
|dex=14 | |||
|spd=16 | |||
|def=0 | |||
|res=0 | |||
|lck=5 | |||
|bld=16 | |||
|mov=5 | |||
|inventory={{Item|17|Silver Axe}} | |||
}} | |||
{{ChapUnitCellFE17 | |||
|name=[[Corrupted]] | |||
|class=Berserker | |||
|version=corrupted | |||
|lv=8 | |||
|#=∞ | |||
|hp=55 | |||
|str=21 | |||
|mag=0 | |||
|dex=14 | |||
|spd=16 | |||
|def=0 | |||
|res=0 | |||
|lck=5 | |||
|bld=16 | |||
|mov=5 | |||
|inventory={{Item|17|Tomahawk}} | |||
}} | |||
{{ChapUnitCellFE17 | |||
|name=[[Corrupted]] | |||
|class=Hero | |||
|version=corrupted female sword | |||
|lv=8 | |||
|#=∞ | |||
|hp=42 | |||
|str=16 | |||
|mag=0 | |||
|dex=21 | |||
|spd=23 | |||
|def=5 | |||
|res=0 | |||
|lck=12 | |||
|bld=11 | |||
|mov=5 | |||
|inventory={{Item|17|Silver Sword}} | |||
}} | |||
{{ChapUnitCellFE17 | |||
|name=[[Corrupted]] | |||
|class=Wyvern Knight | |||
|classarticle=Wyvern Rider | |||
|version=corrupted female sword | |||
|lv=8 | |||
|#=4 | |||
|hp=47 | |||
|str=15 | |||
|mag=8 | |||
|dex=24 | |||
|spd=19 | |||
|def=6 | |||
|res=3 | |||
|lck=8 | |||
|bld=11 | |||
|mov=6 | |||
|inventory={{Item|17|Silver Sword}} | |||
}} | |||
{{ChapUnitCellFE17 | |||
|name=[[Corrupted]] | |||
|class=Wyvern Knight | |||
|classarticle=Wyvern Rider | |||
|version=corrupted female lance | |||
|lv=8 | |||
|#=2 | |||
|hp=47 | |||
|str=15 | |||
|mag=8 | |||
|dex=24 | |||
|spd=19{{h|−2|Penalized by weapon weight}} | |||
|def=6 | |||
|res=3 | |||
|lck=8 | |||
|bld=11 | |||
|mov=6 | |||
|inventory={{Item|17|Silver Lance}} | |||
}} | |||
{{ChapUnitCellFE17 | |||
|name=[[Corrupted]] | |||
|class=Wyvern Knight | |||
|classarticle=Wyvern Rider | |||
|version=corrupted female axe | |||
|lv=8 | |||
|#=1 | |||
|hp=47 | |||
|str=15 | |||
|mag=8 | |||
|dex=24 | |||
|spd=19{{h|−4|Penalized by weapon weight}} | |||
|def=6 | |||
|res=3 | |||
|lck=8 | |||
|bld=11 | |||
|mov=6 | |||
|inventory={{Item|17|Silver Axe}} | |||
}} | |||
{{ChapUnitCellFE17 | |||
|name=[[Marth]] | |||
|class=Emblem | |||
|version=marth dark | |||
|lv=30 | |||
|#=1 | |||
|hp=39 | |||
|str=10 | |||
|mag=2 | |||
|dex=29 | |||
|spd=23 | |||
|def=4 | |||
|res=7 | |||
|lck=18 | |||
|bld=10 | |||
|mov=5 | |||
|inventory={{Item|17|Rapier|image=rapier marth solo}} • {{Item|17|Mercurius|image=mercurius solo}} • {{Item|17|Falchion|link=Falchion (Archanea)|image=falchion marth solo}}<br>{{Item|17|Divine Speed}} • {{Item|17|Perceptive+}} • {{Item|17|Unyielding++}} • {{Item|17|Break Defenses}} | |||
}} | |||
{{ChapUnitCellFE17 | |||
|name=[[Celica]] | |||
|class=Emblem | |||
|version=celica dark | |||
|lv=30 | |||
|#=1 | |||
|hp=38 | |||
|str=13 | |||
|mag=25 | |||
|dex=17 | |||
|spd=13 | |||
|def=3 | |||
|res=16 | |||
|lck=5 | |||
|bld=9 | |||
|mov=5 | |||
|inventory={{Item|17|Seraphim|image=seraphim solo}} • {{Item|17|Recover|image=recover celica solo}} • {{Item|17|Ragnarok|image=ragnarok solo}}<br>{{Item|17|Holy Stance++}} • {{Item|17|Resonance+}} • {{Item|17|Favorite Food}} • {{Item|17|Echo}} | |||
|last=y | |||
}} | |||
{{ChapUnitFtr}} | |||
}} | |||
====Reinforcements==== | ====Reinforcements==== | ||
{{sectstub}} | {{sectstub}} | ||
*After [[Fell Nil]] uses [[Summon Vortex]] from the southern Fell Sigil <!--(turn 3)--> | |||
*Summon | **2 [[General]]s with [[Silver Lance]]s from west of Fell Nil's starting position | ||
**[[ | **2 [[General]]s with [[Silver Axe]]s from west of Fell Nil's starting position <small>(Hard/Maddening only)</small> | ||
* | **1 [[General]] with a [[Silver Sword]] from just southeast of Fell Nil's starting position | ||
** | **1 <small>(Normal)</small>/2 <small>(Hard/Maddening)</small> [[General]](s) with [[Silver Axe]](s) from east of Fell Nil's starting position | ||
** | **1 [[General]] with a [[Silver Lance]] from southeast of Fell Nil's starting position <small>(Hard/Maddening only)</small> | ||
**Vortex | *After Fell Nil uses Summon Vortex from the southwestern Fell Sigil | ||
** | **3 level 28 [[Corrupted Wolf|Corrupted Wolves]]; one from southwest, east, and north of the southwestern Fell Sigil each <small>(Hard/Maddening only)</small> | ||
** | **3 level 28 [[Corrupted Wolf|Corrupted Wolves]]; two from southeast of the southwestern Fell Sigil, one from north of the southwestern Fell Sigil | ||
** | **1 level 32 [[Corrupted Wolf]] from west of the southwestern Fell Sigil <small>(Hard/Maddening only)</small> | ||
** | *After Fell Nil uses Summon Vortex from the center Fell Sigil <!--(turn 7, also turn 9 on Normal?)--> | ||
** | **1 [[Mage Cannoneer]] with [[Freeze Blast]] from southwest of the center Fell Sigil | ||
** | **1 [[Mage Cannoneer]] with [[Silence Blast]] from southeast of the center Fell Sigil <small>(Hard/Maddening only)</small> | ||
**1 [[Mage Cannoneer]] with [[Break Blast]] from south of the center Fell Sigil | |||
Hard | **1 [[Mage Cannoneer]] with [[Venom Blast]] from southeast of the center Fell Sigil | ||
**1 [[Mage Cannoneer]] with [[Tornado Blast]] from west of the center Fell Sigil <small>(Hard/Maddening only)</small> | |||
**[[ | **1 [[Mage Cannoneer]] with [[Mighty Blast]] from east of the center Fell Sigil <small>(Hard/Maddening only)</small> | ||
*Summon Vortex | **3 [[Sniper]]s; two from west of the center Fell Sigil, one from southeast of the center Fell Sigil <small>(Maddening only)</small> | ||
** | *After Fell Nil uses Summon Vortex from the southeastern Fell Sigil | ||
** | **1 [[Great Knight]] with a [[Silver Lance]] from north of the southeastern Fell Sigil | ||
** | **1 [[Great Knight]] with a [[Silver Sword]] from south of the southeastern Fell Sigil <small>(Hard/Maddening only)</small> | ||
**Vortex | **1 <small>(Normal/Hard)</small>/2 <small>(Maddening)</small> [[Wolf Knight]](s) from just northeast of the southeastern Fell Sigil | ||
** | **1 [[Wolf Knight]] from south of the southeastern Fell Sigil <small>(Hard/Maddening only)</small> | ||
** | **1 [[Great Knight]] with a [[Silver Axe]] from southeast of the southeastern Fell Sigil <small>(Hard/Maddening only)</small> | ||
** | **1 [[Great Knight]] with a [[Silver Sword]] from just west of the southeastern Fell Sigil | ||
** | **2 [[Great Knight]]s with [[Spear]]s from northwest of the southeastern Fell Sigil <small>(Maddening only)</small> | ||
**Vortex | *After Fell Nil uses Summon Vortex from the northwestern Fell Sigil | ||
**2 [[Griffin Knight]]s; one from north and west of the northwestern Fell Sigil each | |||
Maddening | **2 [[Griffin Knight]]s; one from northeast and southeast of the northwestern Fell Sigil each <small>(Hard/Maddening only)</small> | ||
*Summon | **1 [[Wyvern Rider|Wyvern Knight]] with a [[Silver Axe]] from southwest of the northwestern Fell Sigil | ||
**[[ | **2 [[Wyvern Rider|Wyvern Knights]] with [[Silver Axe]]s; one from just southeast and north of the northwestern Fell Sigil each <small>(Hard/Maddening only)</small> | ||
*After Fell Nil uses Summon Vortex from the northeastern Fell Sigil | |||
** | **1 [[Sage]] with [[Elthunder]] from south of the northeastern Fell Sigil | ||
** | **1 [[Sage]] with [[Elfire]] from southwest of the northeastern Fell Sigil <small>(Hard/Maddening only)</small> | ||
** | **1 [[Sage]] with [[Elwind]] from south of the northeastern Fell Sigil | ||
** | **1 [[Sage]] with [[Elthunder]] from north of the northeastern Fell Sigil <small>(Hard/Maddening only)</small> | ||
** | **1 [[Sage]] with [[Elfire]] from northwest of the northeastern Fell Sigil | ||
** | **1 [[Sage]] with [[Elwind]] from just northeast of the northeastern Fell Sigil <small>(Hard/Maddening only)</small> | ||
** | *After Fell Nil uses Summon Vortex from the northern Fell Sigil | ||
** | **2 [[Great Knight]]s with [[Silver Lance]]s from south of the northern Fell Sigil | ||
** | **2 [[Great Knight]]s with [[Spear]]s from south of the northern Fell Sigil <small>(Hard/Maddening only)</small> | ||
**1 [[Sniper]] from south of the northern Fell Sigil <small>(Maddening only)</small> | |||
**1 [[Sage]] with [[Elthunder]] from east of the northern Fell Sigil <small>(Maddening only)</small> | |||
**1 [[Sage]] with [[Elfire]] from southeast of the northern Fell Sigil | |||
**1 [[Martial Master]] with [[Fortify]] and [[Recover]] from southwest of the northern Fell Sigil <small>(Hard/Maddening only)</small> | |||
*After Fell Nil uses Summon Vortex from the northern Fell Sigil a second time | |||
**1 [[Halberdier]] with a [[Silver Lance]] from west of the northern Fell Sigil | |||
**2 [[Halberdier]]s with [[Spear]]s from west of the northern Fell Sigil <small>(Hard/Maddening only)</small> | |||
**2 <small>(Normal)</small>/3 <small>(Hard)</small> [[Sniper]]s; one <small>(Normal)</small>/two <small>(Hard)</small> from north of the northern Fell Sigil, one from southwest of the northern Fell Sigil | |||
**1 [[Martial Master]] with [[Freeze]] from west of the northern Fell Sigil <small>(Maddening only)</small> | |||
**1 level 32 [[Corrupted Wolf]] from just west of the northern Fell Sigil <small>(Maddening only)</small> | |||
**1 [[Mage Cannoneer]] with [[Eldritch Blast]] from northwest of the northern Fell Sigil <small>(Maddening only)</small> | |||
*After Fell Nil uses Summon Vortex from the northern Fell Sigil a third time | |||
**1 <small>(Normal)</small>/2 <small>(Hard/Maddening)</small> [[Berserker]](s) with [[Silver Axe]](s) from northeast of the northern Fell Sigil | |||
**1 [[Berserker]] with a [[Tomahawk]] from east of the northern Fell Sigil | |||
**1 [[Hero]] from northeast of the northern Fell Sigil | |||
**2 [[Hero]]es; one from northeast and southeast of the northern Fell Sigil each <small>(Hard/Maddening only)</small> | |||
**1 [[Sage]] with [[Elthunder]] from northeast of the northern Fell Sigil <small>(Maddening only)</small> | |||
**1 [[Martial Master]] with [[Freeze]] from east of the northern Fell Sigil <small>(Maddening only)</small> | |||
**1 [[Sage]] with [[Elwind]] from southeast of the northern Fell Sigil <small>(Maddening only)</small> | |||
*The pattern in the last three Summon Vortexes repeats infinitely. | |||
*Turn(s) 8 <small>(Normal)</small>/6 and 7 <small>(Hard)</small>/3 and 5 <small>(Maddening)</small> | |||
**1 [[Wyvern Rider|Wyvern Knight]] with a [[Silver Sword]] from just east of the southwest corner of the map | |||
**1 [[Wyvern Rider|Wyvern Knight]] with a [[Silver Axe]] from west of ally starting positions <small>(Hard/Maddening only)</small> | |||
**1 [[Wyvern Rider|Wyvern Knight]] with a [[Silver Lance]] from west of ally starting positions | |||
***On Maddening, these reinforcements repeat on turn 14 if a player unit has reached the northwestern section of the map (columns 1–7, rows 5–23) before turn 9. | |||
*Turn(s) 9 <small>(Normal)</small>/9 and 10 <small>(Hard)</small>/8, 13, 17, 23, and 29 <small>(Maddening)</small> | |||
**1 <small>(Normal/Hard)</small>/2 <small>(Maddening)</small> [[Wyvern Rider|Wyvern Knight]](s) with [[Silver Axe]](s) from the southern border of the map, near ally starting positions | |||
**1 <small>(Normal/Maddening)</small>/2 <small>(Hard)</small> [[Wyvern Rider|Wyvern Knight]](s) with [[Silver Lance]](s) from the southern border of the map, east of ally starting positions | |||
**1 [[Corrupted Wyvern]] from the southern border of the map, east of ally starting positions <small>(Maddening only)</small> | |||
*Turn(s) 9 <small>(Normal)</small>/14 and 15 <small>(Hard)</small>/13 <small>(Maddening)</small> | |||
**1 [[Wyvern Rider|Wyvern Knight]] with a [[Silver Sword]] from west of the northwestern Fell Sigil | |||
**1 [[Wyvern Rider|Wyvern Knight]] with a [[Silver Axe]] from south of the northwest corner of the map <small>(Hard/Maddening only)</small> | |||
**1 [[Corrupted Wyvern]] from northwest of the northwestern Fell Sigil <small>(Maddening only)</small> | |||
*Turn(s) 11 <small>(Normal only)</small>/4 and 6 <small>(Maddening only)</small> | |||
**2 <small>(Normal)</small>/3 <small>(Maddening)</small> [[Wyvern Rider|Wyvern Knight]]s with [[Silver Sword]]s from the western border of the map | |||
*Turns 12 and 13 <small>(Hard only)</small>/9 and 11 <small>(Maddening only)</small> | |||
**1 [[Wyvern Rider|Wyvern Knight]] with a [[Silver Axe]] from south of the northeast corner of the map | |||
**1 [[Wyvern Rider|Wyvern Knight]] with a [[Silver Lance]] from just northeast of the northeastern Fell Sigil | |||
**1 [[Wyvern Rider|Wyvern Knight]] with a [[Silver Lance]] from just east of the northeastern Fell Sigil <small>(Maddening only)</small> | |||
***On Hard, these reinforcements repeat on turn 14 if a player unit has reached the northwestern section of the map (columns 1–7, rows 5–23) before turn 9. | |||
***On Hard and Maddening, these reinforcements repeat on turns 9–14 <small>(Hard)</small>/9, 10, 12, and 14 <small>(Maddening)</small> if a player unit has reached the northwestern section of the map (columns 1–7, rows 5–23) before turn 9. | |||
*Turns 22 and 28 <small>(Hard only)</small>/19, 25, and 31 <small>(Maddening only)</small> | |||
**2 [[Corrupted Wyvern]]s from northwest of the northern Fell Sigil | |||
***These reinforcements repeat on turns 9, 12, 16, 20, and also turns 10 and 18 on Hard if a player unit has reached the northwestern section of the map (columns 1–7, rows 5–23) before turn 9. | |||
*Turn(s) 25 <small>(Hard only)</small>/16, 22, and 28 <small>(Maddening only)</small> | |||
**2 [[Corrupted Wyvern]]s from northeast of the northern Fell Sigil | |||
***These reinforcements repeat on turns 13, 14, 16, 18, and 20 <small>(Hard)</small>/10, 14, and 18 <small>(Maddening)</small> if a player unit has reached the northwestern section of the map (columns 1–7, rows 5–23) before turn 9. | |||
*After [[Diamant]] is provoked | |||
**[[Emblem]] [[Marth]] from just northwest of Diamant's starting position | |||
**[[Emblem]] [[Celica]] from just southwest of Diamant's starting position | |||
**[[Emblem]] [[Roy]] from just southeast of Diamant's starting position <small>(Hard/Maddening only)</small> | |||
**[[Emblem]] [[Leif]] from just northeast of Diamant's starting position <small>(Hard/Maddening only)</small> | |||
===Boss data=== | ===Boss data=== | ||
| Line 189: | Line 1,230: | ||
|bld=19 | |bld=19 | ||
|inventory={{Item|17|Fell Assault}}<br>{{Item|17|Devastation}}<br>{{Item|17|Drain Essence}}<br>{{Item|17|Summon Vortex}}<br>{{Item|17|Fell Beam}} | |inventory={{Item|17|Fell Assault}}<br>{{Item|17|Devastation}}<br>{{Item|17|Drain Essence}}<br>{{Item|17|Summon Vortex}}<br>{{Item|17|Fell Beam}} | ||
|skills={{Item|17|Bond Breaker+}}<br>{{Item|17|Veteran+}}<br>{{Item|17|Sigil Protection}}{{h|*| | |skills={{Item|17|Bond Breaker+}}<br>{{Item|17|Veteran+}}<br>{{Item|17|Sigil Protection}}{{h|*|Granted by Fell Sigil terrain}} | ||
|sp=S | |sp=S | ||
}} | }} | ||
| Line 207: | Line 1,248: | ||
|bld=19 | |bld=19 | ||
|inventory={{Item|17|Fell Assault}}<br>{{Item|17|Devastation}}<br>{{Item|17|Drain Essence}}<br>{{Item|17|Summon Vortex}}<br>{{Item|17|Fell Beam}} | |inventory={{Item|17|Fell Assault}}<br>{{Item|17|Devastation}}<br>{{Item|17|Drain Essence}}<br>{{Item|17|Summon Vortex}}<br>{{Item|17|Fell Beam}} | ||
|skills={{Item|17|Bond Breaker+}}<br>{{Item|17|Veteran+}}<br>{{Item|17|Sigil Protection}}{{h|*| | |skills={{Item|17|Bond Breaker+}}<br>{{Item|17|Veteran+}}<br>{{Item|17|Sigil Protection}}{{h|*|Granted by Fell Sigil terrain}} | ||
|sp=S | |sp=S | ||
}} | }} | ||
| Line 225: | Line 1,266: | ||
|bld=19 | |bld=19 | ||
|inventory={{Item|17|Fell Assault}}<br>{{Item|17|Devastation}}<br>{{Item|17|Drain Essence}}<br>{{Item|17|Summon Vortex}}<br>{{Item|17|Fell Beam}} | |inventory={{Item|17|Fell Assault}}<br>{{Item|17|Devastation}}<br>{{Item|17|Drain Essence}}<br>{{Item|17|Summon Vortex}}<br>{{Item|17|Fell Beam}} | ||
|skills={{Item|17|Bond Breaker+}}<br>{{Item|17|Veteran+}}<br>{{Item|17|Sigil Protection}}{{h|*| | |skills={{Item|17|Bond Breaker+}}<br>{{Item|17|Veteran+}}<br>{{Item|17|Sigil Protection}}{{h|*|Granted by Fell Sigil terrain}} | ||
|sp=S | |sp=S | ||
}} | }} | ||
| Line 323: | Line 1,364: | ||
|bld=6 | |bld=6 | ||
|inventory={{Item|17|Aymr|image=aymr edelgard}}<br>{{Item|17|Areadbhar|image=areadbhar edelgard}}<br>{{Item|17|Failnaught|image=failnaught edelgard}}<br>{{Item|17|Levin Sword}}<br>{{Item|17|Elthunder}}<br>{{Item|17|Nova|type=drop}} | |inventory={{Item|17|Aymr|image=aymr edelgard}}<br>{{Item|17|Areadbhar|image=areadbhar edelgard}}<br>{{Item|17|Failnaught|image=failnaught edelgard}}<br>{{Item|17|Levin Sword}}<br>{{Item|17|Elthunder}}<br>{{Item|17|Nova|type=drop}} | ||
|skills={{Item|17|Fierce Bloom}}<br>{{Item|17|Friendly Rivalry}}<br>{{Item|17|Gambit|link=Gambit (skill)}}<br>{{Item|17|Weapon Sync}}<br>{{Item|17|Combat Arts|link=Combat Arts (skill)}}<br>{{Item|17|Houses Unite}} | |skills={{Item|17|Fierce Bloom}}<br>{{Item|17|Friendly Rivalry}}<br>{{Item|17|Gambit|link=Gambit (Engage skill)}}<br>{{Item|17|Weapon Sync}}<br>{{Item|17|Combat Arts|link=Combat Arts (skill)}}<br>{{Item|17|Houses Unite}} | ||
|sw=B | |sw=B | ||
|to=A | |to=A | ||
| Line 345: | Line 1,386: | ||
|bld=6 | |bld=6 | ||
|inventory={{Item|17|Aymr|image=aymr edelgard}}<br>{{Item|17|Areadbhar|image=areadbhar edelgard}}<br>{{Item|17|Failnaught|image=failnaught edelgard}}<br>{{Item|17|Levin Sword}}<br>{{Item|17|Elthunder}} | |inventory={{Item|17|Aymr|image=aymr edelgard}}<br>{{Item|17|Areadbhar|image=areadbhar edelgard}}<br>{{Item|17|Failnaught|image=failnaught edelgard}}<br>{{Item|17|Levin Sword}}<br>{{Item|17|Elthunder}} | ||
|skills={{Item|17|Fierce Bloom}}<br>{{Item|17|Ignis}}<br>{{Item|17|Friendly Rivalry}}<br>{{Item|17|Gambit|link=Gambit (skill)}}<br>{{Item|17|Weapon Sync}}<br>{{Item|17|Combat Arts|link=Combat Arts (skill)}}<br>{{Item|17|Houses Unite}} | |skills={{Item|17|Fierce Bloom}}<br>{{Item|17|Ignis}}<br>{{Item|17|Friendly Rivalry}}<br>{{Item|17|Gambit|link=Gambit (Engage skill)}}<br>{{Item|17|Weapon Sync}}<br>{{Item|17|Combat Arts|link=Combat Arts (skill)}}<br>{{Item|17|Houses Unite}} | ||
|sw=B | |sw=B | ||
|to=A | |to=A | ||
| Line 367: | Line 1,408: | ||
|bld=6 | |bld=6 | ||
|inventory={{Item|17|Aymr|image=aymr edelgard}}<br>{{Item|17|Areadbhar|image=areadbhar edelgard}}<br>{{Item|17|Failnaught|image=failnaught edelgard}}<br>{{Item|17|Levin Sword}}<br>{{Item|17|Elthunder}}<br>{{Item|17|Nova|type=drop}} | |inventory={{Item|17|Aymr|image=aymr edelgard}}<br>{{Item|17|Areadbhar|image=areadbhar edelgard}}<br>{{Item|17|Failnaught|image=failnaught edelgard}}<br>{{Item|17|Levin Sword}}<br>{{Item|17|Elthunder}}<br>{{Item|17|Nova|type=drop}} | ||
|skills={{Item|17|Fierce Bloom}}<br>{{Item|17|Veteran+}}<br>{{Item|17|Ignis}}<br>{{Item|17|Friendly Rivalry}}<br>{{Item|17|Gambit|link=Gambit (skill)}}<br>{{Item|17|Weapon Sync}}<br>{{Item|17|Combat Arts|link=Combat Arts (skill)}}<br>{{Item|17|Houses Unite}} | |skills={{Item|17|Fierce Bloom}}<br>{{Item|17|Veteran+}}<br>{{Item|17|Ignis}}<br>{{Item|17|Friendly Rivalry}}<br>{{Item|17|Gambit|link=Gambit (Engage skill)}}<br>{{Item|17|Weapon Sync}}<br>{{Item|17|Combat Arts|link=Combat Arts (skill)}}<br>{{Item|17|Houses Unite}} | ||
|sw=B | |sw=B | ||
|to=A | |to=A | ||
| Line 496: | Line 1,537: | ||
|lvl=10 | |lvl=10 | ||
|mov=5 | |mov=5 | ||
|HP= | |HP=50<br>{{RevivalStone}} | ||
|str=24 | |str=24 | ||
|mag=4 | |mag=4 | ||
| Line 528: | Line 1,569: | ||
|mag=13 | |mag=13 | ||
|dex=21 | |dex=21 | ||
|spd=14 | |spd=14 | ||
|def=12 | |def=12 | ||
|res=20 | |res=20 | ||
| Line 550: | Line 1,591: | ||
|mag=20 | |mag=20 | ||
|dex=21 | |dex=21 | ||
|spd=24 | |spd=24 | ||
|def=17 | |def=17 | ||
|res=21 | |res=21 | ||
| Line 572: | Line 1,613: | ||
|mag=20 | |mag=20 | ||
|dex=21 | |dex=21 | ||
|spd=24 | |spd=24 | ||
|def=21 | |def=21 | ||
|res=21 | |res=21 | ||
| Line 795: | Line 1,836: | ||
Nil's move set is the following | Nil's move set is the following | ||
* Fell Assault: Nil's basic attack which is only used if a player initiates combat with him. | * Fell Assault: Nil's basic attack which is only used if a player initiates combat with him. | ||
* Devastation: A instant kill area-of-effect attack that is telegraphed to the player before it is used. Harms both player and enemy units. If one or two units are killed, then Nil heals 5 HP and 10 HP respectively. If any more are killed, then he gains a revival stone instead (max of three). If royals on his team are killed, he will acquire their class skill (excluding Fogado who grants his personal skill instead). Also destroys the island which he is on. | * Devastation: A instant kill area-of-effect attack that is telegraphed to the player before it is used. Harms both player and enemy units. If one or two units are killed, then Nil heals 5 HP and 10 HP respectively. If any more are killed, then he gains a revival stone instead (max of three). If royals on his team are killed, he will acquire their class skill (excluding Fogado who grants his personal skill instead). Also destroys the island which he is on. | ||
**Once Nil destroys the island he is on, he will fly to a predetermined [[Terrain/Nintendo Switch games#Fire Emblem Engage|Fell Sigil]] and any unit caught underneath his flight path will receive 30 damage (units will endure with 1 HP if they otherwise would have been killed) | **Once Nil destroys the island he is on, he will fly to a predetermined [[Terrain/Nintendo Switch games#Fire Emblem Engage|Fell Sigil]] and any unit caught underneath his flight path will receive 30 damage (units will endure with 1 HP if they otherwise would have been killed) | ||
* Drain Essence: Similar to Devastation, except the area-of-effect is much smaller and no part of the land is destroyed. In addition to Nil healing, any unit killed will leave an emblem recharge spot behind for the player's use. | * Drain Essence: Similar to Devastation, except the area-of-effect is much smaller and no part of the land is destroyed. In addition to Nil healing, any unit killed will leave an emblem recharge spot behind for the player's use. | ||
* Summon Vortex: Summons reinforcements the turn after preparing the move. Occupying a player unit on a vortex when the move is used will prevent the reinforcement from spawning. | * Summon Vortex: Summons reinforcements the turn after preparing the move. Occupying a player unit on a vortex when the move is used will prevent the reinforcement from spawning. | ||
* Fell Beam: A powerful area-of-effect attack that is telegraphed to the player before it is used. Only harms player units. | * Fell Beam: A powerful area-of-effect attack that is telegraphed to the player before it is used. Only harms player units. | ||
Nil has two main attack patterns | Nil has two main attack patterns. If no unit ends their turn in area (1, 18) to (7, 26) turn 8 or before (the area where enemy Hortensia and Ivy start off), Nil will follow pattern A below: | ||
*(Turn 1) Fell Beam | *(Turn 1) Fell Beam | ||
*(Turn 2) Summon Vortex (preparation) | *(Turn 2) Summon Vortex (preparation) | ||
| Line 824: | Line 1,865: | ||
*(Turn 21) Devastation (moves to the final island) | *(Turn 21) Devastation (moves to the final island) | ||
If any unit ends their turn in the area of (1,18) to (7,26) turn 8 or before, Nil's move set will be replaced by pattern B starting on turn 9. If Nil triggers pattern B, | If any unit ends their turn in the area of (1, 18) to (7, 26) turn 8 or before, Nil's move set will be replaced by pattern B starting on turn 9. If Nil triggers pattern B, abnormally many reinforcements will be added to the normally occurring ones, even after he has reached the final island. In addition, all fallen royals will become provoked and begin to approach the player units, disregarding any priorities they may have (except Diamant who will still use [[Summon Hero]]). Pattern B is as follows: | ||
* (Turn 9) Devastation | * (Turn 9) Devastation | ||
* (Turn 10) Devastation | * (Turn 10) Devastation | ||
* (Turn 11) Devastation (moves to the final island, ignoring the northwest one) | * (Turn 11) Devastation (moves to the final island, ignoring the northwest one) | ||
Once Nil uses his last instance of Devastation on turn 21 on pattern A or on turn 11 on pattern B, he will move to the final island and use the following moves on loop | Once Nil uses his last instance of Devastation on turn 21 on pattern A or on turn 11 on pattern B, he will move to the final island and use the following moves on loop | ||
* Summon Vortex (preparation) | * Summon Vortex (preparation) | ||
* Summon Vortex A (B on next loop, C on following loop, then repeat) | * Summon Vortex A (B on next loop, C on following loop, then repeat) | ||
| Line 837: | Line 1,878: | ||
===Fallen Royals=== | ===Fallen Royals=== | ||
====Fogado==== | ====Fogado==== | ||
Fogado is likely to be the less threatening of the sub-bosses, combat wise, since he is very unlikely to initiate combat on his own unless he can deal a significant amount of damage to a player unit. This also makes luring him towards the player somewhat difficult without risk, with even some ranged attacks aimed towards him not causing him to move. When fighting him, Veronica's [[Élivágar]] engage weapon is very helpful in neutralizing his stat bonuses, primarily his +10 HP, and since his default weapon is a bow, the player should have an easy time with close range combat. On turn 4, however, Fogado will prioritize on using [[Divine Blessing]] on Nil above all else, then proceed to battle the player normally. Though Nil is likely to gain a [[Hit point#Multiple health bars|revival stone]] from every island he destroys anyways and is likely to have three by the final fight, Fogado's revival stone actually stacks with these ones, giving Nil an effective fourth one that the player can't see. Because of Fogado's likeliness to not engage the player immediately, the player can ignore him at first and get ahead on the third island, if they're okay with Nil having an additional health bar during the final fight. | Fogado is likely to be the less threatening of the sub-bosses, combat wise, since he is very unlikely to initiate combat on his own unless he can deal a significant amount of damage to a player unit. This also makes luring him towards the player somewhat difficult without risk, with even some ranged attacks aimed towards him not causing him to move. When fighting him, Veronica's [[Élivágar]] engage weapon is very helpful in neutralizing his stat bonuses, primarily his +10 HP, and since his default weapon is a bow, the player should have an easy time with close range combat. On turn 4, however, Fogado will prioritize on using [[Divine Blessing]] on Nil above all else, then proceed to battle the player normally. Though Nil is likely to gain a [[Hit point#Multiple health bars|revival stone]] from every island he destroys anyways and is likely to have three by the final fight, Fogado's revival stone actually stacks with these ones, giving Nil an effective fourth one that the player can't see. Because of Fogado's likeliness to not engage the player immediately, the player can ignore him at first and get ahead on the third island, if they're okay with Nil having an additional health bar during the final fight. | ||
====Alfred==== | ====Alfred==== | ||
Alfred is a very unique foe on maddening mode compared to the other royals on this difficulty. From turns 4 to 8, Alfred will prioritize using [[Piercing Glare]] above all else. He will continue to prioritize this skill and be healed by a nearby [[Martial | Alfred is a very unique foe on maddening mode compared to the other royals on this difficulty. From turns 4 to 8, Alfred will prioritize using [[Piercing Glare]] above all else. He will continue to prioritize this skill and be healed by a nearby [[Martial Master]] until turn 8 where, from where he will then move to tile (18, 20) and continue using Piercing Glare from turns 11 to 19. If the player so wishes to defeat him as early as possible, they should do so before his 4th turn as he will then try to return to his starting point and act as a wall. This may be somewhat difficult, however, because, like Fogado, Alfred is very unlikely to initiate combat unless he can deal a significant amount of damage to a player unit. Note that he has the [[Impenetrable]] skill which grants him immunity to the freeze status effect so Corrin's [[Torrential Roar]] is not recommended against him. Otherwise, his low resistance makes him weak to magic attacks so use as many of them as you can against him. | ||
It may also be important to note that while defeating early | It may also be important to note that while defeating Alfred early may make the passageway north appealing to take, entering the northwest area before the second island is destroyed will cause Nil's attack pattern B to commence, causing numerous more reinforcements to join the battle overtime in addition to the ones already designated to come. If Alfred is somehow still alive when Nil activates pattern B, he will not move towards tile (18, 20) but rather battle normally. | ||
====Alcryst==== | ====Alcryst==== | ||
| Line 848: | Line 1,889: | ||
====Timerra and Diamant==== | ====Timerra and Diamant==== | ||
If no player unit has entered Timerra's attack range by turn 11, she will become provoked and begin to approach player units at a fast rate over the water with her [[Soar]] skill. If the player is at a steady pace ahead of Nil in the battle, they may also be simultaneously be dealing with Diamant and his four dark emblems conjured by Dark Veronica. These emblems will be summoned if a player unit enters the northeast island or on enemy phase 10, the sooner of the two. Using area-of-effect attacks on Diamant and the dark emblems such as [[Torrential Roar]], [[Override]], and [[Blazing Lion]] can help minimize their threat before Timerra reaches the player units and unleashes [[Dark Inferno]] on them. When Timerra does arrive, use ranged magic attacks and stay away from close combat because if her [[Sandstorm (skill)|Sandstorm skill]] activates while she has a melee weapon equipped, the player unit fighting her is unlikely to survive. Dark Inferno plus Sandstorm may also result in severe damage towards multiple player units so try to get her as close to your units as you can without getting in range of her Dark Inferno, then try to defeat her in one turn. | If no player unit has entered Timerra's attack range by turn 11, she will become provoked and begin to approach player units at a fast rate over the water with her [[Soar]] skill. If the player is at a steady pace ahead of Nil in the battle, they may also be simultaneously be dealing with Diamant and his four dark emblems conjured by Dark Veronica. These emblems will be summoned if a player unit enters the northeast island or on enemy phase 10, the sooner of the two. Using area-of-effect attacks on Diamant and the dark emblems such as [[Torrential Roar]], [[Override]], and [[Blazing Lion]] can help minimize their threat before Timerra reaches the player units and unleashes [[Dark Inferno]] on them. When Timerra does arrive, use ranged magic attacks and stay away from close combat because if her [[Sandstorm (skill)|Sandstorm skill]] activates while she has a melee weapon equipped, the player unit fighting her is unlikely to survive. Dark Inferno plus Sandstorm may also result in severe damage towards multiple player units so try to get her as close to your units as you can without getting in range of her Dark Inferno, then try to defeat her in one turn. | ||
Take note that unlike the player's version of Veronica, the dark emblems summoned by Dark Veronica will not dissipate if their caster, Diamant, is killed. Also, once Timerra has used Dark Inferno, she will be able to use it again two turns later. | Take note that unlike the player's version of Veronica, the dark emblems summoned by Dark Veronica will not dissipate if their caster, Diamant, is killed. Also, once Timerra has used Dark Inferno, she will be able to use it again two turns later. | ||
| Line 861: | Line 1,902: | ||
====Céline==== | ====Céline==== | ||
Céline is an offensively powerful foe, with her [[Failnaught]] being able to reach a distance of three spaces but if she does use it, then she will be stuck with it on the player phase, thus allowing close ranged units to attack her without harm. Furthermore, since she has [[Aymr]] equipped by default which is a smash weapon, player units will be able to make follow up attacks against her before she can make a single attack, thus allowing them to make finishing blows more safety. Céline will begin moving on her own if the nearby [[Swordmaster]]s or [[Sniper]] on the northern island are provoked. | Céline is an offensively powerful foe, with her [[Failnaught]] being able to reach a distance of three spaces but if she does use it, then she will be stuck with it on the player phase, thus allowing close ranged units to attack her without harm. Furthermore, since she has [[Aymr]] equipped by default which is a smash weapon, player units will be able to make follow up attacks against her before she can make a single attack, thus allowing them to make finishing blows more safety. Céline will begin moving on her own if the nearby [[Swordmaster]]s or [[Sniper]] on the northern island are provoked. | ||
===Tips=== | ===Tips=== | ||
When fighting the fallen royals: | When fighting the fallen royals: | ||
*Corrin's [[Draconic | *Corrin's [[Draconic Hex]] can debuff enemies which can help player units deal more damage to them and take less in return. | ||
*Using Hortensia engaged with Micaiah and using a group [[Rescue (staff)|Rescue]] on turn 9 can allow a player to send all of their units to the final northernmost area to battle Céline while not having to worry about Nil deviating from pattern A. Veronica's [[Contract]] or Seadall's [[Dance]] can help speed up the transportation process. | *Using Hortensia engaged with Micaiah and using a group [[Rescue (staff)|Rescue]] on turn 9 can allow a player to send all of their units to the final northernmost area to battle Céline while not having to worry about Nil deviating from pattern A. Veronica's [[Contract]] or Seadall's [[Dance]] can help speed up the transportation process. | ||
*Edelgard's [[Flame Gambit]] and Corrin and Camilla's [[Dragon Vein (skill)|Vein of Flame/Smoke]] can hinder the movement of landbound foes such as Fogado, Alfred, Alcryst, Diamant, and the dark emblems. | *Edelgard's [[Flame Gambit]] and Corrin and Camilla's [[Dragon Vein (skill)|Vein of Flame/Smoke]] can hinder the movement of landbound foes such as Fogado, Alfred, Alcryst, Diamant, and the dark emblems. | ||
*Soren's [[Decoy]] can help control who Timerra and Ivy target with [[Dark Inferno]] and [[Cataclysm]] respectively (take caution of any [[Mage Cannoneer]]s or [[Corrupted Wyvern]]s who may prematurely wear off the Decoy status effect on a unit). | *Soren's [[Decoy]] can help control who Timerra and Ivy target with [[Dark Inferno]] and [[Cataclysm]] respectively (take caution of any [[Mage Cannoneer]]s or [[Corrupted Wyvern]]s who may prematurely wear off the Decoy status effect on a unit). | ||
| Line 873: | Line 1,913: | ||
When fighting against the generic corrupted enemies: | When fighting against the generic corrupted enemies: | ||
*Mage Cannoneers and Corrupted Wyverns have a tendency to act before other enemy units, if given an opportunity to deal damage | *Mage Cannoneers and Corrupted Wyverns have a tendency to act before other enemy units, if given an opportunity to deal damage | ||
*The Mage Cannoneer at tile (4, 6) will always use [[Let Fly]] with [[Silence Blast]] on tile (10, 7) on turn 2 | *The Mage Cannoneer at tile (4, 6) will always use [[Let Fly]] with [[Silence Blast]] on tile (10, 7) on turn 2 | ||
*Keep non-flier player units away from the water: Wyvern Knights gain +5 speed from their [[Air Raid]] skill when initiating combat from terrain which their opponent cannot enter. | *Keep non-flier player units away from the water: Wyvern Knights gain +5 speed from their [[Air Raid]] skill when initiating combat from terrain which their opponent cannot enter. | ||
Ways to deal more damage to foes and help player units survive: | Ways to deal more damage to foes and help player units survive: | ||
*[[Blue Skies+]] grants a flat +5 damage | *[[Blue Skies+]] grants a flat +5 damage dealt and −5 damage taken to a unit engaged with Erika, and to any ally who has [[Gentility+]] equipped through inheritance. | ||
*[[Reprisal+]], [[Weapon Sync+]] and [[Sword Power|Sword]], [[Lance Power|Lance]], and [[Axe Power | *[[Reprisal+]], [[Weapon Sync+]], and [[Sword Power|Sword]], [[Lance Power|Lance]], and [[Axe Power]] skills can grant additional attack power to player units. | ||
*[[Bond Forger+]] can help nearby units with low accuracy, such as Zelestia and Madeline, have an easier time landing hits on foes. In turn, Zelestia's personal skill [[Friendly Boost]] can improve ally accuracy further when she defeats a foe. [[Divine Pulse+]] and [[Hit +30]] also provide a consistent and reliable accuracy bonus. | *[[Bond Forger+]] can help nearby units with low accuracy, such as Zelestia and Madeline, have an easier time landing hits on foes. In turn, Zelestia's personal skill [[Friendly Boost]] can improve ally accuracy further when she defeats a foe. [[Divine Pulse+]] and [[Hit +30]] also provide a consistent and reliable accuracy bonus. | ||
*Marth's [[Avoid +30]] can help units have a slightly higher chance of avoiding foes. | *Marth's [[Avoid +30]] can help units have a slightly higher chance of avoiding foes. | ||
| Line 884: | Line 1,924: | ||
==Trivia== | ==Trivia== | ||
*The enemy Hortensia is the only royal in the stage to not use an | *The enemy Hortensia is the only royal in the stage to not use an [[Emblem Bracelet]]. | ||
**Incidentally, she is also the only royal to drop an item and not have a | **Incidentally, she is also the only royal to drop an item and not have a [[Revival Stone]] on Hard mode. | ||
*Enemy reinforcements that appear as a result of Nil following his pattern B move set will appear at the beginning of the player phase as opposed to the end of the enemy phase with those that normally appear | *Enemy reinforcements that appear as a result of Nil following his pattern B move set will appear at the beginning of the player phase as opposed to the end of the enemy phase with those that normally appear. | ||
==Etymology and other languages== | ==Etymology and other languages== | ||
| Line 912: | Line 1,952: | ||
==Gallery== | ==Gallery== | ||
<gallery> | <gallery> | ||
Cg fe17 dlc event 07.png|Alear releases the seal from the Bracelet of Three Houses | Cg fe17 dlc event 07.png|Alear releases the seal from the Bracelet of the Three Houses | ||
Cg fe17 dlc event 08.png|Rafal uses the power of the seven bracelets to transform himself | Cg fe17 dlc event 08.png|Rafal uses the power of the seven bracelets to transform himself | ||
Cg fe17 dlc event 09.png|A flashback of Mauvier warping his fellow Winds to safety | Cg fe17 dlc event 09.png|A flashback of Mauvier warping his fellow Winds to safety | ||
| Line 922: | Line 1,962: | ||
Ss fe17 three winds meet mauvier.png|The remaining three Winds meet the Mauvier of Alear's world | Ss fe17 three winds meet mauvier.png|The remaining three Winds meet the Mauvier of Alear's world | ||
Ss fe17 rafal revives nel.png|Rafal reviving Nel | Ss fe17 rafal revives nel.png|Rafal reviving Nel | ||
Ss fe17 bracelets freed.png|The seven | Ss fe17 bracelets freed.png|The seven Emblems freed from Fell Dragon magic | ||
</gallery> | </gallery> | ||
| Line 932: | Line 1,972: | ||
{{Nav17}} | {{Nav17}} | ||
[[Category:Chapters of Fire Emblem Engage]] | [[Category:Chapters of Fire Emblem Engage]] | ||
[[Category:Downloadable content chapters of Fire Emblem Engage]] | [[Category:Downloadable content chapters of Fire Emblem Engage]] | ||
Latest revision as of 16:42, 16 April 2024
| ||||||||
|

Seven Bracelets is the sixth and final chapter of the Fire Emblem Engage expansion Fell Xenologue. In this chapter, Alear and Nel fight against Nil for the future of the parallel world.
Completing this chapter will unlock Zelestia, Gregory, Madeline, Nel, and Rafal for use in the main story for that save file.
Plot
- Main article:
Seven Bracelets/Script
At the fallen remains of the Somniel, Nil recounts on his past powerlessness as a child. Nel begs him to stop trying to rule over a dead world, urging him to remember the time he shared with her as family, but he reveals that he is merely pretending to be her twin, who had died long ago. He then declares his desire to fight against her, and for her to end his life. Though he briefly considers their time as "family", he grows restless and announces that he will carry out his father Sombron's legacy. Soon after, Alear arrives, and Nil demands that he dispel a magical ward that was placed on the final Emblem Bracelet—the Bracelet of the Three Houses—by their world's Alear; otherwise, he would kill Nel. Alear obliges, however Nil uses the seven bracelets' power to transform himself into a dragon, and reneges on his promise to keep Nel alive.
Zelestia, Gregory, and Madeline soon reunite with the group, explaining that Mauvier had used a Warp staff to teleport them to safety while he alone remained underneath the crumbling temple. Disgusted by the survival of three of the Four Winds, Nil threatens to kill all of them. Alear, Nel, and the others refuse to back down, and engage against Nil in one final battle, albeit not before the Alear of this world grants them their power.
Despite his newfound power, Nil is defeated and reverts to his human form, with the Emblem Bracelets disappearing as well. Unable to fulfill Sombron's will, Nil deems himself worthless, though Nel refutes this feeling. Nil then reveals that he is not Nel's twin, but another Fell Dragon whose twin died when he was very young. In the past, he met the real Nil, who was nearly identical to him. When the real Nil died, he gave the false one Nel's dragonstone, and asked him to take his place to keep Nel from grieving. Nel then tells him that she had always known about his ruse, and chose to accept him as her brother regardless. She also reveals that she had left flowers for the real Nil back when they were mourning their world's Alear at Lythos Castle.
With these words on his mind, Nil requests Nel to kill him. She refuses, stabbing herself instead, stating that she would rather die than lose another brother. Her last words are to ask Nil what his true name is; she then dies, causing her dragonstone to shatter in front of Nil. Grieving, he reveals his name to be Rafal, and laments his failure to be her other half. Alear and Zelestia then sense Sombron's magic within the shards of the dragonstone, and reason that it must have sown hatred in Rafal's heart to keep him and Nel from conspiring against Sombron; with its destruction, the spell is released. Despite learning of this, Rafal refuses to allow anyone else to take responsibility for his misdeeds. Using Lumera's revival of Alear as inspiration, Rafal then pledges to pour his life force into Nel to revive her, even if it takes a thousand years. Impressed by his resolve, Alear then invites Rafal and Nel to join them in their world's Somniel when he completes his goal. Rafal agrees to his invitation, though only when Nel is revived and if she has forgiven him. Zelestia then thanks Rafal, and expresses her desire to meet him again.
Alear, the remaining Winds, and the others return to Lythos Castle. After reflecting on the events that have passed, the Winds discuss their next plans. Gregory suggests they try to rebuild the world, but Madeline protests that, without any other living people in it, it would be a fruitless endeavor. Alear then invites the Winds to join them in their world. Though Madeline is reluctant to leave Mauvier behind in the world, Gregory reminds her that Mauvier's last wishes were that they all be happy. The two argue briefly, and Madeline weeps over Mauvier's death again, but the three Winds ultimately accept Alear's invitation. As the group departs, the Alear of the dead world thanks them and asks them to take care of their people.
Back in their Somniel, Alear basks in the good weather. Suddenly, Rafal and Nel approach them.
Beginning log
Having lost Nel and the bracelets, the Divine Dragon journeys to a once-floating island to find Nil.
Chapter data
Normal Hard Maddening


Character data
| Characters | |
|---|---|
New units
| |
| |
Required characters
| |
Available characters
| |
Undeployable characters
| |
When replaying the chapter, Nel, Zephia, Gregory, and Madeline will use their default stats and thus cannot use their inheritable skills or emblem bond levels.
Emblem Ring data
| Characters | |
|---|---|
New units
| |
| |
Required characters
| |
Available characters
| |
Additionally, Emblem Energy appears in the following locations:
- Column 1, row 12: Southwest of the northwestern Fell Sigil
- Column 2, row 20: Just southeast of Fogado's starting position
- Column 4, row 26: South of the southwestern Fell Sigil
- Column 7, row 13: Southeast of the northwestern Fell Sigil
- Column 17, row 21: Just southeast of a Sniper in woods
- Column 20, row 17: East of the center Fell Sigil
- Column 24, row 7: West of the northeastern Fell Sigil
- Column 30, row 15: On the eastern border of the map, between two small patches of open water
Item data
The following items are obtained as a reward to be used in the main story:
| |||||||||||||||||||||||||||||||||||||||||||||
|
Additionally, numerous enemy units drop items for use specifically in this chapter:
| ||||||||||||||||||||||||||||||||||||
|
Enemy data
This section has been marked as a stub. Please help improve the page by adding information.
Normal Hard Maddening
| ||||||||||||||||||||||||||||||||||||||||||||||||||||||||||||||||||||||||||||||||||||||||||||||||||||||||||||||||||||||||||||||||||||||||||||||||||||||||||||||||||||||||||||||||||||||||||||||||||||||||||||||||||||||||||||||||||||||||||||||||||||||||||||||||||||||||||||||||||||||||||||||||||||||||||||||||||||||||||||||||||||||||||||||||||||||||||||||||||||||||||||||||||||||||||||||||||||||||||||||||||||||||||||||||||||||||||||||||||||||||||||||||||||||||||||||||||||||||||||||||||||||||||||||||||||||||||||||||||||||||||||||||||||||||||||||||||||||||||||||||||||||||||||||||||||||||||||||||||||||||||||||||||||||||||||||||||||||||||||||||||||||||||||||||||||||||||||||||||||||||||||||||||||||||||||||||||||||||||||||||||||||||||||||||||||||||||||||||||||||||||||||||||||||||||||||||||||||||||||||||||||||||||||||||||||||||||||||||||||||||||||||||||||||||
| ||||||||||||||||||||||||||||||||||||||||||||||||||||||||||||||||||||||||||||||||||||||||||||||||||||||||||||||||||||||||||||||||||||||||||||||||||||||||||||||||||||||||||||||||||||||||||||||||||||||||||||||||||||||||||||||||||||||||||||||||||||||||||||||||||||||||||||||||||||||||||||||||||||||||||||||||||||||||||||||||||||||||||||||||||||||||||||||||||||||||||||||||||||||||||||||||||||||||||||||||||||||||||||||||||||||||||||||||||||||||||||||||||||||||||||||||||||||||||||||||||||||||||||||||||||||||||||||||||||||||||||||||||||||||||||||||||||||||||||||||||||||||||||||||||||||||||||||||||||||||||||||||||||||||||||||||||||||||||||||||||||||||||||||||||||||||||||||||||||||||||||||||||||||||||||||||||||||||||||||||||||||||||||||||||||||||||||||||||||||||||||||||||||||||||||||||||||||||||||||||||||||||||||||||||||||||||||||||||||||||||||||||||||||||
| ||||||||||||||||||||||||||||||||||||||||||||||||||||||||||||||||||||||||||||||||||||||||||||||||||||||||||||||||||||||||||||||||||||||||||||||||||||||||||||||||||||||||||||||||||||||||||||||||||||||||||||||||||||||||||||||||||||||||||||||||||||||||||||||||||||||||||||||||||||||||||||||||||||||||||||||||||||||||||||||||||||||||||||||||||||||||||||||||||||||||||||||||||||||||||||||||||||||||||||||||||||||||||||||||||||||||||||||||||||||||||||||||||||||||||||||||||||||||||||||||||||||||||||||||||||||||||||||||||||||||||||||||||||||||||||||||||||||||||||||||||||||||||||||||||||||||||||||||||||||||||||||||||||||||||||||||||||||||||||||||||||||||||||||||||||||||||||||||||||||||||||||||||||||||||||||||||||||||||||||||||||||||||||||||||||||||||||||||||||||||||||||||||||||||||||||||||||||||||||||||||||||||||||||||||||||||||||||||||||||||||||||||||||||||
| ||||||||||||||||||||||||||||||||||||||||||||||||||||||||||||||||||||||||||||||||||||||||||||||||||||||||||||||||||||||||||||||||||||||||||||||||||||||||||||||||||||||||||||||||||||||||||||||||||||||||||||||||||||||||||||||||||||||||||||||||||||||||||||||||||||||||||||||||||||||||||||||||||||||||||||||||||||||||||||||||||||||||||||||||||||||||||||||||||||||||||||||||||||||||||||||||||||||||||||||||||||||||||||||||||||||||||||||||||||||||||||||||||||||||||||||||||||||||||||||||||||||||||||||||||||||||||||||||||||||||||||||||||||||||||||||||||||||||||||||||||||||||||||||||||||||||||||||||||||||||||||||||||||||||||||||||||||||||||||||||||||||||||||||||||||||||||||||||||||||||||||||||||||||||||||||||||||||||||||||||||||||||||||||||||||||||||||||||||||||||||||||||||||||||||||||||||||||||||||||||||||||||||||||||||||||||||||||||||||||||||||||||||||||||
Reinforcements
This section has been marked as a stub. Please help improve the page by adding information.
- After Fell Nil uses Summon Vortex from the southern Fell Sigil
- 2 Generals with Silver Lances from west of Fell Nil's starting position
- 2 Generals with Silver Axes from west of Fell Nil's starting position (Hard/Maddening only)
- 1 General with a Silver Sword from just southeast of Fell Nil's starting position
- 1 (Normal)/2 (Hard/Maddening) General(s) with Silver Axe(s) from east of Fell Nil's starting position
- 1 General with a Silver Lance from southeast of Fell Nil's starting position (Hard/Maddening only)
- After Fell Nil uses Summon Vortex from the southwestern Fell Sigil
- 3 level 28 Corrupted Wolves; one from southwest, east, and north of the southwestern Fell Sigil each (Hard/Maddening only)
- 3 level 28 Corrupted Wolves; two from southeast of the southwestern Fell Sigil, one from north of the southwestern Fell Sigil
- 1 level 32 Corrupted Wolf from west of the southwestern Fell Sigil (Hard/Maddening only)
- After Fell Nil uses Summon Vortex from the center Fell Sigil
- 1 Mage Cannoneer with Freeze Blast from southwest of the center Fell Sigil
- 1 Mage Cannoneer with Silence Blast from southeast of the center Fell Sigil (Hard/Maddening only)
- 1 Mage Cannoneer with Break Blast from south of the center Fell Sigil
- 1 Mage Cannoneer with Venom Blast from southeast of the center Fell Sigil
- 1 Mage Cannoneer with Tornado Blast from west of the center Fell Sigil (Hard/Maddening only)
- 1 Mage Cannoneer with Mighty Blast from east of the center Fell Sigil (Hard/Maddening only)
- 3 Snipers; two from west of the center Fell Sigil, one from southeast of the center Fell Sigil (Maddening only)
- After Fell Nil uses Summon Vortex from the southeastern Fell Sigil
- 1 Great Knight with a Silver Lance from north of the southeastern Fell Sigil
- 1 Great Knight with a Silver Sword from south of the southeastern Fell Sigil (Hard/Maddening only)
- 1 (Normal/Hard)/2 (Maddening) Wolf Knight(s) from just northeast of the southeastern Fell Sigil
- 1 Wolf Knight from south of the southeastern Fell Sigil (Hard/Maddening only)
- 1 Great Knight with a Silver Axe from southeast of the southeastern Fell Sigil (Hard/Maddening only)
- 1 Great Knight with a Silver Sword from just west of the southeastern Fell Sigil
- 2 Great Knights with Spears from northwest of the southeastern Fell Sigil (Maddening only)
- After Fell Nil uses Summon Vortex from the northwestern Fell Sigil
- 2 Griffin Knights; one from north and west of the northwestern Fell Sigil each
- 2 Griffin Knights; one from northeast and southeast of the northwestern Fell Sigil each (Hard/Maddening only)
- 1 Wyvern Knight with a Silver Axe from southwest of the northwestern Fell Sigil
- 2 Wyvern Knights with Silver Axes; one from just southeast and north of the northwestern Fell Sigil each (Hard/Maddening only)
- After Fell Nil uses Summon Vortex from the northeastern Fell Sigil
- 1 Sage with Elthunder from south of the northeastern Fell Sigil
- 1 Sage with Elfire from southwest of the northeastern Fell Sigil (Hard/Maddening only)
- 1 Sage with Elwind from south of the northeastern Fell Sigil
- 1 Sage with Elthunder from north of the northeastern Fell Sigil (Hard/Maddening only)
- 1 Sage with Elfire from northwest of the northeastern Fell Sigil
- 1 Sage with Elwind from just northeast of the northeastern Fell Sigil (Hard/Maddening only)
- After Fell Nil uses Summon Vortex from the northern Fell Sigil
- 2 Great Knights with Silver Lances from south of the northern Fell Sigil
- 2 Great Knights with Spears from south of the northern Fell Sigil (Hard/Maddening only)
- 1 Sniper from south of the northern Fell Sigil (Maddening only)
- 1 Sage with Elthunder from east of the northern Fell Sigil (Maddening only)
- 1 Sage with Elfire from southeast of the northern Fell Sigil
- 1 Martial Master with Fortify and Recover from southwest of the northern Fell Sigil (Hard/Maddening only)
- After Fell Nil uses Summon Vortex from the northern Fell Sigil a second time
- 1 Halberdier with a Silver Lance from west of the northern Fell Sigil
- 2 Halberdiers with Spears from west of the northern Fell Sigil (Hard/Maddening only)
- 2 (Normal)/3 (Hard) Snipers; one (Normal)/two (Hard) from north of the northern Fell Sigil, one from southwest of the northern Fell Sigil
- 1 Martial Master with Freeze from west of the northern Fell Sigil (Maddening only)
- 1 level 32 Corrupted Wolf from just west of the northern Fell Sigil (Maddening only)
- 1 Mage Cannoneer with Eldritch Blast from northwest of the northern Fell Sigil (Maddening only)
- After Fell Nil uses Summon Vortex from the northern Fell Sigil a third time
- 1 (Normal)/2 (Hard/Maddening) Berserker(s) with Silver Axe(s) from northeast of the northern Fell Sigil
- 1 Berserker with a Tomahawk from east of the northern Fell Sigil
- 1 Hero from northeast of the northern Fell Sigil
- 2 Heroes; one from northeast and southeast of the northern Fell Sigil each (Hard/Maddening only)
- 1 Sage with Elthunder from northeast of the northern Fell Sigil (Maddening only)
- 1 Martial Master with Freeze from east of the northern Fell Sigil (Maddening only)
- 1 Sage with Elwind from southeast of the northern Fell Sigil (Maddening only)
- The pattern in the last three Summon Vortexes repeats infinitely.
- Turn(s) 8 (Normal)/6 and 7 (Hard)/3 and 5 (Maddening)
- 1 Wyvern Knight with a Silver Sword from just east of the southwest corner of the map
- 1 Wyvern Knight with a Silver Axe from west of ally starting positions (Hard/Maddening only)
- 1 Wyvern Knight with a Silver Lance from west of ally starting positions
- On Maddening, these reinforcements repeat on turn 14 if a player unit has reached the northwestern section of the map (columns 1–7, rows 5–23) before turn 9.
- Turn(s) 9 (Normal)/9 and 10 (Hard)/8, 13, 17, 23, and 29 (Maddening)
- 1 (Normal/Hard)/2 (Maddening) Wyvern Knight(s) with Silver Axe(s) from the southern border of the map, near ally starting positions
- 1 (Normal/Maddening)/2 (Hard) Wyvern Knight(s) with Silver Lance(s) from the southern border of the map, east of ally starting positions
- 1 Corrupted Wyvern from the southern border of the map, east of ally starting positions (Maddening only)
- Turn(s) 9 (Normal)/14 and 15 (Hard)/13 (Maddening)
- 1 Wyvern Knight with a Silver Sword from west of the northwestern Fell Sigil
- 1 Wyvern Knight with a Silver Axe from south of the northwest corner of the map (Hard/Maddening only)
- 1 Corrupted Wyvern from northwest of the northwestern Fell Sigil (Maddening only)
- Turn(s) 11 (Normal only)/4 and 6 (Maddening only)
- 2 (Normal)/3 (Maddening) Wyvern Knights with Silver Swords from the western border of the map
- Turns 12 and 13 (Hard only)/9 and 11 (Maddening only)
- 1 Wyvern Knight with a Silver Axe from south of the northeast corner of the map
- 1 Wyvern Knight with a Silver Lance from just northeast of the northeastern Fell Sigil
- 1 Wyvern Knight with a Silver Lance from just east of the northeastern Fell Sigil (Maddening only)
- On Hard, these reinforcements repeat on turn 14 if a player unit has reached the northwestern section of the map (columns 1–7, rows 5–23) before turn 9.
- On Hard and Maddening, these reinforcements repeat on turns 9–14 (Hard)/9, 10, 12, and 14 (Maddening) if a player unit has reached the northwestern section of the map (columns 1–7, rows 5–23) before turn 9.
- Turns 22 and 28 (Hard only)/19, 25, and 31 (Maddening only)
- 2 Corrupted Wyverns from northwest of the northern Fell Sigil
- These reinforcements repeat on turns 9, 12, 16, 20, and also turns 10 and 18 on Hard if a player unit has reached the northwestern section of the map (columns 1–7, rows 5–23) before turn 9.
- 2 Corrupted Wyverns from northwest of the northern Fell Sigil
- Turn(s) 25 (Hard only)/16, 22, and 28 (Maddening only)
- 2 Corrupted Wyverns from northeast of the northern Fell Sigil
- These reinforcements repeat on turns 13, 14, 16, 18, and 20 (Hard)/10, 14, and 18 (Maddening) if a player unit has reached the northwestern section of the map (columns 1–7, rows 5–23) before turn 9.
- 2 Corrupted Wyverns from northeast of the northern Fell Sigil
- After Diamant is provoked
Boss data
Main boss
- Main article:
Nil
Normal Hard Maddening
|
| |||||||||||||||||||||||||||||||||||||||||||||||||||||||||
Sub-bosses
- Main article:
Alfred
Normal Hard Maddening
|
| |||||||||||||||||||||||||||||||||||||||||||||||||||||||||||
- Main article:
Céline
Normal Hard Maddening
|
| |||||||||||||||||||||||||||||||||||||||||||||||||||||||||||
- Main article:
Diamant
Normal Hard Maddening
|
| |||||||||||||||||||||||||||||||||||||||||||||||||||||||||||
- Main article:
Alcryst
Normal Hard Maddening
|
| |||||||||||||||||||||||||||||||||||||||||||||||||||||||||||
- Main article:
Ivy
Normal Hard Maddening
|
| |||||||||||||||||||||||||||||||||||||||||||||||||||||||||||
- Main article:
Hortensia
Normal Hard Maddening
- Main article:
Timerra
Normal Hard Maddening
|
| |||||||||||||||||||||||||||||||||||||||||||||||||||||||||||
- Main article:
Fogado
Normal Hard Maddening
|
| |||||||||||||||||||||||||||||||||||||||||||||||||||||||||||
Strategy
| This section details unofficial strategies that may help with completion of the chapter. This may not work for everybody. |
The following strategy and enemy behaviors described apply to maddening mode and may deviate from normal and hard mode
Nil
Nil's move set is the following
- Fell Assault: Nil's basic attack which is only used if a player initiates combat with him.
- Devastation: A instant kill area-of-effect attack that is telegraphed to the player before it is used. Harms both player and enemy units. If one or two units are killed, then Nil heals 5 HP and 10 HP respectively. If any more are killed, then he gains a revival stone instead (max of three). If royals on his team are killed, he will acquire their class skill (excluding Fogado who grants his personal skill instead). Also destroys the island which he is on.
- Once Nil destroys the island he is on, he will fly to a predetermined Fell Sigil and any unit caught underneath his flight path will receive 30 damage (units will endure with 1 HP if they otherwise would have been killed)
- Drain Essence: Similar to Devastation, except the area-of-effect is much smaller and no part of the land is destroyed. In addition to Nil healing, any unit killed will leave an emblem recharge spot behind for the player's use.
- Summon Vortex: Summons reinforcements the turn after preparing the move. Occupying a player unit on a vortex when the move is used will prevent the reinforcement from spawning.
- Fell Beam: A powerful area-of-effect attack that is telegraphed to the player before it is used. Only harms player units.
Nil has two main attack patterns. If no unit ends their turn in area (1, 18) to (7, 26) turn 8 or before (the area where enemy Hortensia and Ivy start off), Nil will follow pattern A below:
- (Turn 1) Fell Beam
- (Turn 2) Summon Vortex (preparation)
- (Turn 3) Summon Vortex 1
- (Turn 4) Devastation
- (Turn 5) Summon Vortex (preparation)
- (Turn 6) Summon Vortex 2
- (Turn 7) Fell Beam
- (Turn 8) Devastation
- (Turn 9) Summon Vortex (preparation)
- (Turn 10) Summon Vortex 3
- (Turn 11) Fell Beam
- (Turn 12) Devastation
- (Turn 13) Summon Vortex (preparation)
- (Turn 14) Summon Vortex 4
- (Turn 15) Devastation
- (Turn 16) Summon Vortex (preparation)
- (Turn 17) Summon Vortex 5
- (Turn 18) Devastation
- (Turn 19) Summon Vortex (preparation)
- (Turn 20) Summon Vortex 6
- (Turn 21) Devastation (moves to the final island)
If any unit ends their turn in the area of (1, 18) to (7, 26) turn 8 or before, Nil's move set will be replaced by pattern B starting on turn 9. If Nil triggers pattern B, abnormally many reinforcements will be added to the normally occurring ones, even after he has reached the final island. In addition, all fallen royals will become provoked and begin to approach the player units, disregarding any priorities they may have (except Diamant who will still use Summon Hero). Pattern B is as follows:
- (Turn 9) Devastation
- (Turn 10) Devastation
- (Turn 11) Devastation (moves to the final island, ignoring the northwest one)
Once Nil uses his last instance of Devastation on turn 21 on pattern A or on turn 11 on pattern B, he will move to the final island and use the following moves on loop
- Summon Vortex (preparation)
- Summon Vortex A (B on next loop, C on following loop, then repeat)
- Fell Beam
- Drain Essence
Fallen Royals
Fogado
Fogado is likely to be the less threatening of the sub-bosses, combat wise, since he is very unlikely to initiate combat on his own unless he can deal a significant amount of damage to a player unit. This also makes luring him towards the player somewhat difficult without risk, with even some ranged attacks aimed towards him not causing him to move. When fighting him, Veronica's Élivágar engage weapon is very helpful in neutralizing his stat bonuses, primarily his +10 HP, and since his default weapon is a bow, the player should have an easy time with close range combat. On turn 4, however, Fogado will prioritize on using Divine Blessing on Nil above all else, then proceed to battle the player normally. Though Nil is likely to gain a revival stone from every island he destroys anyways and is likely to have three by the final fight, Fogado's revival stone actually stacks with these ones, giving Nil an effective fourth one that the player can't see. Because of Fogado's likeliness to not engage the player immediately, the player can ignore him at first and get ahead on the third island, if they're okay with Nil having an additional health bar during the final fight.
Alfred
Alfred is a very unique foe on maddening mode compared to the other royals on this difficulty. From turns 4 to 8, Alfred will prioritize using Piercing Glare above all else. He will continue to prioritize this skill and be healed by a nearby Martial Master until turn 8 where, from where he will then move to tile (18, 20) and continue using Piercing Glare from turns 11 to 19. If the player so wishes to defeat him as early as possible, they should do so before his 4th turn as he will then try to return to his starting point and act as a wall. This may be somewhat difficult, however, because, like Fogado, Alfred is very unlikely to initiate combat unless he can deal a significant amount of damage to a player unit. Note that he has the Impenetrable skill which grants him immunity to the freeze status effect so Corrin's Torrential Roar is not recommended against him. Otherwise, his low resistance makes him weak to magic attacks so use as many of them as you can against him.
It may also be important to note that while defeating Alfred early may make the passageway north appealing to take, entering the northwest area before the second island is destroyed will cause Nil's attack pattern B to commence, causing numerous more reinforcements to join the battle overtime in addition to the ones already designated to come. If Alfred is somehow still alive when Nil activates pattern B, he will not move towards tile (18, 20) but rather battle normally.
Alcryst
Alcryst is very easy to lure to the player units because if he can deal at least one damage with Giga Levin Sword (which is telegraphed to the player if they enter his engage attack range), he will take the opportunity to use it. Once he is within a close range, a group of four or five player units can deal with him easily, seeing as he only has one revival stone to use unlike most other fallen royals on this difficulty. Regardless, remain careful of his Luna skill which may cause his attacks to deal a sudden increase in damage.
Timerra and Diamant
If no player unit has entered Timerra's attack range by turn 11, she will become provoked and begin to approach player units at a fast rate over the water with her Soar skill. If the player is at a steady pace ahead of Nil in the battle, they may also be simultaneously be dealing with Diamant and his four dark emblems conjured by Dark Veronica. These emblems will be summoned if a player unit enters the northeast island or on enemy phase 10, the sooner of the two. Using area-of-effect attacks on Diamant and the dark emblems such as Torrential Roar, Override, and Blazing Lion can help minimize their threat before Timerra reaches the player units and unleashes Dark Inferno on them. When Timerra does arrive, use ranged magic attacks and stay away from close combat because if her Sandstorm skill activates while she has a melee weapon equipped, the player unit fighting her is unlikely to survive. Dark Inferno plus Sandstorm may also result in severe damage towards multiple player units so try to get her as close to your units as you can without getting in range of her Dark Inferno, then try to defeat her in one turn.
Take note that unlike the player's version of Veronica, the dark emblems summoned by Dark Veronica will not dissipate if their caster, Diamant, is killed. Also, once Timerra has used Dark Inferno, she will be able to use it again two turns later.
Ivy and Hortensia
There are two ways in which fighting Ivy and Hortensia can be done for the most part. Because Ivy and Hortensia will both move if either one is provoked, entering Hortensia's Elthunder range with a flying unit as soon as possible will lure the two of them down along with some Mage Knights. If the player wishes to defeat the two of them as soon as possible, then be careful of the Wyvern Knight reinforcements that enter the battle from the west and south west along the way. This method is also risky since Ivy can use powerful attacks while above the water, preventing landbound player units from getting close. The benefit to defeating the two of them now is that players will gain the Nodus staff earlier and they won't have to deal fight them later alongside Céline at the same time.
The other, safer method is to not provoke them early and naturally wait for them to begin moving on their 19th turn, preferably after Timerra and Diamant have been defeated. This way, there is more land to fight Ivy and Hortensia on in the north island and landbound units can deal damage to Ivy without her being able to counterattack, should she have Bolting still equipped.
Although Ivy's Bolting is a minimal threat, her Cataclysm skill may prove to be a much greater problem. Like Timerra, once Ivy's engage attack is used, she will be able to use it again after two turns. Hortensia is rather frail with low defense nor does she have any emblem skills so defeating her with physical attacks shouldn't be too difficult, but take caution that if the nearby Marial Monk is unable to heal Alfred to full HP, then Hortensia will use her Fortify, resulting in her and Ivy's provocation.
Céline
Céline is an offensively powerful foe, with her Failnaught being able to reach a distance of three spaces but if she does use it, then she will be stuck with it on the player phase, thus allowing close ranged units to attack her without harm. Furthermore, since she has Aymr equipped by default which is a smash weapon, player units will be able to make follow up attacks against her before she can make a single attack, thus allowing them to make finishing blows more safety. Céline will begin moving on her own if the nearby Swordmasters or Sniper on the northern island are provoked.
Tips
When fighting the fallen royals:
- Corrin's Draconic Hex can debuff enemies which can help player units deal more damage to them and take less in return.
- Using Hortensia engaged with Micaiah and using a group Rescue on turn 9 can allow a player to send all of their units to the final northernmost area to battle Céline while not having to worry about Nil deviating from pattern A. Veronica's Contract or Seadall's Dance can help speed up the transportation process.
- Edelgard's Flame Gambit and Corrin and Camilla's Vein of Flame/Smoke can hinder the movement of landbound foes such as Fogado, Alfred, Alcryst, Diamant, and the dark emblems.
- Soren's Decoy can help control who Timerra and Ivy target with Dark Inferno and Cataclysm respectively (take caution of any Mage Cannoneers or Corrupted Wyverns who may prematurely wear off the Decoy status effect on a unit).
- Fallen Royals will not use any droppable S rank weapons or staves they may have (Hortensia may use her droppable Fortify but is very unlikely to).
When fighting against the generic corrupted enemies:
- Mage Cannoneers and Corrupted Wyverns have a tendency to act before other enemy units, if given an opportunity to deal damage
- The Mage Cannoneer at tile (4, 6) will always use Let Fly with Silence Blast on tile (10, 7) on turn 2
- Keep non-flier player units away from the water: Wyvern Knights gain +5 speed from their Air Raid skill when initiating combat from terrain which their opponent cannot enter.
Ways to deal more damage to foes and help player units survive:
- Blue Skies+ grants a flat +5 damage dealt and −5 damage taken to a unit engaged with Erika, and to any ally who has Gentility+ equipped through inheritance.
- Reprisal+, Weapon Sync+, and Sword, Lance, and Axe Power skills can grant additional attack power to player units.
- Bond Forger+ can help nearby units with low accuracy, such as Zelestia and Madeline, have an easier time landing hits on foes. In turn, Zelestia's personal skill Friendly Boost can improve ally accuracy further when she defeats a foe. Divine Pulse+ and Hit +30 also provide a consistent and reliable accuracy bonus.
- Marth's Avoid +30 can help units have a slightly higher chance of avoiding foes.
- Veyle engaged with Soren and having the inheritable skills Hold Out+++ and Quick Riposte+ is very helpful since she will constantly heal and endure during every combat for four turns, due to the engage skill Flare and her dragon unit type bonus granting her double critical rate, making her near invincible against all non-Nil enemies (so long as she doesn't miss a hit and not heal as a result). At max bond rank with Soren, Veyle's Rexcalibur can instantly defeat Wyvern Knights and thus can be utilized well on the enemy phase.
Trivia
- The enemy Hortensia is the only royal in the stage to not use an Emblem Bracelet.
- Incidentally, she is also the only royal to drop an item and not have a Revival Stone on Hard mode.
- Enemy reinforcements that appear as a result of Nil following his pattern B move set will appear at the beginning of the player phase as opposed to the end of the enemy phase with those that normally appear.
Etymology and other languages
This section has been marked as a stub. Please help improve the page by adding information.
| Names, etymology, and in other regions | ||
|---|---|---|
| Language | Name | Definition, etymology, and notes |
| English |
Seven Bracelets |
-- |
Gallery

Alear releases the seal from the Bracelet of the Three Houses
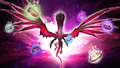
Rafal uses the power of the seven bracelets to transform himself

A flashback of Mauvier warping his fellow Winds to safety
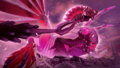
Female Alear battling against Rafal
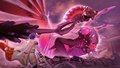
Male Alear battling against Rafal

Nel stabs herself in remorse

Nel's dragonstone breaks before Rafal as a result of her death

Rafal mourns the death of Nel

The remaining three Winds meet the Mauvier of Alear's world
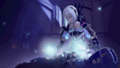
Rafal reviving Nel

The seven Emblems freed from Fell Dragon magic


References
| ← The Fell Heir • | Seven Bracelets |
|---|