| Site News |
|---|
| Warning: This wiki contains spoilers. Read at your own risk! Social media: If you would like, please join our Discord server, and/or follow us on X (Twitter) or Tumblr! |
The Bandits of Dacia: Difference between revisions
Thecornerman (talk | contribs) m (→Gallery: Added default sort key) |
Thecornerman (talk | contribs) m (Text replacement - "([Cc])hapter (\d+)" to "$1hapter $2") |
||
| (39 intermediate revisions by 8 users not shown) | |||
| Line 1: | Line 1: | ||
{{Chapter Infobox | |||
{{Chapter Infobox | |||
|image=[[File:Cm fe05 12.png|200px]] | |image=[[File:Cm fe05 12.png|200px]] | ||
|location=Dacia Forest | |location=Dacia Forest | ||
|new units=[[Mareeta]] | |new units=[[Mareeta]] | ||
|boss=[[ | |boss=[[Cullough]] | ||
|weather=[[Fog of War]] | |weather=[[Fog of War]] | ||
|previous=*[[Dandrum | |previous=*[[Fort Dandrum]] | ||
*[[Murder | *[[Murder Holes]] | ||
|next=*[[The Walled City]] | |next=*[[The Walled City]] | ||
*[[Dandelion]] | *[[The Dandelion]] <small>(side quest)</small> | ||
|sidequest=Chapter is completed before turn 20. | |||
}} | }} | ||
'''The | '''The Bandits of Dacia''' (Japanese: {{hl|ダキアの盗賊|Dakia no tōzoku}} ''The Thieves of Dakia'') is the twelfth chapter of {{FE5}}. In order to play [[The Dandelion|the side quest after]], this chapter must be completed in fewer than 20 turns. | ||
==Plot== | ==Plot== | ||
{{main|The | {{main|The Bandits of Dacia/Script}} | ||
[[Perne]] recruits [[Salem]] into his group of bandits, the Dandelion, and declares that he plans to leave some new recruits behind soon, as they are bloodthirsty and the Dandelion is not meant to be that way. He intends to abscond with [[Troude]] and [[Tina]], as well as Salem. He then enters the Dandelion's hideout and leaves Salem behind as a lookout. | |||
In the meantime, inside a house near Dacia Forest, [[Saias]] leaves [[Mareeta]] in an elderly woman's care. Before he takes his leave, he gives Mareeta the [[Shadow Sword]] and tells her that she should wield it, even though it once possessed her. | |||
After Saias leaves, bandits under command of [[Cullough]]—one of the Dandelion's most infamous new recruits—attack the village where Mareeta is. Mareeta pledges to protect the village despite the protests of her caretaker and rushes out to meet the bandits. In the meantime, Tina comes out of the Dandelion's hideout to bring Salem some food, and Salem reassures her that they will find her sister, whom she misses dearly. | |||
Once the battle ends, if it was finished quickly, [[Dryas]] tells [[Leif]] to seize the Dandelion's hideout and eliminate the bandit problem in the area. If the battle was not finished quickly, [[August]] tells Leif that the Dandelion is a surprisingly honorable group of bandits and they should be left alone, so Leif's forces do not storm the hideout. Regardless of what Leif does next, if Mareeta survived the battle, she meets with Leif and joins his forces while making a mutual promise with him that they will go back to Munster for [[Eyvel]] one day. | |||
==Chapter data== | ==Chapter data== | ||
| Line 25: | Line 29: | ||
|victory=Seize the throne | |victory=Seize the throne | ||
|defeat=[[Leif]] dies | |defeat=[[Leif]] dies | ||
|ally= | |ally=8–12{{h|+1|Upon Mareeta arriving}} | ||
|enemy=27{{h|+18|Reinforcements}} | |enemy=27{{h|+18|Reinforcements}} | ||
|map=[[File:Cm fe05 12.png]] | |map=[[File:Cm fe05 12.png]] | ||
}} | }} | ||
Units are arranged based on their position in deployment order after Leif. | |||
On turn 20, the [[fog of war]] clears. | |||
===Character data=== | ===Character data=== | ||
{{ChapChars | {{ChapChars | ||
|game#=05 | |game#=05 | ||
|newunit1={{NewUnit | |newunit1={{NewUnit | ||
|name=Mareeta | |name=Mareeta | ||
|portrait=[[File:portrait mareeta fe05.png]] | |portrait=[[File:portrait mareeta fe05.png]] | ||
|class= | |class=Sword Fighter | ||
|HP=22 | |HP=22 | ||
|lv=2 | |lv=2 | ||
|inventory={{Item|5|Mareeta's Sword}}<br>{{Item|5|Vulnerary}} | |||
|recruitment method=Automatically from turn 2 | |recruitment method=Automatically from turn 2 | ||
}} | }} | ||
|return1= | |forced1=leif | ||
|return2= | |return1=lifis | ||
|return3= | |return2=fergus | ||
|return4= | |return3=karin | ||
|return5= | |return4=brighton | ||
|return6= | |return5=machyua | ||
|return7= | |return6=lara | ||
|return8= | |return7=dalsin | ||
|return9= | |return8=asbel | ||
|return10= | |return9=nanna | ||
|return11= | |return10=hicks | ||
|return12= | |return11=finn | ||
|return13= | |return12=safy | ||
|return14= | |return13=shiva | ||
|return15= | |return14=osian | ||
|return16= | |return15=halvan | ||
|return17= | |return16=ronan | ||
|return18= | |return17=carrion | ||
|return19= | |return18=marty | ||
|return20= | |return19=dagdar | ||
|return21= | |return20=tanya | ||
|return22 | |return21=selphina | ||
|return22=cain | |||
| | |return22article=Cain (Thracia 776) | ||
| | |return23=alva | ||
| | |return23article=Alva (Thracia 776) | ||
| | |return24=robert | ||
| | |return25=fred | ||
|return26 | |return26=olwen | ||
}} | |||
}} | |||
===Item data=== | ===Item data=== | ||
{{ChapItems | {{ChapItems | ||
|platform=snes03 | |platform=snes03 | ||
|item1=Silence | |item1=Silence | ||
|item1article=Silence (staff) | |item1article=Silence (staff) | ||
|obtain1=Visit northern house<br>(if Peter escaped in [[Murder | |obtain1=Visit northern house<br>(if Peter escaped in [[Murder Holes|Chapter 11x]]) | ||
|item2=Heim Scroll | |item2=Heim Scroll | ||
|obtain2=Visit south eastern house<br>(if Sera escaped in [[Murder | |obtain2=Visit south eastern house<br>(if Sera escaped in [[Murder Holes|Chapter 11x]]) | ||
|item3=Vulnerary | |item3=Vulnerary | ||
|obtain3=Visit south western house | |obtain3=Visit south western house if Rosa did not escape in [[Murder Holes|Chapter 11x]], or visit with any unit except [[Olwen]] | ||
|itemlast=Magic Ring | |itemlast=Magic Ring | ||
|obtainlast=Visit south western house with [[Olwen]] | |obtainlast=Visit south western house with [[Olwen]] if Rosa escaped in [[Murder Holes|Chapter 11x]] | ||
}} | }} | ||
| Line 91: | Line 97: | ||
{{ChapShop SNES03 | {{ChapShop SNES03 | ||
|tome1=Wind | |tome1=Wind | ||
|tocost1=2,200 | |tocost1=2,200 | ||
|tome2=Fire | |tome2=Fire | ||
|tocost2=2,250 | |tocost2=2,250 | ||
|item1=Vulnerary | |item1=Vulnerary | ||
| Line 106: | Line 110: | ||
===Enemy data=== | ===Enemy data=== | ||
{{ | :''Stats with two figures separated by a ~ are presented as a range, representing stats that vary due to random growths. The figures to the left and right of the ~ are the stat's minimum and maximum possible values respectively.'' | ||
|platform=snes03 | {{ChapUnitHdr|type=Enemy|platform=snes03}} | ||
| | {{ChapUnitCellFE5 | ||
| | |name=[[Salem]] | ||
| | |class=Loptr Mage | ||
|#1= | |lv=5 | ||
| | |#=1 | ||
|- | |hp=22 | ||
| | |str=0 | ||
| | |mag=8 | ||
| | |skill=6 | ||
| | |spd=7 | ||
| | |lck=2 | ||
| | |def=2 | ||
| | |con=4 | ||
| | |mov=6 | ||
| | |inventory={{Item|5|Jormungand}} • {{Item|5|Sleep|link=Sleep (staff)}} | ||
| | |notes=• Does not move; stands on a [[Terrain/Super Famicom games#Fire Emblem: Thracia 776|gate]], the chapter's seize point.<br>• Randomly acts or does not act each turn.<!--Seems to be a ~30% chance to act--> | ||
|#3= | }} | ||
| | {{ChapUnitCellFE5 | ||
| | |name=Brigand | ||
| | |class=Brigand | ||
| | |version=steal | ||
| | |lv=9 | ||
|# | |#=1 | ||
| | |hp=22~33 | ||
| | |str=5~16 | ||
| | |mag=0~11 | ||
| | |skill=0~11 | ||
| | |spd=0~11 | ||
|#5= | |lck=0~11 | ||
| | |def=3~14 | ||
| | |con=9~20 | ||
| | |mov=6~7 | ||
| | |inventory={{Item|5|Iron Axe}}<br>{{Item|5|Steal}} | ||
| | |notes='''Authority:''' Cullough | ||
| | }} | ||
|# | {{ChapUnitCellFE5 | ||
| | |name=Brigand | ||
| | |class=Brigand | ||
| | |lv=5 | ||
| | |#=2 | ||
| | |hp=22~29 | ||
| | |str=5~12 | ||
|# | |mag=0~3 | ||
| | |skill=0~7 | ||
| | |spd=0~7 | ||
| | |lck=0~7 | ||
| | |def=3~10 | ||
| | |con=9~16 | ||
| | |mov=6~7 | ||
|# | |inventory={{Item|5|Hand Axe}} | ||
| | |notes='''Authority:''' Cullough | ||
| | }} | ||
| | {{ChapUnitCellFE5 | ||
| | |name=Brigand | ||
| | |class=Brigand | ||
| | |version=steal | ||
| | |lv=10 | ||
| | |#=1 | ||
|hp=22~34 | |||
| | |str=5~17 | ||
| | |mag=0~12 | ||
| | |skill=0~12 | ||
|# | |spd=0~12 | ||
| | |lck=0~12 | ||
| | |def=3~15 | ||
| | |con=9~20 | ||
| | |mov=6~7 | ||
| | |inventory={{Item|5|Iron Axe}}<br>{{Item|5|Steal}} | ||
| | |notes='''Authority:''' Cullough | ||
| | }} | ||
| | {{ChapUnitCellFE5 | ||
| | |name=Brigand | ||
| | |class=Brigand | ||
|# | |lv=6 | ||
| | |#=11 | ||
|hp=22~30 | |||
|str=5~13 | |||
|mag=0~3 | |||
|skill=0~8 | |||
|spd=0~8 | |||
|lck=0~8 | |||
|def=3~11 | |||
|con=9~17 | |||
|mov=6~7 | |||
|inventory={{Item|5|Iron Axe}} | |||
|notes='''Authority:''' Cullough<br>The two nearest and east of the central lake move to raid houses. | |||
}} | |||
{{ChapUnitCellFE5 | |||
|name=Brigand | |||
|class=Brigand | |||
|lv=6 | |||
|#=1 | |||
|hp=22~30 | |||
|str=5~13 | |||
|mag=0~3 | |||
|skill=0~8 | |||
|spd=0~8 | |||
|lck=0~8 | |||
|def=3~11 | |||
|con=9~17 | |||
|mov=6~7 | |||
|inventory={{Item|5|Iron Axe}} • {{Item|5|Bridge Key}} | |||
|notes='''Authority:''' Cullough<br>Ignores combat and moves to raid houses, then moves to attack units once no houses can be raided. | |||
}} | |||
{{ChapUnitCellFE5 | |||
|name=Brigand | |||
|class=Brigand | |||
|version=steal | |||
|lv=11 | |||
|#=1 | |||
|hp=22~35 | |||
|str=5~18 | |||
|mag=0~13 | |||
|skill=0~13 | |||
|spd=0~13 | |||
|lck=0~13 | |||
|def=3~16 | |||
|con=9~20 | |||
|mov=6~7 | |||
|inventory={{Item|5|Iron Axe}}<br>{{Item|5|Steal}} | |||
|notes='''Authority:''' Cullough | |||
}} | |||
{{ChapUnitCellFE5 | |||
|name=Brigand | |||
|class=Brigand | |||
|version=steal | |||
|lv=12 | |||
|#=1 | |||
|hp=22~36 | |||
|str=5~19 | |||
|mag=0~14 | |||
|skill=0~14 | |||
|spd=0~14 | |||
|lck=0~14 | |||
|def=3~17 | |||
|con=9~20 | |||
|mov=6~7 | |||
|inventory={{Item|5|Iron Axe}}<br>{{Item|5|Steal}} | |||
|notes='''Authority:''' Cullough | |||
}} | |||
{{ChapUnitCellFE5 | |||
|name=Brigand | |||
|class=Brigand | |||
|version=steal | |||
|lv=5 | |||
|#=2 | |||
|hp=22~29 | |||
|str=5~12 | |||
|mag=0~7 | |||
|skill=0~7 | |||
|spd=0~7 | |||
|lck=0~7 | |||
|def=3~10 | |||
|con=9~16 | |||
|mov=6~7 | |||
|inventory={{Item|5|Iron Axe}}<br>{{Item|5|Steal}} | |||
|notes='''Authority:''' Cullough | |||
}} | |||
{{ChapUnitCellFE5 | |||
|name=Brigand | |||
|class=Brigand | |||
|lv=2 | |||
|#=5 | |||
|hp=22~26 | |||
|str=5~9 | |||
|mag=0~3 | |||
|skill=0~4 | |||
|spd=0~4 | |||
|lck=0~4 | |||
|def=3~7 | |||
|con=9~13 | |||
|mov=6~7 | |||
|inventory={{Item|5|Iron Axe}} | |||
|notes='''Authority:''' Cullough<br>Moves to raid houses. | |||
}} | |||
{{ChapUnitCellFE5 | |||
|name=[[Cullough]] | |||
|class=Warrior | |||
|lv=8 | |||
|#=1 | |||
|hp=50 | |||
|str=14 | |||
|mag=1 | |||
|skill=11 | |||
|spd=12 | |||
|lck=3 | |||
|def=11 | |||
|con=18 | |||
|mov=6 | |||
|inventory={{Item|5|Poison Axe}} • {{Item|5|Hammer}} • {{Item|5|Vulnerary}} • {{Item|5|Vantage Manual|image=vantage m}} | |||
|notes='''Authority:''' ★<br>Moves to attack units in range. | |||
|last=y | |||
}} | |||
{{ChapUnitReinf|type=Enemy|platform=snes03}} | |||
{{ChapUnitCellFE5 | |||
|name=Brigand | |||
|class=Brigand | |||
|lv=3 | |||
|#=18 | |||
|hp=22~27 | |||
|str=5~10 | |||
|mag=0~3 | |||
|skill=0~5 | |||
|spd=0~5 | |||
|lck=0~5 | |||
|def=3~8 | |||
|con=9~14 | |||
|mov=6~7 | |||
|inventory={{Item|5|Iron Axe}} | |||
|notes='''Authority:''' Cullough<br>Moves to raid houses. | |||
}} | |||
{{ChapUnitCellFE5 | |||
|name=Brigand | |||
|class=Brigand | |||
|version=steal | |||
|lv=3 | |||
|#=9 | |||
|hp=22~27 | |||
|str=5~10 | |||
|mag=0~5 | |||
|skill=0~5 | |||
|spd=0~5 | |||
|lck=0~5 | |||
|def=3~8 | |||
|con=9~14 | |||
|mov=6~7 | |||
|inventory={{Item|5|Iron Axe}}<br>{{Item|5|Steal}} | |||
|notes='''Authority:''' Cullough | |||
|last=y | |||
}} | }} | ||
{{ChapUnitFtr}} | |||
====Reinforcements==== | ====Reinforcements==== | ||
*Turns | *Turns 4–12, each with a 40% chance to appear; halted when [[Cullough]] is defeated | ||
** | **Two [[Brigand]]s without [[Steal]] from the northwestern road | ||
* | **One Brigand with Steal from the northwestern road | ||
===Boss data=== | ===Boss data=== | ||
{{Main| | {{Main|Cullough}} | ||
{{BossStats FE5 | {{BossStats FE5 | ||
|portrait=[[File:Portrait | |portrait=[[File:Portrait cullough fe05.png]] | ||
|sprite=warrior enemy | |sprite=warrior enemy | ||
|class=Warrior | |class=Warrior | ||
| Line 208: | Line 367: | ||
|build=18 | |build=18 | ||
|move=6 | |move=6 | ||
|inventory={{Item|5|Poison Axe}}<br>{{Item|5|Hammer}}<br>{{Item|5|Vulnerary}}<br>{{Item|5|Vantage Manual | |inventory={{Item|5|Poison Axe}}<br>{{Item|5|Hammer}}<br>{{Item|5|Vulnerary}}<br>{{Item|5|Vantage Manual|image=vantage m}} | ||
|ax=C | |ax=C | ||
|bo=E | |bo=E | ||
}} | }} | ||
==Strategy== | ==Strategy== | ||
{{strategy}} | {{strategy}} | ||
Because of the heavy terrain, unpromoted mounted units will have less movement than their infantry counterparts, while promoted mounted units will move at the same rate as their infantry counterparts. | |||
Using the [[Warp]] to capture [[Salem]] on turn 1 is recommended to avoid having him inflict [[Sleep (status)|Sleep]] on the player's units. [[Salem]] can be recruited by capturing him and not releasing him; while he is not required for the side quest, his staff utility makes him worth the effort. His [[Jormungand]] tome will weigh him down to the point where he has 0 attack speed, and he also has poor defense and HP, making him a relatively easy capture. While there are reinforcements from the north, the Gate's bonuses negate their risk, even with the penalties of capturing. Warp can also conveniently complete the map given the high concentration of forest tiles. However, it is also important to note that this chapter has the only [[Vantage Manual]] in the entire game—which may work well on a unit such as [[Olwen]] or [[Asbel]]—as well as a vendor that sells [[Wind]] tomes, the next such vendor appearing in [[The War of Liberation|Chapter 21]]. | |||
To complete the map without the warp staff, keep in mind that a drawbridge will need to be closed (one of the Brigands conveniently has a [[Bridge Key]]), and the chapter must be completed within 20 turns to reach [[The Dandelion|the following side quest]]. [[Karin]] is recommended to avoid the heavy terrain, and because she can fly over the water she allows the player to skip [[Cullough]] without a Warp use. The Brigands are capable of stealing items, but they are very slow and usually unable to steal. | |||
<!-- | |||
==Trivia== | ==Trivia== | ||
--> | |||
==Etymology and other languages== | ==Etymology and other languages== | ||
{{Names | {{Names | ||
|eng-fan-name=• The Thieves of Dakia<br>• The Bandits of Dacia | |eng-fan-name=• The Thieves of Dakia<br>• The Bandits of Dacia | ||
|eng-fan-mean=• Used in FireLizard's translation.<br>• Used in the Lil' Manster | |eng-fan-mean=• Used in FireLizard's [[fan translation]].<br>• Used in the Lil' Manster fan translation patch. | ||
| | |jpn-name={{h|ダキアの盗賊|Dakia no tōzoku}} | ||
| | |jpn-mean=The Thieves of Dakia | ||
}} | }} | ||
==Gallery== | ==Gallery== | ||
<gallery> | |||
Cm fe05 12.png|Map of the chapter | |||
</gallery> | |||
{{ChapterNav | {{ChapterNav | ||
|prechapter=Dandrum | |prechapter=Fort Dandrum | ||
|prealternate=Murder | |prealternate=Murder Holes{{!}}Murder Holes <small>(side quest)</small> | ||
|nextchapter=The Walled City | |nextchapter=The Walled City | ||
|nextalternate=Dandelion | |nextalternate=The Dandelion{{!}}The Dandelion <small>(side quest)</small> | ||
}} | }} | ||
{{Nav5}} | {{Nav5}} | ||
{{DEFAULTSORT: | {{DEFAULTSORT:Bandits of Dacia, The}} | ||
[[Category:Chapters of Fire Emblem: Thracia 776]] | [[Category:Chapters of Fire Emblem: Thracia 776]] | ||
Latest revision as of 17:06, 28 March 2024
The Bandits of Dacia (Japanese: ダキアの盗賊 The Thieves of Dakia) is the twelfth chapter of Fire Emblem: Thracia 776. In order to play the side quest after, this chapter must be completed in fewer than 20 turns.
| ||||||||||||||
|

Plot
- Main article:
The Bandits of Dacia/Script
Perne recruits Salem into his group of bandits, the Dandelion, and declares that he plans to leave some new recruits behind soon, as they are bloodthirsty and the Dandelion is not meant to be that way. He intends to abscond with Troude and Tina, as well as Salem. He then enters the Dandelion's hideout and leaves Salem behind as a lookout.
In the meantime, inside a house near Dacia Forest, Saias leaves Mareeta in an elderly woman's care. Before he takes his leave, he gives Mareeta the Shadow Sword and tells her that she should wield it, even though it once possessed her.
After Saias leaves, bandits under command of Cullough—one of the Dandelion's most infamous new recruits—attack the village where Mareeta is. Mareeta pledges to protect the village despite the protests of her caretaker and rushes out to meet the bandits. In the meantime, Tina comes out of the Dandelion's hideout to bring Salem some food, and Salem reassures her that they will find her sister, whom she misses dearly.
Once the battle ends, if it was finished quickly, Dryas tells Leif to seize the Dandelion's hideout and eliminate the bandit problem in the area. If the battle was not finished quickly, August tells Leif that the Dandelion is a surprisingly honorable group of bandits and they should be left alone, so Leif's forces do not storm the hideout. Regardless of what Leif does next, if Mareeta survived the battle, she meets with Leif and joins his forces while making a mutual promise with him that they will go back to Munster for Eyvel one day.
Chapter data
| ||||||
|
| |||||
| Victory: Seize the throne | Player | Enemy | ||||
|---|---|---|---|---|---|---|
| Defeat: Leif dies | 8–12+1 | 27+18 | ||||
| ||||||
Units are arranged based on their position in deployment order after Leif.
On turn 20, the fog of war clears.
Character data
| Characters | |||||||||||
|---|---|---|---|---|---|---|---|---|---|---|---|
New units
| |||||||||||
| |||||||||||
Required characters
| |||||||||||
Available characters
| |||||||||||
Item data
| |||||||||||||||
|
Shop data
Swords Lances Axes Bows Tomes Staves Items Secret
None
Enemy data
- Stats with two figures separated by a ~ are presented as a range, representing stats that vary due to random growths. The figures to the left and right of the ~ are the stat's minimum and maximum possible values respectively.
| ||||||||||||||||||||||||||||||||||||||||||||||||||||||||||||||||||||||||||||||||||||||||||||||||||||||||||||||||||||||||||||||||||||||||||||||||||||||||||||||||||||||||||||||||||||||||||||||||||||||||||||||||||||||||||||||||||||||||||||||||||||||||||||||||||||||||||||||||||||||||||||||||||||||||||||||||||||||||
| ||||||||||||||||||||||||||||||||||||||||||||||||||||||||||||||||||||||||||||||||||||||||||||||||||||||||||||||||||||||||||||||||||||||||||||||||||||||||||||||||||||||||||||||||||||||||||||||||||||||||||||||||||||||||||||||||||||||||||||||||||||||||||||||||||||||||||||||||||||||||||||||||||||||||||||||||||||||||
| ||||||||||||||||||||||||||||||||||||||||||||||||||||||||||||||||||||||||||||||||||||||||||||||||||||||||||||||||||||||||||||||||||||||||||||||||||||||||||||||||||||||||||||||||||||||||||||||||||||||||||||||||||||||||||||||||||||||||||||||||||||||||||||||||||||||||||||||||||||||||||||||||||||||||||||||||||||||||
| ||||||||||||||||||||||||||||||||||||||||||||||||||||||||||||||||||||||||||||||||||||||||||||||||||||||||||||||||||||||||||||||||||||||||||||||||||||||||||||||||||||||||||||||||||||||||||||||||||||||||||||||||||||||||||||||||||||||||||||||||||||||||||||||||||||||||||||||||||||||||||||||||||||||||||||||||||||||||
Reinforcements
- Turns 4–12, each with a 40% chance to appear; halted when Cullough is defeated
Boss data
- Main article:
Cullough
|
|
| ||||||||||||||||||||||||||||||||||||||||||||||||||||||||||||
Strategy
| This section details unofficial strategies that may help with completion of the chapter. This may not work for everybody. |
Because of the heavy terrain, unpromoted mounted units will have less movement than their infantry counterparts, while promoted mounted units will move at the same rate as their infantry counterparts.
Using the Warp to capture Salem on turn 1 is recommended to avoid having him inflict Sleep on the player's units. Salem can be recruited by capturing him and not releasing him; while he is not required for the side quest, his staff utility makes him worth the effort. His Jormungand tome will weigh him down to the point where he has 0 attack speed, and he also has poor defense and HP, making him a relatively easy capture. While there are reinforcements from the north, the Gate's bonuses negate their risk, even with the penalties of capturing. Warp can also conveniently complete the map given the high concentration of forest tiles. However, it is also important to note that this chapter has the only Vantage Manual in the entire game—which may work well on a unit such as Olwen or Asbel—as well as a vendor that sells Wind tomes, the next such vendor appearing in Chapter 21.
To complete the map without the warp staff, keep in mind that a drawbridge will need to be closed (one of the Brigands conveniently has a Bridge Key), and the chapter must be completed within 20 turns to reach the following side quest. Karin is recommended to avoid the heavy terrain, and because she can fly over the water she allows the player to skip Cullough without a Warp use. The Brigands are capable of stealing items, but they are very slow and usually unable to steal.
Etymology and other languages
| Names, etymology, and in other regions | ||
|---|---|---|
| Language | Name | Definition, etymology, and notes |
| English (unofficial) |
• The Thieves of Dakia |
• Used in FireLizard's fan translation. |
| Japanese |
ダキアの盗賊 |
The Thieves of Dakia |
Gallery
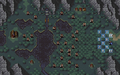
Map of the chapter
| ← Fort Dandrum • ← Murder Holes (side quest) • |
The Bandits of Dacia | • The Walled City → • The Dandelion (side quest) → |
|---|