| Site News |
|---|
| Warning: This wiki contains spoilers. Read at your own risk! Social media: If you would like, please join our Discord server, and/or follow us on Twitter (X) or Tumblr! |
The Golden Deer's Plea/Saving Derdriu
| ||||||||
|
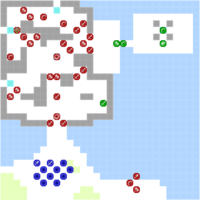
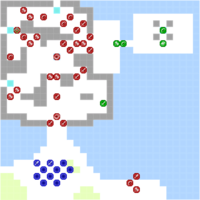
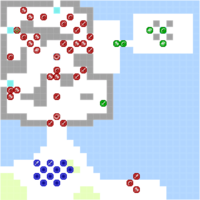
Saving Derdriu (Japanese: デアドラ救援戦 Diadora relief) is the main battle map of the nineteenth chapter on the Azure Moon route in Fire Emblem: Three Houses. In this map, Dimitri marches to Derdriu at the request of Claude to aid him against Adrestia.
Beginning log
Shortly after reclaiming the Kingdom capital, a request for aid arrives from Claude. To save the Alliance from ruin, you head to Derdriu, the Aquatic Capital.
Chapter data
Normal Hard Maddening
| ||||||
|
| |||||
| Victory: Defeat Lord Arundel | Player | Other | Enemy | |||
|---|---|---|---|---|---|---|
| Defeat: Byleth or Dimitri dies*, the player's army is routed*, or Claude dies | 2–11 | 5 | 30+∞ | |||
| ||||||
| Map dimensions: 30 columns by 30 rows | ||||||
Character data
| Characters | |
|---|---|
New units
| |
| |
Required characters
| |
 
| |
Available characters
| |
                                 
|
Item data
| ||||||||||||||||||||||||||||||
|
- Note: If Hilda is recruited, Judith surviving the chapter is the only requirement for obtaining the Giant Shell and Goddess Icon.
Enemy data
Normal Hard Maddening
| |||||||||||||||||||||||||||||||||||||||||||||||||||||||||||||||||||||||||||||||||||||||||||||||||||||||||||||||||||||||||||||||||||||||||||||||||||||||||||||||||||||||||||||||||||||||||||||||||||||||||||||||||||||||||||||||||||||||||||||||||||||||||||||||||||||||||||||||||||||||||||||||||||||||||||||||||||||||||||||||||||||||||||||||||||||||||||||||||||||||||||||||||||||||||||||||||||||||||||||||||||||||||||||||||||||||||||||||||||||||||||||||||||||||||||||||||||||||||||||||||||||||||||||||||||||||||||||||||||||||||||||||||||||||||||||||||||||||||||||||||||||||
| |||||||||||||||||||||||||||||||||||||||||||||||||||||||||||||||||||||||||||||||||||||||||||||||||||||||||||||||||||||||||||||||||||||||||||||||||||||||||||||||||||||||||||||||||||||||||||||||||||||||||||||||||||||||||||||||||||||||||||||||||||||||||||||||||||||||||||||||||||||||||||||||||||||||||||||||||||||||||||||||||||||||||||||||||||||||||||||||||||||||||||||||||||||||||||||||||||||||||||||||||||||||||||||||||||||||||||||||||||||||||||||||||||||||||||||||||||||||||||||||||||||||||||||||||||||||||||||||||||||||||||||||||||||||||||||||||||||||||||||||||||||||
| |||||||||||||||||||||||||||||||||||||||||||||||||||||||||||||||||||||||||||||||||||||||||||||||||||||||||||||||||||||||||||||||||||||||||||||||||||||||||||||||||||||||||||||||||||||||||||||||||||||||||||||||||||||||||||||||||||||||||||||||||||||||||||||||||||||||||||||||||||||||||||||||||||||||||||||||||||||||||||||||||||||||||||||||||||||||||||||||||||||||||||||||||||||||||||||||||||||||||||||||||||||||||||||||||||||||||||||||||||||||||||||||||||||||||||||||||||||||||||||||||||||||||||||||||||||||||||||||||||||||||||||||||||||||||||||||||||||||||||||||||||||||
| |||||||||||||||||||||||||||||||||||||||||||||||||||||||||||||||||||||||||||||||||||||||||||||||||||||||||||||||||||||||||||||||||||||||||||||||||||||||||||||||||||||||||||||||||||||||||||||||||||||||||||||||||||||||||||||||||||||||||||||||||||||||||||||||||||||||||||||||||||||||||||||||||||||||||||||||||||||||||||||||||||||||||||||||||||||||||||||||||||||||||||||||||||||||||||||||||||||||||||||||||||||||||||||||||||||||||||||||||||||||||||||||||||||||||||||||||||||||||||||||||||||||||||||||||||||||||||||||||||||||||||||||||||||||||||||||||||||||||||||||||||||||
Reinforcements
On Maddening, all reinforcements can act the turn they arrive.
- Every third turn, starting turn 1; halted when the respective gate is seized
- Every third turn, starting turn 1 (Hard and Maddening)
- 1 Paladin from the southeast border.
- 1 Paladin with Empire Cavalry from the southeastern border. (Maddening only)
- Upon either Hilda or her replacement dies,
- 2 Fortress Knight on tiles (16,4) and (16,8)
- 2 Hero on tiles (15,4) and (15, 8)
- 2 Falcon Knight on tiles (18, 2) and (19, 9) (Maddening Only)
NPC data
Normal Hard Maddening
Boss data
- Main article:
Lord Arundel
Normal Hard Maddening
|
|
| |||||||||||||||||||||||||||||||||||||||||||||||||||||||||||||||||||||||||||||||||||
Strategy
| This section details unofficial strategies that may help with completion of the chapter. This may not work for everybody. |
On Maddening and without the player's interaction, Judith will likely die on turn 3 or 4. The Alliance Priest will eventually run out of Physic uses, and if Hilda survives to turn 7, her battalion will run out of endurance and she will die afterward. Claude will likely die around turn 12. On Hard and Normal, the NPCs can survive longer, and on Normal, Claude is unlikely to die until his weapons break.
Hilda is the most durable of the Alliance soldiers, but will be surrounded on turn 1. She will always be attacked by a Fortress Knight and two Heroes, as well as the second Fortress Knight with a Tomahawk on Hard and Maddening; the Fortress Knights are fairly inaccurate, but the Heroes carry Venin Edges that poison her upon making contact, and none of her allies can restore her condition—on Maddening, every Hero has Axebreaker+, bringing their accuracy against her to 100 and significantly reducing hers. Hilda can kill any enemy attacking her with a critical hit, but this is unreliable; she has enough HP and defense to withstand the enemies attacking her if she is healed by the Priest—and Bishop on Maddening—but she may be killed by a crit from an enemy, especially if she was poisoned. If Hilda was recruited in Part I, she will be replaced by a War Master, though the differences in stats are mostly insignificant; the War Master has less attack with a weaker battalion and without Freikugel, but she is more likely to crit with Crit +20—additionally, the Alliance Sniper deals slightly less damage with Hilda's replacement than he would with Hilda, as she lacks Advocate. She will survive about as long as Hilda would.
Judith initially moves towards Claude; her path will cross multiple Heroes, Mortal Savants, Fortress Knights, and Snipers, including those that attack Hilda. Judith will not be doubled by the Heroes, can double the Mortal Savants, and can take four hits from either on Maddening before she dies. While she does have healing items, they do not greatly strengthen her survivability, and they are of little use if she is surrounded. Claude can double every enemy present, can deal decent damage, has a fairly high chance to crit each one, and has decent avoid. However, most enemies will have around 50 hit against him, and he may open himself up to more enemies in a turn as he defeats them. Claude has less HP than Hilda or Judith, but about as much protection and significantly more avoid.
The enemies east of the player's starting location each drop a rare item; one Paladin drops a Magic Bow, the other an Axe of Zoltan, and the Pegasus Knight an Aurora Shield. The Pegasus Knight will begin moving on turn 2, but the Paladins will only move once provoked. The closest of the three enemies is the Paladin with the Magic Bow; he can deal little damage to a unit with a high-resistance unit—his magic is much lower than his strength—but as the Magic Bow deals magic damage, the nearby forest terrain will not provide any avoid bonus. Alternately, the Paladins cannot move onto the sea tiles to their north, and a flier can take advantage of that; a flier three tiles north of the Magic Bow Paladin would be completely out of his range, and could move from there to 1 range where he could not retaliate, then back out with Canto. The Paladins both a have weakness to weaponry effective against cavalry, but the Pegasus Knight's Aurora Shield negates her flier weakness.
This map can be cleared in one turn, as it only requires defeating Arundel, who starts fairly close to the player's start location. Arundel starts 23 tiles away from Dimitri's starting location over terrain—to reach one-range, Dimitri would need to move over 22 tiles, or two full moves of a 6-move flier with Stride. Dimitri only has access to the Wyvern Rider and Wyvern Lord flying classes which both have more than 6 move, but both require that he train in axes, in which he has a bane. While it does not have to be Dimitri, having a strong flier makes clearing this map in one turn much easier, as it would otherwise require clearing a way through up to three enemies before fighting Arundel. Without a flier, a sufficiently long Warp and potentially a Dancer can enable a one-turn clear. The closest tile to Arundel that a non-flier can access without the need to fight any other enemies is 17 tiles from a Warp-user adjacent to Dimitri's starting position, requiring a 68 magic; alternately, two units could be warped—two warp users send a strong unit and the Dancer, or the Dancer dances for the warp-user to send two units—at a significantly closer range, there would be at least one enemy between the unit and Arundel. Manuela is unlikely to have the magic for a Warp range required for a one-turn, but the other Warp users—Lysithea, Linhardt, and Hapi—are much more likely to.
Alternately, a unit with A authority can equip the Blue Lion Dancers to use the Dance of the Goddess gambit and move four units closer to Arundel, possibly within range of attacking him if they have sufficiently high movement; Dance of the Goddess may be used to accomplish a one-turn without Warp—which requires a number of movement combat arts and potentially a strong ranged combat unit—or to aid one with Warp if the maximum range is too short or there are not enough strong units to defeat Arundel or clear a path to him. Even if a one-turn is unwanted or infeasible, faster clears on later turns have similar structures; using Stride, Warp, Dance of the Goddess, etc. on a strong combat unit to move them in range of Arundel and defeat him. Additionally defeating Arundel quickly is the most reliable way of ensuring the safety of the Alliance army, as they cannot be attacked once the map is over.
Defeating Arundel in one hit requires (on Normal/Hard/Maddening) 79/91/109 physical attack or 89/95/111 magical attack. Defeating Arundel in two hits requires 54/63/75 physical attack or 64/67/77 magical attack, and 8/15/26 attack speed when he has Hades Ω equipped or 17/24/34 with Thoron equipped. Arundel has relatively low speed, and Hades Ω—which he starts equipped with—has high weight and low hit; as such, Arundel has fairly low avoid, low attack speed, and relatively decent hit—most fliers will likely have enough avoid to make Arundel unreliably miss, as will Dimitri and Ferdinand through their personal abilities. However, Arundel can deal high damage, has high resistance—and high defense on Maddening—and has Pavise, potentially halving damage from most physical weapons; additionally, he has Cavalry Effect Null, negating any bonus damage from being a Dark Knight.
Cavalry Effect Null does not negate bonus damage from Atrocity; Dimitri will have 53 attack before accounting for anything other than Atrocity and the might of Areadbhar when using the art—given Dimitri's high strength growth and base, he may be strong enough to one-shot Arundel on Maddening with Atrocity. Alternately, with Dimitri's good speed growth and Areadbhar's relatively high crit, it may be better to simply attack without using a combat art, so as to maximize the chance of getting at least one crit and minimizing the chance for Pavise to completely stop a one-round. The Lance of Ruin could be used in a similar way, as it has higher might and crit than Areadbhar, or Sylvain could use Ruined Sky to maximize a single hit's damage and crit chance. If Lysithea was recruited, she could learn Luna Λ at C reason, which would completely ignore Arundel's resilience; while Lysithea is unlikely to have the magic required to one-shot Arundel with Luna Λ, she may have the magic to two-shot him—especially if she mastered Mage for Fiendish Blow—and may have the attack speed to with her high speed growth and Luna Λ's low weight. If the Land of the Golden Deer or An Ocean View paralogues were completed, Lysithea will have access to two staves—Thyrsus and the Caduceus Staff respectively—that extend her range, causing her to outrange Arundel with Hades Ω; however, Lysithea is one of the few Warp users, and it may be impossible for her to defeat Arundel on turn 1.
Arundel also only has 2 shots of Hades Ω and 4 shots of Thoron. Using Impregnable Wall and some broken/rusted weapons (to ensure you get doubled and make Arundel drain his spells twice as fast), it's fairly easy to run Arundel out of spells, at which point he can be kept alive or executed with zero difficulty. This makes it much easier to rout everyone but Arundel and farm the infinitely spawning reinforcements for EXP if it is desired.
Trivia
- If Hilda was recruited, she is replaced in this battle by a female War Master—a class that is exclusively male—using a female Myrmidon model, portrait, and class sprite.
Etymology and other languages
| Names, etymology, and in other regions | ||
|---|---|---|
| Language | Name | Definition, etymology, and notes |
| English |
Saving Derdriu |
-- |
| Japanese |
デアドラ救援戦 |
Diadora relief |
| Spanish |
Al auxilio de Derdriu |
To the aid of Derdriu |
| French |
Derdriu en danger |
Derdriu in danger |
| German |
Die Rettung Derdrius |
The Salvation of Derdriu |
| Italian |
In soccorso di Derdriu |
To the aid of Derdriu |
| Korean |
디아도라 구원전 |
Saving Diadora |
| Simplified Chinese |
迪亚朵拉救援战 |
Diadora saving battle |
| Traditional Chinese |
迪亞朵拉救援戰 |
Diadora saving battle |
Gallery

|
It has been requested that image(s) be placed in this page or section. Please submit images to help improve this page and talk on this page's talk page about what images are needed. Remove this when this has been fixed. |
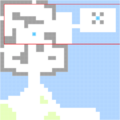
Entering the red area triggers Lord Arundel's movement.
| ← Reclaiming the Capital • | Saving Derdriu | • Taking Fort Merceus → |
|---|
| Fire Emblem: Three Houses | |||||||||||||||||||||||||||||||||||||||||||||||||||||||||||||||||||||
|---|---|---|---|---|---|---|---|---|---|---|---|---|---|---|---|---|---|---|---|---|---|---|---|---|---|---|---|---|---|---|---|---|---|---|---|---|---|---|---|---|---|---|---|---|---|---|---|---|---|---|---|---|---|---|---|---|---|---|---|---|---|---|---|---|---|---|---|---|---|
| |||||||||||||||||||||||||||||||||||||||||||||||||||||||||||||||||||||


