Land of Sorrow (Gaiden)/The Swamps of Duma Battle
The Swamps of Duma Battle (Japanese: ドーマの沼の戦い Doma's Swamp Battle) is the sixth map of the fourth act of Celica's route in Fire Emblem Gaiden and Fire Emblem Echoes: Shadows of Valentia.
| ||||||||
|

Map data
Gaiden Echoes: Shadows of Valentia
Normal Hard
| ||||||
|
| |||||
| Victory: Rout the enemy | Player | Enemy | ||||
|---|---|---|---|---|---|---|
| Defeat: Celica dies | 1–16 | 5+reinforcements | ||||
| Map dimensions: 22 columns by 20 rows | ||||||
Character data
Gaiden Echoes: Shadows of Valentia
| Characters | |
|---|---|
New units
| |
| |
Required characters
| |

| |
Available characters
| |
               
|
Item data
Gaiden Echoes: Shadows of Valentia
| ||||||
|
Enemy data
Gaiden Echoes: Shadows of Valentia Normal Echoes: Shadows of Valentia Hard
| |||||||||||||||||||||||||||||||||||||||||||||||||||||||||||||||||||||||||||||||||||||||||
| |||||||||||||||||||||||||||||||||||||||||||||||||||||||||||||||||||||||||||||||||||||||||
| |||||||||||||||||||||||||||||||||||||||||||||||||||||||||||||||||||||||||||||||||||||||||
| |||||||||||||||||||||||||||||||||||||||||||||||||||||||||||||||||||||||||||||||||||||||||
Boss data
- Main article:
Jedah
Gaiden Echoes: Shadows of Valentia Normal Echoes: Shadows of Valentia Hard
|
|
| |||||||||||||||||||||||||||||||||||||||||||||||

Strategy
| This section details unofficial strategies that may help with completion of the chapter. This may not work for everybody. |
Jedah is quite possibly the hardest boss in the game. He hits like a truck, regenerates 10 HP per turn, constantly summons Mogalls, doesn't need to pay HP to cast spells, and can only be damaged every four rounds of combat. In this appearance, he also sports a Dracoshield to make him abominably durable. His only real failing is poor Speed. If you want to kill him, chip him from outside his range with your two Snipers and a Mage with Thunder/Sagittae and the Mage Ring. Nomah does quite well in this, and Sonya can do so and has unique dialogue with Jedah. He leaves on turn 6, so you don't have forever to take him down for his Dracoshield. Thankfully, he will never initiate combat on his own turn, even if he could potentially kill someone.
On Hard, Jedah has 29 DEF and 25 RES. He also has 52 HP which recovers by 10 HP each turn, and can only be attacked every 4th round. Since 3 units need to expend their actions to temporarily disable Jedah's invincibility, defeating Jedah comes down to optimizing the amount of damage dealt in this 4th round of combat. 31 damage per round of combat is needed to kill Jedah if damage is only being dealt every other turn due to his invincibility (due to his passive healing each turn); the threshold drops to 24 damage if it can be maintained on 3 consecutive turns while 18 damage OHKOs Jedah with a crit, which is always a possibility due to his LCK of 0.
Hitting Jedah with expensive spells for damage is somewhat difficult; while Jedah is slow, he hits very hard on his counterattack and will likely leave the attacker with insufficient HP to cast a follow-up. Sagittae, however, has 1-3 range; the Mage Ring will enable it to hit Jedah without being countered, making it somewhat viable as an attack option. 12 AS will double Jedah with Sagittae, while 22 ATK (before spell might) will 4HKO, potentially ORKO-ing with a crit. Nomah has it at base, but his bad ATK makes him not viable for this purpose. Boey also learns it, and can realistically be expected to reach Lv4 Sage by this point, averaging 18 MAG; if he's given some attention for extra levels and possibly the Soma from Sage's Hamlet, he can reach the ATK threshold for a 4HKO. However, he is nowhere close in being fast enough to double. Yuzu, if recruited from the DLC, has the SPD to double at base, and by the time she learns Sagittae at Lv5 Priestess, she'll hit an average of 17.4 ATK. The Soma bumps that up to 19.4, but she'll likely need some extra levels and possibly the Temple of Mila fountains to reach the 4HKO threshold. The remaining Sagittae candidates all fall short; Atlas is too slow to double, while Kliff lacks the firepower and Sonya had the spell nerfed out of her repertoire from Gaiden.
There is one spell that hits even harder than Sagittae, and with the Mage Ring, can outrange Jedah. That spell is the legendary Ragnarok, which only two units in the game can use, one of which isn't available for this map. Celica is the only unit on hand that can use it on Jedah, but learning the spell requires Celica get at least 17 levels (her forced promotion effectively counts as 2 levels for learning spells). Depending on what level she was at before she promoted, she'll either average enough (15) SPD to double Jedah, or be half a point off (she averages 14.5 SPD if she promoted at a point where she already exceeded Princess' class base in SPD). In all cases, she'll still average a minimum of 18 ATK, enough to exactly 4HKO Jedah at 13 damage per Ragnarok cast. Additionally, her bond support with Conrad gives Ragnarok perfect accuracy, making Ragnarok able to kill Jedah completely reliably if Celica can attack Jedah with it on 3 consecutive turns. Additionally, if she was given 3 points of ATK beyond her average of 18 (Novis fountains, Soma, Temple of Mila fountains etc.), she will also be able to kill Jedah completely reliably even if she only attacks Jedah every other turn due to having enough damage to get through Jedah's healing.
A physical combat art nuke is the other option, and while it will likely be very expensive due to weapon forges, it generally has a higher chance of success due to spells having imperfect accuracy, while Jedah's avoid is nonexistent. There are only 4 combat arts that can realistically deal enough damage to defeat Jedah in a timely manner through firepower or crit-fishing for an OHKO with the turnwheel; Tigerstance on the Zweihander, Dragonhaze on the Rhomphaia, Roundhouse on the Silver Sword and the sisters' Triangle Attack with a strong Lance forge.
Tigerstance is the first option. With a +3 forge, it already deals 20 damage to Jedah on a class-base Dread Fighter, enough to potentially fish for a crit for OHKO. Getting the Zweihander there can be somewhat expensive, however, costing 200 silver and 3 gold to turn a Steel Sword into a +3 Zweihander. Dread Fighter Atlas will average 22 ATK, enough to deal 27 damage to Jedah and realistically take him out without crits if Atlas can use it on Jedah 3 turns in a row; with the Soma and both Temple of Mila ATK fountains, he hits 31 damage, enough to kill Jedah through his healing without crits if he uses it every other turn. Unfortunately, neither Saber nor Kamui are particularly likely to exceed Dread Fighter's class bases in ATK or SKL by any significant margin, but they can still be serviceable Tigerstance users against Jedah, since as stated above, a crit Tigerstance will be an OHKO, and that can be fished for with the Turnwheel.
Dragonhaze is the second option. Unfortunately, it falls flat when compared to Tigerstance. Without DLC, the Rhomphaia needs to be made from a Ridersbane, and the only Ridersbane is on Alm's side, where it is one of the most valuable weapons due to the abundance of cavalry to be faced there. While this does allow Alm to pool his own funds into the forging of a maxed Rhomphaia (totaling 200 silver and 4 gold), it comes at such a high opportunity cost that it simply isn't worth it. With Gold Knight bases it deals 19 damage, still enough to fish for a crit. While Palla's speed is terrible, Catria exceeds Falcon Knight class bases on join; At Lv5 Falcon Knight she will average about 15 ATK and 18-19 SPD, enough to deal 20-21 damage, making it not particularly better than Tigerstance.
Roundhouse is the third option. The Silver Sword it's based off of can be forged to +5, but it only costs 400 Silver to make, making it cheaper (when gold marks are converted into silver) than Tigerstance for a Dread Fighter win condition. It also grants +20 crit when in use, making it viable for crit-fishing with the Turnwheel and gives it a rather good chance to down Jedah in one hit. A base Dread Fighter will deal 17 damage with Roundhouse on Silver +5, 1 point of ATK short from OHKO-ing with a crit. A single ATK level up or the Soma will turn Roundhouse into a 3HKO, or crit-OHKO, which can be turnwheel-scummed fairly easily due to having a 33% minimum crit chance (effectively a 1 in 3).
Triangle Attack is the final option. Since it only grants +8 MT, Palla (who has the highest ATK of the sisters) will want the strongest lance she can get her hands on, which is likely to be a Silver Lance +5. Like the Silver Sword for Roundhouse strats, the Silver Lance will cost 400 silver to max out, which as stated above, is plenty feasible and somewhat cheap. A Lv5 Falcon Knight Palla will average 16 ATK; with a maxed Silver Lance, she still only does 7 damage. However, it will have a minimum 55% crit rate (with Palla-Est A support) which is enough to make it quite viable if Palla is fed ATK-fountains and the Soma. Additionally, since Catria and Est need to be in formation anyways, they can help by burning Jedah's invulnerability if provided with healing; launching a Triangle Attack each turn becomes plenty feasible with enough healers.
Map Turn Count: 4
Game Turn Count: 267
Flavor text
| Game | Text (English) |
Text (Japanese) |
|---|---|---|
| Echoes: Shadows of Valentia | Situated at the north-
most extreme of the Rigelian Empire, this swamp's poison mire is said to be as potent as the god for which it was named. |
リゲル帝国の北端
に位置する、 神の名を冠する 広大な毒の沼地。 |
Etymology and other languages
| Names, etymology, and in other regions | ||
|---|---|---|
| Language | Name | Definition, etymology, and notes |
| English |
The Swamps of Duma Battle |
-- |
| Japanese |
ドーマの沼の戦い |
Doma's Swamp Battle |
| French |
Bataille: Marais de Duma |
Swamp of Duma Battle |
| Korean |
도마의 늪의 전투 |
Doma swamp battle |
Gallery
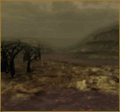
Thumbnail of the Swamps of Duma.

| ← Storming of Duma Gate • | The Swamps of Duma Battle | • Duma Tower → |
|---|
| Fire Emblem Echoes: Shadows of Valentia | ||||||||||||||||||||||||||||||||||||||||||||||||||||||||||||||||||||||||||
|---|---|---|---|---|---|---|---|---|---|---|---|---|---|---|---|---|---|---|---|---|---|---|---|---|---|---|---|---|---|---|---|---|---|---|---|---|---|---|---|---|---|---|---|---|---|---|---|---|---|---|---|---|---|---|---|---|---|---|---|---|---|---|---|---|---|---|---|---|---|---|---|---|---|---|
| ||||||||||||||||||||||||||||||||||||||||||||||||||||||||||||||||||||||||||