| Site News |
|---|
| Warning: This wiki contains spoilers. Read at your own risk! Social media: If you would like, please join our Discord server, and/or follow us on Twitter (X) or Tumblr! |
Jeritza: Difference between revisions
Mariopi276 (talk | contribs) (Blanked the page) Tag: Blanking |
m (Reverted edits by Mariopi276 (talk) to last revision by Blackress) Tag: Rollback |
||
| Line 1: | Line 1: | ||
:''Death Knight and Emile redirect here. For the class, see [[Death Knight (class)]]. For the boss from {{title|Path of Radiance}}, see [[Emil]].'' | |||
{{Character Infobox | |||
|name=Jeritza von Hrym | |||
|- | |||
|img_game1=''Part I'' <small>(Three Houses)</small> | |||
|image1=[[File:FETH Jeritza.png|200px]] | |||
|caption1=Artwork of Jeritza from {{title|Three Houses}}. | |||
|- | |||
|img_game2=''Part II'' <small>(Three Houses)</small> | |||
|image2=[[File:Portrait jeritza 02 fe16.png|200px]] | |||
|caption2=Artwork of Jeritza in Part II from {{title|Three Houses}} | |||
|- | |||
|img_game3=''Death Knight'' <small>(Three Houses)</small> | |||
|image3=[[File:FETH Death Knight 01.png|200px]] | |||
|caption3=Artwork of the Death Knight from {{title|Three Houses}}. | |||
|- | |||
|img_game4=''Heroes'' | |||
|image4=[[File:FEH Death Knight The Reaper 01.png|200px]] | |||
|caption4=Artwork of the Death Knight from {{title|Heroes}}. | |||
|help_text4=The Flame Emperor's subordinate, a knight who desires only to fight the strong. Given his name due to his scythe and dark steed. | |||
|gender=Male | |||
|race=Human | |||
|age=21 <small>(Part I)</small><br>26 <small>(Part II)</small> | |||
|birthday=4th of the Lone Moon (March 4th) | |||
|height=193 cm (6'3") | |||
|family= | |||
*[[Mercedes]] <small>(half-sister)</small> | |||
*An unnamed mother | |||
*An unnamed father <small>(deceased)</small> | |||
|startingclass=[[Death Knight (class)|Death Knight]] | |||
|voice=*[[wikipedia:Atsushi Imaruoka|Atsushi Imaruoka]]<br><small>(Japanese, all appearances)</small><ref name=credits>[[:File:FETH voice credits.png|Credits]]</ref> | |||
*[[wikipedia:Patrick Seitz|Patrick Seitz]]<br><small>(English, all appearances)</small><ref name=credits/> | |||
|appearances=*{{title|Three Houses}} | |||
*{{title|Heroes}} | |||
}} | |||
{{Quote|I am nothing more than a merciless killer. A demon whose only pleasure is found within death’s shadow. Such a creature should not be allowed near you, dear sister.|Jeritza to Mercedes}} | |||
'''Jeritza von Hrym''' (pronounced {{IPA|jəˈɹitsə vɒn hɹɪm}}; Japanese: {{hl|イエリッツァ|Ierittsa}} ''Jeritza'') is a character appearing in {{FE16}} who was made playable in the Version 1.1.0 update. He is the fencing instructor at the Officers Academy, and is secretly the infamous '''Death Knight''' (Japanese: {{hl|死神騎士|Shinigami kishi}} ''Death God Knight''). His true identity is '''Emile''' (pronounced {{IPA|ɪ'mil}}; Japanese: {{hl|エミール|Emīru}} ''Emile''), the half-brother of [[Mercedes|Mercedes von Martritz]]. | |||
==Biography== | |||
Jeritza was born Emile von Bartels, heir to House Bartels of [[Adrestia]]. His mother was a commoner who married his father for financial security for her daughter [[Mercedes]], but his father was only interested in her Crest and banished the two as soon as Emile was born. When Emile was eight years old, his mother and sister absconded to [[Faerghus]]; Emile remained behind, fearing that his father would hunt them down and kill both of them if they fled with his true-born heir. Eventually, Emile's father tracked the two down and decided that since Emile's mother was past the age of bearing children, he would marry Mercedes to have more children with the Crest of Lamine. Emile snapped and massacred House Bartels, and because of this incident developed a homicidal split personality known as the Death Knight. In the aftermath, Princess [[Edelgard]] von Hresvelg discovered him, arranged for him to be adopted into the Hrym family under the name Jeritza, and took him into her service in order to make use of his skills for her plans to overthrow the [[Church of Seiros]]. Eventually, with the recommendation of [[Lord Arundel]], Jeritza took a post as a fencing instructor at the [[Officers Academy]] at [[Garreg Mach Monastery]]. | |||
Jeritza spends Part I aiding Edelgard in her [[Flame Emperor]] identity. Jeritza can be seen around the Monastery prior to [[Rumors of a Reaper|Chapter 6]]. He is first seen as the Death Knight accompanying a raid on the Holy Mausoleum, but does not engage the students sent to stop them unless attacked first. Jeritza is responsible for kidnapping [[Flayn]] and stabbing [[Manuela]] during Chapter 6. He develops a fixation on the students' teacher [[Byleth]] and directly challenges them after their investigation leads them to the underground chamber where Flayn is held, but is ordered to retreat by the Flame Emperor. The Monastery faculty correctly conclude that Jeritza is the Death Knight, and he is not seen around the Monastery for the rest of Part I. | |||
The Death Knight is next seen reinforcing [[Solon]] in the battle in Remire Village, but is again forced to retreat by Byleth. After the Flame Emperor is unmasked as Edelgard, the Death Knight fights in the Battle of Garreg Mach on Adrestia's side, potentially allying with Byleth to do so. Afterwards, the Death Knight takes up a post as an Adrestian general. | |||
If Byleth is a member of the [[Black Eagles]] and sides with Adrestia over the Church, Jeritza joins their side and fights alongside Byleth for the rest of the Crimson Flower route. | |||
In any of the other three routes, if both Mercedes and [[Caspar]] are recruited, a [[paralogue]] can be played in which Mercedes deduces that his true identity is Emile, and he gives her family Relic, the [[Rafail Gem]], before threatening to kill Mercedes the next time they meet and departing. If Caspar defeats the Death Knight, the Death Knight gives him his [[Scythe of Sariel]] as a reward. Afterwards, regardless of whether this paralogue was completed, the Death Knight is assigned to defend Fort Merceus from the invading [[Faerghus]] army. He fails in this task; on the Azure Moon route, he is killed in this encounter. On Silver Snow and Verdant Wind, the Death Knight survives this encounter and instead warns the Resistance Army/Leicester army to leave the fortress, lest they be killed by incoming [[those who slither in the dark|Agarthan]] missiles. He later defends Enbarr along with [[Hubert]] and is killed in this encounter. | |||
=={{FE16}}== | |||
===Role=== | |||
Jeritza spends most of his time as an NPC at [[Garreg Mach Monastery]] during the first quarter of the game. Eventually, he vanishes, and a secret passageway is found in his quarters where the recently abducted [[Flayn]] is discovered. He was made playable as free DLC in wave 3, exclusively on the Crimson Flower route. From Chapters 3 to 5 and Crimson Flower Chapter 13 onward in version 1.1.0 onward, he can tutor the player in swords, lances, brawling, and riding. | |||
===Starting stats and growth rates=== | |||
====Playable==== | |||
{{CharStats FE16 | |||
|portrait=[[File:Small portrait jeritza 02 fe16.png|128px]] | |||
|sprite=death knight jeritza | |||
|class=Death Knight (class) | |||
|classname=Death Knight | |||
|crest={{Crest|Lamine|Minor}} | |||
|lv=27 | |||
|HP=53 | |||
|str=32 | |||
|mag=18 | |||
|dex=15 | |||
|spd=27 | |||
|luck=12 | |||
|def=24 | |||
|res=18 | |||
|cha=10 | |||
|move=7 | |||
|inventory={{Item|16|Scythe of Sariel|image=lance black}}<br>{{Item|16|Silver Sword|image=sword}}<br>{{Item|16|Dark Seal|image=seal}} | |||
|skills={{Item|16|Murderous Intent|image=heartseeker}}<br>{{Item|16|Canto}}<br>{{Item|16|Lancefaire}}<br>{{Item|16|Sword Prowess Lv 4}}<br>{{Item|16|Axebreaker}}<br>{{Item|16|Lance Prowess Lv 5}}<br>{{Item|16|Swordbreaker}}<br>{{Item|16|Brawling Prowess Lv 3}} | |||
|combatarts={{Item|16|Glowing Ember|image=combat art lance}}<br>{{Item|16|Knightkneeler|image=combat art lance}}<br>{{Item|16|Shatter Slash|image=combat art lance}} | |||
|spells={{Item|16|Thunder|image=black magic|link=Thunder (tome)}} | |||
|sw=B+ | |||
|la=A+ | |||
|ax=C+ | |||
|bo=D | |||
|br=C+ | |||
|re=D | |||
|au=B | |||
|ri=A | |||
|HP1=80 | |||
|str1=60 | |||
|mag1=45 | |||
|dex1=35 | |||
|spd1=55 | |||
|luck1=30 | |||
|def1=45 | |||
|res1=30 | |||
|cha1=25 | |||
|sw1={{Strength16}} | |||
|la1={{Strength16}} | |||
|br1={{Strength16}} | |||
|fa1={{Weakness16}} | |||
|au1={{Weakness16}} | |||
|ri1={{Strength16}} | |||
|fl1={{Budding16}} | |||
|HPm=79 | |||
|strm=74 | |||
|magm=42 | |||
|dexm=49 | |||
|spdm=78 | |||
|luckm=41 | |||
|defm=63 | |||
|resm=42 | |||
|cham=42 | |||
|recruit=[[Beyond Escape|Crimson Flower Chapter 13]], automatically from the start.{{hover|*|Version 1.1.0 onward. If an in-progress Crimson Flower save file started prior to this update is loaded and the player is past his natural join time, he will automatically be added to the player’s party with accordingly scaled stats.}} | |||
}} | |||
Jeritza can reclass to a [[Noble]] and [[Cavalier]]. | |||
====NPC==== | |||
{{main|Jeritza/Stats}} | |||
:''Due to technical limitations, Jeritza's stats as a non-playable character, both friendly and enemy, both as Jeritza and as the Death Knight, have been split onto a separate page.'' | |||
===Growth rates when reclassed=== | |||
{{main|Jeritza/Stats/Growth rates}} | |||
===Abilities=== | |||
{|width="65%" align=center style="padding: 3px; border-spacing: 4px; margin-left:auto; margin-right:auto; {{round}}; border:2px solid {{Color2}}; background-color: {{Color1}}; text-align: center" | |||
!style="border:none" colspan="3" | | |||
|- | |||
!style="{{roundtl}}; border:none; background-color:{{Color3}}" colspan="2" | Ability | |||
!style="{{roundtr}}; border:none; background-color:{{Color3}}" | Learned at | |||
|- | |||
|style="border:none; background-color:{{Color3}}" | [[File:Is ns01 heartseeker.png|20px]] | |||
|style="border:none; background-color:{{Color3}}" | [[Murderous Intent]] | |||
|style="border:none; background-color:{{Color3}}" | Personal ability, innate and unremovable | |||
|- | |||
|style="border:none; background-color:{{Color3}}" | [[File:Is ns01 sword prowess lv 4.png|20px]] | |||
|style="border:none; background-color:{{Color3}}" | [[Sword Prowess]] | |||
|style="border:none; background-color:{{Color3}}" | Innate; replaced with higher levels at {{Sword16}} A+ | |||
|- | |||
|style="border:none; background-color:{{Color3}}" | [[File:Is ns01 mastermind.png|20px]] | |||
|style="border:none; background-color:{{Color3}}" | [[Mastermind]] | |||
|style="border:none; background-color:{{Color3}}" | Innate<!--E+--> | |||
|- | |||
|style="border:none; background-color:{{Color3}}" | [[File:Is ns01 combat art sword.png|20px]] | |||
|style="border:none; background-color:{{Color3}}" | [[Wrath Strike]] | |||
|style="border:none; background-color:{{Color3}}" | Innate<!--D--> | |||
|- | |||
|style="border:none; background-color:{{Color3}}" | [[File:Is ns01 combat art sword.png|20px]] | |||
|style="border:none; background-color:{{Color3}}" | [[Grounder]] | |||
|style="border:none; background-color:{{Color3}}" | Innate<!--C--> | |||
|- | |||
|style="border:none; background-color:{{Color3}}" | [[File:Is ns01 combat art sword.png|20px]] | |||
|style="border:none; background-color:{{Color3}}" | [[Haze Slice]] | |||
|style="border:none; background-color:{{Color3}}" | Innate<!--C+--> | |||
|- | |||
|style="border:none; background-color:{{Color3}}" | [[File:Is ns01 axebreaker.png|20px]] | |||
|style="border:none; background-color:{{Color3}}" | [[Axebreaker]] | |||
|style="border:none; background-color:{{Color3}}" | Innate<!--B--> | |||
|- | |||
|style="border:none; background-color:{{Color3}}" | [[File:Is ns01 combat art sword.png|20px]] | |||
|style="border:none; background-color:{{Color3}}" | [[Windsweep]] | |||
|style="border:none; background-color:{{Color3}}" | {{Sword16}} A | |||
|- | |||
|style="border:none; background-color:{{Color3}}" | [[File:Is ns01 sword crit +10.png|20px]] | |||
|style="border:none; background-color:{{Color3}}" | [[Sword Crit +10]] | |||
|style="border:none; background-color:{{Color3}}" | {{Sword16}} S | |||
|- | |||
|style="border:none; background-color:{{Color3}}" | [[File:Is ns01 swordfaire.png|20px]] | |||
|style="border:none; background-color:{{Color3}}" | [[Swordfaire]] | |||
|style="border:none; background-color:{{Color3}}" | {{Sword16}} S+ | |||
|- | |||
|style="border:none; background-color:{{Color3}}" | [[File:Is ns01 lance prowess lv 5.png|20px]] | |||
|style="border:none; background-color:{{Color3}}" | [[Lance Prowess]] | |||
|style="border:none; background-color:{{Color3}}" | Innate | |||
|- | |||
|style="border:none; background-color:{{Color3}}" | [[File:Is ns01 combat art lance.png|20px]] | |||
|style="border:none; background-color:{{Color3}}" | [[Tempest Lance]] | |||
|style="border:none; background-color:{{Color3}}" | Innate<!--D--> | |||
|- | |||
|style="border:none; background-color:{{Color3}}" | [[File:Is ns01 combat art lance.png|20px]] | |||
|style="border:none; background-color:{{Color3}}" | [[Knightkneeler]] | |||
|style="border:none; background-color:{{Color3}}" | Innate<!--C--> | |||
|- | |||
|style="border:none; background-color:{{Color3}}" | [[File:Is ns01 combat art lance.png|20px]] | |||
|style="border:none; background-color:{{Color3}}" | [[Shatter Slash]] | |||
|style="border:none; background-color:{{Color3}}" | Innate<!--C+--> | |||
|- | |||
|style="border:none; background-color:{{Color3}}" | [[File:Is ns01 swordbreaker.png|20px]] | |||
|style="border:none; background-color:{{Color3}}" | [[Swordbreaker]] | |||
|style="border:none; background-color:{{Color3}}" | Innate<!--B--> | |||
|- | |||
|style="border:none; background-color:{{Color3}}" | [[File:Is ns01 combat art lance.png|20px]] | |||
|style="border:none; background-color:{{Color3}}" | [[Glowing Ember]] | |||
|style="border:none; background-color:{{Color3}}" | Innate<!--A--> | |||
|- | |||
|style="border:none; background-color:{{Color3}}" | [[File:Is ns01 lance crit +10.png|20px]] | |||
|style="border:none; background-color:{{Color3}}" | [[Lance Crit +10]] | |||
|style="border:none; background-color:{{Color3}}" | {{Lance16}} S | |||
|- | |||
|style="border:none; background-color:{{Color3}}" | [[File:Is ns01 lancefaire.png|20px]] | |||
|style="border:none; background-color:{{Color3}}" | [[Lancefaire]] | |||
|style="border:none; background-color:{{Color3}}" | {{Lance16}} S+ | |||
|- | |||
|style="border:none; background-color:{{Color3}}" | [[File:Is ns01 axe prowess lv 3.png|20px]] | |||
|style="border:none; background-color:{{Color3}}" | [[Axe Prowess]] | |||
|style="border:none; background-color:{{Color3}}" | Innate; replaced with higher levels at {{Axe16}} B+ and A+ | |||
|- | |||
|style="border:none; background-color:{{Color3}}" | [[File:Is ns01 combat art axe.png|20px]] | |||
|style="border:none; background-color:{{Color3}}" | [[Smash]] | |||
|style="border:none; background-color:{{Color3}}" | Innate<!--D--> | |||
|- | |||
|style="border:none; background-color:{{Color3}}" | [[File:Is ns01 combat art axe.png|20px]] | |||
|style="border:none; background-color:{{Color3}}" | [[Helm Splitter]] | |||
|style="border:none; background-color:{{Color3}}" | Innate<!--C--> | |||
|- | |||
|style="border:none; background-color:{{Color3}}" | [[File:Is ns01 lancebreaker.png|20px]] | |||
|style="border:none; background-color:{{Color3}}" | [[Lancebreaker]] | |||
|style="border:none; background-color:{{Color3}}" | {{Axe16}} B | |||
|- | |||
|style="border:none; background-color:{{Color3}}" | [[File:Is ns01 axe crit +10.png|20px]] | |||
|style="border:none; background-color:{{Color3}}" | [[Axe Crit +10]] | |||
|style="border:none; background-color:{{Color3}}" | {{Axe16}} S | |||
|- | |||
|style="border:none; background-color:{{Color3}}" | [[File:Is ns01 axefaire.png|20px]] | |||
|style="border:none; background-color:{{Color3}}" | [[Axefaire]] | |||
|style="border:none; background-color:{{Color3}}" | {{Axe16}} S+ | |||
|- | |||
|style="border:none; background-color:{{Color3}}" | [[File:Is ns01 bow prowess lv 1.png|20px]] | |||
|style="border:none; background-color:{{Color3}}" | [[Bow Prowess]] | |||
|style="border:none; background-color:{{Color3}}" | Innate; replaced with higher levels at {{Bow16}} D+, C+, B+, and A+ | |||
|- | |||
|style="border:none; background-color:{{Color3}}" | [[File:Is ns01 combat art bow.png|20px]] | |||
|style="border:none; background-color:{{Color3}}" | [[Curved Shot]] | |||
|style="border:none; background-color:{{Color3}}" | Innate<!--D--> | |||
|- | |||
|style="border:none; background-color:{{Color3}}" | [[File:Is ns01 close counter.png|20px]] | |||
|style="border:none; background-color:{{Color3}}" | [[Close Counter]] | |||
|style="border:none; background-color:{{Color3}}" | {{Bow16}} C | |||
|- | |||
|style="border:none; background-color:{{Color3}}" | [[File:Is ns01 bow crit +10.png|20px]] | |||
|style="border:none; background-color:{{Color3}}" | [[Bow Crit +10]] | |||
|style="border:none; background-color:{{Color3}}" | {{Bow16}} S | |||
|- | |||
|style="border:none; background-color:{{Color3}}" | [[File:Is ns01 bowfaire.png|20px]] | |||
|style="border:none; background-color:{{Color3}}" | [[Bowfaire]] | |||
|style="border:none; background-color:{{Color3}}" | {{Bow16}} S+ | |||
|- | |||
|style="border:none; background-color:{{Color3}}" | [[File:Is ns01 brawling prowess lv 3.png|20px]] | |||
|style="border:none; background-color:{{Color3}}" | [[Brawling Prowess]] | |||
|style="border:none; background-color:{{Color3}}" | Innate; replaced with higher levels at {{Brawling16}} B+ and A+ | |||
|- | |||
|style="border:none; background-color:{{Color3}}" | [[File:Is ns01 combat art brawling.png|20px]] | |||
|style="border:none; background-color:{{Color3}}" | [[Fading Blow]] | |||
|style="border:none; background-color:{{Color3}}" | Innate<!--D--> | |||
|- | |||
|style="border:none; background-color:{{Color3}}" | [[File:Is ns01 combat art brawling.png|20px]] | |||
|style="border:none; background-color:{{Color3}}" | [[Rushing Blow]] | |||
|style="border:none; background-color:{{Color3}}" | Innate<!--C--> | |||
|- | |||
|style="border:none; background-color:{{Color3}}" | [[File:Is ns01 combat art brawling.png|20px]] | |||
|style="border:none; background-color:{{Color3}}" | [[Nimble Combo]] | |||
|style="border:none; background-color:{{Color3}}" | Innate<!--C+--> | |||
|- | |||
|style="border:none; background-color:{{Color3}}" | [[File:Is ns01 combat art.png|20px]] | |||
|style="border:none; background-color:{{Color3}}" | [[Healing Focus]] | |||
|style="border:none; background-color:{{Color3}}" | {{Brawling16}} B | |||
|- | |||
|style="border:none; background-color:{{Color3}}" | [[File:Is ns01 brawl crit +10.png|20px]] | |||
|style="border:none; background-color:{{Color3}}" | [[Brawl Crit +10]] | |||
|style="border:none; background-color:{{Color3}}" | {{Brawling16}} S | |||
|- | |||
|style="border:none; background-color:{{Color3}}" | [[File:Is ns01 fistfaire.png|20px]] | |||
|style="border:none; background-color:{{Color3}}" | [[Fistfaire]] | |||
|style="border:none; background-color:{{Color3}}" | {{Brawling16}} S+ | |||
|- | |||
|style="border:none; background-color:{{Color3}}" | [[File:Is ns01 reason lv 1.png|20px]] | |||
|style="border:none; background-color:{{Color3}}" | [[Reason (ability)|Reason]] | |||
|style="border:none; background-color:{{Color3}}" | Innate; replaced with higher levels at {{Reason16}} D+, C+, B+, and A+ | |||
|- | |||
|style="border:none; background-color:{{Color3}}" | [[File:Is ns01 dark magic range +1.png|20px]] | |||
|style="border:none; background-color:{{Color3}}" | [[Dark Magic Range +1]] | |||
|style="border:none; background-color:{{Color3}}" | {{Reason16}} S | |||
|- | |||
|style="border:none; background-color:{{Color3}}" | [[File:Is ns01 dark tomefaire.png|20px]] | |||
|style="border:none; background-color:{{Color3}}" | [[Dark Tomefaire]] | |||
|style="border:none; background-color:{{Color3}}" | {{Reason16}} S+ | |||
|- | |||
|style="border:none; background-color:{{Color3}}" | [[File:Is ns01 faith lv 1.png|20px]] | |||
|style="border:none; background-color:{{Color3}}" | [[Faith (ability)|Faith]] | |||
|style="border:none; background-color:{{Color3}}" | {{Faith16}} E+; replaced with higher levels at {{Faith16}} D+, C+, B+, and A+ | |||
|- | |||
|style="border:none; background-color:{{Color3}}" | [[File:Is ns01 white magic range +1.png|20px]] | |||
|style="border:none; background-color:{{Color3}}" | [[White Magic Range +1]] | |||
|style="border:none; background-color:{{Color3}}" | {{Faith16}} S | |||
|- | |||
|style="border:none; background-color:{{Color3}}" | [[File:Is ns01 white tomefaire.png|20px]] | |||
|style="border:none; background-color:{{Color3}}" | [[White Tomefaire]] | |||
|style="border:none; background-color:{{Color3}}" | {{Faith16}} S+ | |||
|- | |||
|style="border:none; background-color:{{Color3}}" | [[File:Is ns01 authority lv 3.png|20px]] | |||
|style="border:none; background-color:{{Color3}}" | [[Authority (ability)|Authority]] | |||
|style="border:none; background-color:{{Color3}}" | Innate; replaced with higher levels at {{Authority16}} B+ and A+ | |||
|- | |||
|style="border:none; background-color:{{Color3}}" | [[File:Is ns01 battalion wrath.png|20px]] | |||
|style="border:none; background-color:{{Color3}}" | [[Battalion Wrath]] | |||
|style="border:none; background-color:{{Color3}}" | Innate<!--C--> | |||
|- | |||
|style="border:none; background-color:{{Color3}}" | [[File:Is ns01 defensive tactics.png|20px]] | |||
|style="border:none; background-color:{{Color3}}" | [[Defensive Tactics]] | |||
|style="border:none; background-color:{{Color3}}" | Innate<!--B--> | |||
|- | |||
|style="border:none; background-color:{{Color3}}" | [[File:Is ns01 battalion desperation.png|20px]] | |||
|style="border:none; background-color:{{Color3}}" | [[Battalion Desperation]] | |||
|style="border:none; background-color:{{Color3}}" | Innate<!--B--> | |||
|- | |||
|style="border:none; background-color:{{Color3}}" | [[File:Is ns01 offensive tactics.png|20px]] | |||
|style="border:none; background-color:{{Color3}}" | [[Offensive Tactics]] | |||
|style="border:none; background-color:{{Color3}}" | {{Authority16}} S+ | |||
|- | |||
|style="border:none; background-color:{{Color3}}" | [[File:Is ns01 weight -3.png|20px]] | |||
|style="border:none; background-color:{{Color3}}" | [[Weight -3]] | |||
|style="border:none; background-color:{{Color3}}" | {{Armor16}} C | |||
|- | |||
|style="border:none; background-color:{{Color3}}" | [[File:Is ns01 combat art.png|20px]] | |||
|style="border:none; background-color:{{Color3}}" | [[Smite]] | |||
|style="border:none; background-color:{{Color3}}" | {{Armor16}} B | |||
|- | |||
|style="border:none; background-color:{{Color3}}" | [[File:Is ns01 weight -5.png|20px]] | |||
|style="border:none; background-color:{{Color3}}" | [[Weight -5]] | |||
|style="border:none; background-color:{{Color3}}" | {{Armor16}} A | |||
|- | |||
|style="border:none; background-color:{{Color3}}" | [[File:Is ns01 armored effect null.png|20px]] | |||
|style="border:none; background-color:{{Color3}}" | [[Armored Effect Null]] | |||
|style="border:none; background-color:{{Color3}}" | {{Armor16}} S+ | |||
|- | |||
|style="border:none; background-color:{{Color3}}" | [[File:Is ns01 dexterity +4.png|20px]] | |||
|style="border:none; background-color:{{Color3}}" | [[Dexterity +4]] | |||
|style="border:none; background-color:{{Color3}}" | Innate<!--C--> | |||
|- | |||
|style="border:none; background-color:{{Color3}}" | [[File:Is ns01 movement +1.png|20px]] | |||
|style="border:none; background-color:{{Color3}}" | [[Movement +1]] | |||
|style="border:none; background-color:{{Color3}}" | {{Riding16}} A+ | |||
|- | |||
|style="border:none; background-color:{{Color3}}" | [[File:Is ns01 cavalry effect null.png|20px]] | |||
|style="border:none; background-color:{{Color3}}" | [[Cavalry Effect Null]] | |||
|style="border:none; background-color:{{Color3}}" | {{Riding16}} S+ | |||
|- | |||
|style="border:none; background-color:{{Color3}}" | [[File:Is ns01 darting blow.png|20px]] | |||
|style="border:none; background-color:{{Color3}}" | [[Darting Blow]] | |||
|style="border:none; background-color:{{Color3}}" | Budding Talent: {{Flying16}} | |||
|- | |||
|style="border:none; background-color:{{Color3}}" | [[File:Is ns01 alert stance.png|20px]] | |||
|style="border:none; background-color:{{Color3}}" | [[Alert Stance]] | |||
|style="border:none; background-color:{{Color3}}" | {{Flying16}} B | |||
|- | |||
|style="border:none; background-color:{{Color3}}" | [[File:Is ns01 alert stance+.png|20px]] | |||
|style="border:none; background-color:{{Color3}}" | [[Alert Stance+]] | |||
|style="border:none; background-color:{{Color3}}" | {{Flying16}} A+ | |||
|- | |||
|style="border:none; background-color:{{Color3}}" | [[File:Is ns01 flying effect null.png|20px]] | |||
|style="border:none; background-color:{{Color3}}" | [[Flying Effect Null]] | |||
|style="border:none; background-color:{{Color3}}" | {{Flying16}} S+ | |||
|- | |||
!colspan="3" style="{{Roundb}}; border:none; background-color:{{Color3}}" width="100%"|<small>The above ability list does not include class abilities, or abilities and combat arts that are granted by items.</small> | |||
|} | |||
===Spell list=== | |||
{|width="40%" align=center style="padding: 3px; border-spacing: 4px; margin-left:auto; margin-right:auto; {{round}}; border:2px solid {{Color2}}; background-color: {{Color1}}; text-align: center" | |||
!style="border:none" colspan="2" | | |||
|- | |||
!style="{{roundtl}}; border:none; background-color:{{Color3}}; width: 30%;" | Spell | |||
!style="{{roundtr}}; border:none; background-color:{{Color3}};" | Learned at | |||
|- | |||
|style="border:none; background-color:{{Color3}};" | [[Thunder (tome)|Thunder]] | |||
|style="border:none; background-color:{{Color3}};" | Innate<!--D--> | |||
|- | |||
|style="border:none; background-color:{{Color3}};" | [[Thoron]] | |||
|style="border:none; background-color:{{Color3}};" | {{Reason16}} C | |||
|- | |||
|style="border:none; background-color:{{Color3}};" | [[Death Γ]] | |||
|style="border:none; background-color:{{Color3}};" | {{Reason16}} B | |||
|- | |||
|style="border:none; background-color:{{Color3}};" | [[Heal]] | |||
|style="border:none; background-color:{{Color3}};" | {{Faith16}} D | |||
|- | |||
|style="border:none; background-color:{{Color3}};" | [[Nosferatu]] | |||
|style="border:none; background-color:{{Color3}};" | {{Faith16}} D+ | |||
|- | |||
|style="{{roundbl}}; border:none; background-color:{{Color3}};" | [[Restore]] | |||
|style="{{roundbr}}; border:none; background-color:{{Color3}};" | {{Faith16}} C | |||
|} | |||
===Analysis=== | |||
{{analysis}} | |||
Jeritza is a unit that joins only during Part II on the Crimson Flower route. He has a unique class, the [[Death Knight (class)|Death Knight]], which has high movement, [[Canto]], and the ability to use magic. He starts at a very high level 27, with exceptional stats all-around, especially in [[HP]], [[strength]], [[speed]], and [[defense]], as well as fairly solid [[magic (stat)|magic]] and decent [[resistance]]. His base stats alone allow him to ORKO most enemies on Normal and Hard modes, and still contest and even ORKO some of Maddening mode's high-level enemies without too much trouble. He is capable of taking a few hits without dying, and will avoid getting doubled by most enemies thanks to his high speed. Contrary to what one might expect, he also has high growth rates that will ensure that he remains a potent unit for the rest of the game. His only notably lacking stats are his [[dexterity]], [[luck]], and [[charm (stat)|charm]]. His weakness in the former two translate into somewhat below-average hit rates, though this is mostly mitigated thanks to his personal ability, [[Murderous Intent]]. His low charm, however, is much more problematic, as it will greatly harm his hit rates with [[gambit]]s even factoring in Murderous Intent, while also making him very susceptible to being hit by enemy gambits himself. His high movement and Canto will allow him to strike battalion-holding enemies and retreat safely, though it is still important to keep him out of their range during enemy phase, to ensure that he does not get immobilized for a turn. His low luck can also put him at risk of enemy [[critical hit]]s, though there are similarly ways of avoiding these. | |||
In addition to his strong stats, Jeritza also boasts great skill levels. His A+ in [[lance (weapon)|lance]]s allows him to use any lance in the game at base, and also brings him closer to learning [[Lance Crit +10]] and [[Lancefaire]]. His B+ in [[sword]]s is also notable, as he starts needing only around 16 skill experience to reach A-rank, and thus learn [[Windsweep]]; this can allow him to safely damage some of the route's most threatening bosses, such as [[Dimitri]] and [[Rhea]]. As well, despite having a weakness in [[authority]], he starts with a great base B-rank, allowing him use of valuable high-level [[battalion]]s to boost his combat prowess further. His A-rank and strength in Riding additionally lets him learn [[Movement +1]] very quickly compared to most other units. Lastly, Jeritza has a Budding Talent in Flying that, when realized, unlocks [[Darting Blow]]. This makes him the only male unit that can acquire the ability outside of [[Byleth]] when using [[New Game +]], and allows him to double almost all enemies outside of [[Swordmaster]]s and [[Falcon Knight]]s. | |||
Jeritza's [[black magic]] spell list, while somewhat short, is also solid, with [[Thoron]] and [[Death Γ]] granting him solid 3-range options without even needing to leave his starting class. Thoron will likely be used more often by him as, despite the high base [[crit]] of Death Γ, Jeritza's aforementioned low dexterity and luck mean that his crit rates with it may not be particularly high, especially on Maddening difficulty, where enemies have much higher luck as well as high-level prowess abilities. Thoron will thus be more reliable more often due to its higher might. | |||
Jeritza bears the minor [[Crest]] of [[Lamine]]. It has a chance of conserving use of healing [[white magic]], and also grants full use of the effects of the [[Rafail Gem]]; however, neither of these effects is useful to Jeritza. His weakness in faith and lack of healing spells make him ill-suited to being a healer or support unit, especially when his sheer offensive potential mean he would rather be a front line fighter. The Rafail Gem, on the other hand, is not available on the Crimson Flower route at all. At the very least, his access to a Crest allows him to take advantage of the high might of a [[Hero's Relic]] without taking damage afterwards, which can be useful. | |||
Though Jeritza can do more than well in his default class, having him dip into other classes can also prove valuable to him. He uniquely has access to [[Mastermind]] as an equippable ability, which will double not only his skill experience, but also his class experience gained in battle. This allows him to easily achieve class mastery and learn valuable abilities such as [[Death Blow]], [[Fiendish Blow]], [[Hit +20]], and/or [[Reposition]] without too much time investment. Moreover, it also allows him to master his personal Death Knight class in fairly little time, which will unlock [[Counterattack]]. This is a fine ability that allows him to counter long-range foes such as [[Sniper]]s and [[Bow Knight]]s without needing to switch to a ranged weapon; it even allows him to counterattack against [[Bolting]], which appears in the last two chapters of the route and can be otherwise difficult to deal with. | |||
Overall, Jeritza is an incredible unit that can easily carry the player through the Crimson Flower route on lower difficulties, and can be an incredible help on Maddening mode. He starts out strong, and will only continue to grow stronger and more flexible with investment. Unfortunately, being locked to Part II of Crimson Flower means he can only be used for six chapters, not including paralogues, giving the player comparatively little time to have fun with his kit. Regardless, Jeritza's capabilities make him more than worth his position on any Crimson Flower team. | |||
=={{FEH}}== | |||
===Role=== | |||
Jeritza is one of the characters added to the game in the [[Omnicidal Witch]] update, and was made available to players in the thirty-fourth [[Grand Hero Battles|Grand Hero Battle]], which initially ran from August 12, 2019 through August 21, 2019. Only one variation of Jeritza is currently available in ''Heroes'', based on his Death Knight persona in ''Three Houses''. | |||
===Starting stats=== | |||
{{Tab | |||
|tab1={{star|3}} | |||
|tab2={{star|4}} | |||
|tab3={{star|5}} | |||
|content1={{CharStats FEH | |||
|portrait=[[File:Portrait death knight the reaper feh.png|100px]] | |||
|rarity=3 | |||
|wpntype=Lance | |||
|wpnlink=Lance (weapon) | |||
|unittype=Cavalry | |||
|fixed=y | |||
|HP=17 | |||
|atk=8 | |||
|spd=5 | |||
|def=7 | |||
|res=4 | |||
|HP_gp=6 | |||
|atk_gp=8 | |||
|spd_gp=5 | |||
|def_gp=6 | |||
|res_gp=6 | |||
|offense=[[Steel Lance]] | |||
}} | |||
|content2={{CharStats FEH | |||
|portrait=[[File:Portrait death knight the reaper feh.png|100px]] | |||
|rarity=4 | |||
|wpntype=Lance | |||
|wpnlink=Lance (weapon) | |||
|unittype=Cavalry | |||
|fixed=y | |||
|HP=17 | |||
|atk=9 | |||
|spd=5 | |||
|def=8 | |||
|res=4 | |||
|HP_gp=6 | |||
|atk_gp=8 | |||
|spd_gp=5 | |||
|def_gp=6 | |||
|res_gp=6 | |||
|offense=[[Silver Lance]] | |||
|special=[[Rising Flame]] | |||
}} | |||
|content3={{CharStats FEH | |||
|portrait=[[File:Portrait death knight the reaper feh.png|100px]] | |||
|rarity=5 | |||
|wpntype=Lance | |||
|wpnlink=Lance (weapon) | |||
|unittype=Cavalry | |||
|fixed=y | |||
|HP=18 | |||
|atk=9 | |||
|spd=6 | |||
|def=8 | |||
|res=5 | |||
|HP_gp=6 | |||
|atk_gp=8 | |||
|spd_gp=5 | |||
|def_gp=6 | |||
|res_gp=6 | |||
|offense=[[Scythe of Sariel]] | |||
|special=[[Rising Flame]] | |||
}} | |||
}} | |||
===Skill set=== | |||
{|width="50%" align=center class="cellpadding-3" style="border-spacing: 4px; margin-left:auto; margin-right:auto; {{round}}; border:2px solid {{Color2}}; background-color: {{Color1}}; text-align: center" | |||
!style="border:none" colspan="3" | | |||
|- | |||
!style="{{roundtl}}; border:none; background-color:{{Color3}}; width: 60%;" colspan="2" | Skill | |||
!style="border:none; background-color:{{Color3}}; width: 20%;" | Rarity | |||
!style="{{roundtr}}; border:none; background-color:{{Color3}}; width: 20%;" | [[Skill point|SP]] cost | |||
|- | |||
|style="border:none; background-color:{{Color3}};" | [[File:Is feh skill offense.png|24px]] | |||
|style="border:none; background-color:{{Color3}};" | [[Iron Lance]] | |||
|style="border:none; background-color:{{Color3}};" colspan="2" | Innate | |||
|- | |||
|style="border:none; background-color:{{Color3}};" | [[File:Is feh skill offense.png|24px]] | |||
|style="border:none; background-color:{{Color3}};" | [[Steel Lance]] | |||
|style="border:none; background-color:{{Color3}};" colspan="2" | Innate | |||
|- | |||
|style="border:none; background-color:{{Color3}};" | [[File:Is feh skill offense.png|24px]] | |||
|style="border:none; background-color:{{Color3}};" | [[Silver Lance]] | |||
|style="border:none; background-color:{{Color3}};" | {{star|3}} | |||
|style="border:none; background-color:{{Color3}};" | 200 SP | |||
|- | |||
|style="border:none; background-color:{{Color3}};" | [[File:Is feh skill offense.png|24px]] | |||
|style="border:none; background-color:{{Color3}};" | [[Scythe of Sariel]] | |||
|style="border:none; background-color:{{Color3}};" | {{star|5}} | |||
|style="border:none; background-color:{{Color3}};" | 400 SP | |||
|- | |||
|style="border:none; background-color:{{Color3}};" | [[File:Is feh skill special.png|24px]] | |||
|style="border:none; background-color:{{Color3}};" | [[Rising Flame]] | |||
|style="border:none; background-color:{{Color3}};" | {{star|3}} | |||
|style="border:none; background-color:{{Color3}};" | 150 SP | |||
|- | |||
|style="border:none; background-color:{{Color3}};" | [[File:Is feh skill special.png|24px]] | |||
|style="border:none; background-color:{{Color3}};" | [[Blazing Flame]] | |||
|style="border:none; background-color:{{Color3}};" | {{star|4}} | |||
|style="border:none; background-color:{{Color3}};" | 300 SP | |||
|- | |||
|style="border:none; background-color:{{Color3}};" | [[File:Is feh escape route 1.png|24px]]<sub>{{color|blue|B}}</sub> | |||
|style="border:none; background-color:{{Color3}};" | [[Escape Route|Escape Route 1]] | |||
|style="border:none; background-color:{{Color3}};" | {{star|3}} | |||
|style="border:none; background-color:{{Color3}};" | 60 SP | |||
|- | |||
|style="border:none; background-color:{{Color3}};" | [[File:Is feh escape route 2.png|24px]]<sub>{{color|blue|B}}</sub> | |||
|style="border:none; background-color:{{Color3}};" | [[Escape Route|Escape Route 2]] | |||
|style="border:none; background-color:{{Color3}};" | {{star|4}} | |||
|style="border:none; background-color:{{Color3}};" | 120 SP | |||
|- | |||
|style="border:none; background-color:{{Color3}};" | [[File:Is feh escape route 3.png|24px]]<sub>{{color|blue|B}}</sub> | |||
|style="border:none; background-color:{{Color3}};" | [[Escape Route|Escape Route 3]] | |||
|style="border:none; background-color:{{Color3}};" | {{star|5}} | |||
|style="border:none; background-color:{{Color3}};" | 240 SP | |||
|- | |||
|style="border:none; background-color:{{Color3}};" | [[File:Is feh close guard 1.png|24px]]<sub>{{color|green|C}}</sub> | |||
|style="border:none; background-color:{{Color3}};" | [[Close Guard|Close Guard 1]] | |||
|style="border:none; background-color:{{Color3}};" | {{star|3}} | |||
|style="border:none; background-color:{{Color3}};" | 60 SP | |||
|- | |||
|style="border:none; background-color:{{Color3}};" | [[File:Is feh close guard 2.png|24px]]<sub>{{color|green|C}}</sub> | |||
|style="border:none; background-color:{{Color3}};" | [[Close Guard|Close Guard 2]] | |||
|style="border:none; background-color:{{Color3}};" | {{star|3}} | |||
|style="border:none; background-color:{{Color3}};" | 120 SP | |||
|- | |||
|style="border:none; background-color:{{Color3}};" | [[File:Is feh close guard 3.png|24px]]<sub>{{color|green|C}}</sub> | |||
|style="border:none; background-color:{{Color3}};" | [[Close Guard|Close Guard 3]] | |||
|style="border:none; background-color:{{Color3}};" | {{star|4}} | |||
|style="border:none; background-color:{{Color3}};" | 240 SP | |||
|- | |||
!colspan="4" style="{{Roundb}}; border:none; background-color:{{Color3}}" width="100%"| | |||
|} | |||
==Personality and character== | |||
It is strongly suggested in his supports that Jeritza suffers from some form of dissociative identity disorder, with distinct mannerisms, reactions to other characters, and general temperament and personality between his “Jeritza” and “Death Knight” personas. | |||
Jeritza dislikes mingling with others, and will actively reject any attempt to make small talk. He spends most of his time at the Monastery alone and near the training grounds. Jeritza is a man of few words, but he does care deeply about Mercedes. He desperately struggles to maintain control of his Death Knight personality, to the point where he is actually willing to desert the Empire to keep her safe when he nearly turns his blade on her during a conversation. Jeritza is also very loyal to Edelgard for rescuing him after the massacre of House Bartels and giving him a purpose in life, as well as for their shared belief that the crest-based nobility system is irredeemably flawed and their shared goal of improving the social order of Fódlan. Notably, Edelgard is perhaps the only person Jeritza is more loyal to than his sister, as Jeritza will go as far as to engage his sister in the Crimson Flower route after failing to persuade her to stand down, should she not have been recruited in Part 1. | |||
As the Death Knight, he is an extremely intimidating figure. He deeply enjoys battle to the point of not caring whether his own life is placed in jeopardy, and develops a particular fixation on Byleth as the story progresses. He also tends to chafe at taking orders, and on several occasions disobeys his superiors to act on his own impulses. In stark contrast to Jeritza’s loyalty to Edelgard, the Death Knight personality is often somewhat dismissive of Edelgard whenever her orders clash with his “pleasure”, most notably on display during the Remire incident. The Death Knight persona also seems mostly unbothered at the prospect of cutting down Mercedes, attacking her without cause in their B support. However, this persona is not entirely devoid of compassion for his sister or honor; he gives Caspar the Scythe of Sariel if he defeats him in battle as a sign of respect, and he gives his half-sister Mercedes their family Hero's Relic (although he says that he would not hesitate to kill her in their next encounter). Mercedes’s presence is also enough to give the Death Knight brief pause on several occasions in spite of his willingness to attack her in several such instances, and this personality still acknowledges Mercedes as his sister. | |||
==Supports== | |||
{{stub}} | |||
{{main|Jeritza/Supports}} | |||
==Endings== | |||
'''Jeritza, Bloodstained Demon'''<br> | |||
After the war for Fódlan, Jeritza threw himself fully into the struggle against those who slither in the dark. Visage masked by the likeness of death itself, he laid waste to his enemies with a scythe that terrified friend and foe alike. When it was all over, he stole away in secret and vanished without a trace. His whereabouts thereafter have been the subject of much conjecture. | |||
'''Byleth, Wings of the Hegemon & Jeritza, Bloodstained Demon'''<br> | |||
After the war for Fodlan, Byleth and Jeritza threw themselves fully into Emperor Edelgard's struggle against those who slither in the dark. Though the battle proved vicious, none could stand against the combined might of shining sword and reaper's scythe, and the pair become venerated by history as heroes of Adrestia. Once those who slither in the dark were forever vanquished, the two heroes stole away in secret and vanished without a trace. Their whereabouts thereafter have been the subject of much conjecture among historians. | |||
'''Mercedes, Benevolent Soul & Jeritza, Bloodstained Demon'''<br> | |||
Once those who slither in the dark were finally defeated, Mercedes left home and opened a small orphanage in the Faerghus region with her mother. After many years of kind service raising children who had lost their families, she received a letter bearing familiar handwriting. Its author, a prisoner in Enbarr, expressed his sincerest well-wishes to Mercedes and her family. Still more time passed until, one day, the man who wrote the letter paid her a visit. With joyful tears in her eyes, Mercedes smiled, took Emile by the hand, and at last welcomed him home. | |||
'''Bernadetta, Eternal Loner & Jeritza, Bloodstained Demon'''<br> | |||
After the war for Fódlan, Jeritza threw himself fully into the struggle against those who slither in the dark. Visage masked by the likeness of death itself, he laid waste to his enemies with a scythe that terrified friend and foe alike. When it was all over, he stole away in secret and vanished. At the same time, a mysterious guest arrived in Varley territory, which Bernadetta had inherited from her father. On that day, the reclusive noble and her guest were seen walking the grounds pleasantly together. A rendition of that scene, said to be painted by Bernadetta herself, remains at the estate to this day. | |||
'''Constance, Sorcery Incarnate & Jeritza, Bloodstained Demon'''<br> | |||
After the war, Jeritza and Constance joined the battle against those who slither in the dark. In that dire struggle, which raged across the continent, Constance earned her noble title with powerful magic that proved essential to victory. Her rise in status ruffled more than a few feathers, but Jeritza kept the Imperial nobility in line. It is said, in the ballads composed about the couple, that they swore their wedding vows in the beautiful rose garden they had planted together on the Nuvelle estate. | |||
==Quotes== | |||
{{main|Jeritza/Quotes (Three Houses)}} | |||
<!--{{main|Jeritza/Quotes (Heroes)}} - Undummy when he appears as Jeritza in Heroes, as opposed to solely as the Death Knight--> | |||
{{main|Death Knight/Quotes (Heroes)}} | |||
==Other appearances== | |||
===''Fire Emblem Cipher''=== | |||
This character is currently featured on two cards in {{TCGCipher}}, one each as Jeritza and the Death Knight; he has yet to be featured as Emile. | |||
{{TCGCipherData | |||
|name=Jeritza and the Death Knight | |||
|serenes=Jeritza | |||
|serenes2=Death_Knight | |||
|image1=[[File:TCGCipher B19-047HN.png|150px]] | |||
|title1=Funeral-Knight of Hell | |||
|name1=Death Knight | |||
|affil1=Fódlan | |||
|gender1=Male | |||
|weapon1=Lance | |||
|type1=[[File:It TCGCipher Mounted.png|20px|Mounted]] | |||
|quote1=One of us will die, the other will live. I will enjoy this dance of damnation. | |||
|attack1=70 | |||
|support1=0 | |||
|atkcost1=4 | |||
|range1=1 | |||
|class1=Death Knight | |||
|class1article=Death Knight (class) | |||
|tier1=Advanced | |||
|cccost1=3 | |||
|skill1='''Scythe of Sariel:''' {{CipherTrigger}} {{CipherOncePerTurn}} When one of your opponent's orbs is destroyed, choose 1 non-lord enemy, and destroy them.<br>'''Commander:''' {{CipherAlways}} This unit is immune to destruction as the cost or effect of skills. | |||
|no1=B19-047HN | |||
|artist1={{CipherIllust|セツ}} | |||
|- | |||
|image2=[[File:TCGCipher B21-045N.png|150px]] | |||
|title2=Masked Fencing Instructor | |||
|name2=Jeritza | |||
|affil2=Fódlan | |||
|gender2=Male | |||
|weapon2=Sword | |||
|quote2=I am Jeritza. I teach here. Weapon instruction. | |||
|attack2=70 | |||
|support2=10 | |||
|atkcost2=3 | |||
|range2=1 | |||
|class2=Myrmidon | |||
|tier2=Base | |||
|skill2='''“You look bored. Care to duel?”:''' {{CipherActivate}} {{CipherOncePerTurn}} Choose 1 non-Main Character enemy who is in the Front Line. Until the end of the turn, that enemy cannot evade. | |||
|no2=B21-045N | |||
|artist2={{CipherIllust|セツ}} | |||
}} | |||
==Trivia== | |||
* The Death Knight is tied for the most appearances as an enemy in a single main-series game. | |||
** If paralogues are discounted, he has 6 appearances and is tied with [[Edelgard]]; he is fought in chapters [[The Goddess's Rite of Rebirth|4]], [[Rumors of a Reaper|6]], [[The Flame in the Darkness|8]], [[To War|12]], and either [[The Golden Scheme|18]] and [[The Chaos of War|19]] of the Verdant Wind route or [[The Impregnable Fortress (Silver Snow)|17]] and [[The Chaos of War|18]] of the Silver Snow route of ''Three Houses''. | |||
** If paralogues are counted, he has 7 appearances and is tied with [[Hubert]]; he is fought in the above chapters, as well as [[The Face Beneath]]. | |||
* The Death Knight has no defeat quotes during [[Outset of a Power Struggle|Chapter 12]] of the Black Eagles route should he fall in battle. | |||
==Etymology and other languages== | |||
===Jeritza=== | |||
{{Names | |||
|eng-name=Jeritza von Hrym | |||
|eng-mean=Full name, known by just '''Jeritza''' in most menus. | |||
|jap-name={{hover|イエリッツァ=フォン=フリュム|Ierittsa fon Furyumu}} | |||
|jap-mean=Jeritza von Hrym | |||
|span-name=Jeritza von Hrym | |||
|span-mean=As above. | |||
|fren-name=Jeritza von Hrym | |||
|fren-mean=As above. | |||
|ger-name=Jeritza von Hrym | |||
|ger-mean=As above. | |||
|ital-name=Jeritza von Hrym | |||
|ital-mean=As above. | |||
|kor-name={{hover|예리차 폰 프륨|Yericha pon Peuryum}} | |||
|kor-mean=Jeriza von Hrym | |||
|ch-simp-name={{hover|伊艾里扎·冯·弗琉慕|Mandarin: Yīàilǐzā féng Fúliúmù; Cantonese: Ji1ngaai6leoi5zaat3 fung4 Fat1lau4mou6}} | |||
|ch-simp-mean=Jeriza von Hrym | |||
|ch-trad-name={{hover|伊艾里扎‧馮‧弗琉慕|Mandarin: Yīàilǐzā féng Fúliúmù; Cantonese: Ji1ngaai6leoi5zaat3 fung4 Fat1lau4mou6}} | |||
|ch-trad-mean=Jeriza von Hrym | |||
}} | |||
===Death Knight=== | |||
{{Names | |||
|eng-name=Death Knight | |||
|jap-name={{hover|死神騎士|Shinigami kishi}} | |||
|jap-mean=Literally "Death God Knight", meaning death personified as a knight. | |||
|span-name=Caballero Sanguinario | |||
|span-mean=Bloodthirsty Knight | |||
|fren-name=Chevalier Macabre | |||
|fren-mean=Macabre Knight | |||
|ger-name=Ritter des Todes | |||
|ger-mean=Knight of Death | |||
|ital-name=Cavaliere Infernale | |||
|ital-mean=Infernal Knight | |||
|kor-name={{hover|사신기사|Sasingisa}} | |||
|kor-mean=Reaper Knight | |||
|ch-simp-name={{hover|死神骑士|Mandarin: sǐshén qíshì; Cantonese: sei2san4 ke4si6}} | |||
|ch-simp-mean=Death God Knight | |||
|ch-trad-name={{hover|死神騎士|Mandarin: sǐshén qíshì; Cantonese: sei2san4 ke4si6}} | |||
|ch-trad-mean=Death God Knight | |||
}} | |||
===Emile=== | |||
{{Names | |||
|eng-name=Emile | |||
|eng-mean=From the Roman surname "Aemilius", derived from the Latin "aemulus" meaning "rival".<ref>{{Cite web|url=https://www.behindthename.com/name/emil|title=Meaning, origin and history of the name Emile - Behind the Name|site=Behind the Name|retrieved=February 29, 2020}}</ref> | |||
|jap-name={{hover|エミール|Emīru}} | |||
|jap-mean=Emile | |||
|span-name=Emile | |||
|span-mean=As above. | |||
|fren-name=Emile | |||
|fren-mean=As above. | |||
|ger-name=Emile | |||
|ger-mean=As above. | |||
|ital-name=Emile | |||
|ital-mean=As above. | |||
|kor-name={{hover|에밀|Emil}} | |||
|kor-mean=Emile | |||
|ch-simp-name={{hover|艾米尔|Mandarin: àimǐěr; Cantonese: ngaai6mai5ji5}} | |||
|ch-simp-mean=Emile | |||
|ch-trad-name={{hover|艾米爾|Mandarin: àimǐěr; Cantonese: ngaai6mai5ji5}} | |||
|ch-trad-mean=Emile | |||
}} | |||
==Gallery== | |||
<gallery> | |||
FETH Jeritza.png|High quality portrait artwork of Jeritza with his mask from {{title|Three Houses}}. | |||
Portrait jeritza 02 fe16.png|Portrait artwork of Jeritza without his mask from {{title|Three Houses}}. | |||
Cg fe16 jeritza s support m.png|Jeritza's S-support illustration with male Byleth. | |||
Cg fe16 jeritza s support f.png|Jeritza's S-support illustration with female Byleth. | |||
Cg fe16 mercedes cries over death knight.png|[[Mercedes]] crying over Emile's death. | |||
FETH Death Knight 01.png|Artwork of the Death Knight from {{title|Three Houses}}. | |||
FETH Death Knight 02.png|High quality portrait artwork of the Death Knight from {{title|Three Houses}}. | |||
FEH Death Knight The Reaper 01.png|Artwork of Death Knight: The Reaper from {{title|Heroes}}. | |||
FEH Death Knight The Reaper 02.png|Artwork of Death Knight: The Reaper from {{title|Heroes}}. | |||
FEH Death Knight The Reaper 02a.png|Artwork of Death Knight: The Reaper from {{title|Heroes}}. | |||
FEH Death Knight The Reaper 03.png|Artwork of Death Knight: The Reaper from {{title|Heroes}}. | |||
</gallery> | |||
==External links== | |||
*[https://www.nintendo.co.jp/switch/anvya/pc/characters/main7.html The Death Knight's page on the Japanese official website] | |||
*[https://www.nintendo.co.jp/switch/anvya/pc/characters/other.html?id=9873 Jeritza's page on the Japanese official website] | |||
{{refbar}} | |||
{{Project Characters}} | |||
{{Nav16}} | |||
{{NavH}} | |||
[[Category:Playable characters in Fire Emblem: Three Houses]] | |||
[[Category:Bosses in Fire Emblem: Three Houses]] | |||
[[Category:Playable characters in Fire Emblem Heroes]] | |||
Revision as of 21:20, 14 July 2020
- Death Knight and Emile redirect here. For the class, see Death Knight (class). For the boss from Path of Radiance, see Emil.
| ||||||||||||||||||
|


| “ | I am nothing more than a merciless killer. A demon whose only pleasure is found within death’s shadow. Such a creature should not be allowed near you, dear sister. | ” | — Jeritza to Mercedes |
|---|
Jeritza von Hrym (pronounced /jəˈɹitsə vɒn hɹɪm/[key]; Japanese: イエリッツァ Jeritza) is a character appearing in Fire Emblem: Three Houses who was made playable in the Version 1.1.0 update. He is the fencing instructor at the Officers Academy, and is secretly the infamous Death Knight (Japanese: 死神騎士 Death God Knight). His true identity is Emile (pronounced /ɪ'mil/[key]; Japanese: エミール Emile), the half-brother of Mercedes von Martritz.
Biography
Jeritza was born Emile von Bartels, heir to House Bartels of Adrestia. His mother was a commoner who married his father for financial security for her daughter Mercedes, but his father was only interested in her Crest and banished the two as soon as Emile was born. When Emile was eight years old, his mother and sister absconded to Faerghus; Emile remained behind, fearing that his father would hunt them down and kill both of them if they fled with his true-born heir. Eventually, Emile's father tracked the two down and decided that since Emile's mother was past the age of bearing children, he would marry Mercedes to have more children with the Crest of Lamine. Emile snapped and massacred House Bartels, and because of this incident developed a homicidal split personality known as the Death Knight. In the aftermath, Princess Edelgard von Hresvelg discovered him, arranged for him to be adopted into the Hrym family under the name Jeritza, and took him into her service in order to make use of his skills for her plans to overthrow the Church of Seiros. Eventually, with the recommendation of Lord Arundel, Jeritza took a post as a fencing instructor at the Officers Academy at Garreg Mach Monastery.
Jeritza spends Part I aiding Edelgard in her Flame Emperor identity. Jeritza can be seen around the Monastery prior to Chapter 6. He is first seen as the Death Knight accompanying a raid on the Holy Mausoleum, but does not engage the students sent to stop them unless attacked first. Jeritza is responsible for kidnapping Flayn and stabbing Manuela during Chapter 6. He develops a fixation on the students' teacher Byleth and directly challenges them after their investigation leads them to the underground chamber where Flayn is held, but is ordered to retreat by the Flame Emperor. The Monastery faculty correctly conclude that Jeritza is the Death Knight, and he is not seen around the Monastery for the rest of Part I.
The Death Knight is next seen reinforcing Solon in the battle in Remire Village, but is again forced to retreat by Byleth. After the Flame Emperor is unmasked as Edelgard, the Death Knight fights in the Battle of Garreg Mach on Adrestia's side, potentially allying with Byleth to do so. Afterwards, the Death Knight takes up a post as an Adrestian general.
If Byleth is a member of the Black Eagles and sides with Adrestia over the Church, Jeritza joins their side and fights alongside Byleth for the rest of the Crimson Flower route.
In any of the other three routes, if both Mercedes and Caspar are recruited, a paralogue can be played in which Mercedes deduces that his true identity is Emile, and he gives her family Relic, the Rafail Gem, before threatening to kill Mercedes the next time they meet and departing. If Caspar defeats the Death Knight, the Death Knight gives him his Scythe of Sariel as a reward. Afterwards, regardless of whether this paralogue was completed, the Death Knight is assigned to defend Fort Merceus from the invading Faerghus army. He fails in this task; on the Azure Moon route, he is killed in this encounter. On Silver Snow and Verdant Wind, the Death Knight survives this encounter and instead warns the Resistance Army/Leicester army to leave the fortress, lest they be killed by incoming Agarthan missiles. He later defends Enbarr along with Hubert and is killed in this encounter.
Fire Emblem: Three Houses
Role
Jeritza spends most of his time as an NPC at Garreg Mach Monastery during the first quarter of the game. Eventually, he vanishes, and a secret passageway is found in his quarters where the recently abducted Flayn is discovered. He was made playable as free DLC in wave 3, exclusively on the Crimson Flower route. From Chapters 3 to 5 and Crimson Flower Chapter 13 onward in version 1.1.0 onward, he can tutor the player in swords, lances, brawling, and riding.
Starting stats and growth rates
Playable
|
|
| ||||||||||||||||||||||||||||||||||||||||||||||||||||||||||||||||||||||||

Jeritza can reclass to a Noble and Cavalier.
NPC
- Main article:
Jeritza/Stats - Due to technical limitations, Jeritza's stats as a non-playable character, both friendly and enemy, both as Jeritza and as the Death Knight, have been split onto a separate page.
Growth rates when reclassed
- Main article:
Jeritza/Stats/Growth rates
Abilities
| style="Template:Roundtl; border:none; background-color:#222222" colspan="2" | Ability | style="Template:Roundtr; border:none; background-color:#222222" | Learned at | |
|---|---|---|
| Murderous Intent | Personal ability, innate and unremovable | |
| Sword Prowess | Innate; replaced with higher levels at | |
| Mastermind | Innate | |
| Wrath Strike | Innate | |
| Grounder | Innate | |
| Haze Slice | Innate | |
| Axebreaker | Innate | |
| Windsweep | ||
| Sword Crit +10 | ||
| Swordfaire | ||
| Lance Prowess | Innate | |
| Tempest Lance | Innate | |
| Knightkneeler | Innate | |
| Shatter Slash | Innate | |
| Swordbreaker | Innate | |
| Glowing Ember | Innate | |
| Lance Crit +10 | ||
| Lancefaire | ||
| Axe Prowess | Innate; replaced with higher levels at | |
| Smash | Innate | |
| Helm Splitter | Innate | |
| Lancebreaker | ||
| Axe Crit +10 | ||
| Axefaire | ||
| Bow Prowess | Innate; replaced with higher levels at | |
| Curved Shot | Innate | |
| Close Counter | ||
| Bow Crit +10 | ||
| Bowfaire | ||
| Brawling Prowess | Innate; replaced with higher levels at | |
| Fading Blow | Innate | |
| Rushing Blow | Innate | |
| Nimble Combo | Innate | |
| Healing Focus | ||
| Brawl Crit +10 | ||
| Fistfaire | ||
| Reason | Innate; replaced with higher levels at | |
| Dark Magic Range +1 | ||
| Dark Tomefaire | ||
| Faith | ||
| White Magic Range +1 | ||
| White Tomefaire | ||
| Authority | Innate; replaced with higher levels at | |
| Battalion Wrath | Innate | |
| Defensive Tactics | Innate | |
| Battalion Desperation | Innate | |
| Offensive Tactics | ||
| Weight -3 | ||
| Smite | ||
| Weight -5 | ||
| Armored Effect Null | ||
| Dexterity +4 | Innate | |
| Movement +1 | ||
| Cavalry Effect Null | ||
| Darting Blow | Budding Talent: | |
| Alert Stance | ||
| Alert Stance+ | ||
| Flying Effect Null | ||
| colspan="3" style="Template:Roundb; border:none; background-color:#222222" width="100%"|The above ability list does not include class abilities, or abilities and combat arts that are granted by items. | ||
Spell list
| style="Template:Roundtl; border:none; background-color:#222222; width: 30%;" | Spell | style="Template:Roundtr; border:none; background-color:#222222;" | Learned at |
|---|---|
| Thunder | Innate |
| Thoron | |
| Death Γ | |
| Heal | |
| Nosferatu | |
| style="Template:Roundbl; border:none; background-color:#222222;" | Restore | style="Template:Roundbr; border:none; background-color:#222222;" | |
Analysis
| This character analysis section may not be accurate to every player's experience. |
Jeritza is a unit that joins only during Part II on the Crimson Flower route. He has a unique class, the Death Knight, which has high movement, Canto, and the ability to use magic. He starts at a very high level 27, with exceptional stats all-around, especially in HP, strength, speed, and defense, as well as fairly solid magic and decent resistance. His base stats alone allow him to ORKO most enemies on Normal and Hard modes, and still contest and even ORKO some of Maddening mode's high-level enemies without too much trouble. He is capable of taking a few hits without dying, and will avoid getting doubled by most enemies thanks to his high speed. Contrary to what one might expect, he also has high growth rates that will ensure that he remains a potent unit for the rest of the game. His only notably lacking stats are his dexterity, luck, and charm. His weakness in the former two translate into somewhat below-average hit rates, though this is mostly mitigated thanks to his personal ability, Murderous Intent. His low charm, however, is much more problematic, as it will greatly harm his hit rates with gambits even factoring in Murderous Intent, while also making him very susceptible to being hit by enemy gambits himself. His high movement and Canto will allow him to strike battalion-holding enemies and retreat safely, though it is still important to keep him out of their range during enemy phase, to ensure that he does not get immobilized for a turn. His low luck can also put him at risk of enemy critical hits, though there are similarly ways of avoiding these.
In addition to his strong stats, Jeritza also boasts great skill levels. His A+ in lances allows him to use any lance in the game at base, and also brings him closer to learning Lance Crit +10 and Lancefaire. His B+ in swords is also notable, as he starts needing only around 16 skill experience to reach A-rank, and thus learn Windsweep; this can allow him to safely damage some of the route's most threatening bosses, such as Dimitri and Rhea. As well, despite having a weakness in authority, he starts with a great base B-rank, allowing him use of valuable high-level battalions to boost his combat prowess further. His A-rank and strength in Riding additionally lets him learn Movement +1 very quickly compared to most other units. Lastly, Jeritza has a Budding Talent in Flying that, when realized, unlocks Darting Blow. This makes him the only male unit that can acquire the ability outside of Byleth when using New Game +, and allows him to double almost all enemies outside of Swordmasters and Falcon Knights.
Jeritza's black magic spell list, while somewhat short, is also solid, with Thoron and Death Γ granting him solid 3-range options without even needing to leave his starting class. Thoron will likely be used more often by him as, despite the high base crit of Death Γ, Jeritza's aforementioned low dexterity and luck mean that his crit rates with it may not be particularly high, especially on Maddening difficulty, where enemies have much higher luck as well as high-level prowess abilities. Thoron will thus be more reliable more often due to its higher might.
Jeritza bears the minor Crest of Lamine. It has a chance of conserving use of healing white magic, and also grants full use of the effects of the Rafail Gem; however, neither of these effects is useful to Jeritza. His weakness in faith and lack of healing spells make him ill-suited to being a healer or support unit, especially when his sheer offensive potential mean he would rather be a front line fighter. The Rafail Gem, on the other hand, is not available on the Crimson Flower route at all. At the very least, his access to a Crest allows him to take advantage of the high might of a Hero's Relic without taking damage afterwards, which can be useful.
Though Jeritza can do more than well in his default class, having him dip into other classes can also prove valuable to him. He uniquely has access to Mastermind as an equippable ability, which will double not only his skill experience, but also his class experience gained in battle. This allows him to easily achieve class mastery and learn valuable abilities such as Death Blow, Fiendish Blow, Hit +20, and/or Reposition without too much time investment. Moreover, it also allows him to master his personal Death Knight class in fairly little time, which will unlock Counterattack. This is a fine ability that allows him to counter long-range foes such as Snipers and Bow Knights without needing to switch to a ranged weapon; it even allows him to counterattack against Bolting, which appears in the last two chapters of the route and can be otherwise difficult to deal with.
Overall, Jeritza is an incredible unit that can easily carry the player through the Crimson Flower route on lower difficulties, and can be an incredible help on Maddening mode. He starts out strong, and will only continue to grow stronger and more flexible with investment. Unfortunately, being locked to Part II of Crimson Flower means he can only be used for six chapters, not including paralogues, giving the player comparatively little time to have fun with his kit. Regardless, Jeritza's capabilities make him more than worth his position on any Crimson Flower team.
Fire Emblem Heroes
Role
Jeritza is one of the characters added to the game in the Omnicidal Witch update, and was made available to players in the thirty-fourth Grand Hero Battle, which initially ran from August 12, 2019 through August 21, 2019. Only one variation of Jeritza is currently available in Heroes, based on his Death Knight persona in Three Houses.
Starting stats
★★★ ★★★★ ★★★★★
|
Initial Stats Level 40 Stats
Note: This unit requires the usage of Trait Fruit to access any flaws and assets. |
| ||||||||||||||||||||||

Skill set
| style="Template:Roundtl; border:none; background-color:#222222; width: 60%;" colspan="2" | Skill | Rarity | style="Template:Roundtr; border:none; background-color:#222222; width: 20%;" | SP cost | |
|---|---|---|---|
| File:Is feh skill offense.png | Iron Lance | Innate | |
| File:Is feh skill offense.png | Steel Lance | Innate | |
| File:Is feh skill offense.png | Silver Lance | ★★★ | 200 SP |
| File:Is feh skill offense.png | Scythe of Sariel | ★★★★★ | 400 SP |
| Rising Flame | ★★★ | 150 SP | |
| Blazing Flame | ★★★★ | 300 SP | |
| Escape Route 1 | ★★★ | 60 SP | |
| Escape Route 2 | ★★★★ | 120 SP | |
| Escape Route 3 | ★★★★★ | 240 SP | |
| Close Guard 1 | ★★★ | 60 SP | |
| Close Guard 2 | ★★★ | 120 SP | |
| Close Guard 3 | ★★★★ | 240 SP | |
| colspan="4" style="Template:Roundb; border:none; background-color:#222222" width="100%"| | |||
Personality and character
It is strongly suggested in his supports that Jeritza suffers from some form of dissociative identity disorder, with distinct mannerisms, reactions to other characters, and general temperament and personality between his “Jeritza” and “Death Knight” personas.
Jeritza dislikes mingling with others, and will actively reject any attempt to make small talk. He spends most of his time at the Monastery alone and near the training grounds. Jeritza is a man of few words, but he does care deeply about Mercedes. He desperately struggles to maintain control of his Death Knight personality, to the point where he is actually willing to desert the Empire to keep her safe when he nearly turns his blade on her during a conversation. Jeritza is also very loyal to Edelgard for rescuing him after the massacre of House Bartels and giving him a purpose in life, as well as for their shared belief that the crest-based nobility system is irredeemably flawed and their shared goal of improving the social order of Fódlan. Notably, Edelgard is perhaps the only person Jeritza is more loyal to than his sister, as Jeritza will go as far as to engage his sister in the Crimson Flower route after failing to persuade her to stand down, should she not have been recruited in Part 1.
As the Death Knight, he is an extremely intimidating figure. He deeply enjoys battle to the point of not caring whether his own life is placed in jeopardy, and develops a particular fixation on Byleth as the story progresses. He also tends to chafe at taking orders, and on several occasions disobeys his superiors to act on his own impulses. In stark contrast to Jeritza’s loyalty to Edelgard, the Death Knight personality is often somewhat dismissive of Edelgard whenever her orders clash with his “pleasure”, most notably on display during the Remire incident. The Death Knight persona also seems mostly unbothered at the prospect of cutting down Mercedes, attacking her without cause in their B support. However, this persona is not entirely devoid of compassion for his sister or honor; he gives Caspar the Scythe of Sariel if he defeats him in battle as a sign of respect, and he gives his half-sister Mercedes their family Hero's Relic (although he says that he would not hesitate to kill her in their next encounter). Mercedes’s presence is also enough to give the Death Knight brief pause on several occasions in spite of his willingness to attack her in several such instances, and this personality still acknowledges Mercedes as his sister.
Supports
| This page has been marked as a stub. Please help improve the page by adding information. |
- Main article:
Jeritza/Supports
Endings
Jeritza, Bloodstained Demon
After the war for Fódlan, Jeritza threw himself fully into the struggle against those who slither in the dark. Visage masked by the likeness of death itself, he laid waste to his enemies with a scythe that terrified friend and foe alike. When it was all over, he stole away in secret and vanished without a trace. His whereabouts thereafter have been the subject of much conjecture.
Byleth, Wings of the Hegemon & Jeritza, Bloodstained Demon
After the war for Fodlan, Byleth and Jeritza threw themselves fully into Emperor Edelgard's struggle against those who slither in the dark. Though the battle proved vicious, none could stand against the combined might of shining sword and reaper's scythe, and the pair become venerated by history as heroes of Adrestia. Once those who slither in the dark were forever vanquished, the two heroes stole away in secret and vanished without a trace. Their whereabouts thereafter have been the subject of much conjecture among historians.
Mercedes, Benevolent Soul & Jeritza, Bloodstained Demon
Once those who slither in the dark were finally defeated, Mercedes left home and opened a small orphanage in the Faerghus region with her mother. After many years of kind service raising children who had lost their families, she received a letter bearing familiar handwriting. Its author, a prisoner in Enbarr, expressed his sincerest well-wishes to Mercedes and her family. Still more time passed until, one day, the man who wrote the letter paid her a visit. With joyful tears in her eyes, Mercedes smiled, took Emile by the hand, and at last welcomed him home.
Bernadetta, Eternal Loner & Jeritza, Bloodstained Demon
After the war for Fódlan, Jeritza threw himself fully into the struggle against those who slither in the dark. Visage masked by the likeness of death itself, he laid waste to his enemies with a scythe that terrified friend and foe alike. When it was all over, he stole away in secret and vanished. At the same time, a mysterious guest arrived in Varley territory, which Bernadetta had inherited from her father. On that day, the reclusive noble and her guest were seen walking the grounds pleasantly together. A rendition of that scene, said to be painted by Bernadetta herself, remains at the estate to this day.
Constance, Sorcery Incarnate & Jeritza, Bloodstained Demon
After the war, Jeritza and Constance joined the battle against those who slither in the dark. In that dire struggle, which raged across the continent, Constance earned her noble title with powerful magic that proved essential to victory. Her rise in status ruffled more than a few feathers, but Jeritza kept the Imperial nobility in line. It is said, in the ballads composed about the couple, that they swore their wedding vows in the beautiful rose garden they had planted together on the Nuvelle estate.
Quotes
- Main article:
Jeritza/Quotes (Three Houses) - Main article:
Death Knight/Quotes (Heroes)
Other appearances
Fire Emblem Cipher
This character is currently featured on two cards in Fire Emblem Cipher, one each as Jeritza and the Death Knight; he has yet to be featured as Emile.
| Fire Emblem Cipher data for Jeritza and the Death Knight | |||||
|---|---|---|---|---|---|

|
Funeral-Knight of Hell, Death Knight | ||||
| "One of us will die, the other will live. I will enjoy this dance of damnation." | |||||
| Attack: 70 | Support: 0 | Range: 1 | Deploy Cost: 4 | ||
| Class: Death Knight | Tier: Advanced | Class Change Cost: 3 | |||
| Scythe of Sariel: [Trigger] [Once per turn] When one of your opponent's orbs is destroyed, choose 1 non-lord enemy, and destroy them. Commander: [Always] This unit is immune to destruction as the cost or effect of skills. | |||||
| Card #B19-047HN • Artist: Setsu | |||||

|
Masked Fencing Instructor, Jeritza | ||||
| "I am Jeritza. I teach here. Weapon instruction." | |||||
| Attack: 70 | Support: 10 | Range: 1 | Deploy Cost: 3 | ||
| Class: Myrmidon | Tier: Base | Class Change Cost: -- | |||
| “You look bored. Care to duel?”: [Activate] [Once per turn] Choose 1 non-Main Character enemy who is in the Front Line. Until the end of the turn, that enemy cannot evade. | |||||
| Card #B21-045N • Artist: Setsu | |||||
| Some card information translation provided by Serenes Forest. For more detailed strategic information on these cards, see their TCG wiki article on Jeritza as well as Death_Knight. | |||||
Trivia
- The Death Knight is tied for the most appearances as an enemy in a single main-series game.
- If paralogues are discounted, he has 6 appearances and is tied with Edelgard; he is fought in chapters 4, 6, 8, 12, and either 18 and 19 of the Verdant Wind route or 17 and 18 of the Silver Snow route of Three Houses.
- If paralogues are counted, he has 7 appearances and is tied with Hubert; he is fought in the above chapters, as well as The Face Beneath.
- The Death Knight has no defeat quotes during Chapter 12 of the Black Eagles route should he fall in battle.
Etymology and other languages
Jeritza
| Names, etymology, and in other regions | ||
|---|---|---|
| Language | Name | Definition, etymology, and notes |
| English |
Jeritza von Hrym |
Full name, known by just Jeritza in most menus. |
| Spanish |
Jeritza von Hrym |
As above. |
| French |
Jeritza von Hrym |
As above. |
| German |
Jeritza von Hrym |
As above. |
| Italian |
Jeritza von Hrym |
As above. |
| Korean |
예리차 폰 프륨 |
Jeriza von Hrym |
| Simplified Chinese |
伊艾里扎·冯·弗琉慕 |
Jeriza von Hrym |
| Traditional Chinese |
伊艾里扎‧馮‧弗琉慕 |
Jeriza von Hrym |
Death Knight
| Names, etymology, and in other regions | ||
|---|---|---|
| Language | Name | Definition, etymology, and notes |
| English |
Death Knight |
-- |
| Spanish |
Caballero Sanguinario |
Bloodthirsty Knight |
| French |
Chevalier Macabre |
Macabre Knight |
| German |
Ritter des Todes |
Knight of Death |
| Italian |
Cavaliere Infernale |
Infernal Knight |
| Korean |
사신기사 |
Reaper Knight |
| Simplified Chinese |
死神骑士 |
Death God Knight |
| Traditional Chinese |
死神騎士 |
Death God Knight |
Emile
| Names, etymology, and in other regions | ||
|---|---|---|
| Language | Name | Definition, etymology, and notes |
| English |
Emile |
From the Roman surname "Aemilius", derived from the Latin "aemulus" meaning "rival".[2] |
| Spanish |
Emile |
As above. |
| French |
Emile |
As above. |
| German |
Emile |
As above. |
| Italian |
Emile |
As above. |
| Korean |
에밀 |
Emile |
| Simplified Chinese |
艾米尔 |
Emile |
| Traditional Chinese |
艾米爾 |
Emile |
Gallery

High quality portrait artwork of Jeritza with his mask from Three Houses.

Portrait artwork of Jeritza without his mask from Three Houses.

Jeritza's S-support illustration with male Byleth.

Jeritza's S-support illustration with female Byleth.
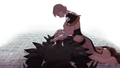
Mercedes crying over Emile's death.
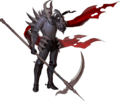
Artwork of the Death Knight from Three Houses.

High quality portrait artwork of the Death Knight from Three Houses.
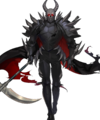
Artwork of Death Knight: The Reaper from Heroes.
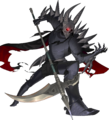
Artwork of Death Knight: The Reaper from Heroes.
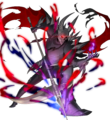
Artwork of Death Knight: The Reaper from Heroes.
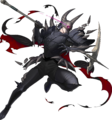
Artwork of Death Knight: The Reaper from Heroes.


External links
- The Death Knight's page on the Japanese official website
- Jeritza's page on the Japanese official website
References
- ↑ 1.0 1.1 Credits
- ↑ Meaning, origin and history of the name Emile - Behind the Name, Behind the Name, Retrieved: February 29, 2020

|
This article is part of Project Characters, a project focused on writing articles for every character present in the Fire Emblem series. |
| Fire Emblem Heroes | |||||||||||||||||||||||||||||||||||||||||||||||||||||||||||||||
|---|---|---|---|---|---|---|---|---|---|---|---|---|---|---|---|---|---|---|---|---|---|---|---|---|---|---|---|---|---|---|---|---|---|---|---|---|---|---|---|---|---|---|---|---|---|---|---|---|---|---|---|---|---|---|---|---|---|---|---|---|---|---|---|
| |||||||||||||||||||||||||||||||||||||||||||||||||||||||||||||||