| Site News |
|---|
| Warning: This wiki contains spoilers. Read at your own risk! Social media: If you would like, please join our Discord server, and/or follow us on Twitter (X) or Tumblr! |
An Oasis of Magic: Difference between revisions
m (→Enemy data) |
Thecornerman (talk | contribs) m (Text replacement - "[Cc]hapter (\d+)" to "Chapter $1") |
||
| (63 intermediate revisions by 13 users not shown) | |||
| Line 1: | Line 1: | ||
{{Chapter Infobox | {{Chapter Infobox | ||
|image=[[File:Cm fe11 15.png|200px]] | |image=[[File:Cm fe11 15.png|200px]] | ||
|location=Khadein | |location=Khadein | ||
| | |boss=[[Gharnef]] | ||
| | |previous=[[Land of Sorrow (Shadow Dragon)|Land of Sorrow]] | ||
|next=[[The Battle for Altea]] | |||
}} | }} | ||
'''An Oasis of Magic''' is the | |||
'''An Oasis of Magic''' (Japanese: {{hl|魔道の国カダイン|Madō no kuni kadain}} ''Khadein, Land of Sorcery'') is the fifteenth chapter in {{FE1}} and {{FE11}} and the twelfth chapter in Book I of {{FE3}}. | |||
==Plot== | ==Plot== | ||
{{main|An Oasis of Magic/Script}} | {{main|An Oasis of Magic/Script}} | ||
[[Marth]] and his companions attack [[Khadein]] and are personally accosted by [[Gharnef]], who proves immune to harm thanks to his dark tome [[Imhullu]]. Eventually, Gharnef bids Marth to pursue him to Thabes if he wants to reclaim [[Falchion (Archanea)|Falchion]] and departs. Marth seizes the castle and is telepathically contacted by the White Sage [[Gotoh]], who explains that Gharnef was once his pupil alongside [[Miloah]] before stealing Imhullu, and he ultimately intends to betray [[Dolhr]] and conquer the world. To atone for his failures in teaching Gharnef, Gotoh directs Marth to collect the [[Lightsphere]] and [[Starsphere]] and bring them to him in [[Macedon]] so he can create the magic tome [[Starlight]], which can pierce Imhullu's defenses. | |||
==Chapter data== | ==Chapter data== | ||
{{Tab | {{Tab | ||
|default=3 | |default=3 | ||
|tab1=''Shadow Dragon | |tab1=''Shadow Dragon & the Blade of Light'' | ||
|tab2=''Mystery of the Emblem'' | |tab2=''Mystery of the Emblem'' | ||
|tab3=''Shadow Dragon'' | |tab3=''Shadow Dragon'' | ||
|content1={{ | |content1={{ChapData | ||
|victory=Seize | |victory=Seize | ||
|defeat=Marth dies | |defeat=[[Marth]] dies | ||
|ally=16 | |ally=16 | ||
|enemy=19{{h|+8|Reinforcements}}{{h|−1|Upon Gharnef's retreat}} | |||
|enemy=19{{ | |||
|map=[[File:Cm fe01 15.png]] | |map=[[File:Cm fe01 15.png]] | ||
|col=30 | |||
|row=28 | |||
}} | }} | ||
|content2={{ | Units are arranged based on their position in deployment order after Marth. | ||
|content2={{ChapData | |||
|victory=Seize | |victory=Seize | ||
|defeat=Marth | |defeat=[[Marth]] dies | ||
|ally= | |ally=1–15 | ||
|enemy=17{{h|+10|Reinforcements}}{{h|−1|Upon Gharnef's retreat}} | |||
|enemy=17{{ | |||
|map=[[File:Cm fe03 b1 12.png]] | |map=[[File:Cm fe03 b1 12.png]] | ||
|}} | |col=30 | ||
|content3={{ | |row=27 | ||
}} | |||
|content3={{ChapData | |||
|victory=Seize | |victory=Seize | ||
|defeat=Marth dies | |defeat=[[Marth]] dies | ||
|ally= | |ally=1–16 | ||
|enemy=19{{h|+11|Reinforcements}}{{h|−1|Upon Gharnef's retreat}} | |||
|enemy=19{{ | |map=[[File:Cm fe11 15.png|512px]] | ||
|map=[[File:Cm fe11 15.png| | |col=30 | ||
|}} | |row=28 | ||
}} | |||
}} | }} | ||
===Character data=== | ===Character data=== | ||
{{Tab | {{Tab | ||
|width=100% | |||
|default=3 | |default=3 | ||
|tab1=''Shadow Dragon | |tab1=''Shadow Dragon & the Blade of Light'' | ||
|tab2=''Mystery of the Emblem'' | |tab2=''Mystery of the Emblem'' | ||
|tab3=''Shadow Dragon'' | |tab3=''Shadow Dragon'' | ||
|content1={{ChapChars | |content1={{ChapChars | ||
|game#=01 | |game#=01 | ||
|return1= | |forced1=marth | ||
|return2= | |return1=jagen | ||
|return3= | |return2=cain | ||
|return4= | |return3=abel | ||
|return5= | |return4=draug | ||
|return6= | |return5=gordin | ||
|return7= | |return6=caeda | ||
|return8= | |return7=wrys | ||
|return9= | |return8=bord | ||
|return9=cord | |||
|return10=barst | |return10=barst | ||
|return11= | |return11=ogma | ||
|return12= | |return12=darros | ||
|return13= | |return13=castor | ||
|return14= | |return14=julian | ||
|return15= | |return15=lena | ||
|return16= | |return16=navarre | ||
|return17= | |return17=merric | ||
|return18=matthis | |return18=matthis | ||
|return19= | |return19=hardin | ||
|return20=wolf | |return20=wolf | ||
|return21=sedgar | |return21=sedgar | ||
|return22=roshea | |return22=roshea | ||
|return23=vyland | |return23=vyland | ||
|return24= | |return24=wendell | ||
|return25= | |return25=rickard | ||
|return26= | |return26=bantu | ||
|return27= | |return27=caesar | ||
|return28= | |return28=radd | ||
|return29= | |return29=roger | ||
|return30= | |return30=jeorge | ||
|return31= | |return31=maria | ||
|return32= | |return32=minerva | ||
|return33= | |return33=linde | ||
|return34= | |return34=jake | ||
|return35= | |return35=dolph | ||
|return36= | |return36=macellan | ||
|return37= | |return37=tomas | ||
|return38= | |return38=boah | ||
|return39= | |return39=midia | ||
|return40= | |return40=astram | ||
|return41= | |return41=beck | ||
|return42= | |return42=catria | ||
|return43=palla | |return43=palla | ||
}} | }} | ||
|content2={{ChapChars | |content2={{ChapChars | ||
|game#=03 | |game#=03 | ||
| | |forced1=marth 01 | ||
| | |forced1article=Marth | ||
| | |return1=abel | ||
| | |return2=cain | ||
|return3=jagen | |return3=jagen | ||
|return4= | |return4=gordin | ||
|return5= | |return5=draug | ||
|return6= | |return6=caeda 01 | ||
|return7= | |return6article=Caeda | ||
|return8= | |return7=bord | ||
|return8=cord | |||
|return9=barst | |return9=barst | ||
|return10= | |return10=ogma | ||
|return11= | |return11=castor | ||
|return12= | |return12=julian | ||
|return13= | |return13=lena | ||
|return14= | |return14=navarre | ||
|return15= | |return15=roshea | ||
|return16= | |return16=vyland | ||
|return17=sedgar | |return17=sedgar | ||
|return18= | |return18=wolf | ||
|return19= | |return19=hardin 01 | ||
| | |return19article=Hardin | ||
| | |return20=matthis | ||
|return21= | |return21=merric | ||
|return22= | |return22=wendell | ||
|return23=rickard | |return23=rickard | ||
|return24= | |return24=bantu | ||
|return25= | |return25=caesar | ||
|return26= | |return26=radd | ||
|return27= | |return27=maria | ||
|return28= | |return28=minerva | ||
|return29= | |return29=jeorge | ||
|return30=linde | |return30=linde | ||
|return31= | |return31=dolph | ||
|return32= | |return32=macellan | ||
|return33= | |return33=tomas | ||
|return34= | |return34=boah | ||
|return35= | |return35=midia | ||
|return36= | |return36=astram | ||
|return37= | |return37=catria | ||
|return38= | |return38=palla | ||
}} | }} | ||
|content3={{ChapChars | |content3={{ChapChars | ||
|game#=11 | |game#=11 | ||
|return1= | |forced1=marth | ||
|return2= | |return1=abel | ||
|return3= | |return2=frey | ||
|return4= | |return3=jagen | ||
|return5= | |return4=cain | ||
|return6= | |return5=gordin | ||
|return7= | |return6=draug | ||
|return8= | |return7=norne | ||
|return9= | |return8=caeda | ||
|return10= | |return9=wrys | ||
|return11= | |return10=ogma | ||
|return12= | |return11=barst | ||
|return13= | |return12=bord | ||
|return14= | |return13=cord | ||
|return15= | |return14=darros | ||
|return16= | |return15=castor | ||
|return17= | |return16=julian | ||
|return18= | |return17=lena | ||
|return19= | |return18=navarre | ||
|return19=merric | |||
|return20=matthis | |return20=matthis | ||
|return21= | |return21=wolf | ||
|return22= | |return22=sedgar | ||
|return23=roshea | |||
|return23= | |return24=vyland | ||
|return24= | |return25=hardin | ||
|return25= | |return26=wendell | ||
|return26= | |return27=rickard | ||
|return27= | |return28=athena | ||
|return28= | |return29=bantu | ||
|return29= | |return30=caesar | ||
|return30= | |return31=radd | ||
|return31= | |return32=roger | ||
|return32= | |return33=jeorge | ||
|return33= | |return34=maria | ||
|return34= | |return35=minerva | ||
|return35= | |return36=linde | ||
|return36= | |return37=jake | ||
|return37= | |return38=dolph | ||
|return38= | |return39=macellan | ||
|return39= | |return40=tomas | ||
|return40= | |return41=boah | ||
|return41= | |return42=midia | ||
|return42= | |return43=horace | ||
|return43= | |return44=astram | ||
|return44= | |return45=beck | ||
|return45= | |return46=catria | ||
|return46= | |||
|return47=palla | |return47=palla | ||
}} | }} | ||
}} | }} | ||
| Line 201: | Line 204: | ||
{{tab | {{tab | ||
|default=3 | |default=3 | ||
|width= | |width=100% | ||
|tab1=''Shadow Dragon | |tab1=''Shadow Dragon & the Blade of Light'' | ||
|tab2=''Mystery of the Emblem'' | |tab2=''Mystery of the Emblem'' | ||
|tab3=''Shadow Dragon'' | |tab3=''Shadow Dragon'' | ||
| Line 209: | Line 212: | ||
|item1=Talisman | |item1=Talisman | ||
|item1image=none | |item1image=none | ||
|obtain1=Left chest | |obtain1=Left [[chest]] | ||
|item2=Power Ring | |item2=Power Ring | ||
|item2image=none | |item2image=none | ||
|obtain2=Right chest | |obtain2=Right [[chest]] | ||
|item3= | |item3=Thunder | ||
|item3image=none | |item3image=none | ||
|obtain3=Dropped by | |obtain3=Dropped by enemy [[Mage]] | ||
|itemlast= | |itemlast=Recover | ||
|itemlastimage=none | |itemlastimage=none | ||
|obtainlast=Dropped by enemy [[Thief]] | |||
|obtainlast=Dropped by | }} | ||
|content2={{ChapItems | |content2={{ChapItems | ||
|platform=snes01 | |platform=snes01 | ||
|item1=Talisman | |item1=Talisman | ||
|obtain1=Left treasure room chest | |obtain1=Left treasure room [[chest]] | ||
|item2=Secret Book | |item2=Secret Book | ||
|obtain2=Right treasure room chest | |obtain2=Right treasure room [[chest]] | ||
|item3=Thunder | |item3=Thunder | ||
|obtain3=Dropped by enemy [[Mage]] | |||
|obtain3=Dropped by | |||
|itemlast=Recover | |itemlast=Recover | ||
|obtainlast=Dropped by | |obtainlast=Dropped by enemy [[Thief]] | ||
}} | |||
|content3={{ChapItems | |content3={{ChapItems | ||
|platform=ds | |platform=ds | ||
|item1=Talisman | |item1=Talisman | ||
|obtain1=Treasure room, leftmost chest | |obtain1=Treasure room, leftmost [[chest]] | ||
|item2=Energy Drop | |item2=Energy Drop | ||
|obtain2=Treasure room, rightmost chest | |obtain2=Treasure room, rightmost [[chest]] | ||
|item3= | |item3=Thunder | ||
|obtain3=Dropped by | |obtain3=Dropped by enemy [[Mage]] | ||
|itemlast= | |itemlast=Recover | ||
|obtainlast=Dropped by enemy [[Thief]] | |||
|obtainlast=Dropped by | }} | ||
}} | }} | ||
| Line 250: | Line 250: | ||
{{tab | {{tab | ||
|default=3 | |default=3 | ||
|width= | |width=100% | ||
|tab1=''Shadow Dragon | |tab1=''Shadow Dragon & the Blade of Light'' | ||
|tab2=''Mystery of the Emblem'' | |tab2=''Mystery of the Emblem'' | ||
|tab3=''Shadow Dragon'' | |tab3=''Shadow Dragon'' | ||
| Line 272: | Line 272: | ||
|bocost2=2200 | |bocost2=2200 | ||
|tome1=Fire | |tome1=Fire | ||
|tocost1=300 | |tocost1=300 | ||
|tome2=Thunder | |tome2=Thunder | ||
|tocost2=460 | |tocost2=460 | ||
|tome3=Blizzard | |tome3=Blizzard | ||
| Line 289: | Line 287: | ||
|item1=Vulnerary | |item1=Vulnerary | ||
|itcost1=600 | |itcost1=600 | ||
}} | |||
|content2={{ChapShop SNES01 | |content2={{ChapShop SNES01 | ||
|tome1=Fire | |tome1=Fire | ||
|tocost1=500 | |tocost1=500 | ||
|tome2=Thunder | |tome2=Thunder | ||
|tocost2=630 | |tocost2=630 | ||
|tome3=Blizzard | |tome3=Blizzard | ||
| Line 327: | Line 323: | ||
|bow2=Silver Bow | |bow2=Silver Bow | ||
|bocost2=2200 | |bocost2=2200 | ||
}} | |||
|content3={{ChapShop DS | |content3={{ChapShop DS | ||
|sword1=Steel Sword | |sword1=Steel Sword | ||
| Line 354: | Line 350: | ||
|bocost2=2100 | |bocost2=2100 | ||
|tome1=Fire | |tome1=Fire | ||
|tocost1=300 | |tocost1=300 | ||
|tome2=Thunder | |tome2=Thunder | ||
|tocost2=420 | |tocost2=420 | ||
|tome3=Blizzard | |tome3=Blizzard | ||
| Line 381: | Line 375: | ||
|default=3 | |default=3 | ||
|width=100% | |width=100% | ||
|tab1=''Shadow Dragon | |header=Enemy data | ||
|tab1=''Shadow Dragon & the Blade of Light'' | |||
|tab2=''Mystery of the Emblem'' | |tab2=''Mystery of the Emblem'' | ||
|tab3=''Shadow Dragon'' | |tab3=''Shadow Dragon'' | ||
|content1={{ChapUnitHdr|type=Enemy|platform=nes01}} | |||
|content1={{ | {{ChapUnitCellFE1 | ||
|platform=nes01 | |name=Khadein | ||
| | |class=Bishop | ||
| | |lv=5 | ||
| | |#=1 | ||
|# | |hp=28 | ||
| | |str=5 | ||
| | |skill=3 | ||
| | |spd=16 | ||
|def=10 | |||
| | |mov=6 | ||
| | |inventory=[[Swarm]] | ||
| | |notes=Does not move; stands on a [[Terrain/Family Computer games#Fire Emblem: Shadow Dragon & the Blade of Light|gate]], the chapter's seize point. | ||
| | }} | ||
{{ChapUnitCellFE1 | |||
| | |name=Khadein | ||
| | |class=Bishop | ||
| | |lv=3 | ||
|# | |#=1 | ||
| | |hp=25 | ||
| | |str=4 | ||
| | |skill=2 | ||
| | |spd=15 | ||
| | |def=9 | ||
| | |mov=6 | ||
| | |inventory=[[Thunder]] | ||
| | |notes=Moves to attack any player unit in range; moves to the western fort if no one is in range. | ||
}} | |||
{{ChapUnitCellFE1 | |||
| | |name=[[Gharnef]] | ||
|# | |class=Bishop | ||
| | |lv=10 | ||
| | |#=1 | ||
| | |hp=34 | ||
| | |str=7 | ||
| | |skill=5 | ||
| | |spd=18 | ||
| | |def=12 | ||
| | |mov=6 | ||
|inventory=[[Imhullu]] | |||
| | |notes=Drops {{drop|Falchion|article=Falchion (Archanea)}} upon defeat.{{h|*|This is impossible to achieve through normal gameplay.}}<br>• Leaves the map on turn 8.<br>• Moves to attack any player unit in range; moves to block the treasure room if no one is in range. | ||
| | }} | ||
| | {{ChapUnitCellFE1 | ||
|# | |name=Khadein | ||
| | |class=Mage | ||
| | |lv=5 | ||
| | |#=2 | ||
| | |hp=22 | ||
| | |str=3 | ||
| | |skill=3 | ||
| | |spd=7 | ||
| | |def=5 | ||
| | |mov=6 | ||
| | |inventory=[[Fire]] | ||
| | |notes=The southern one moves to attack any player unit in range; moves to the south fort if no one is in range. | ||
|# | }} | ||
| | {{ChapUnitCellFE1 | ||
|name=Khadein | |||
| | |class=Mage | ||
| | |lv=3 | ||
| | |#=1 | ||
| | |hp=19 | ||
| | |str=2 | ||
| | |skill=2 | ||
| | |spd=6 | ||
| | |def=4 | ||
| | |mov=6 | ||
|# | |inventory=[[Thunder]] | ||
| | }} | ||
| | {{ChapUnitCellFE1 | ||
| | |name=Dragoon | ||
| | |class=Wyvern Knight | ||
| | |classarticle=Dracoknight | ||
| | |lv=5 | ||
| | |#=2 | ||
| | |hp=28 | ||
| | |str=11 | ||
| | |skill=5 | ||
| | |spd=8 | ||
| | |def=16 | ||
| | |mov=10 | ||
| | |inventory=[[Javelin]] | ||
| | }} | ||
| | {{ChapUnitCellFE1 | ||
| | |name=Dragoon | ||
| | |class=Wyvern Knight | ||
| | |classarticle=Dracoknight | ||
| | |lv=7 | ||
| | |#=2 | ||
| | |hp=31 | ||
| | |str=12 | ||
|skill=6 | |||
| | |spd=9 | ||
| | |def=17 | ||
| | |mov=10 | ||
| | |inventory=[[Javelin]] | ||
| | |notes=• The northwest one moves to attack any player unit in range; moves north of the gate if no one is in range.<br>• The northeast one moves to attack any player unit in range; moves to the north fort if no one is in range. | ||
}} | |||
| | {{ChapUnitCellFE1 | ||
| | |name=Khadein | ||
| | |class=Mage | ||
|# | |lv=7 | ||
| | |#=2 | ||
|hp=25 | |||
| | |str=4 | ||
| | |skill=4 | ||
| | |spd=8 | ||
|# | |def=6 | ||
| | |mov=6 | ||
| | |inventory=[[Blizzard]] | ||
| | |notes=• The central one moves to attack any player unit in range; moves to the center of the map if no one is in range.<br>• The southern one moves to attack any player unit in range; moves west of the lake if no one is in range. | ||
| | }} | ||
| | {{ChapUnitCellFE1 | ||
| | |name=Khadein | ||
| | |class=Mage | ||
|lv=5 | |||
| | |#=2 | ||
| | |hp=22 | ||
| | |str=3 | ||
|# | |skill=3 | ||
| | |spd=7 | ||
|def=5 | |||
| | |mov=6 | ||
| | |inventory=[[Blizzard]] | ||
| | |notes=The right one moves to attack any player unit in range; moves south of the west fort if no one is in range; | ||
|# | }} | ||
| | {{ChapUnitCellFE1 | ||
| | |name=Khadein | ||
|class=Mage | |||
| | |lv=7 | ||
| | |#=1 | ||
| | |hp=25 | ||
| | |str=4 | ||
| | |skill=4 | ||
|spd=8 | |||
|def=6 | |||
| | |mov=6 | ||
| | |inventory=[[Thunder]] | ||
|notes=Drops a {{drop|Thunder}} upon defeat. | |||
| | }} | ||
| | {{ChapUnitCellFE1 | ||
| | |name=Khadein | ||
| | |class=Curate | ||
| | |lv=5 | ||
| | |#=3 | ||
| | |hp=22 | ||
| | |str=3 | ||
| | |skill=3 | ||
| | |spd=3 | ||
| | |def=5 | ||
| | |mov=5 | ||
| | |inventory=[[Mend]] | ||
| | }} | ||
| | {{ChapUnitCellFE1 | ||
| | |name=Khadein | ||
|# | |class=Thief | ||
| | |lv=3 | ||
| | |#=1 | ||
| | |hp=19 | ||
| | |str=4 | ||
| | |skill=2 | ||
| | |spd=10 | ||
| | |def=3 | ||
|mov=7 | |||
| | |inventory=[[Iron Sword]] | ||
| | |notes=Drops a {{drop|Recover}} upon defeat.<br>Prioritizes opening [[chest]]s. | ||
| | |last=y | ||
| | }} | ||
| | {{ChapUnitReinf|type=Enemy|platform=nes01}} | ||
| | {{ChapUnitCellFE1 | ||
| | |name=Khadein | ||
| | |class=Mage | ||
| | |lv=1 | ||
| | |#=8 | ||
|hp=16 | |||
|str=1 | |||
|skill=1 | |||
|spd=5 | |||
|def=3 | |||
|mov=6 | |||
|inventory=[[Fire]] | |||
|last=y | |||
}} | |||
{{ChapUnitFtr}} | |||
|content2={{ChapUnitHdr|type=Enemy|platform=snes01}} | |||
{{ChapUnitCellFE3 | |||
|name=Khadein | |||
|class=Bishop | |||
|lv=3 | |||
|#=1 | |||
|hp=27 | |||
|str=5 | |||
|skill=6 | |||
|spd=5 | |||
|def=4 | |||
|res=11 | |||
|mov=6 | |||
|inventory={{Item|3|Bolganone}} | |||
|notes=Does not move; stands on a [[Terrain/Super Famicom games#Fire Emblem: Mystery of the Emblem|gate]], the chapter's seize point. | |||
}} | |||
{{ChapUnitCellFE3 | |||
|name=Khadein | |||
|class=Bishop | |||
|lv=1 | |||
|#=1 | |||
|hp=26 | |||
|str=5 | |||
|skill=5 | |||
|spd=5 | |||
|def=4 | |||
|res=10 | |||
|mov=6 | |||
|inventory={{Item|3|Fire}} • {{Item|3|Heal}} | |||
}} | |||
{{ChapUnitCellFE3 | |||
|name=[[Gharnef]] | |||
|class=Bishop | |||
|lv=10 | |||
|#=1 | |||
|hp=34 | |||
|str=10 | |||
|skill=2 | |||
|spd=6 | |||
|lck=4 | |||
|def=10 | |||
|res=8 | |||
|mov=6 | |||
|inventory={{Item|3|Imhullu}} • {{Item|3|Falchion|link=Falchion (Archanea)|type=drop}} | |||
|notes=Leaves the map at the start of turn 4. | |||
}} | |||
{{ChapUnitCellFE3 | |||
|name=Khadein | |||
|class=Mage | |||
|lv=3 | |||
|#=1 | |||
|hp=17 | |||
|str=1 | |||
|skill=2 | |||
|spd=3 | |||
|def=2 | |||
|res=4 | |||
|mov=6 | |||
|inventory={{Item|3|Fire}} | |||
}} | |||
{{ChapUnitCellFE3 | |||
|name=Khadein | |||
|class=Mage | |||
|lv=3 | |||
|#=2 | |||
|hp=17 | |||
|str=1 | |||
|skill=2 | |||
|spd=3 | |||
|def=2 | |||
|res=4 | |||
|mov=6 | |||
|inventory={{Item|3|Thunder}} | |||
}} | |||
{{ChapUnitCellFE3 | |||
|name=Pegasus | |||
|class=Pegasus Knight | |||
|lv=5 | |||
|#=1 | |||
|hp=20 | |||
|str=6 | |||
|skill=5 | |||
|spd=7 | |||
|def=7 | |||
|res=6 | |||
|mov=8 | |||
|inventory={{Item|3|Iron Lance}} | |||
}} | |||
{{ChapUnitCellFE3 | |||
|name=Pegasus | |||
|class=Pegasus Knight | |||
|lv=5 | |||
|#=1 | |||
|hp=20 | |||
|str=6 | |||
|skill=5 | |||
|spd=7 | |||
|def=7 | |||
|res=6 | |||
|mov=8 | |||
|inventory={{Item|3|Steel Lance}} | |||
}} | |||
{{ChapUnitCellFE3 | |||
|name=Dragoon | |||
|class=Dracoknight | |||
|lv=3 | |||
|#=1 | |||
|hp=31 | |||
|str=10 | |||
|skill=6 | |||
|spd=8 | |||
|def=14 | |||
|res=0 | |||
|mov=10 | |||
|inventory={{Item|3|Iron Lance}} | |||
}} | |||
{{ChapUnitCellFE3 | |||
|name=Dragoon | |||
|class=Dracoknight | |||
|lv=3 | |||
|#=1 | |||
|hp=31 | |||
|str=10 | |||
|skill=6 | |||
|spd=8 | |||
|def=14 | |||
|res=0 | |||
|mov=10 | |||
|inventory={{Item|3|Javelin}} | |||
}} | |||
{{ChapUnitCellFE3 | |||
|name=Khadein | |||
|class=Mage | |||
|lv=3 | |||
|#=1 | |||
|hp=17 | |||
|str=1 | |||
|skill=2 | |||
|spd=3 | |||
|def=2 | |||
|res=4 | |||
|mov=6 | |||
|inventory={{Item|3|Elfire}} | |||
}} | |||
{{ChapUnitCellFE3 | |||
|name=Khadein | |||
|class=Mage | |||
|lv=1 | |||
|#=2 | |||
|hp=16 | |||
|str=1 | |||
|skill=1 | |||
|spd=3 | |||
|def=2 | |||
|res=3 | |||
|mov=6 | |||
|inventory={{Item|3|Fire}} | |||
}} | |||
{{ChapUnitCellFE3 | |||
|name=Khadein | |||
|class=Mage | |||
|lv=1 | |||
|#=1 | |||
|hp=16 | |||
|str=1 | |||
|skill=1 | |||
|spd=3 | |||
|def=2 | |||
|res=3 | |||
|mov=6 | |||
|inventory={{Item|3|Thunder|type=drop}} | |||
}} | |||
{{ChapUnitCellFE3 | |||
|name=Khadein | |||
|class=Bishop | |||
|lv=3 | |||
|#=2 | |||
|hp=27 | |||
|str=5 | |||
|skill=6 | |||
|spd=5 | |||
|def=4 | |||
|res=11 | |||
|mov=6 | |||
|inventory={{Item|3|Recover}} | |||
}} | |||
{{ChapUnitCellFE3 | |||
|name=Thief | |||
|class=Thief | |||
|lv=5 | |||
|#=1 | |||
|hp=18 | |||
|str=3 | |||
|skill=3 | |||
|spd=9 | |||
|def=2 | |||
|res=0 | |||
|mov=7 | |||
|inventory={{Item|3|Steel Sword}} • {{Item|3|Recover|type=drop}} | |||
|notes=Ignores combat; opens [[chest]]s, then moves to escape to the northeast. | |||
|last=y | |||
}} | |||
{{ChapUnitReinf|type=Enemy|platform=snes01}} | |||
{{ChapUnitCellFE3 | |||
|name=Khadein | |||
|class=Mage | |||
|lv=1 | |||
|#=10 | |||
|hp=16 | |||
|str=1 | |||
|skill=1 | |||
|spd=3 | |||
|def=2 | |||
|res=3 | |||
|mov=6 | |||
|inventory={{Item|3|Thunder}} | |||
|last=y | |||
}} | |||
{{ChapUnitFtr}} | |||
|content3=:''Stats with a decimal can vary randomly; the decimal represents the chance for the stat to increase to the nearest integer, or otherwise be truncated.'' | |||
{{Tab | |||
|width=100% | |||
|tab1=Normal | |||
|tab2=Hard-1 | |||
|tab3=Hard-2 | |||
|tab4=Hard-3 | |||
|tab5=Hard-4 | |||
|tab6=Hard-5 | |||
|content1={{ChapUnitHdr|type=Enemy|platform=ds01}} | |||
{{ChapUnitCellFE11 | |||
|name=Khadein | |||
|class=Bishop | |||
|lv=5 | |||
|#=1 | |||
|hp=23.6 | |||
|str=1 | |||
|mag=4.2 | |||
|skill=3.2 | |||
|spd=5.2 | |||
|lck=0 | |||
|def=3.8 | |||
|res=10 | |||
|inventory={{Item|ds|Swarm}} | |||
|notes=Stands on a [[Terrain/Nintendo DS games#Fire Emblem: Shadow Dragon|gate]], the chapter's seize point. | |||
}} | |||
{{ChapUnitCellFE11 | |||
|name=Khadein | |||
|class=Bishop | |||
|lv=3 | |||
|#=1 | |||
|hp=22.8 | |||
|str=1 | |||
|mag=3.6 | |||
|skill=2.6 | |||
|spd=4.6 | |||
|lck=0 | |||
|def=3.4 | |||
|res=9 | |||
|mov=6 | |||
|inventory={{Item|ds|Thunder}} | |||
|notes=Moves to attack units in range. | |||
}} | |||
{{ChapUnitCellFE11 | |||
|name=[[Gharnef]] | |||
|class=Sorcerer | |||
|lv=15 | |||
|#=1 | |||
|hp=34 | |||
|str=2 | |||
|mag=5 | |||
|skill=5 | |||
|spd=18 | |||
|lck=0 | |||
|def=11 | |||
|res=10 | |||
|mov=6 | |||
|inventory={{Item|ds|Imhullu}} | |||
|notes=• Immediately begins moving unprovoked.<br>• Leaves the map on turn 6. | |||
}} | |||
{{ChapUnitCellFE11 | |||
|name=Khadein | |||
|class=Mage | |||
|lv=7 | |||
|#=2 | |||
|hp=18.4 | |||
|str=0 | |||
|mag=5.4 | |||
|skill=2.8 | |||
|spd=4.8 | |||
|lck=0 | |||
|def=3.2 | |||
|res=4.2 | |||
|mov=6 | |||
|inventory={{Item|ds|Fire}} | |||
|notes=• The southwest one moves to attack units in range; returns to his starting position if no one is in range.<br>• The easternmost one begins moving if the adjacent Mage is provoked. | |||
}} | |||
{{ChapUnitCellFE11 | |||
|name=Khadein | |||
|class=Mage | |||
|lv=9 | |||
|#=1 | |||
|hp=19.2 | |||
|str=0 | |||
|mag=6.2 | |||
|skill=3.4 | |||
|spd=5.4 | |||
|lck=0 | |||
|def=3.6 | |||
|res=4.6 | |||
|mov=6 | |||
|inventory={{Item|ds|Thunder}} | |||
|notes=Moves to attack units in range. | |||
}} | |||
{{ChapUnitCellFE11 | |||
|name=Dragoons | |||
|class=Dracoknight | |||
|lv=3 | |||
|#=4 | |||
|hp=25.8 | |||
|str=8.5 | |||
|mag=1 | |||
|skill=6.2 | |||
|spd=8.8 | |||
|lck=0 | |||
|def=10.6 | |||
|res=3.2 | |||
|mov=10 | |||
|inventory={{Item|ds|Javelin}} | |||
|notes=• The easternmost and westernmost ones both begin moving if either is provoked.<br>• The middle two immediately begin moving unprovoked. | |||
}} | |||
{{ChapUnitCellFE11 | |||
|name=Khadein | |||
|class=Mage | |||
|lv=9 | |||
|#=2 | |||
|hp=19.2 | |||
|str=0 | |||
|mag=6.2 | |||
|skill=3.4 | |||
|spd=5.4 | |||
|lck=0 | |||
|def=3.6 | |||
|res=4.6 | |||
|mov=6 | |||
|inventory={{Item|ds|Blizzard}} | |||
|notes=Moves to attack units in range; the southernmost one returns to his starting position if no one is in range. | |||
}} | |||
{{ChapUnitCellFE11 | |||
|name=Khadein | |||
|class=Mage | |||
|lv=7 | |||
|#=2 | |||
|hp=18.4 | |||
|str=0 | |||
|mag=5.4 | |||
|skill=2.8 | |||
|spd=4.8 | |||
|lck=0 | |||
|def=3.2 | |||
|res=4.2 | |||
|mov=6 | |||
|inventory={{Item|ds|Blizzard}} | |||
|notes=Both begin moving if either of them, the center-west [[Bishop]], or the the reinforcements from the western fort is provoked. | |||
}} | |||
{{ChapUnitCellFE11 | |||
|name=Khadein | |||
|class=Mage | |||
|lv=5 | |||
|#=1 | |||
|hp=17.6 | |||
|str=0 | |||
|mag=4.6 | |||
|skill=2.2 | |||
|spd=4.2 | |||
|lck=0 | |||
|def=2.8 | |||
|res=3.8 | |||
|mov=6 | |||
|inventory={{Item|ds|Thunder|type=drop}} | |||
|notes=Begins moving if the adjacent Mage is provoked. | |||
}} | |||
{{ChapUnitCellFE11 | |||
|name=Khadein | |||
|class=Curate | |||
|lv=7 | |||
|#=3 | |||
|hp=18.4 | |||
|str=0 | |||
|mag=2.2 | |||
|skill=2.8 | |||
|spd=5.8 | |||
|lck=0 | |||
|def=4.2 | |||
|res=8.4 | |||
|mov=5 | |||
|inventory={{Item|ds|Mend}} | |||
|notes=Moves to heal units within twice their movement; return to their starting positions if no one is in range. | |||
}} | |||
{{ChapUnitCellFE11 | |||
|name=Khadein | |||
|class=Thief | |||
|lv=5 | |||
|#=1 | |||
|hp=18.4 | |||
|str=2.8 | |||
|mag=0 | |||
|skill=2.6 | |||
|spd=9 | |||
|lck=0 | |||
|def=2.2 | |||
|res=0 | |||
|mov=7 | |||
|inventory={{Item|ds|Iron Sword}} • {{Item|ds|Recover|type=drop}} | |||
|notes=Moves to open the left [[chest]], then moves to escape west; ignores combat, except to attack units blocking the escape point. | |||
|last=y | |||
}} | |||
{{ChapUnitReinf|type=Enemy|platform=ds}} | |||
{{ChapUnitCellFE11 | |||
|name=Khadein | |||
|class=Mage | |||
|lv=7 | |||
|#=6 | |||
|hp=18.4 | |||
|str=0 | |||
|mag=5.4 | |||
|skill=2.8 | |||
|spd=4.8 | |||
|lck=0 | |||
|def=3.2 | |||
|res=4.2 | |||
|mov=6 | |||
|inventory={{Item|ds|Fire}} | |||
}} | |||
{{ChapUnitCellFE11 | |||
|name=Dragoons | |||
|class=Dracoknight | |||
|lv=3 | |||
|#=3 | |||
|hp=25.8 | |||
|str=8.5 | |||
|mag=1 | |||
|skill=6.2 | |||
|spd=8.8 | |||
|lck=0 | |||
|def=10.6 | |||
|res=3.2 | |||
|mov=10 | |||
|inventory={{Item|ds|Javelin}} | |||
}} | |||
{{ChapUnitCellFE11 | |||
|name=Khadein | |||
|class=Mage | |||
|lv=9 | |||
|#=1 | |||
|hp=19.2 | |||
|str=0 | |||
|mag=6.2 | |||
|skill=3.4 | |||
|spd=5.4 | |||
|lck=0 | |||
|def=3.6 | |||
|res=4.6 | |||
|mov=6 | |||
|inventory={{Item|ds|Blizzard}} | |||
}} | |||
{{ChapUnitCellFE11 | |||
|name=Khadein | |||
|class=Mage | |||
|lv=9 | |||
|#=1 | |||
|hp=19.2 | |||
|str=0 | |||
|mag=6.2 | |||
|skill=3.4 | |||
|spd=5.4 | |||
|lck=0 | |||
|def=3.6 | |||
|res=4.6 | |||
|mov=6 | |||
|inventory={{Item|ds|Thunder}} | |||
|last=y | |||
}} | |||
{{ChapUnitFtr}} | |||
|content2={{ChapUnitHdr|type=Enemy|platform=ds01}} | |||
{{ChapUnitCellFE11 | |||
|name=Khadein | |||
|class=Bishop | |||
|lv=5 | |||
|#=1 | |||
|hp=24.8 | |||
|str=1 | |||
|mag=5.1 | |||
|skill=4.1 | |||
|spd=6.1 | |||
|lck=0 | |||
|def=3.8 | |||
|res=10 | |||
|inventory={{Item|ds|Swarm}} | |||
|notes=Stands on a [[Terrain/Nintendo DS games#Fire Emblem: Shadow Dragon|gate]], the chapter's seize point. | |||
}} | |||
{{ChapUnitCellFE11 | |||
|name=Khadein | |||
|class=Bishop | |||
|lv=3 | |||
|#=1 | |||
|hp=24 | |||
|str=1 | |||
|mag=4.5 | |||
|skill=3.5 | |||
|spd=5.5 | |||
|lck=0 | |||
|def=3.4 | |||
|res=9 | |||
|mov=6 | |||
|inventory={{Item|ds|Thunder}} | |||
|notes=Moves to attack units in range. | |||
}} | |||
{{ChapUnitCellFE11 | |||
|name=[[Gharnef]] | |||
|class=Sorcerer | |||
|lv=15 | |||
|#=1 | |||
|hp=35.2 | |||
|str=2 | |||
|mag=5.9 | |||
|skill=5.9 | |||
|spd=18.9 | |||
|lck=0 | |||
|def=11 | |||
|res=10 | |||
|mov=6 | |||
|inventory={{Item|ds|Imhullu}} | |||
|notes=• Immediately begins moving unprovoked.<br>• Leaves the map on turn 6. | |||
}} | |||
{{ChapUnitCellFE11 | |||
|name=Khadein | |||
|class=Mage | |||
|lv=7 | |||
|#=2 | |||
|hp=19.6 | |||
|str=0 | |||
|mag=6.6 | |||
|skill=3.7 | |||
|spd=5.7 | |||
|lck=0 | |||
|def=3.2 | |||
|res=4.2 | |||
|mov=6 | |||
|inventory={{Item|ds|Fire}} | |||
|notes=• The southwest one moves to attack units in range; returns to his starting position if no one is in range.<br>• The easternmost one begins moving if the adjacent Mage is provoked. | |||
}} | |||
{{ChapUnitCellFE11 | |||
|name=Khadein | |||
|class=Mage | |||
|lv=9 | |||
|#=1 | |||
|hp=20.4 | |||
|str=0 | |||
|mag=7.4 | |||
|skill=4.3 | |||
|spd=6.3 | |||
|lck=0 | |||
|def=3.6 | |||
|res=4.6 | |||
|mov=6 | |||
|inventory={{Item|ds|Thunder}} | |||
|notes=Moves to attack units in range. | |||
}} | |||
{{ChapUnitCellFE11 | |||
|name=Dragoons | |||
|class=Dracoknight | |||
|lv=3 | |||
|#=4 | |||
|hp=28.5 | |||
|str=9.25 | |||
|mag=1 | |||
|skill=6.5 | |||
|spd=10 | |||
|lck=0 | |||
|def=10.6 | |||
|res=3.2 | |||
|mov=10 | |||
|inventory={{Item|ds|Javelin}} | |||
|notes=• The easternmost and westernmost ones both begin moving if either is provoked.<br>• The middle two immediately begin moving unprovoked. | |||
}} | |||
{{ChapUnitCellFE11 | |||
|name=Khadein | |||
|class=Mage | |||
|lv=9 | |||
|#=2 | |||
|hp=20.4 | |||
|str=0 | |||
|mag=7.4 | |||
|skill=4.3 | |||
|spd=6.3 | |||
|lck=0 | |||
|def=3.6 | |||
|res=4.6 | |||
|mov=6 | |||
|inventory={{Item|ds|Blizzard}} | |||
|notes=Moves to attack units in range; the southernmost one returns to his starting position if no one is in range. | |||
}} | |||
{{ChapUnitCellFE11 | |||
|name=Khadein | |||
|class=Mage | |||
|lv=7 | |||
|#=2 | |||
|hp=19.6 | |||
|str=0 | |||
|mag=6.6 | |||
|skill=3.7 | |||
|spd=5.7 | |||
|lck=0 | |||
|def=3.2 | |||
|res=4.2 | |||
|mov=6 | |||
|inventory={{Item|ds|Blizzard}} | |||
|notes=Both begin moving if either of them, the center-west [[Bishop]], or the the reinforcements from the western fort is provoked. | |||
}} | |||
{{ChapUnitCellFE11 | |||
|name=Khadein | |||
|class=Mage | |||
|lv=5 | |||
|#=1 | |||
|hp=18.8 | |||
|str=0 | |||
|mag=5.8 | |||
|skill=3.1 | |||
|spd=5.1 | |||
|lck=0 | |||
|def=2.8 | |||
|res=3.8 | |||
|mov=6 | |||
|inventory={{Item|ds|Thunder|type=drop}} | |||
|notes=Begins moving if the adjacent Mage is provoked. | |||
}} | |||
{{ChapUnitCellFE11 | |||
|name=Khadein | |||
|class=Curate | |||
|lv=7 | |||
|#=3 | |||
|hp=19.6 | |||
|str=0 | |||
|mag=2.8 | |||
|skill=3.7 | |||
|spd=6.7 | |||
|lck=0 | |||
|def=4.2 | |||
|res=8.4 | |||
|mov=5 | |||
|inventory={{Item|ds|Mend}} | |||
|notes=Moves to heal units within twice their movement; return to their starting positions if no one is in range. | |||
}} | |||
{{ChapUnitCellFE11 | |||
|name=Khadein | |||
|class=Thief | |||
|lv=5 | |||
|#=1 | |||
|hp=20.2 | |||
|str=3.4 | |||
|mag=0 | |||
|skill=3.8 | |||
|spd=10.5 | |||
|lck=0 | |||
|def=2.2 | |||
|res=0 | |||
|mov=7 | |||
|inventory={{Item|ds|Iron Sword}} • {{Item|ds|Recover|type=drop}} | |||
|notes=Moves to open the left [[chest]], then moves to escape west; ignores combat, except to attack units blocking the escape point. | |||
|last=y | |||
}} | |||
{{ChapUnitReinf|type=Enemy|platform=ds}} | |||
{{ChapUnitCellFE11 | |||
|name=Khadein | |||
|class=Mage | |||
|lv=7 | |||
|#=6 | |||
|hp=19.6 | |||
|str=0 | |||
|mag=6.6 | |||
|skill=3.7 | |||
|spd=5.7 | |||
|lck=0 | |||
|def=3.2 | |||
|res=4.2 | |||
|mov=6 | |||
|inventory={{Item|ds|Fire}} | |||
}} | |||
{{ChapUnitCellFE11 | |||
|name=Dragoons | |||
|class=Dracoknight | |||
|lv=3 | |||
|#=3 | |||
|hp=28.5 | |||
|str=9.25 | |||
|mag=1 | |||
|skill=6.5 | |||
|spd=10 | |||
|lck=0 | |||
|def=10.6 | |||
|res=3.2 | |||
|mov=10 | |||
|inventory={{Item|ds|Javelin}} | |||
}} | |||
{{ChapUnitCellFE11 | |||
|name=Khadein | |||
|class=Mage | |||
|lv=9 | |||
|#=1 | |||
|hp=20.4 | |||
|str=0 | |||
|mag=7.4 | |||
|skill=4.3 | |||
|spd=6.3 | |||
|lck=0 | |||
|def=3.6 | |||
|res=4.6 | |||
|mov=6 | |||
|inventory={{Item|ds|Blizzard}} | |||
}} | |||
{{ChapUnitCellFE11 | |||
|name=Khadein | |||
|class=Mage | |||
|lv=9 | |||
|#=1 | |||
|hp=20.4 | |||
|str=0 | |||
|mag=7.4 | |||
|skill=4.3 | |||
|spd=6.3 | |||
|lck=0 | |||
|def=3.6 | |||
|res=4.6 | |||
|mov=6 | |||
|inventory={{Item|ds|Thunder}} | |||
|last=y | |||
}} | |||
{{ChapUnitFtr}} | |||
|content3={{ChapUnitHdr|type=Enemy|platform=ds01}} | |||
{{ChapUnitCellFE11 | |||
|name=Khadein | |||
|class=Bishop | |||
|lv=5 | |||
|#=1 | |||
|hp=26 | |||
|str=1 | |||
|mag=6 | |||
|skill=5 | |||
|spd=7 | |||
|lck=0 | |||
|def=3.8 | |||
|res=10 | |||
|inventory={{Item|ds|Swarm}} | |||
|notes=Stands on a [[Terrain/Nintendo DS games#Fire Emblem: Shadow Dragon|gate]], the chapter's seize point. | |||
}} | |||
{{ChapUnitCellFE11 | |||
|name=Khadein | |||
|class=Bishop | |||
|lv=3 | |||
|#=1 | |||
|hp=25.2 | |||
|str=1 | |||
|mag=5.4 | |||
|skill=4.4 | |||
|spd=6.4 | |||
|lck=0 | |||
|def=3.4 | |||
|res=9 | |||
|mov=6 | |||
|inventory={{Item|ds|Thunder}} | |||
|notes=Moves to attack units in range. | |||
}} | |||
{{ChapUnitCellFE11 | |||
|name=[[Gharnef]] | |||
|class=Sorcerer | |||
|lv=15 | |||
|#=1 | |||
|hp=36.4 | |||
|str=2 | |||
|mag=6.8 | |||
|skill=6.8 | |||
|spd=19.8 | |||
|lck=0 | |||
|def=11 | |||
|res=10 | |||
|mov=6 | |||
|inventory={{Item|ds|Imhullu}} | |||
|notes=• Immediately begins moving unprovoked.<br>• Leaves the map on turn 6. | |||
}} | |||
{{ChapUnitCellFE11 | |||
|name=Khadein | |||
|class=Mage | |||
|lv=7 | |||
|#=2 | |||
|hp=20.8 | |||
|str=0 | |||
|mag=7.8 | |||
|skill=4.6 | |||
|spd=6.6 | |||
|lck=0 | |||
|def=3.2 | |||
|res=4.2 | |||
|mov=6 | |||
|inventory={{Item|ds|Fire}} | |||
|notes=• The southwest one moves to attack units in range; returns to his starting position if no one is in range.<br>• The easternmost one begins moving if the adjacent Mage is provoked. | |||
}} | |||
{{ChapUnitCellFE11 | |||
|name=Khadein | |||
|class=Mage | |||
|lv=9 | |||
|#=1 | |||
|hp=21.6 | |||
|str=0 | |||
|mag=8.6 | |||
|skill=5.2 | |||
|spd=7.2 | |||
|lck=0 | |||
|def=3.6 | |||
|res=4.6 | |||
|mov=6 | |||
|inventory={{Item|ds|Thunder}} | |||
|notes=Moves to attack units in range. | |||
}} | |||
{{ChapUnitCellFE11 | |||
|name=Dragoons | |||
|class=Dracoknight | |||
|lv=3 | |||
|#=4 | |||
|hp=31.2 | |||
|str=10 | |||
|mag=1 | |||
|skill=6.8 | |||
|spd=11.2 | |||
|lck=0 | |||
|def=10.6 | |||
|res=3.2 | |||
|mov=10 | |||
|inventory={{Item|ds|Javelin}} | |||
|notes=• The easternmost and westernmost ones both begin moving if either is provoked.<br>• The middle two immediately begin moving unprovoked. | |||
}} | |||
{{ChapUnitCellFE11 | |||
|name=Khadein | |||
|class=Mage | |||
|lv=9 | |||
|#=2 | |||
|hp=21.6 | |||
|str=0 | |||
|mag=8.6 | |||
|skill=5.2 | |||
|spd=7.2 | |||
|lck=0 | |||
|def=3.6 | |||
|res=4.6 | |||
|mov=6 | |||
|inventory={{Item|ds|Blizzard}} | |||
|notes=Moves to attack units in range; the southernmost one returns to his starting position if no one is in range. | |||
}} | |||
{{ChapUnitCellFE11 | |||
|name=Khadein | |||
|class=Mage | |||
|lv=7 | |||
|#=2 | |||
|hp=20.8 | |||
|str=0 | |||
|mag=7.8 | |||
|skill=4.6 | |||
|spd=6.6 | |||
|lck=0 | |||
|def=3.2 | |||
|res=4.2 | |||
|mov=6 | |||
|inventory={{Item|ds|Blizzard}} | |||
|notes=Both begin moving if either of them, the center-west [[Bishop]], or the the reinforcements from the western fort is provoked. | |||
}} | |||
{{ChapUnitCellFE11 | |||
|name=Khadein | |||
|class=Mage | |||
|lv=5 | |||
|#=1 | |||
|hp=20 | |||
|str=0 | |||
|mag=7 | |||
|skill=4 | |||
|spd=6 | |||
|lck=0 | |||
|def=2.8 | |||
|res=3.8 | |||
|mov=6 | |||
|inventory={{Item|ds|Thunder|type=drop}} | |||
|notes=Begins moving if the adjacent Mage is provoked. | |||
}} | |||
{{ChapUnitCellFE11 | |||
|name=Khadein | |||
|class=Curate | |||
|lv=7 | |||
|#=3 | |||
|hp=20.8 | |||
|str=0 | |||
|mag=3.4 | |||
|skill=4.6 | |||
|spd=7.6 | |||
|lck=0 | |||
|def=4.2 | |||
|res=8.4 | |||
|mov=5 | |||
|inventory={{Item|ds|Mend}} | |||
|notes=Moves to heal units within twice their movement; return to their starting positions if no one is in range. | |||
}} | |||
{{ChapUnitCellFE11 | |||
|name=Khadein | |||
|class=Thief | |||
|lv=5 | |||
|#=1 | |||
|hp=22 | |||
|str=4 | |||
|mag=0 | |||
|skill=5 | |||
|spd=12 | |||
|lck=0 | |||
|def=2.2 | |||
|res=0 | |||
|mov=7 | |||
|inventory={{Item|ds|Iron Sword}} • {{Item|ds|Recover|type=drop}} | |||
|notes=Moves to open the left [[chest]], then moves to escape west; ignores combat, except to attack units blocking the escape point. | |||
|last=y | |||
}} | |||
{{ChapUnitReinf|type=Enemy|platform=ds}} | |||
{{ChapUnitCellFE11 | |||
|name=Khadein | |||
|class=Mage | |||
|lv=7 | |||
|#=6 | |||
|hp=20.8 | |||
|str=0 | |||
|mag=7.8 | |||
|skill=4.6 | |||
|spd=6.6 | |||
|lck=0 | |||
|def=3.2 | |||
|res=4.2 | |||
|mov=6 | |||
|inventory={{Item|ds|Fire}} | |||
}} | |||
{{ChapUnitCellFE11 | |||
|name=Dragoons | |||
|class=Dracoknight | |||
|lv=3 | |||
|#=3 | |||
|hp=31.2 | |||
|str=10 | |||
|mag=1 | |||
|skill=6.8 | |||
|spd=11.2 | |||
|lck=0 | |||
|def=10.6 | |||
|res=3.2 | |||
|mov=10 | |||
|inventory={{Item|ds|Javelin}} | |||
}} | |||
{{ChapUnitCellFE11 | |||
|name=Khadein | |||
|class=Mage | |||
|lv=9 | |||
|#=2 | |||
|hp=21.6 | |||
|str=0 | |||
|mag=8.6 | |||
|skill=5.2 | |||
|spd=7.2 | |||
|lck=0 | |||
|def=3.6 | |||
|res=4.6 | |||
|mov=6 | |||
|inventory={{Item|ds|Blizzard}} | |||
}} | |||
{{ChapUnitCellFE11 | |||
|name=Khadein | |||
|class=Mage | |||
|lv=9 | |||
|#=2 | |||
|hp=21.6 | |||
|str=0 | |||
|mag=8.6 | |||
|skill=5.2 | |||
|spd=7.2 | |||
|lck=0 | |||
|def=3.6 | |||
|res=4.6 | |||
|mov=6 | |||
|inventory={{Item|ds|Thunder}} | |||
|last=y | |||
}} | |||
{{ChapUnitFtr}} | |||
|content4={{ChapUnitHdr|type=Enemy|platform=ds01}} | |||
{{ChapUnitCellFE11 | |||
|name=Khadein | |||
|class=Bishop | |||
|lv=5 | |||
|#=1 | |||
|hp=27.2 | |||
|str=1 | |||
|mag=6.9 | |||
|skill=5.9 | |||
|spd=7.9 | |||
|lck=0 | |||
|def=3.8 | |||
|res=10 | |||
|inventory={{Item|ds|Swarm}} | |||
|notes=Stands on a [[Terrain/Nintendo DS games#Fire Emblem: Shadow Dragon|gate]], the chapter's seize point. | |||
}} | |||
{{ChapUnitCellFE11 | |||
|name=Khadein | |||
|class=Bishop | |||
|lv=3 | |||
|#=1 | |||
|hp=26.4 | |||
|str=1 | |||
|mag=6.3 | |||
|skill=5.3 | |||
|spd=7.3 | |||
|lck=0 | |||
|def=3.4 | |||
|res=9 | |||
|mov=6 | |||
|inventory={{Item|ds|Elfire}} | |||
|notes=Moves to attack units in range. | |||
}} | |||
{{ChapUnitCellFE11 | |||
|name=[[Gharnef]] | |||
|class=Sorcerer | |||
|lv=15 | |||
|#=1 | |||
|hp=37.6 | |||
|str=2 | |||
|mag=7.7 | |||
|skill=7.7 | |||
|spd=20.7 | |||
|lck=0 | |||
|def=11 | |||
|res=10 | |||
|mov=6 | |||
|inventory={{Item|ds|Imhullu}} | |||
|notes=• Immediately begins moving unprovoked.<br>• Leaves the map on turn 6. | |||
}} | |||
{{ChapUnitCellFE11 | |||
|name=Khadein | |||
|class=Mage | |||
|lv=7 | |||
|#=4 | |||
|hp=22 | |||
|str=0 | |||
|mag=9 | |||
|skill=5.5 | |||
|spd=7.5 | |||
|lck=0 | |||
|def=3.2 | |||
|res=4.2 | |||
|mov=6 | |||
|inventory={{Item|ds|Elfire}} | |||
|notes=• The southwest one moves to attack units in range; returns to his starting position if no one is in range.<br>• The northwest two both begin moving if either of them, the center-west [[Bishop]], or the the reinforcements from the western fort is provoked.<br>• The easternmost one begins moving if the adjacent Mage is provoked. | |||
}} | |||
{{ChapUnitCellFE11 | |||
|name=Khadein | |||
|class=Mage | |||
|lv=9 | |||
|#=3 | |||
|hp=22.8 | |||
|str=0 | |||
|mag=9.8 | |||
|skill=6.1 | |||
|spd=8.1 | |||
|lck=0 | |||
|def=3.6 | |||
|res=4.6 | |||
|mov=6 | |||
|inventory={{Item|ds|Elfire}} | |||
|notes=Moves to attack units in range; the southernmost one returns to his starting position if no one is in range. | |||
}} | |||
{{ChapUnitCellFE11 | |||
|name=Dragoons | |||
|class=Dracoknight | |||
|lv=3 | |||
|#=4 | |||
|hp=33.9 | |||
|str=10.75 | |||
|mag=1 | |||
|skill=7.1 | |||
|spd=12.4 | |||
|lck=0 | |||
|def=10.6 | |||
|res=3.2 | |||
|mov=10 | |||
|inventory={{Item|ds|Javelin}} | |||
|notes=• The easternmost and westernmost ones both begin moving if either is provoked.<br>• The middle two immediately begin moving unprovoked. | |||
}} | |||
{{ChapUnitCellFE11 | |||
|name=Khadein | |||
|class=Mage | |||
|lv=5 | |||
|#=1 | |||
|hp=21.2 | |||
|str=0 | |||
|mag=8.2 | |||
|skill=4.9 | |||
|spd=6.9 | |||
|lck=0 | |||
|def=2.8 | |||
|res=3.8 | |||
|mov=6 | |||
|inventory={{Item|ds|Elfire}} • {{Item|ds|Thunder|type=drop}} | |||
|notes=Begins moving if the adjacent Mage is provoked. | |||
}} | |||
{{ChapUnitCellFE11 | |||
|name=Khadein | |||
|class=Curate | |||
|lv=7 | |||
|#=3 | |||
|hp=22 | |||
|str=0 | |||
|mag=4 | |||
|skill=5.5 | |||
|spd=8.5 | |||
|lck=0 | |||
|def=4.2 | |||
|res=8.4 | |||
|mov=5 | |||
|inventory={{Item|ds|Mend}} | |||
|notes=Moves to heal units within twice their movement; return to their starting positions if no one is in range. | |||
}} | |||
{{ChapUnitCellFE11 | |||
|name=Khadein | |||
|class=Thief | |||
|lv=5 | |||
|#=1 | |||
|hp=23.8 | |||
|str=4.6 | |||
|mag=0 | |||
|skill=6.2 | |||
|spd=13.5 | |||
|lck=0 | |||
|def=2.2 | |||
|res=0 | |||
|mov=7 | |||
|inventory={{Item|ds|Steel Sword}} • {{Item|ds|Recover|type=drop}} | |||
|notes=Moves to open the left [[chest]], then moves to escape west; ignores combat, except to attack units blocking the escape point. | |||
|last=y | |||
}} | |||
{{ChapUnitReinf|type=Enemy|platform=ds}} | |||
{{ChapUnitCellFE11 | |||
|name=Khadein | |||
|class=Mage | |||
|lv=7 | |||
|#=6 | |||
|hp=22 | |||
|str=0 | |||
|mag=9 | |||
|skill=5.5 | |||
|spd=7.5 | |||
|lck=0 | |||
|def=3.2 | |||
|res=4.2 | |||
|mov=6 | |||
|inventory={{Item|ds|Elfire}} | |||
}} | |||
{{ChapUnitCellFE11 | |||
|name=Dragoons | |||
|class=Dracoknight | |||
|lv=3 | |||
|#=3 | |||
|hp=33.9 | |||
|str=10.75 | |||
|mag=1 | |||
|skill=7.1 | |||
|spd=12.4 | |||
|lck=0 | |||
|def=10.6 | |||
|res=3.2 | |||
|mov=10 | |||
|inventory={{Item|ds|Javelin}} | |||
}} | |||
{{ChapUnitCellFE11 | |||
|name=Khadein | |||
|class=Mage | |||
|lv=9 | |||
|#=2 | |||
|hp=22.8 | |||
|str=0 | |||
|mag=9.8 | |||
|skill=6.1 | |||
|spd=8.1 | |||
|lck=0 | |||
|def=3.6 | |||
|res=4.6 | |||
|mov=6 | |||
|inventory={{Item|ds|Elfire}} | |||
|last=y | |||
}} | |||
{{ChapUnitFtr}} | |||
|content5={{ChapUnitHdr|type=Enemy|platform=ds01}} | |||
{{ChapUnitCellFE11 | |||
|name=Khadein | |||
|class=Bishop | |||
|lv=5 | |||
|#=1 | |||
|hp=28.4 | |||
|str=1 | |||
|mag=7.8 | |||
|skill=6.8 | |||
|spd=8.8 | |||
|lck=0 | |||
|def=3.8 | |||
|res=10 | |||
|inventory={{Item|ds|Swarm}} | |||
|notes=Stands on a [[Terrain/Nintendo DS games#Fire Emblem: Shadow Dragon|gate]], the chapter's seize point. | |||
}} | |||
{{ChapUnitCellFE11 | |||
|name=Khadein | |||
|class=Bishop | |||
|lv=3 | |||
|#=1 | |||
|hp=27.6 | |||
|str=1 | |||
|mag=7.2 | |||
|skill=6.2 | |||
|spd=8.2 | |||
|lck=0 | |||
|def=3.4 | |||
|res=9 | |||
|mov=6 | |||
|inventory={{Item|ds|Elfire}} | |||
|notes=Moves to attack units in range. | |||
}} | |||
{{ChapUnitCellFE11 | |||
|name=[[Gharnef]] | |||
|class=Sorcerer | |||
|lv=15 | |||
|#=1 | |||
|hp=38.8 | |||
|str=2 | |||
|mag=8.6 | |||
|skill=8.6 | |||
|spd=21.6 | |||
|lck=0 | |||
|def=11 | |||
|res=10 | |||
|mov=6 | |||
|inventory={{Item|ds|Imhullu}} | |||
|notes=• Immediately begins moving unprovoked.<br>• Leaves the map on turn 6. | |||
}} | |||
{{ChapUnitCellFE11 | |||
|name=Khadein | |||
|class=Mage | |||
|lv=7 | |||
|#=4 | |||
|hp=23.2 | |||
|str=0 | |||
|mag=10.2 | |||
|skill=6.4 | |||
|spd=8.4 | |||
|lck=0 | |||
|def=3.2 | |||
|res=4.2 | |||
|mov=6 | |||
|inventory={{Item|ds|Elfire}} | |||
|notes=• The southwest one moves to attack units in range; returns to his starting position if no one is in range.<br>• The northwest two both begin moving if either of them, the center-west [[Bishop]], or the the reinforcements from the western fort is provoked.<br>• The easternmost one begins moving if the adjacent Mage is provoked. | |||
}} | |||
{{ChapUnitCellFE11 | |||
|name=Khadein | |||
|class=Mage | |||
|lv=9 | |||
|#=3 | |||
|hp=24 | |||
|str=0 | |||
|mag=11 | |||
|skill=7 | |||
|spd=9 | |||
|lck=0 | |||
|def=3.6 | |||
|res=4.6 | |||
|mov=6 | |||
|inventory={{Item|ds|Elfire}} | |||
|notes=Moves to attack units in range; the southernmost one returns to his starting position if no one is in range. | |||
}} | |||
{{ChapUnitCellFE11 | |||
|name=Dragoons | |||
|class=Dracoknight | |||
|lv=3 | |||
|#=4 | |||
|hp=36.6 | |||
|str=11.5 | |||
|mag=1 | |||
|skill=7.4 | |||
|spd=13.6 | |||
|lck=0 | |||
|def=10.6 | |||
|res=3.2 | |||
|mov=10 | |||
|inventory={{Item|ds|Javelin}} | |||
|notes=• The easternmost and westernmost ones both begin moving if either is provoked.<br>• The middle two immediately begin moving unprovoked. | |||
}} | |||
{{ChapUnitCellFE11 | |||
|name=Khadein | |||
|class=Mage | |||
|lv=5 | |||
|#=1 | |||
|hp=22.4 | |||
|str=0 | |||
|mag=9.4 | |||
|skill=5.8 | |||
|spd=7.8 | |||
|lck=0 | |||
|def=2.8 | |||
|res=3.8 | |||
|mov=6 | |||
|inventory={{Item|ds|Elfire}} • {{Item|ds|Thunder|type=drop}} | |||
|notes=Begins moving if the adjacent Mage is provoked. | |||
}} | |||
{{ChapUnitCellFE11 | |||
|name=Khadein | |||
|class=Curate | |||
|lv=7 | |||
|#=3 | |||
|hp=23.2 | |||
|str=0 | |||
|mag=4.6 | |||
|skill=6.4 | |||
|spd=9.4 | |||
|lck=0 | |||
|def=4.2 | |||
|res=8.4 | |||
|mov=5 | |||
|inventory={{Item|ds|Mend}} | |||
|notes=Moves to heal units within twice their movement; return to their starting positions if no one is in range. | |||
}} | |||
{{ChapUnitCellFE11 | |||
|name=Khadein | |||
|class=Thief | |||
|lv=5 | |||
|#=1 | |||
|hp=25.6 | |||
|str=5.2 | |||
|mag=0 | |||
|skill=7.4 | |||
|spd=15 | |||
|lck=0 | |||
|def=2.2 | |||
|res=0 | |||
|mov=7 | |||
|inventory={{Item|ds|Steel Sword}} • {{Item|ds|Recover|type=drop}} | |||
|notes=Moves to open the left [[chest]], then moves to escape west; ignores combat, except to attack units blocking the escape point. | |||
|last=y | |||
}} | |||
{{ChapUnitReinf|type=Enemy|platform=ds}} | |||
{{ChapUnitCellFE11 | |||
|name=Khadein | |||
|class=Mage | |||
|lv=7 | |||
|#=6 | |||
|hp=23.2 | |||
|str=0 | |||
|mag=10.2 | |||
|skill=6.4 | |||
|spd=8.4 | |||
|lck=0 | |||
|def=3.2 | |||
|res=4.2 | |||
|mov=6 | |||
|inventory={{Item|ds|Elfire}} | |||
}} | |||
{{ChapUnitCellFE11 | |||
|name=Dragoons | |||
|class=Dracoknight | |||
|lv=3 | |||
|#=3 | |||
|hp=36.6 | |||
|str=11.5 | |||
|mag=1 | |||
|skill=7.4 | |||
|spd=13.6 | |||
|lck=0 | |||
|def=10.6 | |||
|res=3.2 | |||
|mov=10 | |||
|inventory={{Item|ds|Javelin}} | |||
}} | |||
{{ChapUnitCellFE11 | |||
|name=Khadein | |||
|class=Mage | |||
|lv=9 | |||
|#=2 | |||
|hp=24 | |||
|str=0 | |||
|mag=11 | |||
|skill=7 | |||
|spd=9 | |||
|lck=0 | |||
|def=3.6 | |||
|res=4.6 | |||
|mov=6 | |||
|inventory={{Item|ds|Elfire}} | |||
|last=y | |||
}} | |||
{{ChapUnitFtr}} | |||
|content6={{ChapUnitHdr|type=Enemy|platform=ds01}} | |||
{{ChapUnitCellFE11 | |||
|name=Khadein | |||
|class=Bishop | |||
|lv=5 | |||
|#=1 | |||
|hp=29.6 | |||
|str=1 | |||
|mag=8.7 | |||
|skill=7.7 | |||
|spd=9.7 | |||
|lck=0 | |||
|def=3.8 | |||
|res=10 | |||
|inventory={{Item|ds|Swarm}} | |||
|notes=Stands on a [[Terrain/Nintendo DS games#Fire Emblem: Shadow Dragon|gate]], the chapter's seize point. | |||
}} | |||
{{ChapUnitCellFE11 | |||
|name=Khadein | |||
|class=Bishop | |||
|lv=3 | |||
|#=1 | |||
|hp=28.8 | |||
|str=1 | |||
|mag=8.1 | |||
|skill=7.1 | |||
|spd=9.1 | |||
|lck=0 | |||
|def=3.4 | |||
|res=9 | |||
|mov=6 | |||
|inventory={{Item|ds|Bolganone}} | |||
|notes=Moves to attack units in range. | |||
}} | |||
{{ChapUnitCellFE11 | |||
|name=[[Gharnef]] | |||
|class=Sorcerer | |||
|lv=15 | |||
|#=1 | |||
|hp=40 | |||
|str=2 | |||
|mag=9.5 | |||
|skill=9.5 | |||
|spd=22.5 | |||
|lck=0 | |||
|def=11 | |||
|res=10 | |||
|mov=6 | |||
|inventory={{Item|ds|Imhullu}} | |||
|notes=• Immediately begins moving unprovoked.<br>• Leaves the map on turn 6. | |||
}} | |||
{{ChapUnitCellFE11 | |||
|name=Khadein | |||
|class=Mage | |||
|lv=7 | |||
|#=4 | |||
|hp=24.4 | |||
|str=0 | |||
|mag=11.4 | |||
|skill=7.3 | |||
|spd=9.3 | |||
|lck=0 | |||
|def=3.2 | |||
|res=4.2 | |||
|mov=6 | |||
|inventory={{Item|ds|Bolganone}} | |||
|notes=• The southwest one moves to attack units in range; returns to his starting position if no one is in range.<br>• The northwest two both begin moving if either of them, the center-west [[Bishop]], or the the reinforcements from the western fort is provoked.<br>• The easternmost one begins moving if the adjacent Mage is provoked. | |||
}} | |||
{{ChapUnitCellFE11 | |||
|name=Khadein | |||
|class=Mage | |||
|lv=9 | |||
|#=3 | |||
|hp=25.2 | |||
|str=0 | |||
|mag=12.2 | |||
|skill=7.9 | |||
|spd=9.9 | |||
|lck=0 | |||
|def=3.6 | |||
|res=4.6 | |||
|mov=6 | |||
|inventory={{Item|ds|Bolganone}} | |||
|notes=Moves to attack units in range; the southernmost one returns to his starting position if no one is in range. | |||
}} | |||
{{ChapUnitCellFE11 | |||
|name=Dragoons | |||
|class=Dracoknight | |||
|lv=3 | |||
|#=4 | |||
|hp=39.3 | |||
|str=12.25 | |||
|mag=1 | |||
|skill=7.7 | |||
|spd=14.8 | |||
|lck=0 | |||
|def=10.6 | |||
|res=3.2 | |||
|mov=10 | |||
|inventory={{Item|ds|Javelin|type=forged}} | |||
|notes=• The easternmost and westernmost ones both begin moving if either is provoked.<br>• The middle two immediately begin moving unprovoked. | |||
}} | |||
{{ChapUnitCellFE11 | |||
|name=Khadein | |||
|class=Mage | |||
|lv=5 | |||
|#=1 | |||
|hp=23.6 | |||
|str=0 | |||
|mag=10.6 | |||
|skill=6.7 | |||
|spd=8.7 | |||
|lck=0 | |||
|def=2.8 | |||
|res=3.8 | |||
|mov=6 | |||
|inventory={{Item|ds|Bolganone}} • {{Item|ds|Thunder|type=drop}} | |||
|notes=Begins moving if the adjacent Mage is provoked. | |||
}} | |||
{{ChapUnitCellFE11 | |||
|name=Khadein | |||
|class=Curate | |||
|lv=7 | |||
|#=3 | |||
|hp=24.4 | |||
|str=0 | |||
|mag=5.2 | |||
|skill=7.3 | |||
|spd=10.3 | |||
|lck=0 | |||
|def=4.2 | |||
|res=8.4 | |||
|mov=5 | |||
|inventory={{Item|ds|Mend}} | |||
|notes=Moves to heal units within twice their movement; return to their starting positions if no one is in range. | |||
}} | |||
{{ChapUnitCellFE11 | |||
|name=Khadein | |||
|class=Thief | |||
|lv=5 | |||
|#=1 | |||
|hp=27.4 | |||
|str=5.8 | |||
|mag=0 | |||
|skill=8.6 | |||
|spd=16.5 | |||
|lck=0 | |||
|def=2.2 | |||
|res=0 | |||
|mov=7 | |||
|inventory={{Item|ds|Silver Sword}} • {{Item|ds|Recover|type=drop}} | |||
|notes=Moves to open the left [[chest]], then moves to escape west; ignores combat, except to attack units blocking the escape point. | |||
|last=y | |||
}} | |||
{{ChapUnitReinf|type=Enemy|platform=ds}} | |||
{{ChapUnitCellFE11 | |||
|name=Khadein | |||
|class=Mage | |||
|lv=7 | |||
|#=6 | |||
|hp=24.4 | |||
|str=0 | |||
|mag=11.4 | |||
|skill=7.3 | |||
|spd=9.3 | |||
|lck=0 | |||
|def=3.2 | |||
|res=4.2 | |||
|mov=6 | |||
|inventory={{Item|ds|Bolganone}} | |||
}} | |||
{{ChapUnitCellFE11 | |||
|name=Dragoons | |||
|class=Dracoknight | |||
|lv=3 | |||
|#=3 | |||
|hp=39.3 | |||
|str=12.25 | |||
|mag=1 | |||
|skill=7.7 | |||
|spd=14.8 | |||
|lck=0 | |||
|def=10.6 | |||
|res=3.2 | |||
|mov=10 | |||
|inventory={{Item|ds|Javelin|type=forged}} | |||
}} | }} | ||
{{ChapUnitCellFE11 | |||
|name=Khadein | |||
| | |class=Mage | ||
| | |lv=9 | ||
| | |#=2 | ||
|# | |hp=25.2 | ||
| | |str=0 | ||
|mag=12.2 | |||
| | |skill=7.9 | ||
|spd=9.9 | |||
|lck=0 | |||
|def=3.6 | |||
| | |res=4.6 | ||
|mov=6 | |||
|inventory={{Item|ds|Bolganone}} | |||
|last=y | |||
| | |||
| | |||
| | |||
| | |||
| | |||
| | |||
| | |||
| | |||
| | |||
| | |||
}} | }} | ||
{{ChapUnitFtr}} | |||
All {{forged|forged|article=Forge}} weapons have +4 Mt and +20 Hit. | |||
}} | }} | ||
}} | }} | ||
====Reinforcements==== | ====Reinforcements==== | ||
=====''Shadow Dragon | =====''Shadow Dragon & the Blade of Light''===== | ||
*Turns | *Turns 3–10 | ||
** | **One [[Mage]] from the treasure room | ||
=====''Mystery of the Emblem''===== | =====''Mystery of the Emblem''===== | ||
*Starting | *Starting turn 1, continuing until 10 have appeared | ||
** | **One [[Mage]] from the treasure room | ||
=====''Shadow Dragon''===== | =====''Shadow Dragon''===== | ||
*Turns | *Turns 5–10 | ||
** | **One [[Mage]] from the treasure room | ||
*Turns | *Turns 8, 12 and 14 | ||
** | **One [[Dracoknight]] from the northeastern fort | ||
*Turns 10 and 14 | *Turns 10 and 14 | ||
** | **One [[Mage]] from the northwestern fort; in Normal, Hard-1, and Hard-2, the first mage has a [[Blizzard]] tome, and the second a [[Thunder]] tome | ||
===Boss data=== | ===Boss data=== | ||
| Line 753: | Line 2,199: | ||
|header=Boss data | |header=Boss data | ||
|width=60% | |width=60% | ||
|tab1=''Shadow Dragon | |tab1=''Shadow Dragon & the Blade of Light'' | ||
|tab2=''Mystery of the Emblem'' | |tab2=''Mystery of the Emblem'' | ||
|tab3=''Shadow Dragon'' | |tab3=''Shadow Dragon'' | ||
|content1={{BossStats FE1 | |content1={{BossStats FE1 | ||
|portrait=[[File:Portrait gharnef fe01.png]] | |portrait=[[File:Portrait gharnef fe01.png]] | ||
|sprite=bishop enemy | |||
|class=Bishop | |class=Bishop | ||
|lv=10 | |lv=10 | ||
| Line 770: | Line 2,217: | ||
|move=6 | |move=6 | ||
|wl=14 | |wl=14 | ||
|inventory=[[Imhullu]] | |||
|drops={{drop|Falchion|article=Falchion (Archanea)}} | |||
|to=y | |to=y | ||
|st=y | |st=y | ||
}} | }} | ||
|content2={{BossStats FE3 | |content2={{BossStats FE3 | ||
|portrait=[[File:Portrait gharnef fe03.png]] | |portrait=[[File:Portrait gharnef fe03.png]] | ||
|sprite=bishop enemy | |||
|class=Bishop | |class=Bishop | ||
|exp=70 | |exp=70 | ||
| Line 788: | Line 2,236: | ||
|res=8 | |res=8 | ||
|move=6 | |move=6 | ||
| | |weapons={{item|3|Imhullu}} | ||
| | |items={{item|3|Falchion|link=Falchion (Archanea)|type=drop}} | ||
| | |to=y | ||
|st=y | |||
}} | }} | ||
|content3={{Tab | |content3=:''Stats with a decimal can vary randomly; the decimal represents the chance for the stat to increase to the nearest integer, or be otherwise truncated.'' | ||
{{Tab | |||
|tab1=Normal | |tab1=Normal | ||
|tab2=Hard-5 | |tab2=Hard-1 | ||
|tab3=Hard-2 | |||
|tab4=Hard-3 | |||
|tab5=Hard-4 | |||
|tab6=Hard-5 | |||
|content1={{BossStats DS | |content1={{BossStats DS | ||
|portrait=[[File:Portrait gharnef fe11.png]] | |portrait=[[File:Portrait gharnef fe11.png]] | ||
|sprite=sorcerer enemy | |||
|class=Sorcerer | |class=Sorcerer | ||
|lv=15 | |lv=15 | ||
| Line 808: | Line 2,263: | ||
|res=10 | |res=10 | ||
|move=6 | |move=6 | ||
|inventory={{Item|ds|Imhullu}} | |||
|to=A | |to=A | ||
|st=E | |st=E | ||
}} | }} | ||
|content2={{BossStats DS | |content2={{BossStats DS | ||
|portrait=[[File:Portrait gharnef fe11.png]] | |portrait=[[File:Portrait gharnef fe11.png]] | ||
|sprite=sorcerer enemy | |||
|class=Sorcerer | |||
|lv=15 | |||
|HP=35.2 | |||
|str=2 | |||
|magic=5.9 | |||
|skill=5.9 | |||
|spd=18.9 | |||
|luck=0 | |||
|def=11 | |||
|res=10 | |||
|move=6 | |||
|inventory={{Item|ds|Imhullu}} | |||
|to=A | |||
|st=C | |||
}} | |||
|content3={{BossStats DS | |||
|portrait=[[File:Portrait gharnef fe11.png]] | |||
|sprite=sorcerer enemy | |||
|class=Sorcerer | |||
|lv=15 | |||
|HP=36.4 | |||
|str=2 | |||
|magic=6.8 | |||
|skill=6.8 | |||
|spd=19.8 | |||
|luck=0 | |||
|def=11 | |||
|res=10 | |||
|move=6 | |||
|inventory={{Item|ds|Imhullu}} | |||
|to=A | |||
|st=C | |||
}} | |||
|content4={{BossStats DS | |||
|portrait=[[File:Portrait gharnef fe11.png]] | |||
|sprite=sorcerer enemy | |||
|class=Sorcerer | |||
|lv=15 | |||
|HP=37.6 | |||
|str=2 | |||
|magic=7.7 | |||
|skill=7.7 | |||
|spd=20.7 | |||
|luck=0 | |||
|def=11 | |||
|res=10 | |||
|move=6 | |||
|inventory={{Item|ds|Imhullu}} | |||
|to=A | |||
|st=B | |||
}} | |||
|content5={{BossStats DS | |||
|portrait=[[File:Portrait gharnef fe11.png]] | |||
|sprite=sorcerer enemy | |||
|class=Sorcerer | |||
|lv=15 | |||
|HP=38.8 | |||
|str=2 | |||
|magic=8.6 | |||
|skill=8.6 | |||
|spd=21.6 | |||
|luck=0 | |||
|def=11 | |||
|res=10 | |||
|move=6 | |||
|inventory={{Item|ds|Imhullu}} | |||
|to=A | |||
|st=B | |||
}} | |||
|content6={{BossStats DS | |||
|portrait=[[File:Portrait gharnef fe11.png]] | |||
|sprite=sorcerer enemy | |||
|class=Sorcerer | |class=Sorcerer | ||
|lv=15 | |lv=15 | ||
|HP= | |HP=40 | ||
|str=2 | |str=2 | ||
|magic= | |magic=9.5 | ||
|skill= | |skill=9.5 | ||
|spd= | |spd=22.5 | ||
|luck=0 | |luck=0 | ||
|def=11 | |def=11 | ||
|res=10 | |res=10 | ||
|move=6 | |move=6 | ||
|inventory={{Item|ds|Imhullu}} | |||
|to=A | |to=A | ||
|st=A | |st=A | ||
}} | }} | ||
}} | }} | ||
}} | }} | ||
| Line 835: | Line 2,362: | ||
==Strategy== | ==Strategy== | ||
{{Strategy}} | {{Strategy}} | ||
* '''Initial Task:''' Eliminate the [[Mage]]s and [[Dracoknight]]s near the starting point. | |||
* '''[[Gharnef]]'s Approach:''' Expect to engage on Turn 3. Utilize the eastern bridge as a chokepoint with a [[Pegasus Knight]], [[Bishop]], and/or [[Wolf]]/[[Sedgar]]. Be cautious of a supporting Mage. Gharnef retreats at the start of Turn 6. | |||
* '''Enemy Reinforcements:''' Mages from the treasure room on Turn 5. Dracoknights from the northeast on Turn 8. | |||
* '''Post-Gharnef Strategy:''' Use a save point. Send a [[Thief]] and escorts eastward to loot the treasure room. A capable Pegasus Knight should target the [[Swarm]] Bishop. | |||
==Trivia== | ==Trivia== | ||
* A modified version of this map appears in [[Sanctuary of Sorcery|Chapter 9]] of {{title|Mystery of the Emblem}} Book 2 and {{title|New Mystery of the Emblem}}. | |||
==Etymology and other languages== | ==Etymology and other languages== | ||
| Line 843: | Line 2,374: | ||
|eng-name=An Oasis of Magic | |eng-name=An Oasis of Magic | ||
|eng-mean= | |eng-mean= | ||
| | |jpn-name={{h|魔道の国カダイン|Madō no kuni kadain}} | ||
| | |jpn-mean=Khadein, Land of Sorcery | ||
|span-name=Un oasis de magia | |span-name=Un oasis de magia | ||
|span-mean=An Oasis of Magic | |span-mean=An Oasis of Magic | ||
| Line 857: | Line 2,388: | ||
==Gallery== | ==Gallery== | ||
{{sectstub}} | {{sectstub}} | ||
<gallery> | |||
Cg fe11 c15.png|CG image displayed during the intro for {{title|Shadow Dragon}} | |||
</gallery> | |||
{{ref}} | {{ref}} | ||
{{ChapterNav | {{ChapterNav | ||
|prechapter=Land of Sorrow (Shadow Dragon) | |prechapter=Land of Sorrow (Shadow Dragon){{!}}Land of Sorrow | ||
|nextchapter=The Battle for Altea | |nextchapter=The Battle for Altea | ||
}} | }} | ||
| Line 869: | Line 2,402: | ||
{{Nav3}} | {{Nav3}} | ||
{{Nav11}} | {{Nav11}} | ||
[[Category:Chapters of Fire Emblem: Shadow Dragon | {{DEFAULTSORT:Oasis of Magic, An}} | ||
[[Category:Chapters of Fire Emblem: Shadow Dragon & the Blade of Light]] | |||
[[Category:Chapters of Fire Emblem: Mystery of the Emblem]] | [[Category:Chapters of Fire Emblem: Mystery of the Emblem]] | ||
[[Category:Chapters of Fire Emblem: Shadow Dragon]] | [[Category:Chapters of Fire Emblem: Shadow Dragon]] | ||
Latest revision as of 13:03, 28 March 2024
| ||||||||
|

An Oasis of Magic (Japanese: 魔道の国カダイン Khadein, Land of Sorcery) is the fifteenth chapter in Fire Emblem: Shadow Dragon & the Blade of Light and Fire Emblem: Shadow Dragon and the twelfth chapter in Book I of Fire Emblem: Mystery of the Emblem.
Plot
- Main article:
An Oasis of Magic/Script
Marth and his companions attack Khadein and are personally accosted by Gharnef, who proves immune to harm thanks to his dark tome Imhullu. Eventually, Gharnef bids Marth to pursue him to Thabes if he wants to reclaim Falchion and departs. Marth seizes the castle and is telepathically contacted by the White Sage Gotoh, who explains that Gharnef was once his pupil alongside Miloah before stealing Imhullu, and he ultimately intends to betray Dolhr and conquer the world. To atone for his failures in teaching Gharnef, Gotoh directs Marth to collect the Lightsphere and Starsphere and bring them to him in Macedon so he can create the magic tome Starlight, which can pierce Imhullu's defenses.
Chapter data
Shadow Dragon & the Blade of Light Mystery of the Emblem Shadow Dragon


| ||||||
|
| |||||
| Victory: Seize | Player | Enemy | ||||
|---|---|---|---|---|---|---|
| Defeat: Marth dies | 1–16 | 19+11−1 | ||||
| ||||||
| Map dimensions: 30 columns by 28 rows | ||||||
Character data
Shadow Dragon & the Blade of Light Mystery of the Emblem Shadow Dragon
| Characters | |
|---|---|
New units
| |
| |
Required characters
| |

| |
Available characters
| |
                                              
|
Item data
Shadow Dragon & the Blade of Light Mystery of the Emblem Shadow Dragon
Shop data
Shadow Dragon & the Blade of Light Mystery of the Emblem Shadow Dragon
Swords Lances Axes Bows Tomes Staves Items Secret
| Name | Cost | |
|---|---|---|
| Steel Sword | 875 | |
| Killing Edge | 1500 | |
| Armorslayer | 1000 | |
| Rapier | 1120 |
- Note: Only one Rapier can be bought.
Enemy data
Shadow Dragon & the Blade of Light Mystery of the Emblem Shadow Dragon
- Stats with a decimal can vary randomly; the decimal represents the chance for the stat to increase to the nearest integer, or otherwise be truncated.
Normal Hard-1 Hard-2 Hard-3 Hard-4 Hard-5
| ||||||||||||||||||||||||||||||||||||||||||||||||||||||||||||||||||||||||||||||||||||||||||||||||||||||||||||||||||||||||||||||||||||||||||||||||||||||||||||||||||||||||||||||||||||||||||||||||||||||||||||||||||||||||||||||||||||||||||||||||||||||||||||||||||||||||||||||||||||||||||||||||||||||||||||||||||||||||
| ||||||||||||||||||||||||||||||||||||||||||||||||||||||||||||||||||||||||||||||||||||||||||||||||||||||||||||||||||||||||||||||||||||||||||||||||||||||||||||||||||||||||||||||||||||||||||||||||||||||||||||||||||||||||||||||||||||||||||||||||||||||||||||||||||||||||||||||||||||||||||||||||||||||||||||||||||||||||
| ||||||||||||||||||||||||||||||||||||||||||||||||||||||||||||||||||||||||||||||||||||||||||||||||||||||||||||||||||||||||||||||||||||||||||||||||||||||||||||||||||||||||||||||||||||||||||||||||||||||||||||||||||||||||||||||||||||||||||||||||||||||||||||||||||||||||||||||||||||||||||||||||||||||||||||||||||||||||
| ||||||||||||||||||||||||||||||||||||||||||||||||||||||||||||||||||||||||||||||||||||||||||||||||||||||||||||||||||||||||||||||||||||||||||||||||||||||||||||||||||||||||||||||||||||||||||||||||||||||||||||||||||||||||||||||||||||||||||||||||||||||||||||||||||||||||||||||||||||||||||||||||||||||||||||||||||||||||
Reinforcements
Shadow Dragon & the Blade of Light
- Turns 3–10
- One Mage from the treasure room
Mystery of the Emblem
- Starting turn 1, continuing until 10 have appeared
- One Mage from the treasure room
Shadow Dragon
- Turns 5–10
- One Mage from the treasure room
- Turns 8, 12 and 14
- One Dracoknight from the northeastern fort
- Turns 10 and 14
Boss data
- Main article:
Gharnef
Shadow Dragon & the Blade of Light Mystery of the Emblem Shadow Dragon
- Stats with a decimal can vary randomly; the decimal represents the chance for the stat to increase to the nearest integer, or be otherwise truncated.

Strategy
| This section details unofficial strategies that may help with completion of the chapter. This may not work for everybody. |
- Initial Task: Eliminate the Mages and Dracoknights near the starting point.
- Gharnef's Approach: Expect to engage on Turn 3. Utilize the eastern bridge as a chokepoint with a Pegasus Knight, Bishop, and/or Wolf/Sedgar. Be cautious of a supporting Mage. Gharnef retreats at the start of Turn 6.
- Enemy Reinforcements: Mages from the treasure room on Turn 5. Dracoknights from the northeast on Turn 8.
- Post-Gharnef Strategy: Use a save point. Send a Thief and escorts eastward to loot the treasure room. A capable Pegasus Knight should target the Swarm Bishop.
Trivia
- A modified version of this map appears in Chapter 9 of Mystery of the Emblem Book 2 and New Mystery of the Emblem.
Etymology and other languages
| Names, etymology, and in other regions | ||
|---|---|---|
| Language | Name | Definition, etymology, and notes |
| English |
An Oasis of Magic |
|
| Japanese |
魔道の国カダイン |
Khadein, Land of Sorcery |
| Spanish |
Un oasis de magia |
An Oasis of Magic |
| French |
Une oasis de magie |
An Oasis of Magic |
| German |
Oase der Magie |
Oasis of Magic |
| Italian |
La città della magia |
The City of Magic |
Gallery
This section has been marked as a stub. Please help improve the page by adding information.
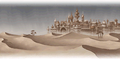
CG image displayed during the intro for Shadow Dragon

References
| ← Land of Sorrow • | An Oasis of Magic | • The Battle for Altea → |
|---|
| Fire Emblem: Mystery of the Emblem | ||||||||||||||||||||||||||||||||||||||
|---|---|---|---|---|---|---|---|---|---|---|---|---|---|---|---|---|---|---|---|---|---|---|---|---|---|---|---|---|---|---|---|---|---|---|---|---|---|---|
| ||||||||||||||||||||||||||||||||||||||
| Fire Emblem: Shadow Dragon | ||||||||||||||||||||
|---|---|---|---|---|---|---|---|---|---|---|---|---|---|---|---|---|---|---|---|---|
|