Land of Gods
- This article is about the chapter in Fates. For the History Mode map in Warriors, see Land of Gods (Warriors).
| ||||||||||
|
| “ | Oh, pardon me, I didn't even introduce myself. I'm Archduke Izana! Voted best hair in Izumo five years running! I'm so happy to have some visitors from Hoshido. Now, what kind of weird stuff do y'all like to get into back in the homeland? No, never mind, we'll get into all that later. Let's just sit back and relax and put on some slippers for now, right? Am I right? | ” | — The impostor pretending to be Izana |
|---|
Land of Gods (Japanese: 神々の坐す国 Land Where the Gods Sit) is the ninth chapter of the Birthright campaign in Fire Emblem Fates. In this chapter, Corrin's army has arrived in Izumo while searching for Ryoma and Takumi, and get welcomed by an impostor pretending to be the Archduke Izana, who lures Corrin and Sakura into a trap. It is up to Corrin and their army to deal with the impostor and rescue the real Izana.
Plot
- Main article:
Land of Gods/Script
|
This article or section does not meet Fire Emblem Wiki's quality standards. Please improve it as you see fit. Editing help is available. This article has been flagged since Too much focus on minor details; a summary is not a play-by-play. |
Having arrived in Izumo, to which Corrin notes is a beautiful place having had no idea of such, Azura tells Corrin about what Izumo is like--called by some the kingdom of the gods, Izumo has remained neutral when other countries are at war, something Azura notes seems too good to be true; an Izumite asks who approaches, to which Corrin introduces themselves and their army as visitors from Hoshido seeking information about Ryoma and Takumi if they passed in this direction. Azura asks the Izumite if they'll give the army permission to enter Izumo, to which the Izumite confirms--stating that people from Hoshido are always welcome within Izumo's borders. The Izumite states that he'll notify the palace and someone will be with the army shortly, to which Azura thanks him; Corrin again asks the Izumite about Ryoma and Takumi and states that they may have been in a battle near Izumo's borders, to which the Izumite denies and reveals that Izumo has been a neutral territory for many generations and there's no way a battle could have been staged in the area. As the Izumite states that they're ready to welcome Corrin's army and asks them to follow him, Corrin silently asks Azura if she thinks the Izumite is telling the truth not knowing of any battle in the area; Azura silently tells Corrin that she doesn't know but that things appear to be a little strange and that they should proceed with caution.
We cut to inside the palace to where Corrin, Azura, Sakura, and Hinoka have gathered; Corrin states that they're not sure what they're supposed to do and figures they should just wait around, to which Sakura deduces that the matter is probably just a bit of formal grandstanding. Sakura then reveals that she's heard that Archduke Izana likes to make people wait a few minutes; as Corrin deduces that Izana eventually shows up with answers for them, Izana enters the room.
Corrin asks Hinoka if the man who entered the room really is Izana and notes that Izana appears serene, after which Hinoka confirms Corrin's points although stating that she's never met him and also notes him to be oddly calm, after which Sakura states that the goings-on are making her nervous; Izana welcomes his guests, after which Corrin asks him how they should address him and Izana tells them they may address him however they like. Continuing his welcomes and asking if he can get his guests anything, Corrin gives a puzzled reaction while Hinoka notes that Izana is a little different than she expected; Izana finally introduces himself and states that he's been voted the best hair in Izumo for five consecutive years and states he's happy to have some visitors from Hoshido; as Izana gets into some eccentricities, Azura brings up that she and her group have some important questions for Izana, first asking if he's aware of a recent battle between Hoshido and Nohr in the area, to which Izana denies and states that he'd be the first one to know of such a battle, after which Corrin deduces that they may be in the wrong place; as Izana continues his eccentricites, among them are a quip about Izumite healers being among the greatest in the region, a point which Sakura confirms and Corrin adding that the group could use a little rejuvenation--Corrin adds that they can't stay long but that it would also be wise to heal their wounds while they can. Izana states that he won't take no for an answer and asks that they get started right away, and asks everyone to follow him to the spa; upon seeing Corrin and Sakura banged up, Izana states that he has something special for them--deep restorative healing that mends the body and soothes the mind. Sakura asks Izana if it's only her and Corrin that'll get this special treatment, while Corrin notes that they are sure they're not the only ones with significant wounds but figuring that they should at least go along; Izana asks Corrin and Sakura to follow and states that the hot towels won't stay hot forever, after which Hinoka gives a puzzled reaction.
We cut to a chamber where Izana leads Corrin and Sakura into; Corrin notes that it's dark in the area but deduces it must help with the relaxation and wonders what the sharp devices are for, to which Izana welcomes Corrin and Sakura into the area. Corrin asks Izana if they're in the right place and asks if the area is the deep-relaxation chamber, to which Izana confirms--they and Sakura will literally go to sleep forever in this room, as it's their execution chamber; Corrin asks Izana to wait a minute as enemy reinforcements arrive, after which Sakura notes that they're surrounded. Corrin asks Izana what he's playing at and that it's not funny, to which Izana states that they haven't even reached the punchline yet--he's not Izana! Shapeshifting into his true form, upon which we learn this person's real name as Zola, he tells Corrin it's been awhile and asks them if it's been awhile, then introduces himself as a dark mage of Nohr; Corrin states they don't care who Zola is and asks him what he's done with Izana, to which Zola asks why Corrin would care about him--then boasts about him being the one who's finally captured Corrin and that he's the one that matters, wishing Corrin good luck getting themselves and Sakura out of this trap. Corrin moves in front of Sakura and asks her to stay behind them, after which Sakura asks Corrin what they plan to do and notes that there are too many enemies; as Zola tells Corrin and Sakura to prepare to die, some of the enemy units begin attacking their allies to Corrin's surprise, with Zola asking the enemy reinforcements what they're doing.
Hinoka arrives on the scene and reveals that she deduced that the healing treatment was a fake, to which Corrin asks how she knew and Zola states that what's going on can't be happening; Kaze notes Hinoka's impression as impressive and that she was right on all counts, with Azura stating that she also had doubts about the situation and thanks Hinoka for acting on her instincts, with Sakura stating that she's glad everyone's in the area. Zola asks how Hinoka suspected anything and notes that his Izana disguise was perfect, then states he still has enough power to defeat everyone, after which Hinoka states that "Izana" acted like a buffoon and no royalty would behave like that, to which Azura confirms; Zola states that his impression was flawless and calls his men to move forth and take them out, with Corrin asking their army to get ready as they have a battle on their hands. Preparations take place at this point; the battle begins once preparations are finished.
At the end of turn 2 enemy phase, Hinata and Oboro arrive on the scene, to which Hinata notes the goings-on and states that he thought they were in Izumo and deduces that the neutrality stance isn't working out for them anymore; Hinata proceeds to ask Oboro if Takumi is anywhere in the area and states he didn't get much information about the Nohrian soldiers; Oboro states that the reason they didn't get much intel is because Hinata tied them up and gagged the Nohrian soldiers before he questioned them, to which Hinata tells her that she would have done the same things--he'll tie up as many people he needs to track down Takumi. Oboro states that she wishes Hinata were the one missing--then it would be her and Takumi relaxing in an Izumo sauna; Hinata asks Oboro to keep her fantasies to herself and states that they have work to do, and quite possibly people in this area could lead them to Takumi, to which Oboro confirms. Oboro then states that she can't stand Nohrians and that she won't know what to do if they've harmed Takumi; Hinata asks Oboro to get a hold of herself, asking where they'd be if she killed everybody on a bloody rampage, to which Oboro tells Hinata he's right--she'll decimate the Nohrians with calculated efficiency but spare a few, then calls herself and Hinata into action.
Upon Corrin speaking with Oboro, Oboro will tell Corrin to die as Nohrian scum, to which Corrin tells Oboro to hold as they are with Hoshido, prompting Oboro to ask Corrin who they are and that they looks familiar; as Corrin introduces themselves to Oboro and asks her who she is, Oboro deduces that Corrin is Takumi's brother/sister and then introduces herself as one of Takumi's retainers and asks Corrin if they have seen him, that she and Hinata haven't seen him anywhere. Corrin denies having seen Takumi but reveals that they're hopeful that he's not far from where they are, and states that their army could use Oboro and Hinata for assistance in tracking him; Corrin asks Oboro if she'll join him/her but also asks if she can temper her zeal about killing Nohrians moderately, to which Oboro confirms--but Oboro then reveals that she starts to rage whenever she sees a Nohrian, but can control herself if she keeps her thoughts focused on Takumi, and will do her best to assist Corrin, after which Corrin thanks Oboro for coming aboard. The player may now control Oboro at this point.
Upon Corrin speaking with Hinata, Corrin deduces he's not with Zola and asks him whose side he is on; Hinata states his surprise as to him/her not knowing who he is, to which Corrin confirms and asks him to introduce himself. Hinata introduces himself as one of Takumi's retainers but ended up separated from Takumi on the battlefield, and that he and Oboro are doing everything to track him down but are running out of ideas, then asking for Corrin's help in finding Takumi; Corrin confirms Hinata's point and reveals they're in the area for the same reason, and deduces that they must be on the right track since they're all in the same location. Hinata thanks Corrin and tells them that it's big of them to put aside their differences and help them find Takumi, especially given some of the things he's said recently; the player may now control Hinata at this point.
Once the battle ends, we find Corrin, Hinoka, and Felicia/Jakob confronting Zola; Corrin tells Zola that the game's over and asks him where he's hiding Izana; as Zola refuses Corrin's request and Corrin notes that Zola's been beaten, Zola notes Corrin's naivety and deduces that Corrin's lived a sheltered life, then states he'd rather die than give Corrin anything and that he won't have to. A smoke screen appears and envelops Corrin, Hinoka, and Felicia/Jakob, to which Zola attempts an escape--then gets stopped by some tree-summoning magic, asking whoever's casting the magic to let him go. The magic caster, Leo, reveals himself and refuses Zola's request, after which Corrin asks Leo what he's doing in the area; Leo tells Zola he's embarrassed Nohr for the last time, after which Zola tells Leo he was simply trying to preserve his dignity; Leo asks Zola what he knows about dignity and tells him he's done, after which Corrin asks Leo what he plans to do; Leo states that Zola is a monster and that he's going to make the world a better place, to which Corrin states that Zola is one of Leo's fellow Nohrians and that they can't believe he'd harm a fellow Nohrian. Leo changes his tone and angrily asks Corrin why he'd listen to a traitor like them, then states that they abandoned Nohr and that they have no right to tell him what to do. Corrin attempts to plead with Leo, but he tells Corrin that they can keep Zola and bids farewell, stating that Corrin will pay for what they have done when the time is right as he leaves. Corrin calls out to him and states that things don't have to be like what they are, after which Hinoka states she's never seen such a fearsome display of power; Felicia/Jakob reveals that Leo is a gifted dark mage that's feared and respected in Nohr, after which Corrin states that he's changed since the time they spent there--the Leo they remembers was kind, curious, and even clumsy at times, then states that they wonder what happened to him.
A short time later, the real Izana tells the army that they saved him and states that this calls for a feast, then goes into eccentricities; Sakura asks if they're still dealing with Zola, to which Hinoka denies but states that they underestimated Zola's impression of Izana. Corrin asks Izana if he's witnessed any nearby conflicts involving the Nohrians, to which Izana confirms; Izana, in an eccentric fashion, reveals that he went outside after hearing a big explosion and got captured, then reveals that Izumo doesn't have a world-class military force before revealing that the Nohrians threw him in his own jail, after which Corrin apologizes for Izana having to suffer through the ordeal. Hinoka notes that it's despicable of Nohr to take advantage of a neutral realm like they did, then asks Izana if he knows anything about Ryoma and Takumi, to which he states he's heard of them and states he overheard that the battle stretched all the way to the Bottomless Canyon and deduces they might have fallen in, prompting a shocked reaction from Sakura; Hinoka tells Sakura to get ahold of herself and states that Ryoma and Takumi are not the type to accidentally fall into a canyon and they have to believe that they're both alive and healthy; Izana apologizes for his rude speculation and notes that the canyon is a treacherous hazard before offering to read the group's fortune, to which Corrin expresses skepticism but states it's his kingdom. Izana states that he's a descendant of the gods and that the group's getting a great deal before starting to read the fortune; as Corrin and Azura watch on, Izana eccentrically reads the group's fortune by reciting words from the lyrics of Lost in Thoughts All Alone.
Once Izana is done reading the group's fortune, Corrin notes that it appeared to be a short reading and Hinoka states that the fortune wasn't very helpful, to which Izana states he told them what he could--he doesn't make the fortunes up, he simply reads them; Corrin asks that they move on, to which Izana starts to get into more eccentricities and then deduces that the group want to resume searching for Ryoma and Takumi before revealing that the group has no rush--he peeked into Ryoma's and Takumi's fortunes and states that they're both doing OK at the moment. Sakura asks Izana if he's sure as she'd want to believe that, to which Izana swears it on the gold-plated statue of himself that they're fine; Corrin thanks Izana for his hospitality and services and notes that, while tempting to stay, they have to resume searching for Ryoma and Takumi, after which Izana asks Corrin to return sometime and gets told to take care.
Back outside, Corrin mulls over what Izana read from the fortune when Azura tells Corrin she must speak with them; Corrin asks Azura if everything's OK, to which Azura states she's asking about the fortune--Corrin notes it as strange and haunting, to which Azura states that the fortune was the words her mother taught her as a child. Corrin and Azura begin talking more about Lost in Thoughts All Alone and about how the words appear to be speaking directly to Corrin, before agreeing to stop talking and get moving; as Azura leaves, Corrin wonders what Azura was actually trying to tell them.
Summary
Smoothing over relations with Fuga and the Wind Tribe, Corrin and company continue on their rescue mission toward the Kingdom of Izumo.
Chapter data
Normal Hard Lunatic
| ||||||
|
| |||||
| Victory: Rout the enemy | Player | Other | Enemy | |||
|---|---|---|---|---|---|---|
| Defeat: Corrin dies* or the player's army is routed* | 1–12+2 | 0+2−2 | 17+4 | |||
| ||||||
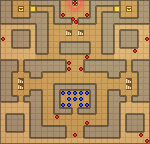
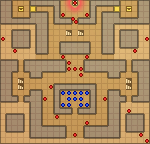
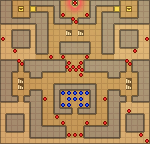
| Map dimensions: 25 columns by 24 rows | ||||||
Character data
| Characters | ||||||||||||||||||||||
|---|---|---|---|---|---|---|---|---|---|---|---|---|---|---|---|---|---|---|---|---|---|---|
New units
| ||||||||||||||||||||||
| ||||||||||||||||||||||
Required characters
| ||||||||||||||||||||||

| ||||||||||||||||||||||
Available characters
| ||||||||||||||||||||||
             
| ||||||||||||||||||||||
Note: Felicia is only a returning character if Corrin is male, while Jakob is only a returning character if Corrin is female. The returning characters list does not include any characters recruitable in paralogues or xenologues, as the player may not have taken on any available paralogue chapters yet. The list also does not include any bonus units, as they are recruitable at the player's discretion.
Item data
| ||||||||||||||||||||||||
|
Event tile data
There are no event tiles during the events of the chapter. When returning to the area for skirmishes, the following event tiles appear:
- Column 5, row 3: One square south, one square east of the northwestern chest
- Column 23, row 23: Two squares west, one square north of the southeastern corner of the map
Dragon Vein data
The Dragon Veins in this chapter are stated to have the effect "Use the holy tree to heal all allies". In addition, they have a hidden effect of boosting the Speed of allied units by 4. They are located as follows:
- Column 3, row 23: Two squares east, one square north of the southwestern corner of the map
- Column 23, row 23: Adjacent to a Thunder Dark Mage
- Column 4, row 9: Seven squares south of the northwestern chest
- Column 22, row 9: Adjacent to an Iron Lance Cavalier
Enemy data
Normal Hard Lunatic
| ||||||||||||||||||||||||||||||||||||||||||||||||||||||||||||||||||||||||||||||||||||||||||||||||||||||||||||||||||||||||||||||||||||||||||||||||||||||||||||||||||||||||||||||||||||||||||||||||||||||||||||||||||||||||||||||||||||||||||||||||||||||||||||||||||
| ||||||||||||||||||||||||||||||||||||||||||||||||||||||||||||||||||||||||||||||||||||||||||||||||||||||||||||||||||||||||||||||||||||||||||||||||||||||||||||||||||||||||||||||||||||||||||||||||||||||||||||||||||||||||||||||||||||||||||||||||||||||||||||||||||
| ||||||||||||||||||||||||||||||||||||||||||||||||||||||||||||||||||||||||||||||||||||||||||||||||||||||||||||||||||||||||||||||||||||||||||||||||||||||||||||||||||||||||||||||||||||||||||||||||||||||||||||||||||||||||||||||||||||||||||||||||||||||||||||||||||
| ||||||||||||||||||||||||||||||||||||||||||||||||||||||||||||||||||||||||||||||||||||||||||||||||||||||||||||||||||||||||||||||||||||||||||||||||||||||||||||||||||||||||||||||||||||||||||||||||||||||||||||||||||||||||||||||||||||||||||||||||||||||||||||||||||
Reinforcements
- Turn 5 (Hard/Lunatic only)
- 2 Cavaliers from the two eastern stairs
- Turn 6 (Hard/Lunatic only)
- 2 Dark Mages from the two western stairs
- Turn 7
- 2 Cavaliers from the two eastern stairs
- Turn 8
- 2 Dark Mages from the two western stairs
- Turn 9 (Lunatic only)
- 2 Cavaliers from the two eastern stairs
- Turn 10 (Lunatic only)
- 2 Dark Mages from the two western stairs
- Turn 11 (Lunatic only)
- 2 Cavaliers from the two eastern stairs
- Turn 12 (Lunatic only)
- 2 Dark Mages from the two western stairs
NPC data
| |||||||||||||||||||||||||||||||||||||||||||||||||||||||||||||||||||||
| |||||||||||||||||||||||||||||||||||||||||||||||||||||||||||||||||||||
| |||||||||||||||||||||||||||||||||||||||||||||||||||||||||||||||||||||
| |||||||||||||||||||||||||||||||||||||||||||||||||||||||||||||||||||||
Reinforcements
Boss data
- Main article:
Zola
Normal Hard/Lunatic
|
|
| ||||||||||||||||||||||||||||||||||||||||||||||||||
Strategy
| This section details unofficial strategies that may help with completion of the chapter. This may not work for everybody. |
Your first order of business is to break out of the starting room, kill as many of the nearby enemies as you can, and secure your position. If you can survive the first turn, you're pretty much golden. The enemy Outlaws will loot the chests on Turn 5; they're too far away for you to stop them directly, but you can intercept them on their way out. Split your forces into two groups; Corrin and a good Ninja should go up the west side while someone capable of killing Cavaliers with Iron Lances should go east. On Turn 2, new recruits Hinata and Oboro appear. They've both got above-average stats all around, and can add some nice bulk to your team. Quickly push north, wipe out all opposition, take out the Outlaws, and you're good to go. Zola easily keels over to a good Ninja.
Trivia
- This chapter's map is reused in Conquest Chapter 18.
Etymology and other languages
| Names, etymology, and in other regions | ||
|---|---|---|
| Language | Name | Definition, etymology, and notes |
| English |
Land of Gods |
-- |
| Japanese |
神々の坐す国 |
Land Where the Gods Sit |
| Spanish |
Tierra de Dioses |
Land of Gods |
| French |
Le royaume des dieux |
The kingdom of the gods |
| German |
Land der Götter |
Land of Gods |
| Italian |
La terra degli dèi |
The land of the gods |
| Korean |
신들의 나라 |
Land of Gods |
Gallery
This section has been marked as a stub. Please help improve the page by adding information.
References
| ← Fierce Winds • | Land of Gods | • Ninja Village → |
|---|

