| Site News |
|---|
| Warning: This wiki contains spoilers. Read at your own risk! Social media: If you would like, please join our Discord server, and/or follow us on Twitter (X) or Tumblr! |
Veiled Kingdom
| ||||||||
|
| “ | Oh, it's a custom among the Knights of Cheve. Whenever one faces some monumental event, it's tradition to pin on a flower. You're pretty special, Corrin. Getting everyone to follow you like this. But...you're not quite as special as Ryoma! | ” | — Scarlet |
|---|
Veiled Kingdom (Japanese: 見えざる王国 Invisible Kingdom) is the eighteenth chapter of the Revelation campaign of Fire Emblem Fates. In this chapter, Corrin convinces the group to enter the kingdom of Valla, where they encounter forces beyond their comprehension.
Plot
- Main article:
Veiled Kingdom/Script
Overlooking Bottomless Canyon, Ryoma notices that the skies above Hoshido and Nohr are changing. Corrin tells them that they must jump off the bridge to reach the bottom of the canyon, to which Takumi doubts the safety of. As the group becomes skeptical of the plan, Corrin begins to tell them of their secret, only for Azura to interrupt, reminding them of the curse of Valla. Ryoma and Xander refuse to stay back, saying that they trust Corrin's judgement to be sound. With that, Corrin commands them to jump, and they proceed. Before Corrin does, however, they notice Scarlet pin a flower to her armor to commemorate the occasion. The two then jump off together. As they fall, a mysterious being attacks them, with Scarlet taking the blow for Corrin, killing her in the process and destroying the flower.
Now on Valla, Corrin mourns the loss of Scarlet briefly, only to be interrupted by the arrival of Vallite forces. The rest of the group arrives just in time to notice a blue haired woman teleport away, summoning even more forces. Corrin commands the group to strike her to end the reinforcements, beginning the battle proper.
Before they can finish her off, the woman vanishes in an instant. Azura finally reveals to the group that they are in Valla. Elsewhere, Ryoma searches for Scarlet, and Corrin shows him that she has died. Corrin also notices how the flower she had pinned had burned off during the fall. After mourning, Ryoma asks Corrin to not let Scarlet's sacrifice be in vain, to which they vow it on the Yato.
Summary
Corrin's hopes are finally answered—the royal siblings of Hoshido and Nohr join together. They descend on Valla, where a great evil awaits them...
Chapter data
Normal Hard Lunatic
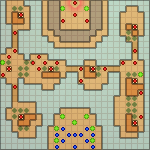
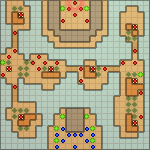
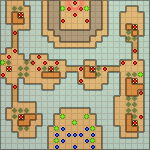
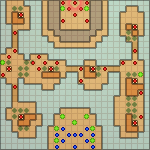
This chapter features sigils that act as one-way warp points between the isles; by using the "Transfer" command while standing on them, a unit will be transported to the endpoint, and will be left with a movement stat = their base movement - the movement it took to reach the sigil. They are located as follows:
- Column 11, row 20: Warps from the starting isle to the furthest northwestern isle (Column 3, row 1)
- Column 10, row 22: Warps from the starting isle to the west part of the center isle (Column 9, row 14)
- Column 10, row 24: Warps from the starting isle to the furthest southwestern isle (Column 6, row 22)
- Column 15, row 20: Warps from the starting isle to the furthest northeastern isle (Column 22, row 3)
- Column 16, row 22: Warps from the starting isle to the east part of the center isle (Column 15, row 14)
- Column 16, row 24: Warps from the starting isle to the furthest southeastern isle (Column 21, row 23)
- Column 1, row 11: Warps from the west part of the center isle to the starting isle (Column 11, row 23)
- Column 24, row 13: Warps from the east part of the center isle to the starting isle (Column 15, row 23)
- Column 13, row 21: Warps from the starting isle to the boss's isle (Column 13, row 5)
- Note: This sigil is only available once all Dragon Veins have been activated.
- Column 11, row 2: Warps from the boss's isle to the starting isle (Column 11, row 23)
- Column 15, row 2: Warps from the boss's isle to the starting isle (Column 15, row 23)
Character data
| Characters | |
|---|---|
New units
| |
| |
Required characters
| |

| |
Available characters
| |
                                       
| |
Undeployable characters
| |

|
Note: The returning characters list does not include any characters recruitable in paralogues or xenologues, as the player may not have taken on any available paralogue chapters yet. The list also does not include any bonus units, as they are recruitable at the player's discretion.
Item data
| ||||||||||||||||||||||||
|
Event tile data
There are no event tiles during the events of the chapter. When returning to the area for skirmishes, the following event tiles appear:
- Column 3, row 18: One square south of the southernmost bridge tile leading onto the southwest isle
- Column 22, row 6: One square south, one square west of the fort on the northeast isle
Dragon Vein data
Dragon Veins in this chapter are stated to have the effect "Damage the statue to reveal a central sigil". When all eight are activated, the barrier on the starting isle will be destroyed, revealing a sigil that transports units to ???'s isle. They are as follows:
- Column 2, row 12: On a fort underneath an immobile General
- Column 4, row 3: On a fort underneath an immobile Berserker
- Column 4, row 20: On a fort underneath an immobile Oni Chieftain
- Column 9, row 12: On a fort underneath an immobile General
- Column 16, row 12: On a fort underneath an immobile Onmyoji
- Column 23, row 5: On a fort underneath an immobile Master Ninja
- Column 23, row 14: On a fort underneath an immobile General
- Column 23, row 21: On a fort underneath an immobile Oni Chieftain
Enemy data
Normal Hard Lunatic
| |||||||||||||||||||||||||||||||||||||||||||||||||||||||||||||||||||||||||||||||||||||||||||||||||||||||||||||||||||||||||||||||||||||||||||||||||||||||||||||||||||||||||||||||||||||||||||||||||||||||||||||||||||||||||||||||||||||||||||||||||||||||||||||||||||||||||||||||||||||||||||||||||||||||||||||||||||||||||||||||||||||||||||||||||||||||||||||||||||||||||||||||||||||||||||||||||||||||||||||||||||||||||||||||||||||||||||||||||||||||||||||||||||||||||||||||||||||||||||||||||||||||||||||||||||||||||||||||||||||||||||||||||||||||||||||||||||||||||||||||||||||||||||||||||||||||||||||||||||||||||||||||||||||||||||||||||||||||||||||||||||||||||||||||||||||||
| |||||||||||||||||||||||||||||||||||||||||||||||||||||||||||||||||||||||||||||||||||||||||||||||||||||||||||||||||||||||||||||||||||||||||||||||||||||||||||||||||||||||||||||||||||||||||||||||||||||||||||||||||||||||||||||||||||||||||||||||||||||||||||||||||||||||||||||||||||||||||||||||||||||||||||||||||||||||||||||||||||||||||||||||||||||||||||||||||||||||||||||||||||||||||||||||||||||||||||||||||||||||||||||||||||||||||||||||||||||||||||||||||||||||||||||||||||||||||||||||||||||||||||||||||||||||||||||||||||||||||||||||||||||||||||||||||||||||||||||||||||||||||||||||||||||||||||||||||||||||||||||||||||||||||||||||||||||||||||||||||||||||||||||||||||||||
| |||||||||||||||||||||||||||||||||||||||||||||||||||||||||||||||||||||||||||||||||||||||||||||||||||||||||||||||||||||||||||||||||||||||||||||||||||||||||||||||||||||||||||||||||||||||||||||||||||||||||||||||||||||||||||||||||||||||||||||||||||||||||||||||||||||||||||||||||||||||||||||||||||||||||||||||||||||||||||||||||||||||||||||||||||||||||||||||||||||||||||||||||||||||||||||||||||||||||||||||||||||||||||||||||||||||||||||||||||||||||||||||||||||||||||||||||||||||||||||||||||||||||||||||||||||||||||||||||||||||||||||||||||||||||||||||||||||||||||||||||||||||||||||||||||||||||||||||||||||||||||||||||||||||||||||||||||||||||||||||||||||||||||||||||||||||
| |||||||||||||||||||||||||||||||||||||||||||||||||||||||||||||||||||||||||||||||||||||||||||||||||||||||||||||||||||||||||||||||||||||||||||||||||||||||||||||||||||||||||||||||||||||||||||||||||||||||||||||||||||||||||||||||||||||||||||||||||||||||||||||||||||||||||||||||||||||||||||||||||||||||||||||||||||||||||||||||||||||||||||||||||||||||||||||||||||||||||||||||||||||||||||||||||||||||||||||||||||||||||||||||||||||||||||||||||||||||||||||||||||||||||||||||||||||||||||||||||||||||||||||||||||||||||||||||||||||||||||||||||||||||||||||||||||||||||||||||||||||||||||||||||||||||||||||||||||||||||||||||||||||||||||||||||||||||||||||||||||||||||||||||||||||||
Reinforcements
- Turns 6, 12, 18, 24, and 30
- 2 Snipers; one from the southwestern fort, one from the middle-eastern fort
- 1 Swordmaster from the middle-western fort
- 1 Onmyoji from the northeastern fort
- Turns 9, 15, 21, and 27
- 1 Basara from the northwestern fort
- 1 Swordmaster from the far western fort
- 1 Master Ninja from the far eastern fort
- 1 General from the southeastern fort
- Activating a fort's Dragon Vein will prevent reinforcements from spawning from that particular fort.
Boss data
- Main article:
???
Normal Hard Lunatic
|
|
| ||||||||||||||||||||||||||||||||||||||||||||||||||
Strategy
| This section details unofficial strategies that may help with completion of the chapter. This may not work for everybody. |
This section has been marked as a stub. Please help improve the page by adding information.
Because of the plot, Scarlet will permanently leave the party at the end of this chapter. If you wish for Corrin to build a support with her or to obtain her gold statue for My Castle, you should do so before attempting this chapter.
Also note, that from here on out, barring one exception, everything is promoted. If any of your units you plan are using aren't promoted yet, this map is where you want them to be reach promotion level - any later and they may be too weak to safely gain EXP.
As tempting as it may be to split the party up and activate each DV as soon as possible, doing so can easily invite a massacre. A combination of terrain and chokepoints can easily delay such an operation to the point where reinforcements can overwhelm your split forces. Instead, move as one large body and take advantage of the chokepoints to limit unit exposure.
Top-Left and Top-Right are generally the two safest sigils. Pick one or the other, and, utilizing Pair-up to warp two units at once, send the entire army to one of the two. From there, overwhelm the one enemy on the fort and set up a defensive formation. The plan is to take advantage of the easily-defended islands in order to safely control the flow of reinforcements in order to feed the reinforcements to units that want the EXP.
In order to control the flow of reinforcements, a tanky unit will have to hold the 1-wide pass. This unit needs to unequip their weapon, as they otherwise may "suffer from success" as a result of killing too many enemies and overexposing themselves as a result. They should also be in Guard Stance, and ideally their Guard Stance partner should be carrying their weapon, for ease of access when it is needed. For the Top-Left Island, the tank is positioned 1 East, 2 South of the Fort. For the Top-Right Island, position the tank 2 West, 1 North of the Fort. The tank should also be under the influence of any damage-reducing auras, such as Sakura's personal or Demoiselle/Gentilhomme. Bring plenty of Sun Festals for healing from a safe distance.
No unit should be on the fort, but units that intend to farm EXP should have ranged weapons, as they will be attacking from a distance. Once the reinforcements start coming, the tank should be able to block them, resulting in a long line forming. Then, from each turn on, a unit should move onto the fort, shoot at one of the enemies in range, then be danced by Azura to get off the fort and back to safety. Excess units may have to remain in Pair-up to save space. Eventually, the 1-tile pass will get clogged by Snipers, and no more 1-range units will be able to reach the tank, resulting in a Sniper moving adjacent to the tank. In this case, simply have the tank equip their weapon and kill a Sniper, then have another unit trade it away, and move that unit to safety with sing. This will enable the Snipers to be removed safely one at a time, as to unclog the passageway for more EXP farming.
Eventually, the reinforcements will stop, at which point it becomes safe to move out of your positions and accomplish the rest of the mission.
As for storming the boss chamber, the strategy differs based on difficulty. On normal, there is nothing stopping a bosskiller from warping in and killing the boss. On Hard, the bosskiller now needs 7 mov to reach the boss with a 1-range weapon, or 6 mov with a 2-range weapon, to go around the boss' bodyguards. Alternatively, another unit can warp in and kill one of the blocking units. On Lunatic, it is now impossible to fight the boss without killing one of the bodyguards first. Either kill a blocking unit and rush in and immediately kill the boss to end the chapter, or warp in 7 different units to kill everyone but the boss, as the boss doesn't move.
Regardless, the boss is quite weak. Fast units will double through her 17 SPD, and her low DEF and HP make killing her with physical units fairly easy. Ryoma ORKO's her at base, even on Lunatic.
Trivia
- This is the only time in the Revelation route that a playable character dies, permanently leaves the army, and has no circumstances to avoid it.
Etymology and other languages
| Names, etymology, and in other regions | ||
|---|---|---|
| Language | Name | Definition, etymology, and notes |
| English |
Veiled Kingdom |
-- |
| Japanese |
見えざる王国 |
Invisible Kingdom |
| Spanish |
Reino velado |
Veiled kingdom |
| French |
Le royaume secret |
The secret kingdom |
| German |
Hinter dem Schleier |
Behind the Curtain |
| Italian |
Il regno velato |
The veiled kingdom |
| Korean |
보이지 않는 왕국 |
Invisible kingdom |
Gallery
References
| ← Black Flames • | Veiled Kingdom | • Hidden Strings → |
|---|


