| Site News |
|---|
| Warning: This wiki contains spoilers. Read at your own risk! Social media: If you would like, please join our Discord server, and/or follow us on Twitter (X) or Tumblr! |
Den of Betrayal
| ||||||||
|
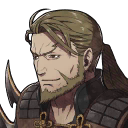
| “ | Is that so? Tell it to King Garon, you filthy mutt. When Nohr prevails, he has promised me a huge piece of land to expand my kingdom. No one will get in the way of Mokushu's future glory—not even a Nohrian prince/princess! | ” | — Kotaro revealing his true colors after his deceptions were exposed by Corrin. |
|---|
Den of Betrayal (Japanese: 裏切りの魔窟 Treacherous Den of Thieves) is the seventeenth chapter of the Conquest campaign in Fire Emblem Fates. In this chapter, Corrin and their army arrive in Mokushu, an apparent Nohrian ally within Hoshidan territory, and come to the aid of their daimyo, Kotaro; upon Corrin figuring out Kotaro's actual tactics and ambitions, Kotaro turns the Mokushujin against Corrin's army in hopes of furthering his own ambitions.
Plot
- Main article:
Den of Betrayal/Script
We witness Corrin and Azura leading Xander, Camilla, Leo, Elise, and Kaze through a Hoshidan cherry blossom forest, to which Corrin notes the group's arrival in Hoshido and states that they aren't used to sea travel yet; Kotaro arrives on the scene and greets Corrin and states that he's been waiting for them, before introducing himself as the daimyo of Mokushu, with Corrin noting it being the place that Shura had mentioned. As Kotaro catches Corrin thinking, Corrin states that they were reflecting on their journey to the area, then states that Mokushu lies in Hoshidan territory and asks Kotaro if he's certain he wants to ally his people with Nohr, to which Kotaro confirms--revealing that Mokushu's people have long been on good terms with Nohr and always knew they'd take the Nohrian side when the war broke out; Corrin thanks Kotaro for his loyalty, after which Kotaro states that he'll be showing Corrin the path the army will be using to sneak into Hoshido proper.
In another part of the forest, Kotaro reveals the route ahead of Corrin being the quickest and safest they can take, then reveals he'd normally invite the army to his castle for rest if the army weren't in a hurry; as Corrin thanks Kotaro, a Mokushujin arrives with an urgent report for Kotaro, revealing that Hoshidan ninja have marched into Mokushu and that their forces are fighting off the Hoshidans in the forest cave but it's not going well, asking for reinforcements. Corrin asks Kotaro why the Hoshidans are attacking Mokushu, to which Kotaro states that Hoshidans have been invading the area with increasing frequency ever since the war escalated yet Mokushu has never instigated an attack on the Hoshidans; Corrin deduces that Hoshido is punishing Mokushu for being loyal to Nohr, to which Kotaro reveals that the attacks have been going on for weeks and that their reserves are nearly depleted, asking Corrin's army to lend them a hand, to which Corrin agrees.
Inside the forest cave, we witness Corrin and Kaze at the entry, after which Xander emerges and reveals that he has dispatched the Hoshidans in his zone; Azura appears and reveals she's cleared her area as well, with Elise, Leo and Camilla appearing and reveals they've taken care of their areas as well, to which Corrin congratulates them. Noticing that they've been doing all the fighting and wondering if Mokushu is really short on personnel, Corrin asks if they should ask Garon for reinforcements, to which Kaze asks Corrin to watch themselves; Kaze blocks an attack aimed at Corrin, then notices the attacker to be Saizo, after which the two of them vow to not have to battle each other again, Saizo revealing that his business is with Kotaro rather than Corrin's army. Upon Kaze revealing that Corrin's army is vowing to protect Kotaro, Saizo states that he won't allow it, then reveals that Kotaro was the one who killed their father; Saizo reveals that he has taken Kagero as a hostage to force the Hoshidians to surrender. Kotaro appears, after which Corrin asks him to talk; Kotaro tells Corrin to kill Saizo, but Corrin silences him and asks Kotaro about Kagero's situation and if he attempted to force Hoshido to surrender, to which Kotaro denies. Saizo vows to kill Kotaro before the day ends, to which Kaze asks Saizo to calm down; Corrin asks Kotaro to show them his jail cells and prove the integrity of his words, to which Kotaro refuses, but after much pressure, he spitefully states that he did take Kagero hostage to use her as a bargaining chip, and is angered that Corrin would question such motive, stating it to be par for the course for the Nohrians, to which Corrin states that to no longer be true. Kotaro reveals that Garon promised him a huge piece of land to expand his kingdom, and that not even Corrin can get in the way of Mokushu's future glory, to which Xander deduces Kotaro's tactics are due to Garon's influence and that he refuses to accept his methods and vows to correct Kotaro's behavior by force if necessary; Kotaro vows to not let Xander have his way, after which reinforcements arrive, Corrin deducing that Kotaro's claim of being low on troops was also a lie. Kotaro states that he won't waste any more breath on Corrin, and that Corrin's army shall keep his secrets in death; he then states that he'll tell Garon that his children died fighting the Hoshidans, and that they could have lived if they had stayed silent, but will instead be sacrifices on the altar of his grand ambition, to which Corrin calls the army into battle. Preparations take place at this point, revealing that Saizo and Kotaro have switched colors; once preparations are finished, the game reveals the gimmick of the caltrops terrain and how the Locktouch skill interacts with it, and reveals that Saizo's role is to scout ahead and clear traps in your favor, after which the battle begins.
Once the battle ends and with Kotaro dead, Saizo tells Kaze that their father's murder has been avenged, after which Kaze states that he did not know about Kotaro's claims about him killing their father, believed their father died in the line of duty while fighting in Mokushu, after which Saizo and Kaze continue talking about Kotaro's atrocities; Corrin and Kagero arrive at the scene, to which Corrin states that they found the dungeon where Kagero was being held, after which Saizo and Kagero state in reunion that they need to return to Ryoma's side. Kagero states that Saizo was willing to side with Corrin to help rescue her, to which Saizo states that he cooperated with nobody and revealed what happened before he crossed paths with Corrin; Saizo then asks Corrin why they didn't kill the soldiers defeated by their army, noting mercy as a concept foreign to Nohrians, to which Corrin states that all Nohrians aren't the same much like all ninja aren't vile like Kotaro. Saizo thanks Corrin for rescuing Kagero and helping him avenge his father's death, but vows that they'll be enemies the next time they meet and won't hold back, to which Corrin states they also won't hold back; after Saizo and Kagero leave the scene, Corrin and Kaze talk about the impact Corrin's decision to side with Nohr impacted Kaze, revealing that a different choice might have had Kaze and Saizo fighting side by side; Kaze states that there's no telling how that decision might have turned out, but also states that Corrin may have made the right decision as it actually transpired and that both sides know they're fighting for what they believe in.
Should Saizo have survived the events of the battle, Kaze reveals that Saizo gave him something to thank Corrin with for being able to survive Kotaro's attack; Kaze states that the gift was given as a token of thanks and a sign that their battle is far from over.
Summary
Corrin enters Hoshido and discovers that a Nohrian ally, Mokushu, has been under attack for days. Corrin rushes to assist their besieged troops.
Chapter data
Normal Hard Lunatic
Character data
| Characters | |
|---|---|
New units
| |
| |
Required characters
| |

| |
Available characters
| |
                      
|
Note: The returning characters list does not include any characters recruitable in paralogues or xenologues, as the player may not have taken on any available paralogue chapters yet. The list also does not include any bonus units, as they are recruitable at the player's discretion.
Item data
| ||||||||||||
|
Dragon Vein data
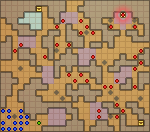
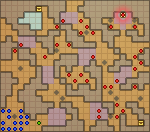
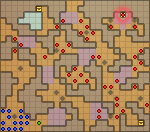
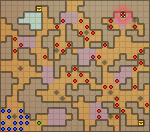
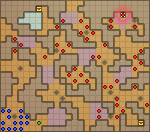
The Dragon Veins in this chapter are stated to have the effect "Block or open certain paths in the cavern". They are located as follows:
- Column 7, row 20: Adjacent to Saizo's initial position
- Column 5, row 11: Two squares south, two squares east of a Steel Shuriken/Locktouch Ninja
- Column 8, row 9: Adjacent to a Steel Shuriken/Poison Strike/Locktouch Master Ninja
- Column 9, row 4: Two squares east, two squares south of the northwestern chest
- Column 10, row 7: Adjacent to a Saw/Locktouch Automaton
- Column 17, row 6: Adjacent to a Steel Shuriken/Locktouch Mechanist
- Column 22, row 19: Two squares north, two squares west of the southeastern chest
- Column 14, row 17: Three squares north, two squares west of a Saw/Locktouch Automaton
- Column 15, row 13: Adjacent to a Silence/Wane Festal/Locktouch Shrine Maiden
Enemy data
Normal Hard Lunatic
| |||||||||||||||||||||||||||||||||||||||||||||||||||||||||||||||||||||||||||||||||||||||||||||||||||||||||||||||||||||||||||||||||||||||||||||||||||||||||||||||||||||||||||||||||||||||||||||||||||||||||||||||||||||||||||||||||||||||||||||||||||||||||||||||||||||||||||||||||||||||||||||
| |||||||||||||||||||||||||||||||||||||||||||||||||||||||||||||||||||||||||||||||||||||||||||||||||||||||||||||||||||||||||||||||||||||||||||||||||||||||||||||||||||||||||||||||||||||||||||||||||||||||||||||||||||||||||||||||||||||||||||||||||||||||||||||||||||||||||||||||||||||||||||||
| |||||||||||||||||||||||||||||||||||||||||||||||||||||||||||||||||||||||||||||||||||||||||||||||||||||||||||||||||||||||||||||||||||||||||||||||||||||||||||||||||||||||||||||||||||||||||||||||||||||||||||||||||||||||||||||||||||||||||||||||||||||||||||||||||||||||||||||||||||||||||||||
| |||||||||||||||||||||||||||||||||||||||||||||||||||||||||||||||||||||||||||||||||||||||||||||||||||||||||||||||||||||||||||||||||||||||||||||||||||||||||||||||||||||||||||||||||||||||||||||||||||||||||||||||||||||||||||||||||||||||||||||||||||||||||||||||||||||||||||||||||||||||||||||
Reinforcements
- After reaching column 11, row 14 (roughly 1/3 into the map)
- 1 Automaton with a Big Saw from the northwest corner of the map (Hard/Lunatic only)
- 2 Automatons with Saws from the northwest corner of the map
- 1 (Normal/Hard)/2 (Lunatic) Mechanist(s) from the northwest corner of the map
- 2 (Normal)/3 (Hard/Lunatic) Ninjas from the southern border of the map
- 1 (Normal/Hard)/2 (Lunatic) Master Ninja(s) from the southern border of the map
- After reaching column 21, row 13 (roughly 3/4 into the map)
- 2 Samurai with Steel Katanas from the northern border of the map
- 1 Samurai with a Dual Katana from the northern border of the map (Hard/Lunatic only)
- 1 (Normal/Hard)/2 (Lunatic) Swordmaster(s) from the northern border of the map
- 2 Automatons with Saws from the southeast corner of the map
- 1 Automaton with a Big Saw from the southeast corner of the map (Hard/Lunatic only)
- 1 (Normal/Hard)/2 (Lunatic) Mechanist(s) from the southeast corner of the map
NPC data
| ||||||||||||||||||||||||||||||||||||||||||
| ||||||||||||||||||||||||||||||||||||||||||
Boss data
- Main article:
Kotaro
Normal Hard/Lunatic
|
|
| ||||||||||||||||||||||||||||||||||||||||||||||||||
Strategy
| This section details unofficial strategies that may help with completion of the chapter. This may not work for everybody. |
In this chapter, harmful terrain in the form of caltrops are introduced. These deal damage to units who start their turn as well as decreasing their Defense and Avoid while standing on such terrain. Units who possess the Locktouch skill can disable these traps, as well as stand inside it without suffering its negative effects.
Saizo will proceed through the map, disabling traps along the way to help you. He also possesses the Immune Status skill, shielding him from the debuffs of enemy Ninja. Do not be fooled however; Saizo is not invincible, and is likely to be defeated unless care is taken. However, if you manage to complete the map with Saizo still alive, the Speedwing is yours. That being said, it may not be worth the aggravation of keeping him safe for two points of speed. The choice, as always, is yours.
For general map strategy, Ninjas are running rampant, and have a few Samurai around for support. Bulky green units, Knights/Generals, and Xander are your best friends. If you recruited Kumagera way back in Chapter 14, he's really useful to have around since he comes with 21 Defense and an A in axes right out of the gate and his Certain Blow skill effectively negates the enemy's good Avoid stats; this goes double for Kotaro, whose throne gives him an extra 30 Avoid and coupled with his excellent stats all around makes him extremely dangerous. Make good use of chokepoints and Dragon Veins to take the enemy on a couple of bites at a time. The Master Ninjas should be targeted for elimination with extreme prejudice since their Poison Strike and Grisly Wound combo can rip you apart. You'll need 29 Speed to double them; your best options are Camilla or a speed-blessed Corrin, using tonics and meals if necessary. Kaze and Niles can also be valid options thanks to their great speed, though both will likely need investment in strength to secure ORKOs.
Etymology and other languages
| Names, etymology, and in other regions | ||
|---|---|---|
| Language | Name | Definition, etymology, and notes |
| English |
Den of Betrayal |
-- |
| Japanese |
裏切りの魔窟 |
Treacherous Den of Thieves |
| Spanish |
Nido del traidor |
Nest of the traitor |
| French |
Alliance perfide |
Treacherous alliance |
| German |
Höhle des Verräters |
Den of Traitors |
| Italian |
Un nido di serpi |
A nest of snakes |
| Korean |
배신의 동굴 |
Cave of betrayal |
Gallery
This section has been marked as a stub. Please help improve the page by adding information.
References
| ← Invasion • | Den of Betrayal | • Black & White → |
|---|

